CP Executive train in Albany

CP Executive train in Albany

Saturday, January 16, 2021

Structure - Agway (Quonset hut)

With a full three-day holiday weekend available to me, I decided to really get serious about working on the North Menands section of my layout. I redid some scenery, added ballast, and started planning in full size how my structures would go. This included the Agway complex, which contained at least three buildings. For an overview how they all fit into the area I am calling "North Menands", see here. This is what the complex currently looks like. You will need to imagine a railroad spur leaving the mainline and cutting through where the thick trees are to run parallel to the larger building on the right.

This Agway still was receiving rail service in 1984. I didn't have many good pictures of how it existed at that time, and this is the only one showing it:

While drawing up my plans for these buildings, I realized that most of their square footage would be cut off by the aisle. I had to selectively compress everything, but the Quonset hut (the middle building) was especially difficult because they are generally built to a common set of proportions and if I made it too thin then its height would need to be reduced accordingly, making it look extremely silly.

So, I started with this building. Plus, my wife was using our computer and I couldn't easily access the pictures I took of the other buildings. This led to an issue later on that only reinforces this important rule: always have reference pictures available when you are building something! 

I determined that a width of 4.75" inches and a depth of about 5" would produce a building that was large enough to give the impression of what I wanted without dominating the scene or looking too small. Its height would be determined later. The prototype picture below shows it to be a pretty neat looking building but sadly I couldn't build it to size. 

I then looked in the recent Walthers' catalog to see if there were any commercial kits that would work. Rix had one (628-410) but it was too small for what I needed. I found a Busch "Airplane Hangar" (189-1408) that looked promising but it was too big and the curvature of the roof arch didn't match that of a quonset hut. One kit was too little, one kit was too big... I needed one that was just right. So I decided to scratchbuild it. 

I assumed that the end profiles were essentially half-circles along the roof line. Perhaps the area where the arch intersects with the ground it actually straightened but I wasn't sure. And I didn't have access to the internet. So I forged ahead. Styrene is cheap (did I mention I bought another two 4'x8' sheets of 0.040" recently?) and I was in the mood for cutting and gluing.

Based on my width dimension of 4.75", I pulled out my trusty compass and drew a circle on some styrene. This was cut in half and then I had the two ends marked out. I cut close to them with a knife, and then used my belt sander to go right to the pencil mark. Some sanding sticks smoothed over any areas that needed a touch up. One end was used as a template to mark a middle interior brace.

The two ends were then glued to a piece of styrene that I had cut to the dimension of the base, and the interior joints were braced with pieces of 0.25" square styrene.

The middle brace was installed the same way, and then two more pieces of square styrene connected them at the top to prevent collapsing when the wrapper was installed.

At this point I installed vertical styrene corrugated siding pattern sheets to the ends, which matched most Quonset huts I had seen in my life. Unfortunately, the prototype is not like "most" and it actually had horizontal wooden siding installed on the ends. The picture below is of the side facing the tracks. My compressed size of the building makes modeling it with all of the windows impossible, but I decided to add some detail. If you look carefully just below the two innermost windows you can see a green gooseneck lamp that is hanging above a sliding door (hidden by the brush). I may add that light, because it will give my scene extra points for the MMR scenery certificate.

The first roof layer was made from a long piece of 0.040" styrene, cut to width allowing for a little overhang on the ends and taped to one side. It was then bent over the curve and pulled tightly, and then the other non-taped joint was flooded with MEK and allowed to set. I had to hold it in position for a good ten minutes while it dried. I then ran MEK along the curved arch and let it set. The next morning, I removed each piece of tape one at a time, added MEK to the joint, and retaped it. Once cured, it was nice and strong. Any gaps along the roof will be hidden later.

Before going on, I set it on the layout to check its relative size and see if it was what I was looking for. It was fine, though I really wish I had room to make it larger.

I then decided to strengthen the roof by laminating on another plain piece of styrene. I cut it a little wider than the first one to give me some extra overhang on the ends. To mount this one, I decided to go with the Pliobond contact cement I had used over the summer. I remembered that it had worked well (though it smelled terrible). I applied two coats to each surface, let them dry, and then in one smooth movement bent it over the existing structure. 

However, this idea was a bust. Even though I carefully followed the instructions it never formed a nice solid bond. My Pliobond was only 6 months old, which should have been "fresh enough" to work. Maybe I should have scuffed up both pieces of styrene first so that the contact cement would have had something to grip. Regardless, I resorted to MEK and superglue.

As noted above, I then rushed ahead and glued on some styrene Embossed Pattern Sheets brand #97402 corrugated styrene sheet vertically on the ends. I later discovered this was all wrong for the ends, which had horizontal wooden siding. It didn't stop me from sketching out where the sliding door and upper air vent would be located. I plan to add these details on the track-facing side, but left off all of the windows. 

I then glued on some Evergreen O scale freight car scribed siding #2067, which was perfect in size for the large HO scale wooden siding. There were some gaps along the edges of the joints where the contact cement had not fully secured the pieces together, but they were hidden behind a trim piece of 0.060" square styrene that I bent around the entire curve and then secured in place with MEK. 

On the trackside end, I cut a square hole in the subwall before gluing on the horizontal siding. The door on the end will be removable, and behind it will be a hole which will allow me access to run the wires from the gooseneck light through the building to the benchwork if the bulb ever burns out. At least in theory that is why I did it this way.

After looking at more prototype pictures (finally!) I noticed that the roof was made up of lots of panels running the length of the roof, but with seams every so often. I simulated this by cutting more of the corrugated styrene into strips about 2" wide, and then gluing them along the roof. 

It took a while to get all the joints in place, as I had to hold the edges down with a metal straightedge to avoid fingerprints marring the soft plastic and there really was no easy way to clamp things. 

I installed some details on the trackside end including a sliding door track made from some styrene I-channel and L-angle, as well as a vent along the top made from a Pikestuff casting (#541-1009). Then, I washed everything in soap and water in preparation for painting. 

Assuming that masking the roof would be easier than masking the ends, I painted the roof first. The prototype roof looks like it the corrugated metal was left in its natural silver color, and it weathered or corroded to a whitish finish. In addition, the dips in the corrugations trapped water, dirt, and rust and left interesting weathering patterns. I started by spraying the roof with Rustoleum "Silver Metallic" #7271, which I thought would be a good silver color. However, upon spraying I could see silver flake particles floating in the paint and they pooled in areas. Once I weathered it they went away, but a non-sparkly silver would have been a better choice. After that I drybrushed the entire roof with "Dolphin Gray" acrylic paint, which allowed some of the silver to show through. It was just the effect I was after, and now it looked like chalky, weathered metal.

The roof was then given a shot of Dullcote and weathered with brown and black oil paint and mineral spirits. 

For the wood siding ends, I first went to the hobby store and bought a bottle of tan paint but when I tried it out I realized it was too "orangish". So, instead I used some Valspar tan spray paint whose color was called "Rugged" (#84230) that I had lying around. After masking the roof, I applied several light coats and it was ready for final weathering and detailing.

Weathering was done with oil paint washes, mostly focusing on brown to represent the years of dirt that would blow against the sides and wear down the paint. In the 2010 pictures above, the paint was heavily peeling and the rubber-cement trick would be a good way to replicate it. However, I don't think the building was as in such bad shape 26 years before so I just left the paint dirty with only a few peeling/worn spots.

I still need to install and wire the gooseneck lamp, and then glue the sliding door on and plant the building. I am looking into the light now. And I think I have a nifty trick for powering it up. Stay tuned.

Wednesday, January 13, 2021

Making Scenic Express "SuperTrees"

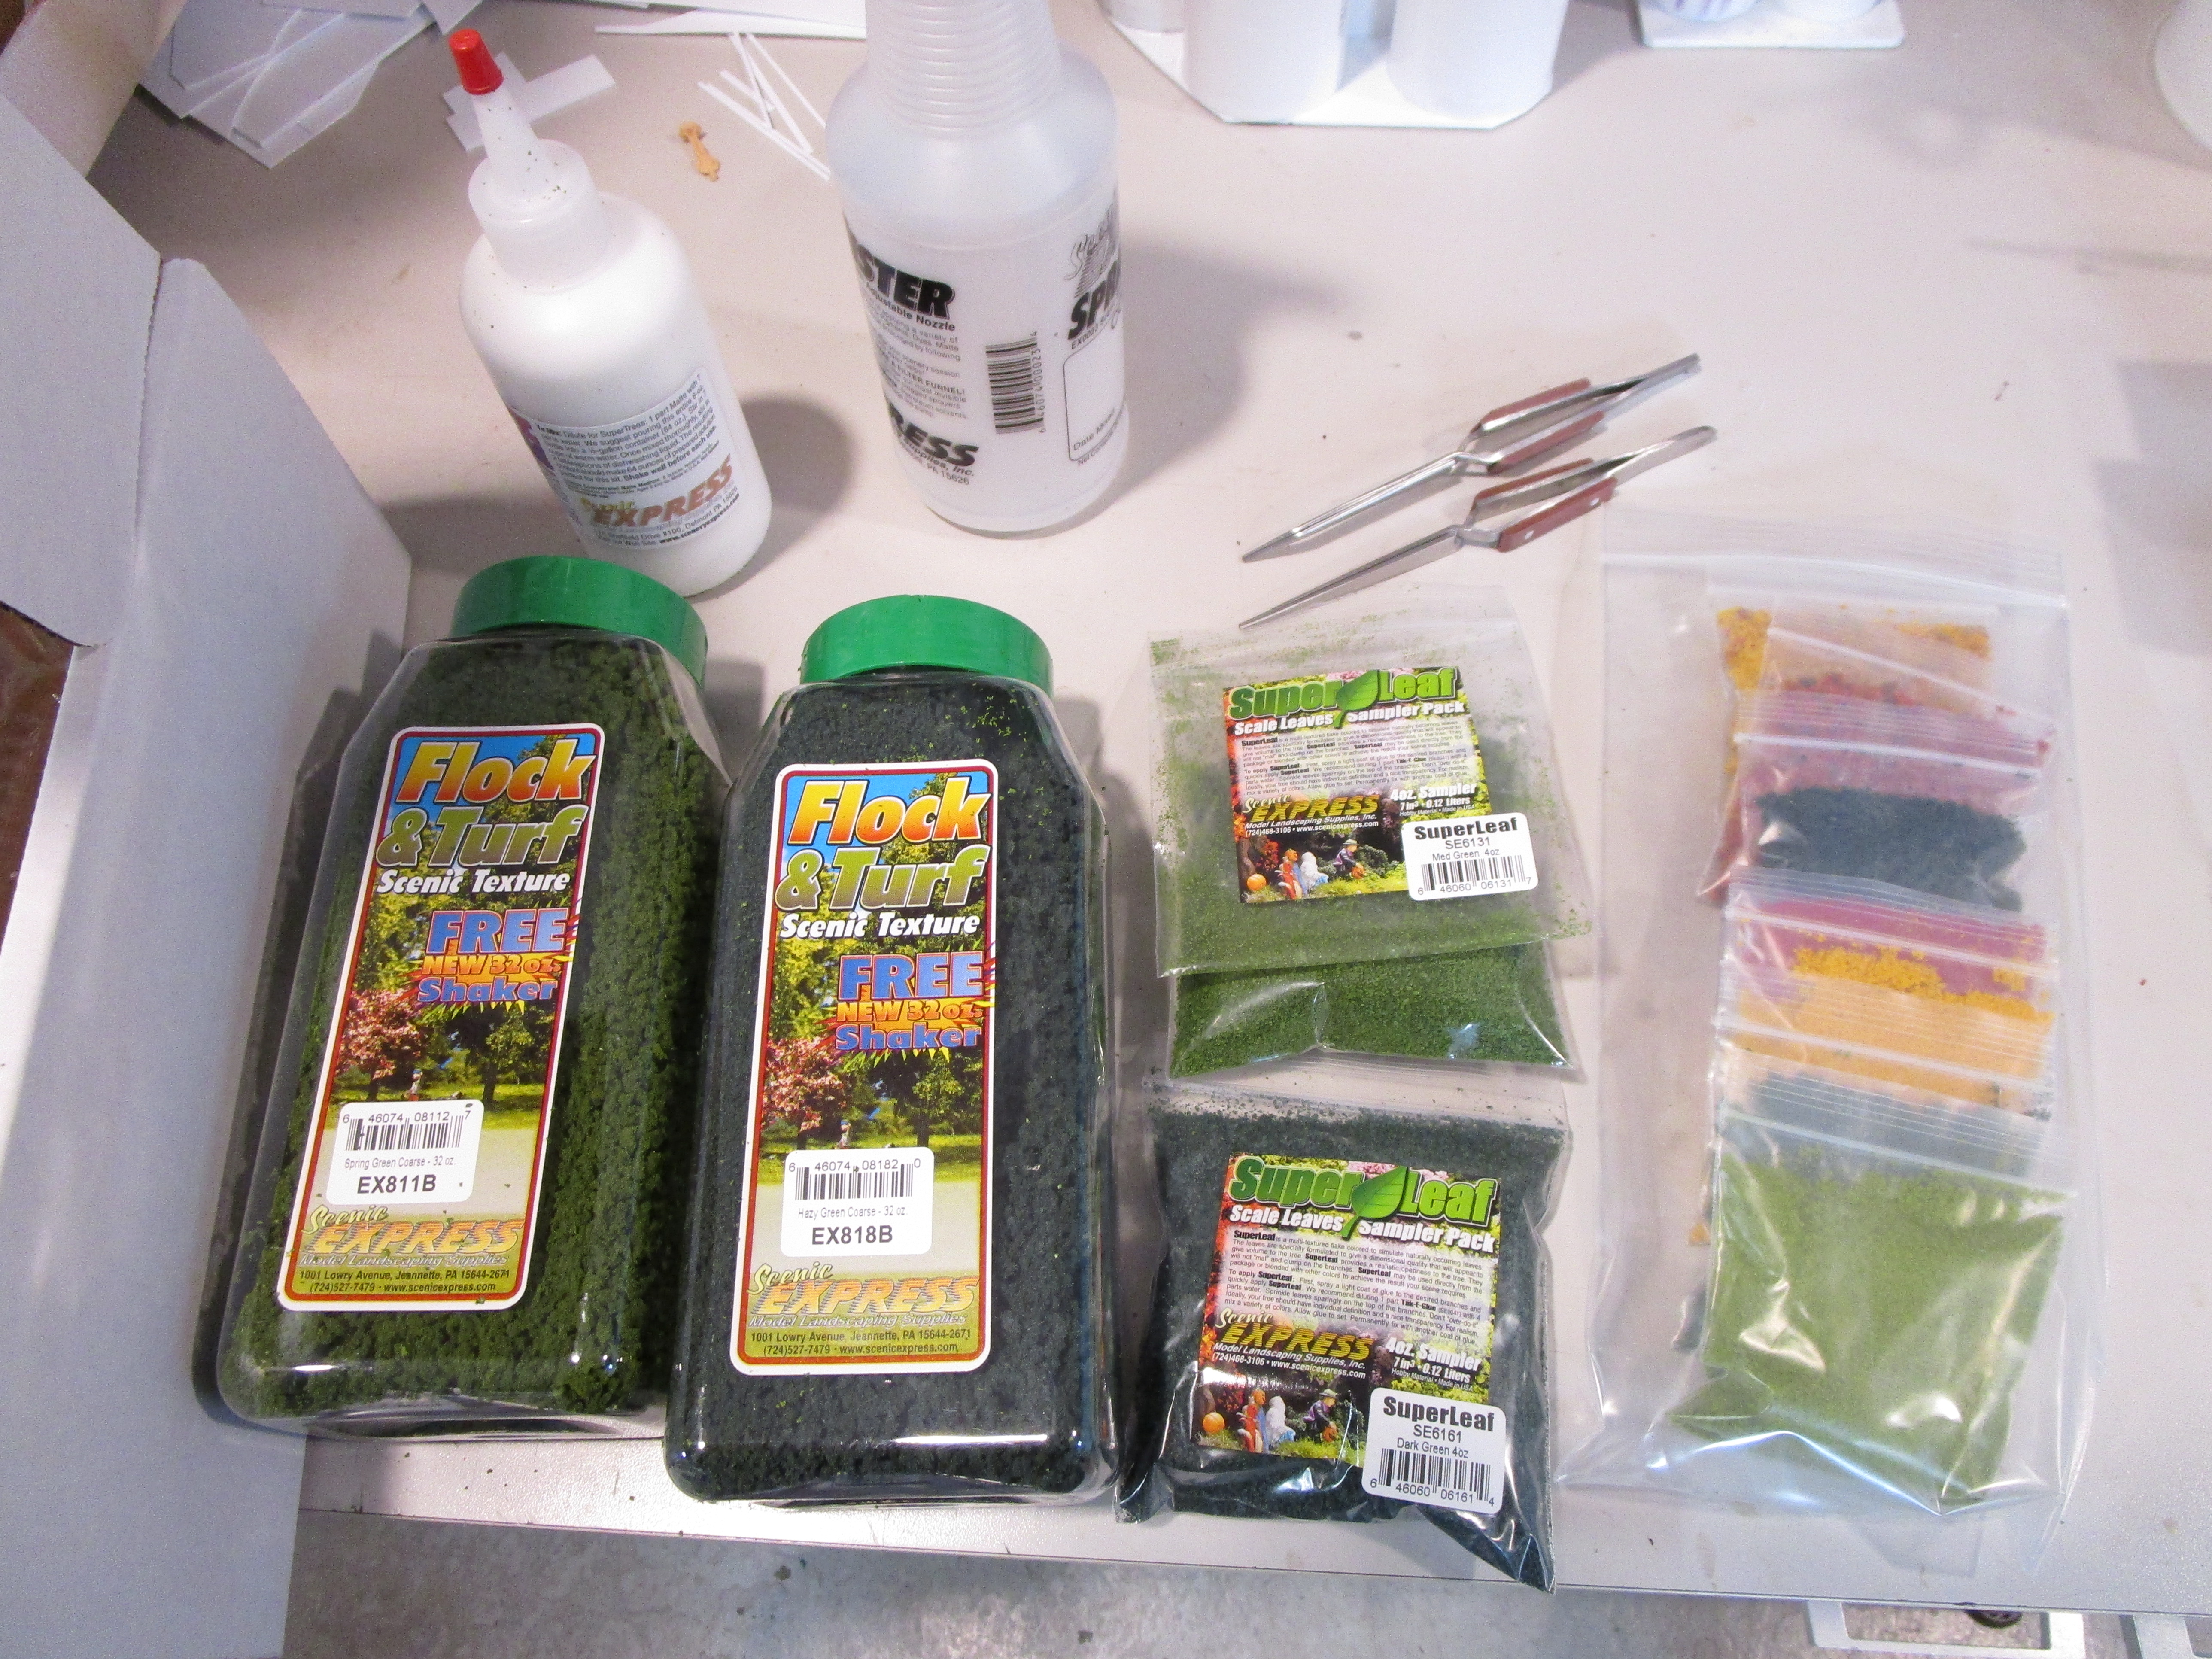
Model railroad trees have come a long way from the Life Like and Bachmann brand blobs on plastic poles that I used to put on my layouts as a kid. One of the more popular options now are the Scenic Express "SuperTrees" kits. During my vacation last fall I purchased a starter kit (#EX0220), which was reasonably priced and included enough armatures for 14-18 HO scale sized trees, glue adhesive, various small packages of green flocking, a bottle, tweezers, storage trays, instructions, and a "carrying case" (why would anyone need a carrying case?). 

There was a lot of stuff in the box including various colors of turf to model spring, summer, or fall trees. I discovered one of the green bags of leaf material had ripped somewhere along the way and my box already had the look of a forest carpet. It was easy enough to gather up though.

After doing a lot of forum reading, I came across these two videos which proved pretty helpful. This one by Scott Mason, shows how to build a tree quickly. It is pretty basic, but that is fine. However, I also came across some posts from people who found the tree branches were unrealistically bent out of the box (they were natural plants, after all). One method of straightening them is to touch a hot soldering iron to the trunk. Another is to soak them in a matte medium and water solution and hang them to dry upside down, as shown in this Model Railroad Hobbyist magazine video. This link also shows how to paint the trunks and leaf material in different colors for a more realistic effect.

However, I decided to try an unusual boiling method as described here. I first had to purchase a suitable boiling pot, knowing full well that using one of my wife's cooking pots would be a bad idea. I tried Walmart, the Dollar Store, and an Asian import store but nothing was large enough and cheap enough. On a whim I then went to the Salvation Army and snagged this one for a couple of bucks.

I then got involved with other projects and let this sit for three months. When I finally got back into it I first made some "tree service clothespins." These were nothing more than regular wooden sprung clothes that I marked by painting part of the handle green, and then glued wood squares from my parts bin to the handle of half of them. After that, I epoxied on some surplus metal bolts to the wood and suddenly I had my custom tree service clothespins. The metal weights will help straighten some really bent trees. Some metal links from a surplus chain that I bent and attached to the clothespins finished them off. All of this was probably unnecessary, by the way, but it was a slow day and fun to do.

I decided to take some pictures of the actual tree branches / stems as they came from the box. I did this first over my layout, then on top of a nice white piece of styrene destined to become my backdrop, and finally over my wife's laundry table. The branches shed dirt and leaves, and lots of black bits that reminded me of poppy seeds. I now can name three places off the top of my head where you should NOT do this! Take it outside. 

I sorted out 5 or 6 good pieces to use for trees, and then used the supplied tweezers to remove oversize leaves. I also trimmed the trunks a bit in length, and sometimes shortened the height of the tree. They are extremely delicate, and just looking at them wrong will cause them to snap and break. 

When done, I still had a large pile to go through for the next batch of "second-status" trees. And lots of little pieces for background trees and brush.

The stems I picked were then put in a pot of water and boiled for 30 minutes. After that, I hung them on the clothespins to dry for about 24 hours.

Next, I sprayed the trees with cheap gray primer spray paint so that the trunks wouldn't look red and yellow, the natural color of whatever weeds these started as. Scenic Express recommended soaking the trees in matte medium (which they provided) to seal the plants and help them stay flexible but I skipped this step. I may try it on the next batch as an experiment.

I then sprayed the trees all over with 3M spray adhesive and sprinkled on the green "SuperLeaf" material that they recommend for HO and O scale trees. It is larger and flatter than regular ground foam and I thought it looked pretty good. Though I tried to sprinkle the trees only from the top (so that the trunks wouldn't turn green and fluffy) some got on them anyway. Oh well.

For a couple of the trees, I sprayed the trunks with dark flat brown paint and used the dark green SuperLeaf material on them. Some variety is nice. On a few, I sprinkled more of the lighter green leaves over the dark green to add shading.

An awl was used to poke a hole in my hard scenery shell, and then tacky glue was squirted into the hole. I avoided a drill as I didn't want small bits of foam and stuff thrown around the finished layout scene.

Finally the tree was set in place, and sometimes propped up temporarily with a clamp to keep it upright until the glue set.

On the foreground hill, I installed several large trees and a couple of smaller ones. For the back ridge along the backdrop (which is on order) I intentionally chose smaller trees to give the impression of forced perspective. I still mixed up the sizes, but I didn't use any of the large trees. I wouldn't say any of the trees are perfect but I am happy with them. And if down the road I want to switch them out with better ones it is easy to cut them down or pull them out. I am not modeling a completely forested hill and don't want a lot of trees on it... just enough to look good.

Upon reflection I like the SuperTrees and the starter kit was nice, but there were things in it I didn't need and tools were included that while helpful I already had. In the future, I will only order their branches and perhaps the leaves themselves. Or, maybe I will forage in the wilderness for my own tree limbs. We shall see. Once the blue background is in place I may also go and apply some photographic images of trees behind the modeled ones just to add more depth. But I need to wait for that.

Sunday, January 10, 2021

Toning down Neon Green static grass

One of the things I learned when doing scenery is that nothing has to be permanent. That is a good thing, too, as I am still learning a lot of techniques. My static grass, for example, has a long ways to go. Everyone always says to use a variety of sizes and colors for the most realistic result but I have discovered that 12mm is too large and 2mm is too small for almost all HO scale applications. Also, Woodland Scenics' brand static grass seems to always come out crooked. And, no matter how appealing it might look like online, doing patches of this and that that with various colors of grass will likely look odd. 

I recently added static grass to a new area of the layout and tried instead to only use one or two shades of dark green. I found the result to monotonous, and realized I had shifted too far in the other direction. Not sure what to do, I sprinkled various colors of ground foam over the static grass and it spruced it up. This was secured with lots of matte medium, but once dried the grass still looked like individual blades and it felt soft. Hairspray might have worked too.

Thinking about my results some more, I decided to then see if I could "fix" the problem caused by the neon green patches of static grass on cut corner. If they look bright in the pictures, they looked even brighter in person. To correct it, I sprinkled on various shades and sizes of green ground foam and secured it with matte medium. And just like that, I had the hill I always wanted. 

The first picture shows the new hill. The picture below shows what it looked like before. I'm pretty happy with the results.

Thursday, January 7, 2021

The (three rail) track not taken?

I have been a rubber-gauger all of my life. My first train set was HO scale, but I soon received a Lionel set too. Since then, I have purchased starter sets in N scale and G scale, was gifted a box of American Flyer trains, and have a couple of OO scale items. I have 1/8 scale trains to ride on, too. The only thing I don't have is Z scale... yet... but there are a couple of pieces I have had my eye on. I buy what makes me happy.

Part of me likes to run trains... any type of trains. Lego trains, toy trains, scale models, it just doesn't matter. I want to see them go round and round. I enjoy the noise and the lights and the smoke. It is fun and exciting. But another part of me likes to build scale models, and carefully craft scenes that match the prototype, and weather everything realistically. On occasion those two different areas of the hobby can overlap, but frequently they don't. 

I remember visiting NMRA Division member Jack Smolik's "Not So Great Eastern" O gauge model railroad in 2012. The pictures here are from that visit. It was fun to just watch the trains go round and round. They sort of capture what I am thinking of, but not quite. 

My HO layout is currently under construction, which means that there is usually a mess somewhere or another. Going down to run trains isn't always easy as I need to clean the track, remove supplies overhanging the main line, and perhaps fix some wiring. I also don't keep trains set out on the layout currently for fear of damaging them while working. So, it is a process to take them out and set them up. One thing I have noticed with Lionel (or any three-rail) tinplate trains is that they just work. You push the throttle open and they go. Rarely do you need to clean track. I like that.

My love for Lionel and other three-rail trains isn't new. As a young child, I was a member of Rochester's Edgerton Model Railroad Club. It has been featured several times in Classic Toy Trains magazine (June and August 1991 issues) and O Scale Railroading magazine (October 1989, Run 107). It also celebrated its 70th Anniversary in 2020. My father even shared the interest with me, and at one time he was their Recording Secretary. If you read the articles, you will not see him in the pictures as he missed the day they stopped by. But he is mentioned in one of the captions. Sadly, I cannot find a single picture I took of the Edgerton train club. I should go back when the pandemic is over.

I have considered building a three-rail layout since at least 2005, when I asked online for some advice. My first real exposure to a "hi-rail" layout was Neal Schorr's magnificent Pennsylvania Railroad layout shown in the 2007 Model Railroad Planning mazagine. Wow! I didn't realize hi-rail meant more than gluing extra ties under tubular track.

I was serious about it when we moved into our new house, but I wanted the HO layout more. However, my current layout only takes up 1/4 of my basement. And I already know what I want on my Lionel layout. Realistic Gargraves brand track, which has wooden ties AND is made just a little outside of my hometown of Rochester. I want realistic scenery set in the fall, with a small-town atmosphere. A couple of areas to switch cars would be nice, but not many as I mostly just want to run trains around to relax and/or show friends. And I already have the track plan picked out too! It is a modified version of the track plan found here, with the second level removed and replaced with hills similar to what you would find in upstate NY and Vermont. Picture rolling hills covered in fall foliage trees, quaint wooden stations and factories, and a simple track plan that still allows for plenty of train storage. I have even contacted the author of the article and discussed it with him. He doesn't live far from me.

Will I ever build it? Likely someday. As I get older I know my eyes will get worse, and the larger trains will be a blessing. The track plan above won't need a large room (12'x16') which means our next house doesn't require a basement, just a larger bedroom. I already collect O scale trains despite only having the Christmas tree to run them under, but I still like to purchase more at train shows. So, by the time I am ready to retire I will have enough to get started. 

But what will happen to my D&H HO scale stuff? I don't know. Maybe I will keep the engines in a display case and sell the rest. Or keep both, but just build a small 4'x8' layout to run them on. And, like everything else, my fancies change over time. So, I may file this track plan away for another 15 years only to dig it out again and dream. But dreams are fun, and I like fun.

Tuesday, January 5, 2021

A Gift of some free Xacto knife blades

A good friend of mine has been helping me build a 1/3 scale live steam locomotive in his basement over the past 8 years. Before that, we built a 1/8 scale tender for a different locomotive and several other projects. He is a master machinist and I appreciate all the help he has given me over the years. 

Through his travels he has picked up a basement full of useful metal bits, hardware, tooling, and other materials. When we were on the topic of hobby knives and blades recently he pulled out a box full that he had acquired for pennies. While all the usual suspects where there, he had a couple I had never seen before and graciously offered some of them to me. I am thinking specifically of the #14 "diamond tipped" and bottom "elephant trunk" blades (my nicknames). The wide #18 chisel is my absolute favorite blade as the thinner #17 frequently breaks when I apply a little too much pressure. But, now I have both for my stash. And a near-lifetime supply of the odd ones!

Saturday, January 2, 2021

Setting up a small home workshop

Power tools aren't necessary to build good models. But, good tools are necessary to build good models. And, power tools certainly make life easy. Things like files and screwdrivers are easy, but what about drills? I have had a corded drill for 15 years but only this year bought a battery-powered cordless one. I figured it wasn't worth the expense only to have the batteries die (my first cordless drill that I bought died after only 2 charges, and that left me very cautious about them). What about a drill press? Very nice, but not entirely necessary if you have steady hands. A miniature belt sander is awesome for various tasks, but can be replaced with regular sandpaper and files. 

How about a bandsaw? A friend of mine recently purchased one for me as a Christmas gift and it is an excellent tool. Actually, he purchased a handheld, corded Dewalt saw and I bought a custom table that it mounts in. This is the type of tool that can take your fingers off if you aren't careful, but with proper use can make your life extremely easy. I can't wait to use it.

And here is what my "workshop" looks like now. It is still a work in progress, but there are lots of things that I have used so far on my projects. From left to right is the aforementioned bandsaw, a belt sander, a drill press, and an angle grinder. If you are going to work in metal, even for G scale projects, some of these tools should be considered essential. I guess the same thing goes if you own a house. And all were gifts from a special friend who helps me on lots of projects. I really owe him a lot of thanks for them. I am still looking for a lathe and a mill, but those will need to wait as want large ones that will also be useful for my 7.25" gauge trains.


Wednesday, December 30, 2020

2020 Wrap Up

Wow, the my 2019 Wrap Up blog post started with the sentence "The year of 2019 will first and foremost be remembered as the year of the plague." With all due respect to my 2019 self, who was referring to Crohns disease, I must say that the year 2020 will first and foremost be remembered as the year of the plague. Some things change, and some things stay the same. Despite the global pandemic that was Covid 19...

I accomplished several things in 2020:

1.) I completed the requirements for my NMRA "Master Builder - Cars" certificate. I came into 2020 with the my first car, an O scale caboose, in pieces and two HO flatcars as warped frames. However, working from home gave me extra time during the day when I would normally be in the Office or commuting to get some work done on them. And, lunch time spent in the basement helped too. My original goal of completing "one car a year" quickly turned into "four cars before the convention" and then "all eight cars before the convention." And all earned enough merit award points (87.5), which was pretty cool. I only have three more certificates to go (Association Volunteer; Chief Dispatcher; Master Builder - Scenery) before I earn Master Model Railroader.

2.) This year I finally had a suspended ceiling installed over the layout area, and in fact over most of the basement. Because my trains were now safe from dirt and dust falling on them (and at times it was pretty substantial and just touching the ceiling joists would turn your hands black), I finally had the confidence to start building scenery without worrying that it would get damaged.

3.) I started building scenery on my primary layout. I haven't actively worked on adding scenery to my layout in likely 10 years. A lot of things were new to me, such as buying a static grass machine, playing with ground goop, and installing backdrops. But, I felt right at home using ground foam. So far, I have one scene mostly finished and another half-way done. There is still lots of detailing to do, and more structures to build, and more vehicles to add, and...

4.) On the 7.25" gauge (1/8 scale) railroad front, I wrote up an article for Live Steam and Outdoor Railroading magazine about my battery powered Boston & Maine "critter" engine and it was published in the Jan/Feb 2021 issue. While I enjoyed building the engine, and writing the article, I hope that it might inspire others who faced similar issues to what I dealt with while working on my engine.

And, I have some things to look forward to in 2021:

1.) Train Shows! True, the Amherst show in January is cancelled but it is unlikely that every show will be postponed in 2021. Specifically, I imagine that the Great Train Extravaganza in Albany will occur in December which is always a fun time. 

2.) Train Rides: some tourist trains are already operating now with limited capacity. Because of my immune system I don't want to risk even partially-crowded trains, but if the vaccine receives widespread distribution in the next six months or so then perhaps by Fall I will be able to ride trains again. And perhaps the Arcade and Attica Railroad will have their #18 steam engine assembled and running at that time. 

3.) Good Health: my Crohns disease is being managed very well through infusion treatments, and despite the Covid all around us I feel a whole lot better than I did in 2019. Yay for that! 

4.) A new Gauge 1 live steam locomotive. I won't reveal the details now, but I have had an engine on order for 18 months now and hopefully it will be delivered in the spring. 

5.) Eating Out: I normally don't like to eat out, as I would rather spend the money on trains. But, Covid has made it so that eating out is a rarity in our household. The ability to eat out again is something I am really looking forward too.

Here's to hopefully a great 2021!

Sunday, December 27, 2020

Turboliners in Albany (1988)

Last Christmas I happened to check my email and saw that Rapido was bringing out HO scale Rohr Turboliner trains. Without thinking (as is my wont) I ordered a set right away. I first picked the "late" Phase III painted set #2, but later switched my reservation to set #4 because I liked the car numbers better (petty to be sure). 

However, one thing I struggled to find online was information about when the roofs of the cars were painted black. Most of the pictures online show the trains when new, and at that time their roof's were painted white. I asked online at Railroad.net and the answers pointed to around 1987, which is a bit later than my 1984 time period. But that is okay. I rode them in the late 1980s, and likely at that point they had black roofs. Plus, I think they look sharper with the contrasting color (and it hid the exhaust grime too, something I am sure they took into account).


I have been searching EBay for a while now for slides showing the black roofs and kept coming up empty. When they first came out people took lots of pictures of them, but I guess a decade later the magic had worn off and they were just another train to ride. Luckily, I found these two images for sale. They were taken in Albany on May 5, 1988 at Amtrak's dedicated Turboliner repair facility. It still exists today, some 30+ years later, and I see it all the time from across the Hudson River on my way in to work. Amtrak still uses it, but sadly the Turboliners are gone. The date is just a few days before my 6th birthday. I don't remember exactly when I rode them, but perhaps it was this day? Who knows?

Well, one year down, another year to wait. I can make it... I think.

Wednesday, December 23, 2020

Merry Christmas

Christmas holds a few special traditions for me. I always watch the Charlie Brown special (get the DVD... as the television version has parts edited for commercials). I like to eat holiday foods, including this year's new addition of a homemade fruitcake. And most of all, I get to set up a train around the tree. I usually do it around the beginning of December and tie it in with the Great Train Extravaganza train show. It gets me in the holiday mood. This year was extra special, as there was no train show. The below picture was taken by my lovely wife, who used her smart phone to add the snowflakes.

Our retriever Clover seemed to like the train, though she has has taken to licking the track. As discussed previously, the track was reclaimed from my grandfather's basement and it is likely 60+ years old. My wife's theory is that the iron in the track that tastes good to the dog. Maybe...

I usually pick different train sets each year to run, with the Hogwarts Express coming out nearly every other year. This year, I went with a Guilford theme with a Williams B&M "Bluebird" Geep, several D&H and B&M cars, a stock car decorated with bows I had made for a work Christmas party, and a B&M caboose. Many of these pieces were purchased from my friend Peter at previous GTE shows, though the D&H red covered hopper is a new addition that I bought recently because I felt the train needed some more festive color. In light of the news that CSX is acquiring Pan Am Railways (the successor in name to Guilford, itself the successor in name to the D&H/B&M, and Maine Central), perhaps next year I will feature a CSX consist. NOT A CHANCE! Maybe Conrail though...

The curves are 0-27 and the train sometimes struggles to get around them. The red covered hopper sure doesn't like them, and as it is the train already covers 50% of the loop. Lightweight cars are at the rear to avoid string-lining the train. My wife said the track was too large for the space, but I pointed out that the increased real estate meant more room for presents. I think that excuse worked. She also commented that the train was too big for the ceramic houses, but went silent when I pointed out the figures on the right who couldn't possibly fit into the doorways of the buildings.

And now for the really important stuff...

Matthew 1, 18-25

(18) Now the birth of Jesus Christ took place in this way. When his mother Mary had been betrothed to Joseph, before they came together she was found to be with child from the Holy Spirit. (19) And her husband Joseph, being a just man and unwilling to put her to shame, resolved to divorce her quietly. (20) But as he considered these things, behold, an angel of the Lord appeared to him in a dream, saying, “Joseph, son of David, do not fear to take Mary as your wife, for that which is conceived in her is from the Holy Spirit. (21) She will bear a son, and you shall call his name Jesus, for he will save his people from their sins.” (22) All this took place to fulfill what the Lord had spoken by the prophet:

(23) “Behold, the virgin shall conceive and bear a son, and they shall call his name Immanuel” (which means, God with us). (24) When Joseph woke from sleep, he did as the angel of the Lord commanded him: he took his wife, (25) but knew her not until she had given birth to a son. And he called his name Jesus.

MERRY CHRISTMAS to all!