CP Executive train in Albany

CP Executive train in Albany

Wednesday, March 31, 2021

Railfanning: Voorheesville, NY (2009-2021)

Voorheesville, NY, is a place that always makes me smile and not because I am told I can't pronounce it correctly (hey, I'm not local). No, I grin because of my railfan ignorance of the area. When I moved to Albany from Rochester in the mid-2000s there were several railfan areas I wanted to explore. After looking are printed paper maps, I drove up to Mechanicville and discovered that the huge yards were long gone (of course, things have changed as documented earlier here). I also went to Rotterdam Junction on the south side to capture the West Shore Railroad, only to discover that it had been torn up and there were no tracks to see (though CSX still ran on the north side of the river, which later became my primary spotting area). And there was the D&H/CSH diamond in Voorheesville, which on paper still existed but was long gone by the time I first visited. These photos are from that day on September 05, 2009. Per online sources, it was torn out in June of 2000 but of course my gas station map didn't show it. At one time, it was a busy crossing. Here is a good online resource for local train information.

As part of CSX's acquisition of Pan Am Railways, there have been talks of Norfolk Southern being given access to run double stack trains over the old D&H connector track onto CSX and then east to Worchester/Ayer. For those unfamiliar with the area, I drew up a simple schematic. The dotted lines below are D&H tracks that are now a rail trail.

I thought I would head over to the old diamond again and take some "now" shots before it is rebuilt. I hadn't been there in years, as I discovered more trains ran through Amsterdam, NY, so I always headed there for a day of railfanning. But, returning with my wife for a couple of hours on a cold winter day brought back good memories of the place.

At that time, the D&H's tracks south/west of the diamond were torn up for a little ways, though they were still in place farther back. You can see in this first shot just to the left of the road part of a D&H track. The CSX train is heading south-east. With a railroad diamond nearly intersecting a roadway, it must have been a nightmare for drivers and train crews.

This nifty shot below shows the western part of the D&H track as it terminated at the road. In the distance through the centerbeam car is the old Albany Main, later renamed Voorheesville Running Track. It had extended into the distance due east to Albany, but at this time was torn up. To the left was a gravel parking lot in the shade where I would sit and watch trains.

Another shot showing the empty right of way heading to Albany.

In the shot below, the connnector track between the D&H (to the lower right) and CSX (the mainline heading off southwest as it goes into the distance) can be seen.

The next few shots are from April 03, 2010. You can see in this shot that the old roadbed heading towards Albany still was nice, flat, and clear. This would prove useful for future developments, as we shall see.

Turning the other way, and facing west, a scrap train is visible in the distance. There were I think at least a half-dozen gondolas that I saw through the trees while driving on a parallel road. I don't know when the rails were actually removed though.

The same direction, just zoomed out more. I am standing with my back to the old diamond, and you can see the connecting track breaking off and curving to the left. Oddly, some rails are removed in the track between me and the switch. Perhaps that was done to legally "break" any connection to the diamond?

Here is the connecting track as it swung off the D&H (to the left) and headed towards CSX (to my right and behind me). This track probably hadn't been used in a quite a while, and the nearby business was encroaching in the right-of-way.

One of my favorite diesel locomotives of all time is the EMD SD40-2. I don't know why, but I think the long porches on either end made it easy for me to spot as a kid. I had an Athearn model painted for the BN, and wish I still had it. It was a gift from my grandfather. Anyway, I hadn't seen them in many years when this train showed up led by CSX #8364.

Fast forward to January 02, 2015, and I must have been bored from an uneventful New Year's Day previously because I went railfanning in the cold. Looking northwest on CSX, the control point interlocking was visible and several trains were waiting to head southeast.

One of them contained an old BCRail locomotive, the only one I believe I have ever seen (there certainly weren't that many total).

This is what the connecting track looked like, now with its own red flag and derail on the right rail. I think CSX sometimes parked MOW equipment on it, and so this let the crew know where to stop. In the distance are a pair of engines that I saw go back and forth several times this day. They were stopped and the crew had gotten off to get lunch at the diner located right next to the engines. It was neat to see.

Then, several interesting things happened. New York State loves putting money into rail trails (and, unfortunately, ripping up tracks in the process) and the Albany County Rail Trail was paved between Albany and Voorheesville. They put up informational maps, displays, and built a pavilion in the shape of the old D&H Voorheesville station. The trail leading away from the viewer heads towards Albany. I took these shots when I went back on March 13, 2021.

Near the train tracks themselves, another viewing platform was set up. This is located with the rail trail heading towards Albany to the left, and the CSX tracks heading southeast to the right. It was too cold this day to sit in the pavilion and watch trains, but I will come here more during the nicer weather.

If Norfolk Southern is going to run double stack trains onto CSX, then the connecting track will definitely need to be rebuilt. This is the view of it now.

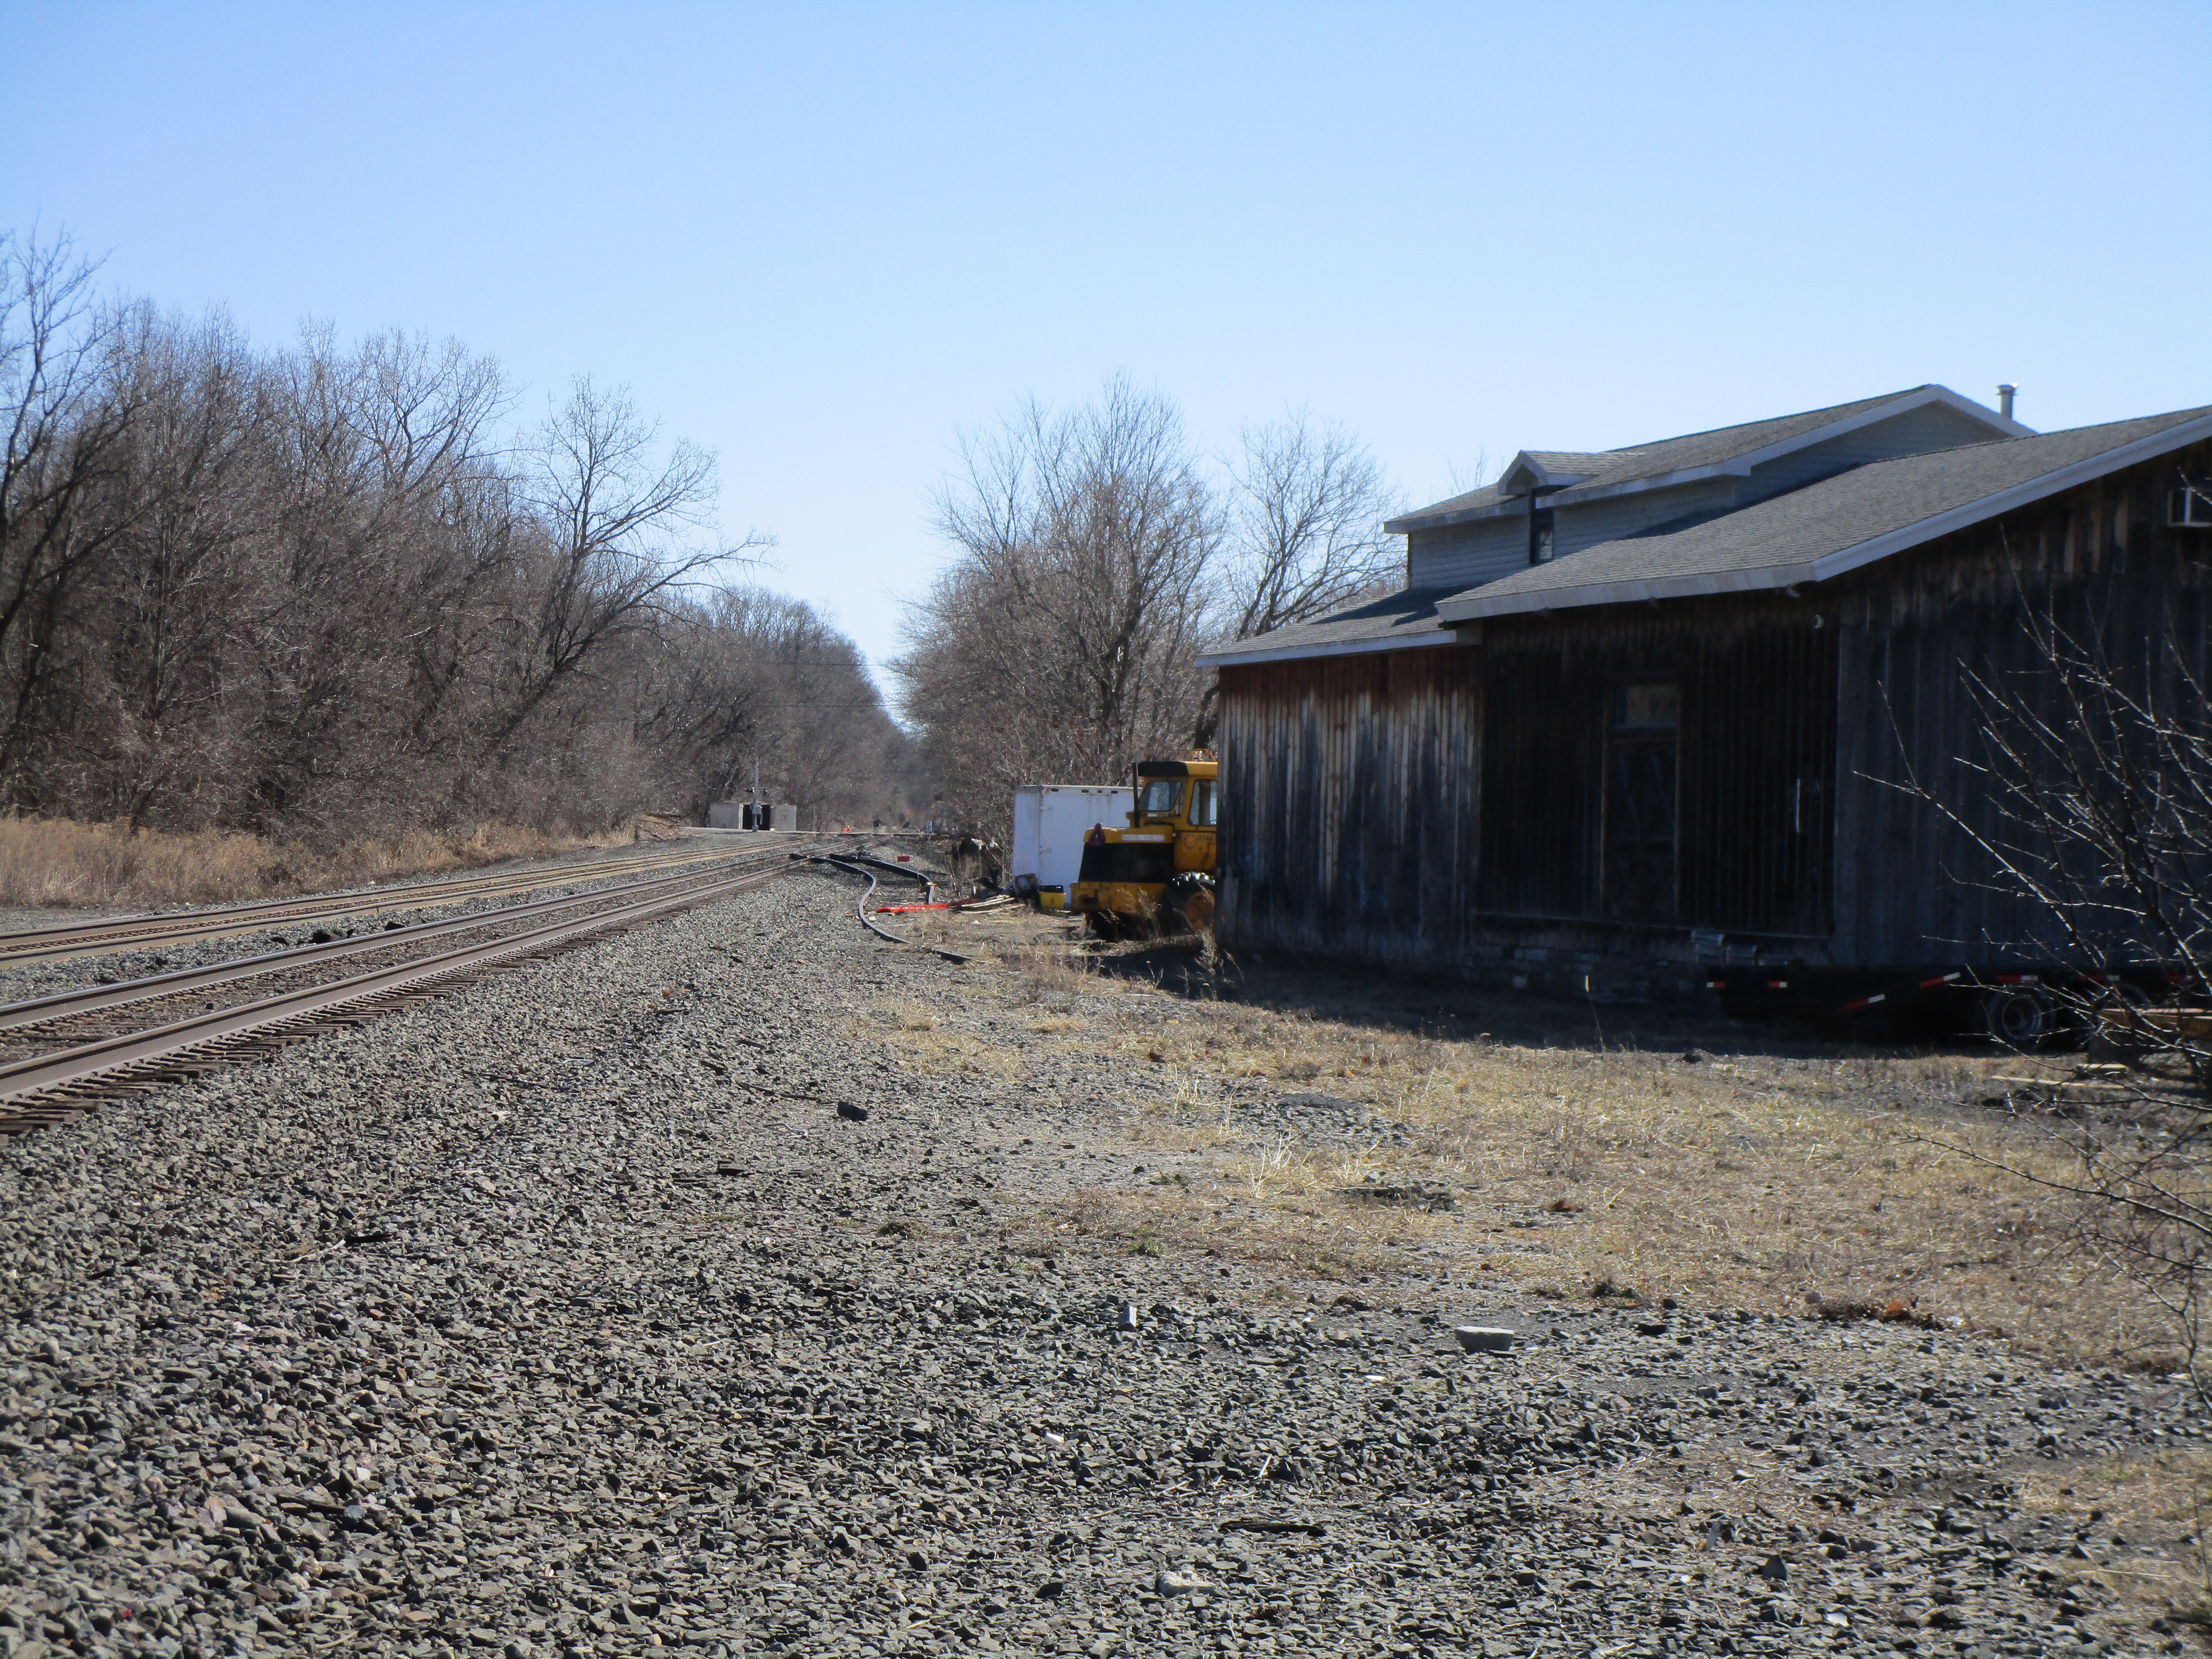
The track is still there and curves towards CSX in the background, but the business has completely taken over the lot.

The switch onto CSX is there, but everything else is buried in dirt and weeds. 

But, its encouraging to see old track come back to life. I took these shots to record for history what it looked like now. Will the connector ever get rebuilt? We shall see. But, I know I want to come back here now sometime and railfan. In the "old days", it was an unknown location but now with the Pavilion and such I hope there aren't too many people about. The day I was here, a bunch of kids were running over the tracks and taking pictures and it is this sort of thing I try to avoid. 

Saturday, March 27, 2021

The end of the Troy Local?

Across the river from Albany, NY is the city of Troy. Whereas once it was a bustling town that hosted several railroads (NYC, B&M, and D&H) but now there isn't much rail served business left. Sometimes I would see the CSX trains head over the Hudson River bridge in the morning and I always wanted to railfan it, so one day in the summer of 2015 I got my chance. I took the whole day and parked in various spots in Troy along the tracks to figure out the best photo spots, and then waited. And waited. For hours, actually, but no train. I finally asked the employees at Interstate Commodities if a train was due that day and they said yes. Turns out, CSX had gotten held up at the bridge and had to wait for clearance to cross. When they finally showed up, it was late in the afternoon.

Until recently there were at least three industries located at the northern end of a long spur that crossed over the Hudson River on a swing bridge, then turned sharply north and ran along the river about six or seven miles until it reached the area shown in the picture below (north is directly left). I took a lot of pictures, talked with the owner, and had a great time. I always meant to get back and catch another train, but never did. And then recently I drove there and the tracks were completely rusted over and the place looked deserted. Upon getting home, I searched online and found out that Interstate Commodities had declared bankruptcy in the fall of 2020. Perhaps due to Covid? I don't know, but the property was purchased by an Architect and will be redesigned for something else (condos likely) so the days of the Troy Local here are probably done. It is sad.

In the center was Interstate Commodities, which at one time sold more than 30 commodities around the world, operated grain facilities and fertilizer plants, and managed 10,000 rail cars and five repair shops. For years as I was driving to work I would look across the river and see strings of covered hoppers. Along the lower left is a huge pile of salt, and covered hoppers of salt are/were brought up seemingly year round and dumped into a large pile 20-30 feet tall. Finally, in the upper left corner is a lone refridgerated, insulated boxcar and I heard that a Latino grocery would order supplies on occasion and unload them here. Behind the car is a long, old freight station.

I took a lot of pictures, talked with the owner, and had a great time. I always meant to get back and catch another train, but never did. And then recently I drove there and the tracks were completely rusted over and the place looked deserted. Upon getting home, I searched online and found out that Interstate Commodities had declared bankruptcy in the fall of 2020. Perhaps due to Covid? I don't know, but the property was purchased by an Architect and will be redesigned for something else (condos likely) so the days of the Troy Local here are probably done. It is sad.

I don't know if cars of salt will still arrive, or whether the occasional insulated boxcar of food will still make it up the line, but it won't be the same. 

Here are some pictures of my rail-fanning trip that day. 

When the train arrived, the engine cut off from the inbounds and worked on pulling the empties first. Discussions were had with the Interstate employees, who were using one of their trackmobiles to push a car into position.

There was a lot going on.

Here was their other car mover, but on its rubber tires.

One of the empties being pulled, with the inbound cars in the distance. The large castle-like structure was an old fortress and made for a neat background in some of my shots.

Then, the engine reversed and pulled cars from another track. 

The, the end-of-train device ("EOT") was put on the rear car, which made up the now-southbound train.

The local crew evidently had pride in their engine, an EMD GP40-2. Note its clean appearance and pair of U.S. flags.

Rolling through Troy, this shot reminded me of some of the modeling of Lance Mindheim.

The train also passed an old iron works. 

Right before it crossed the river, the tracks paralleled a large mill structure. At the time I visited it was an artist co-op, though I don't know what it was originally. It is in really rough shape.

Then the train swung round a curve and crossed the Hudson River. The sun was setting (the time between this picture and the previous one was about 5 minutes!) so this was the best I got. That is downtown Albany in the background.

It would make a great modeling subject for a shelf layout. There are three industries receiving different loads, and shuffling the various types of covered hoppers filled with different commodities would be challenging. The architecture of the various nearby buildings would require scratchbuilding, but that can be a lot of fun. And, several other areas that once were rail served could be added on-line if the layout were backdated. 

I stopped by recently to take some pictures and they were all covered with rust. But, an insulated boxcar had been spotted at the freight warehouse so evidently the tracks are still in use. But barely. 

Tuesday, March 23, 2021

Structure - "Uncovered" bridge

One of the MMR: Structures certificate requirements was to build a bridge. It could be any type of bridge: a wooden railroad trestle crossing a gorge, a modern concrete highway overpass for cars, or a wooden foot walkway over a creek. The requirements are loose so that you can build what you want. And what I wanted was something special. Living in the northeast, I considered the trademark wooden covered bridge but while researching different things came across an "Uncovered Bridge." Huh?

It was featured in an article in the August 1993 Model Railroader magazine (portion of scanned page below) by William Rooke and was based on a Boston & Maine Railroad prototype. The deck had lots of interconnected braces and girders which looked interesting. It had vertically planked sides, which were capped with shingles! And it was small enough to be manageable. I was sold.

It was all stripwood except for some steel wire trussrods and the shingles, so I had to order more wood. This time, I went with Kaplan Mill & Lumber Company because the article specified their products in the purchase list. Like my last wood project, I colored in the drawing and laminated it, and that helped me visualize where all the different sizes of lumber went.

As I discussed on an earlier post, the first thing I did was color the wood. The bridge's foundation was to be a weathered, faded dark black, and the sides were to be more aged gray. I used acrylic paint washes (brown, black and gray) to first color the bridge's girders and braces and later stained them several times with alcohol and ink washes.

The bridge has a lot of cross-braces, including two extra long ones. I built up a styrene fixture to hold them perfectly parallel and spaced properly. It is a shame that it is a one-time use thing.

The cross-braces were added, and then the parallel girders on each side of the bridge were glued on.

Two more full size girders, and two thinner girders which support the railroad tie ends were attached next. I gently lifted it out of the fixture.

A truss rod runs through the bridge in the very center, so I drilled it out with a small drill and then ran some 0.025" steel piano wire in the hole. The girders are actually supposed to be notched for it, and for the inner girders I did just that with a small file.

Next, there are a pair of diagonal braces. The girders are supposed to be notched to let the smaller diagonal brace boards through, but that looked clumsy and required a level of precision I didn't have. So, I instead made them from lots of smaller sections of wood. I started by drawing out the location of the braces in red on some graph paper, then set the bridge on top of it.

Then, piece by piece the diagonal braces were added. Care was required to keep them all aligned so it didn't look stupid. But, much will be hidden by the track ties anyway.

The bridge with the finished diagonal braces. Twenty two pieces total. It was these types of architectural details that drew me to modeling this bridge.

The railroad ties are longer on the bridge than regular ties, so I cut them 4 at a time from strip wood. They were then heavily stained.

Some bridges have ties spaced more closely together than on regular track, but the picture in the article didn't show that so I used a styrene tie jig I had previously made for handlaying HO scale track ties. It was sized for 7"x9" scale lumber. The bridge used 8"x10" and the ties in some spots were a tight fit. As a result, I could only use portions of the jig and had to pull the ties in batches. The ends look longer in the strip in the jig, but they were cleaned up to size. 

Then, tiny dots of glue were added to the underside of the ties and they were applied to the bridge and weighed down until the glue set.

I took some Micro Engineering flextrack and laid it on the bridge, and then cut away all the ties that would interfere with the bridge. I left the ties on the ends, which helped hold the gauge on the bridge. Then, the rails were spiked down.

Spiking the rails down wasn't fun. The small Micro Engineering spikes I had on hand were too long and I had to grind them shorter so they wouldn't poke out the bottom of the girders. But they were also still too large and split the ties even with pre-drilling the holes. And, they weren't consistently sized and the heads on some were out of scale. Worse, they had a tendency to break some of the fragile glue joints of the ties. This all combined for a big problem. (Edit: I later learned that ME makes much smaller spikes and I should have used them)

So, I switched to some very small Life Like track spikes. They were also too long but easy to shorten, and their heads whilst round were at least consistently sized. And, they didn't require pre-drilling. I spiked here and there, jumping around to keep up my interest. I used short needlenose pliers to insert and push the spikes into position. There were only 112 total spikes (28 ties x 4 spikes per tie). Thank goodness there weren't any guardrails on the bridge or that would have required more spiking!

I hate oversize spike heads on handlaid track, at least for HO (it isn't noticeable on the larger scales) but here I thought it better to add them rather then leave the rails unsecured. I painted them brown to match the rails and hopefully that will help minimize their bulk.

Then, I painted the rails brown. Finally, the excess plastic ties at the ends of the track were cut away and it was set aside to dry.

After that, some thin wooden stringers were attached to the ends of the ties on top. What their purpose was I could not say, as they don't seem like they could hold a derailed train on the bridge (nor would they need to, with the sides and all) and they are too narrow to walk on as a walkway. But they made the bridge look more presentable. 

The sides of the bridge were framed with 12"x24" lumber, and the tops were pitched at an angle and shingled on the top. The sides were sheathed in 1"x6" lumber... lots of it. To get started, I cut the 12x24 lumber and then framed up each side into a box. For ease I put the top connecting piece below the edge of the angle. Otherwise, if I attached it at an angle part would have needed to be sanded down along the length where it stood proud of the sides. 

For the top surface, I used a very thin piece of wood and glued that on. It was flimsy, though, and I wanted to strengthen it. Though it will be a display model, applying the shingles might cause it to bow otherwise so it needed some rigidity.

My solution was to flip them over and fill the gaps on the inside with round toothpick scraps and wood glue. I flooded it in, knowing it would seep into the gaps and then shrink beneath the surface level.

Once dry, it was nice and strong and would later be hidden by the outer sheathing boards.

I then lightly sprayed them with gray paint and attached them to the bridge. I also stained the wood after this shot was taken with my ink/alcohol stain to give it some color. Naturally, though, most of it is hidden.

I needed lots of 1x6 boards for the sides, and I wanted them more of a grayish color than the black I had used on the bridge framework. Soaking the wood in my paint solution didn't seem to work very quickly (even with my oven drying) or effectively, so instead I decided to brush them with watered down paint. But holding each piece of stripwood to do it would likely take just as long, and drive me nuts. So, I taped them to some surplus laminated pages I had lying around. 

For color variation I painted them in three batches. The top had medium gray paint mixed with black ink and alcohol solution. The middle group had black paint mixed with the black ink solution. The bottom had light gray paint mixed with plain rubbing alcohol. I then went over the top and middle groups lightly with light gray paint and plain alcohol solution. I cut them to size and mixed them up for a variegated appearance.

I quickly noticed that I would need every spare inch of wood, so I removed the tape and colored the portions underneath. I had purchased the four packages required but it looked like I would need more. Then, I used my NWSL chopper to cut them to length. Thankfully, the prototype bridge had boards that didn't perfectly line up at the top or the bottom, so that gave me some flexibility when installing them. 

I didn't shoot for perfect, but I did try to have everything pretty close. The top edges of the boards were hidden by a trim strip anyway so no perfection there was required. Each side contains 85 vertical boards, including two per slot where the diagonal braces come out of the sides. Each board was glued on in three spots underneath, and after each board was laid in place any squeeze-out was removed. There wasn't much. I discovered early on that another horizontal brace was needed to support the middle of the delicate boards.

Where the diagonal braces come out from the sides I added vertical boards on top and below. I added braces behind to support them. They give the bridge a distinct appearance. I liked the variegated appearance of the boards and am glad I weathered them in different colors and patterns. 

Because some of the lumber bent away from the sides while gluing, and a couple of boards aren't perpendicular to the sides, it developed a rustic, "worn" feeling. I didn't try for it, and intentionally didn't break boards or add other signs of age, but it ended up looking like a used bridge.

It was at this point that I realized I was short 1x6 lumber. I had ordered the exact amount the article called for but only had enough to do the sides' outer walls and the end walls. I still had to do the inside walls, so I essentially needed double the lumber required. The author of the article had cut his own scale lumber, so he probably guessed as to quantities needed. And he was wrong. So, another order for scale lumber was placed. This time, I went with Northeastern Scale Lumber which delivered quickly. But, the wood was much more fuzzy than the Kaplan stuff. Including the ends, there are 354 individual boards! 

While waiting for the second batch of lumber to arrive, I started adding Grandt Line #127 nut/bolt/washer castings along the ends of the tie stringers. After they were glued in I painted them a rusty, red color to make them pop and distinguish them from the rusty brown color of the rails and spikes.

The underside also received some Grandt Line #5096 nut/bolt/washer castings. Since the underside of the bridge is visible from certain angles I added them all along the edges. They too were painted a rusty red color.

The base is a piece of 1"x4" lumber that I cut to length, and then used my belt sander to add a bevel to the edges. It was stained and polyurethaned. To build up the trackbed high enough to (sort of) justify a bridge, I used a piece of 2"x4" lumber and some more green florist foam scraps.  

Then, everything was covered in ground goop, real dirt, and ground foam.

Simple "concrete" bridge piers were fabricated from styrene, painted gray, and weathered with chalks. Then, they were glued to the base and scenery was applied around them. Some commercial Mt. Albert Scale Lumber ties that I had on hand were weathered and applied to the roadbed.

The bridge set in place and the rails were spiked on either end. The bridge itself wasn't glued on, and the rails alone hold it in position.

The spike heads were painted brown, and the track was ballasted with Woodland Scenics ballast.

One detail on the plans was a truss rod running up through the extended crossbeam and then along the diagonal side brace. I added this feature with steel piano wire, and a nut/bolt/washer casting. Note how the wood looks very yellow in this picture, and gray in other pictures. 

The shingles for the top of the bridge started out as index cards that I spray painted gray, then added mottled random blotches of three concentrations of India ink and alcohol solution. 

I let them dry, cut them into strips, and notched them with a knife to match the commercial shingles I had used on my church. Even for such a small bridge, it was tedious work. 

They were glued on in rows, and along the top another wooden strip was attached to act as a cap. I didn't strive for perfection but also didn't want it to look like the roof needed to be replaced either. 

And with that, my bridge was finished. I contemplated modeling water underneath the bridge but in the end decided to stick with how it looked. I do wish I had made the base was wider, though, as the sides of the bridge crossbraces stick out farther than the edges of the base.

But I am happy with my "uncovered" bridge. I liked working with wood, and really can appreciate now the amount of effort invested by those who build structures board by board. It took over 4 hours to do just the sides, and though I enjoyed it I don't think I will build a large barn or mill using individual pieces of wood. It is just too time consuming. And making my own shingles was okay on such a small scale, but in the future I am sticking with commercial products. What to build next?