CP Executive train in Albany

CP Executive train in Albany

Sunday, April 30, 2023

B&M Hoosick Falls freight house (1982)

Here is a shot showing the Boston & Maine's freight house in Hoosick Falls, NY. Taken on April 30, 1982, the building was already looking pretty old and the siding on the front has already been removed. While the age of the building is unknown, it dates back to at least 1876 as it was located on maps from that time period.

It was situated at the railroad crossing of Center Street, in the northeast quadrant. Sadly, on June 12, 2007 a teenage arsonist burned it down.


Sunday, April 23, 2023

D&H's 200th Birthday! (April 23, 2023)

Today marks the 200th anniversary of the Delaware and Hudson Canal Corporation which, on April 23, 1823, was incorporated under New York State law. In 1973, to commerate the D&H's Sesquicentennial (150th anniversary), then President Carl Bruce Sterzing organized several celebratory events. Some of them included fan trips pulled by steam locomotives over the line.

Unfortunately, all of the D&H steamers had long-since been retired for over 20 years. So, he got creative and leased an ex-Canadian Pacific hudson (#1278) from the Steamtown collection in nearby Bellows Falls, Vermont. It was loaned to the D&H and repainted as D&H #653. While purists knew it wasn't a correct D&H locomotive, many people didn't care and were just thrilled that steam had returned to the Bridge Line. 

But one engine wasn't enough, so Bruce looked around for another engine and cast his eyes on the the larger northern operating as Reading Rambler #2101. It was then modified by D&H forces by rebuilding the smokebox front, adding smoke deflectors and marker lights, and finally repainted as D&H #302. 

These engines pulled several trips along various portions of the D&H throughout April and May of 1973, and perhaps longer. However, eventually the engines were returned to their owners and returned to their original appearance.

When I started collecting D&H slides around 2012 or so, I specifically looked for interesting shots of these two engines. I don't claim that these are the best shots but I am happy to have them in my collection. Information on each slide is shown above the image.

D&H RS11 #5001 and D&H #653 at Colonie, NY on April 28, 1973

Another shot taken on April 28, 1973.


D&H #653 traveling light through Waterford, NY on April 28, 1973.

D&H #302 at Colonie, NY sometime in April, 1973

D&H #302 at Colonie, NY sometime in April, 1973

D&H #302 at Colonie, NY sometime in April, 1973. I love this shot of it taking on coal.

I have more that are from May 1973, but I will post them next month.

Wednesday, April 19, 2023

D&H shop in Green Island (1987)

Pictured is the D&H shop in Green Island on December 22, 1987. At one time it was the Rensselaer & Saratoga Railroad's shop building, but it was later acquired by the D&H. It was located right where the D&H's "Green Island branch" terminated. Some more information about that branch can be found here.

I like the green switch engine on the left. I don't know if it was a shop switcher, or if it was about to be scrapped.

It was later sold and operated as R.K. Freedman and Sons as a scrapyard, until it suffered a fire in March 2011 and the place was leveled. The area today is surrounded by chain link fences and warning signs.

The building is somewhat special to me as I was told that it served as the basis for the Adirondack Live Steamers' car barn. I can sort of see the resemblance. This project was inspired by, and heavily worked on by, member Myron Rapaport. I was later approached by Myron to write an article about the car barn's construction, which was published in the March/April 2009 issue of Live Steam & Outdoor Railroading magazine. 

Even the weathervane is a 1/8 scale side profile of a steam locomotive.

Saturday, April 15, 2023

D&H Laurentian passing through North Albany (1968)

Here is a nice shot of a southbound Laurentian passenger train passing through North Albany in February 11, 1968. Much of the trackwork here is gone (though about ten years ago they extended the double track north from the "concrete canyon" to just beyond this road crossing). Even the road crossing here was eliminated. 

Look how sharp that siding off secondary track into the warehouse is... complete with "S" curve!

An overview of the area just beyond where the train is coming from can be found here.

Tuesday, April 11, 2023

D&H service tank car #35985

I love tank cars, and am always on the lookout for any painted for the D&H. After purchasing a few slides of red D&H tank cars thinking they were used for molasses traffic (turns out they were in fuel service), I came across this one of #35985 and bought it. I don't know its purposes. 

It was taken in April of 1982 which is only a few years off my layout target date, and would  be pretty simple to model.


Friday, April 7, 2023

Concrete pavement around Southworth Machinery

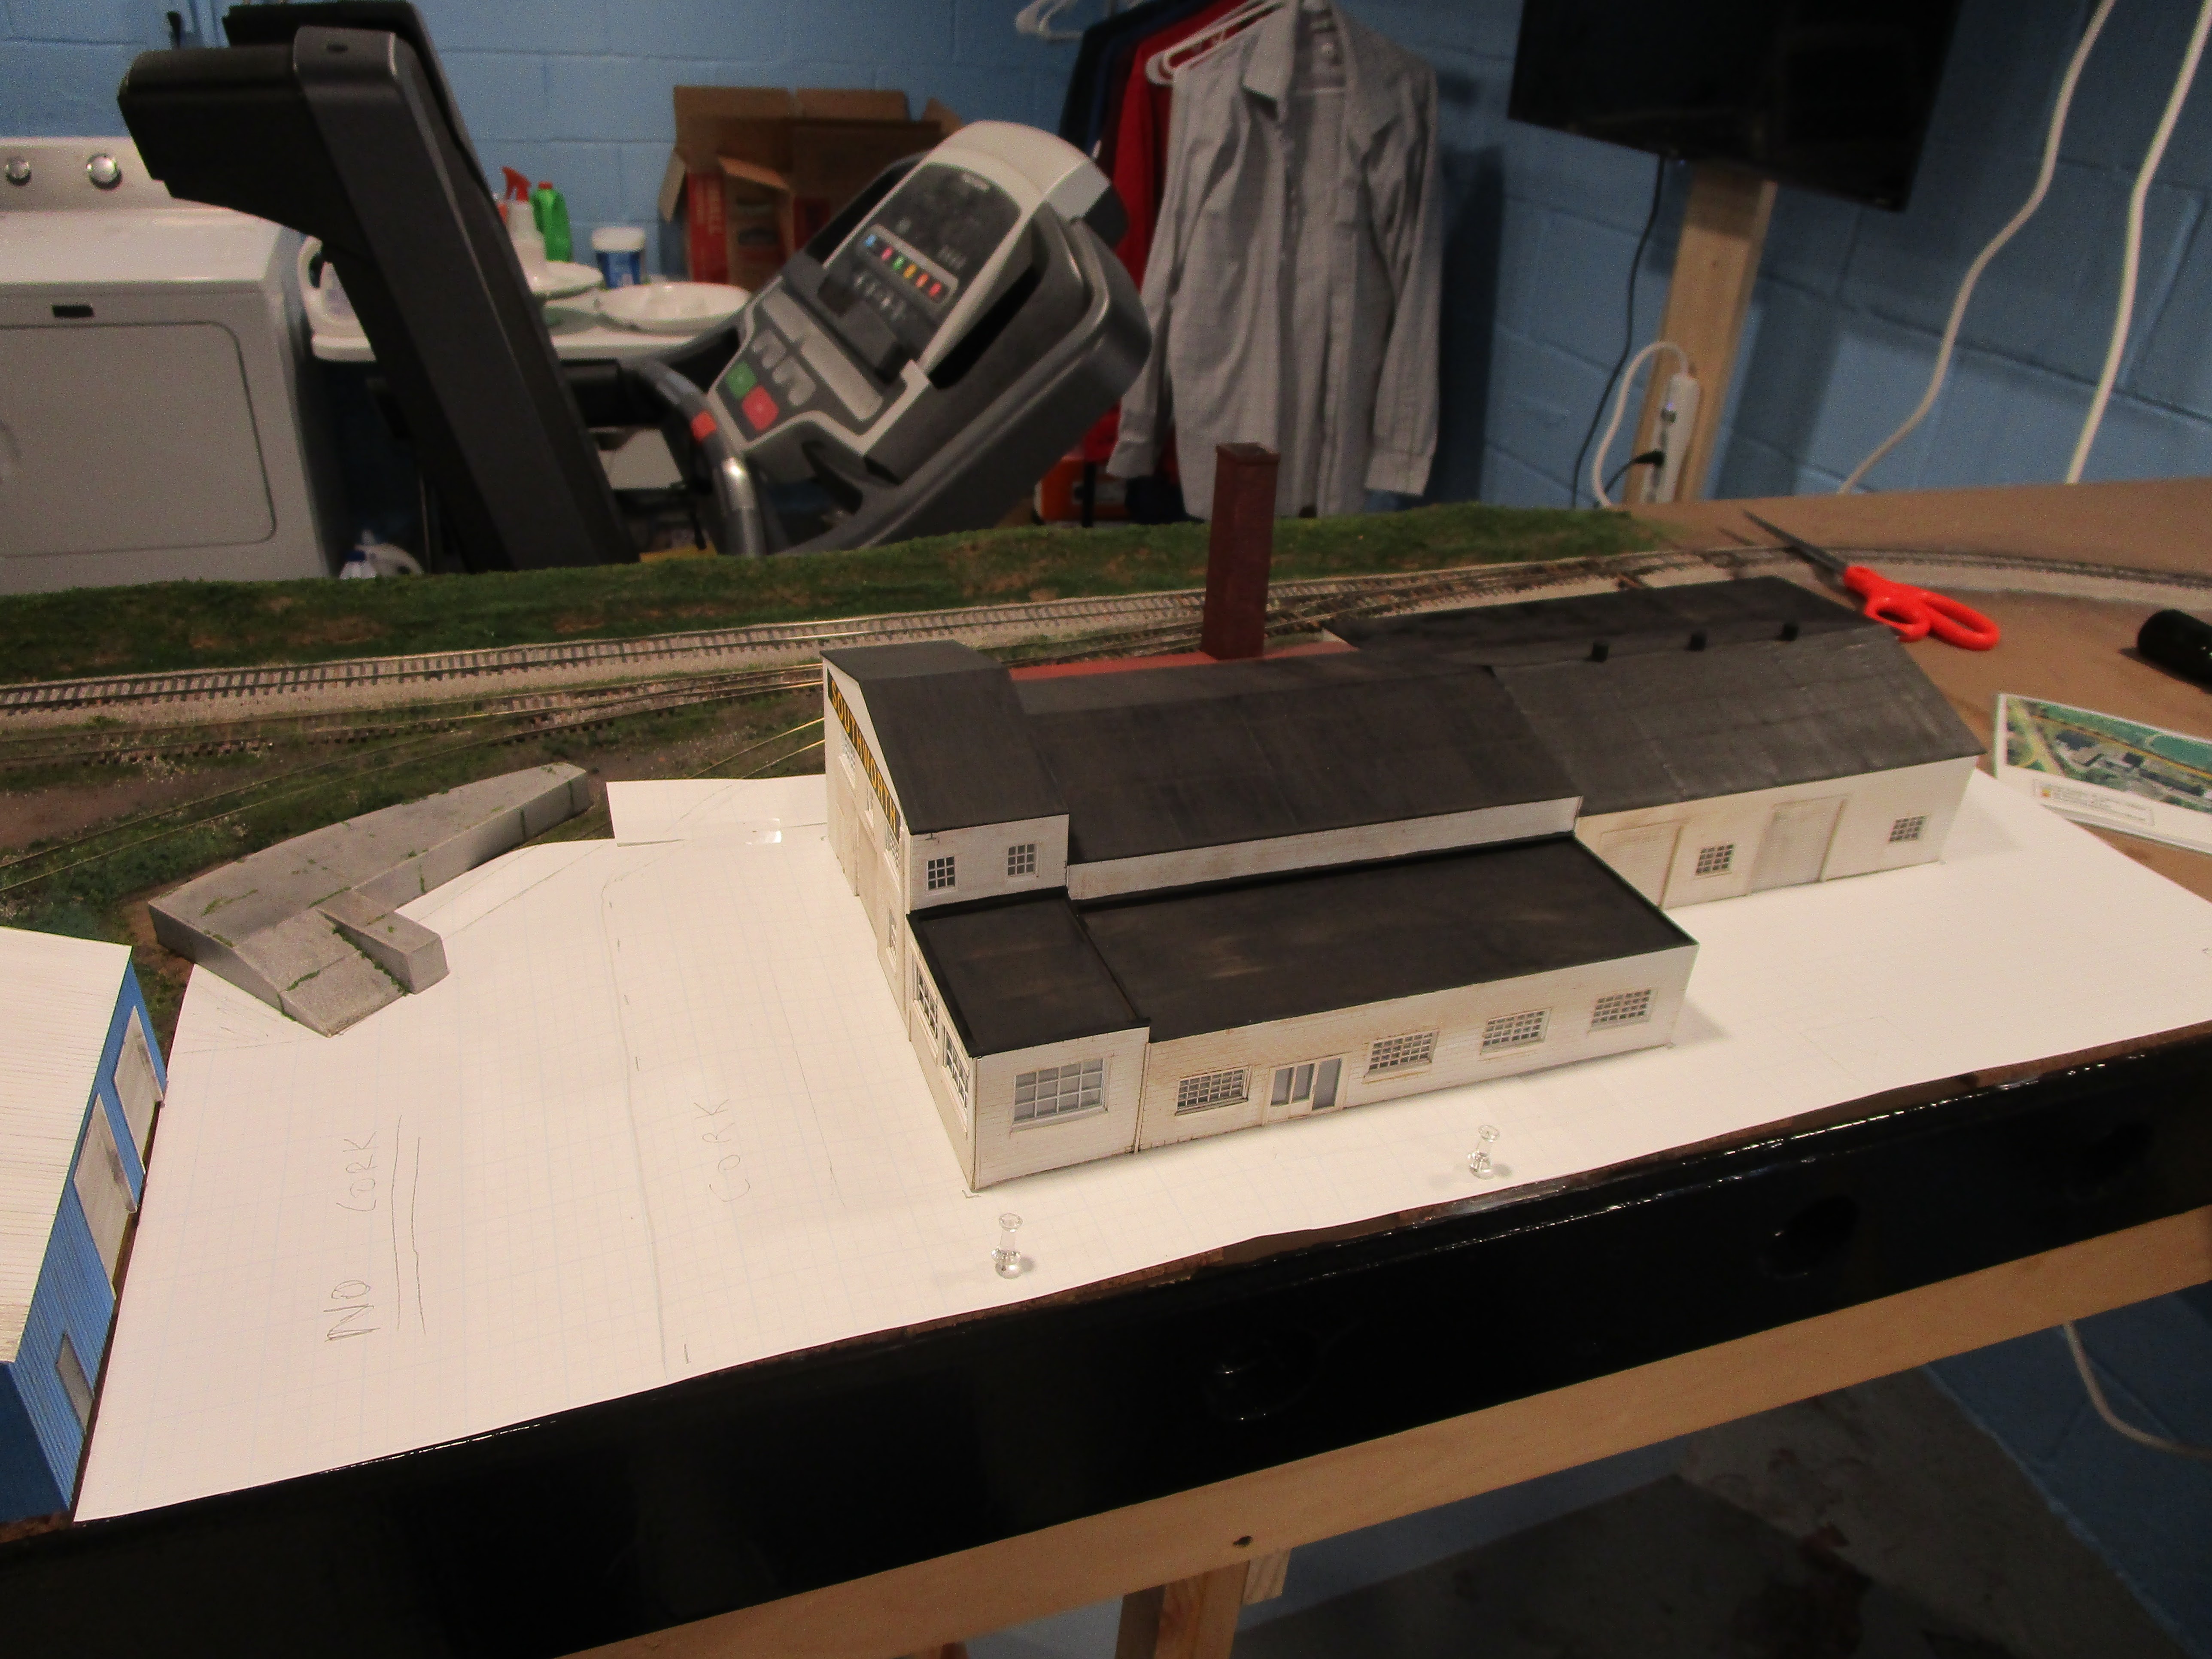
The next area to work on my layout was Southworth Machinery. I had finished the building but it was just sitting on top of a sheet cork foundation that I glued down a while ago. With the sudden urge to keep working on the layout before another project took over, I looked at satellite pictures of the area to determine what would be appropriate.

Most of the structure except for the rear side which abuts the tracks is surrounded by poured concrete. At least that was what existed in the 1970s and 1980s. Pictures showed that it was in almost perfect condition in the 1970s, and I doubt too much changed by 1984. Now, it is still concrete but there are large portions that have been repaired with asphalt. 

Unfortunately, the area between Southworth Machinery and the blue Agway building was another matter. Around the Agway building was old asphalt, then a chain link fence dividing the two properties, and then the poured concrete of Southworth. I didn't have room to model all of this. Worse, there were many truck and tractor access doors on the sides of the buildings so I had to model enough room for trucks or other large vehicles to enter and exit. Thus, I just installed concrete between the two and dropped the fence altogether. Concrete is easier to model than black asphalt and it can be done with styrene. 

Large sheets of graph paper were taped together and set into place. Then, pencil marks were drawn where the tracks, buildings, and ramp were located. 

Next, it was taken to my workbench and cut to the size where the concrete would go. Multiple trips back and forth to the layout confirmed that everything was correct, and a few areas needed some adjustment.

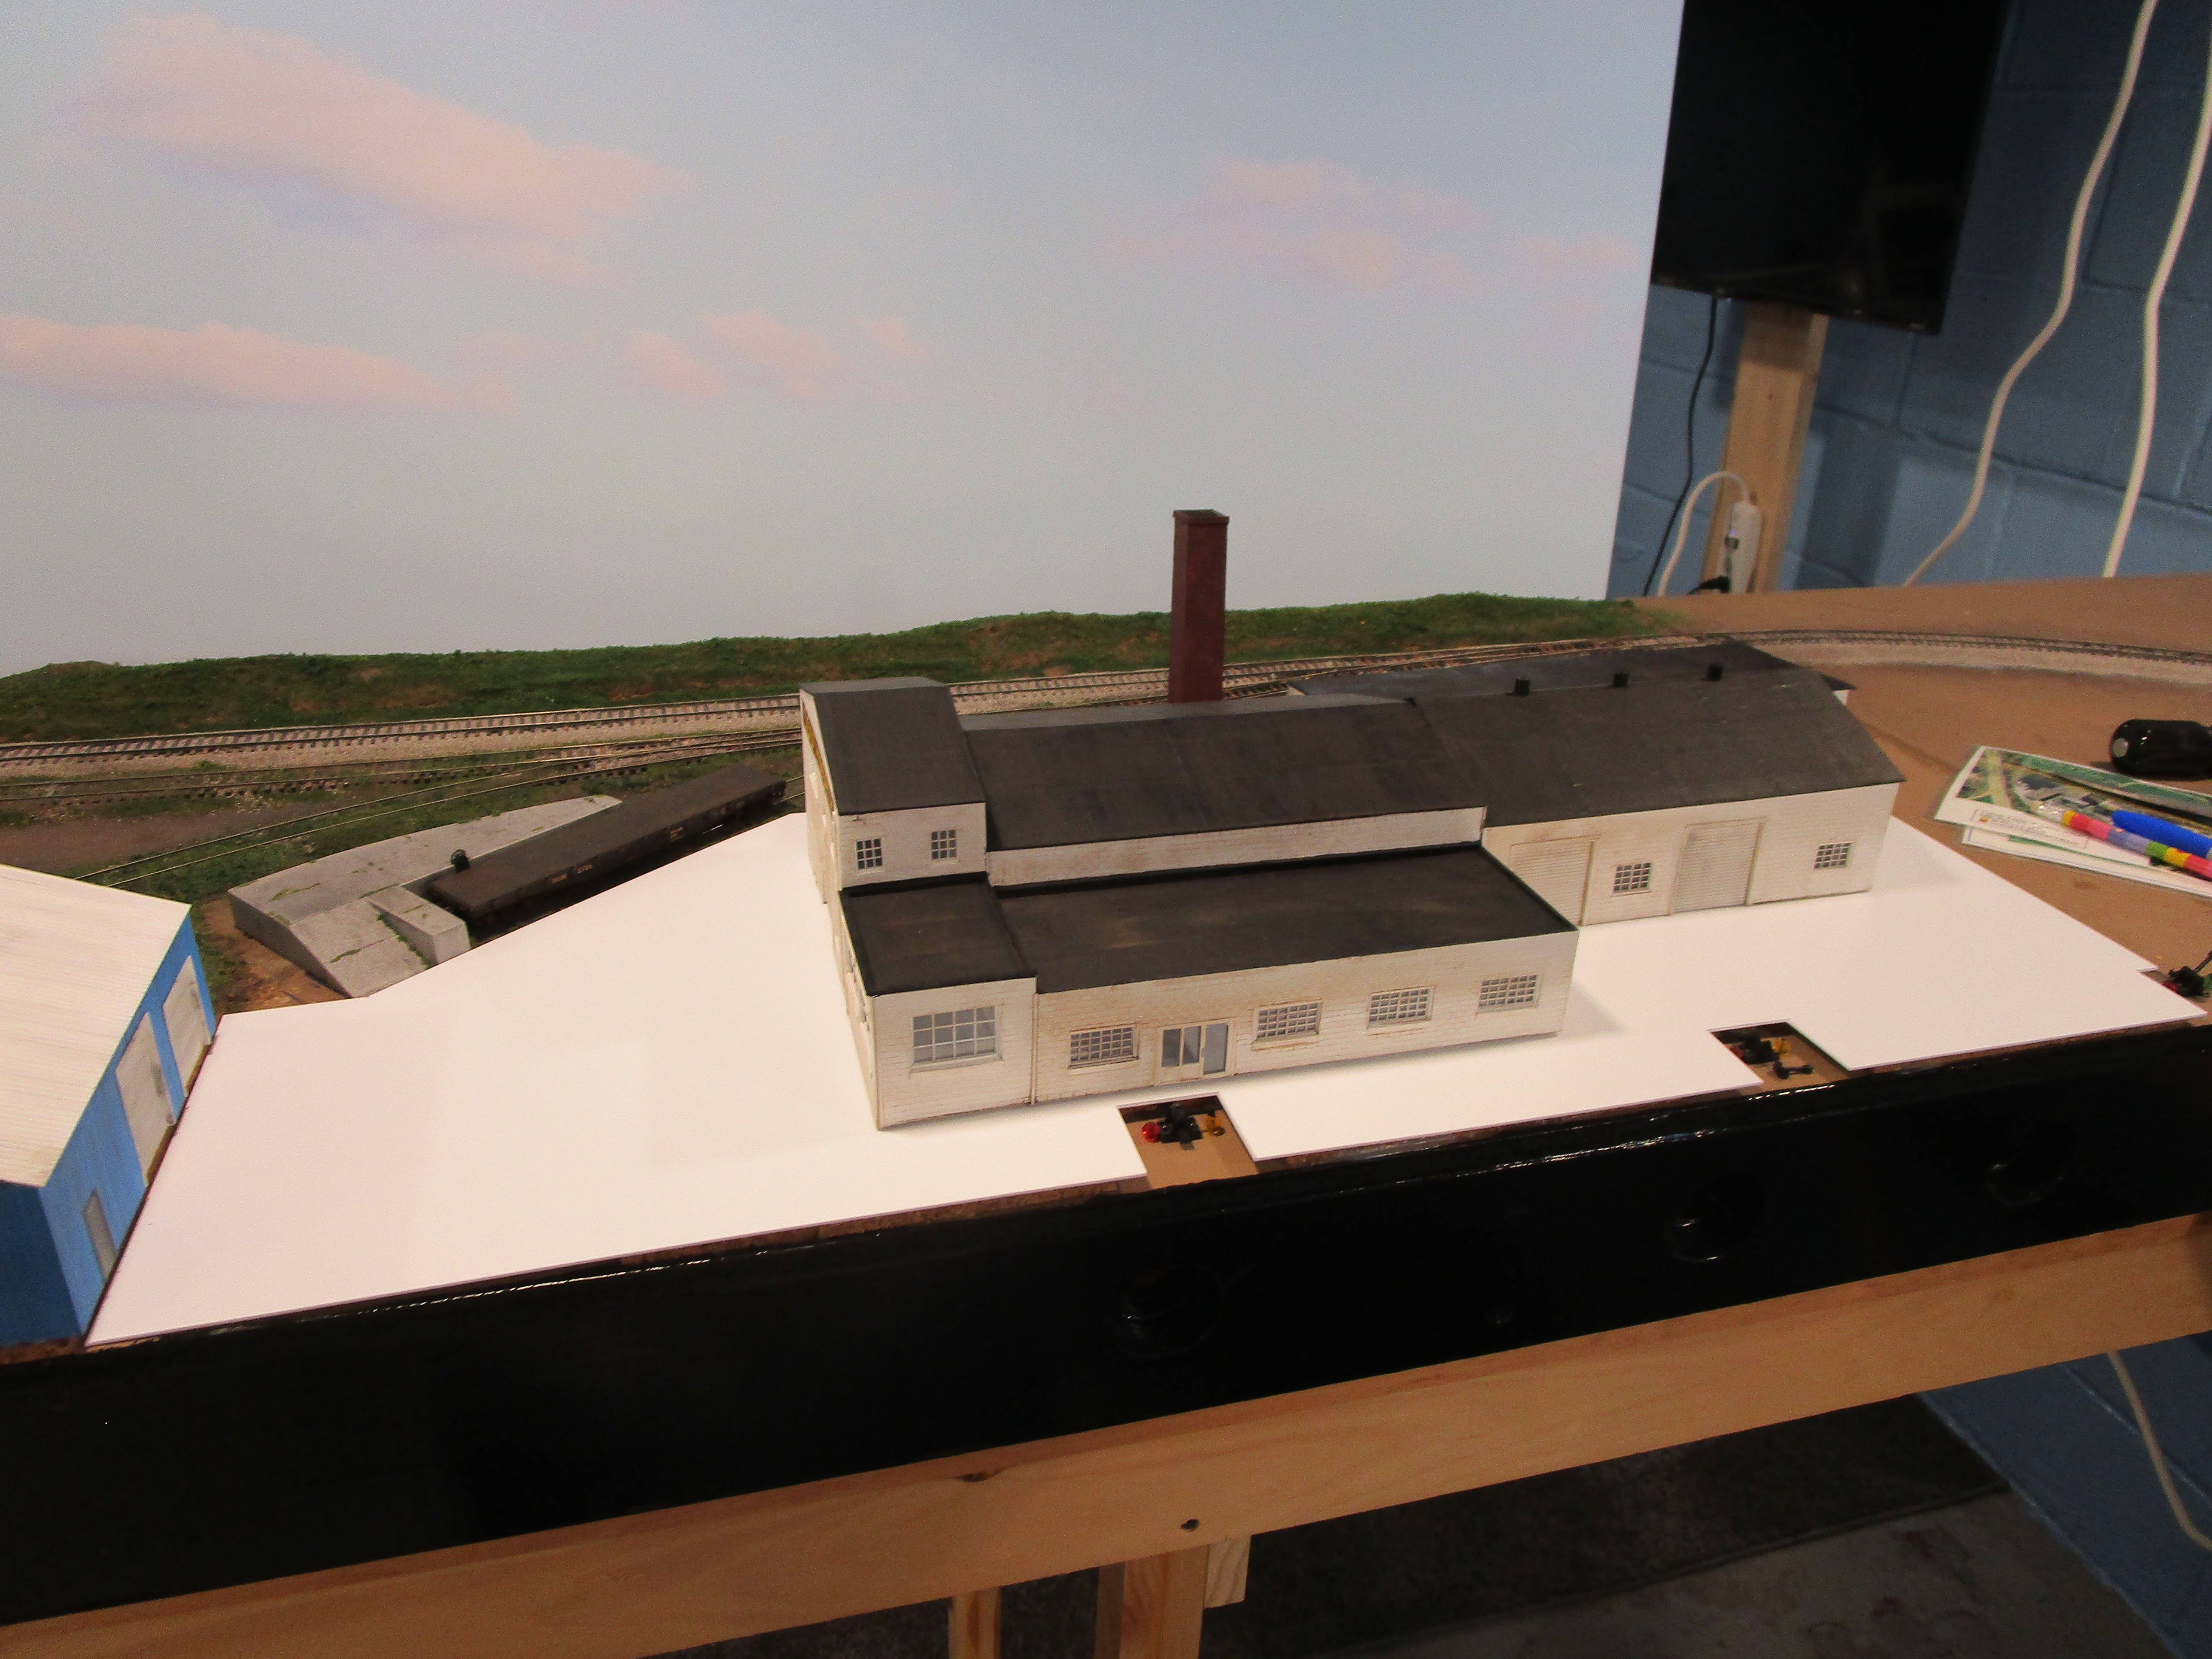
There is cork under the buildings, but not between them, so that area will need to be supported with more cork or something else. Also, the concrete ramp is a problem because its overall height was calculated perfectly with the top of a flatcar on the track next to it, and if I raise the base of the ramp enough to be level with the concrete the top of the ramp will be too tall for a flatcar. I will figure that out later.

Next, the paper's dimensions were transferred to some 0.040" thick styrene I had which, amazingly, was the perfect size.

I tested the styrene in situ too before making any cuts.

I noticed that one of my Caboose Industry ground throws was broken. I am not sure when that happened, but I decided to fix it while access was easy. Thankfully, I had another spare ground throw in my parts bin.

A grid of roughly 1.5" x 2" rectangles was drawn on the pavement. The real parking area has all different size sections running both horizontally and vertically, so I wasn't terribly concerned about making it all perfect. Some lines I adjusted to make them more pleasing to the eye. 

You can see below the ramp issue I was talking about earlier. I will need to raise the ramp so that it meets the concrete, but I will deal with that later.

Pressing on, I then scribed the lines with a yardstick and the point of a compass tool. I didn't slip a single time while making the lines, including some that were over 2 feet long. The pencil lead from drawing the lines fell into the cracks, making them easy to see.

Next, various fissures and chips were scribed into the panels using the same tool. It was tiresome and I didn't try to overdue it, but I did add some character to it all. Finally, fine sandpaper was used in tiny circular motions over the entire parking lot. This removed any ridges created while scribing the lines, and it also gave the smooth styrene surface some texture. My arm ached afterwards.

Next, I used some 0.188" thick styrene strips to frame the edges of the pavement and also add supports under the road area that is between the two buildings' cork foundations.

Another problem... the pavement wouldn't fit under the edge of the blue building. It was about 0.020" too tall! If I had installe the concrete first, and then glued down the blue building, everything would have been perfect. However, I didn't want to try and pry up the right side of the blue building because I feared it would crack. That would be bad. So, I cut the styrene short so that it abuts the side of the building instead of sliding under it and will hide the gaps with weeds. The areas in front of the garage doors were built up with styrene strips to minimize the gap, as weeds likely wouldn't grow there.

Then, the concrete was washed and painted with various shades of tan paint. The final coat was Rustoleum camouflage "Sand", which when sprayed from about 18" away dries with a slightly rough surface that looks a lot like worn concrete.

After two days for the paint to cure, I applied an oil paint wash to bring out the cracks and expansion joints. I focused on getting a smoother appearance over the parts that will be seen, and just quickly brushed it over the portions that will be hidden by the structure. 

Once dry, it was sprayed with Dullcote and then glued down with tacky glue and held in place with weights. I wrapped my steel blocks with plastic wrap so there would be no chance of having the steel leave rust marks on the pavement.

Then, the Southworth building was glued down. It didn't sit perfectly flat, no doubt because it was built from 6-7 different subassemblies, and I had to use more steel weights to hold it in contact with the concrete. Those two large steel plates on the ends are actually the bufferbeams for my 1/3 scale live steam engine, and the one on the right damaged a roof vent in the process. It was easy to repair though.

Finally, I stepped back and called it good. I need to add some greenery growing in the cracks and along the foundation of the building, as well as some buildings, figures, and a bit more weathering. But, for now I am happy with it.

Monday, April 3, 2023

The Adirondack Returns!

After being in hiatus since March 2020 (due to the pandemic and staffing issues), Amtrak is scheduled to bring back the "Adirondack" train on April 03, 2023. Amtrak has this to say about their train: "The Adirondack travels from New York City, through the lush wine country of the Hudson Valley, into Montreal". Sounds pretty nice, eh? See Amtrak's website for a full description of the train.

The above image from 1976 is of the drumhead found on the observation car when the D&H ran the Adirondack train. I would assume they had two drumheads as there was a northbound and a southbound train.

Saturday, April 1, 2023

Favorite Engines - Amtrak & Conrail GG1s

Considering this is "April Fool's Day" I thought I would post about something completely random (but no fooling... I really do like these engines!) 

I am too young to have seen a GG1 operate in real life. I was born in 1982, and most of them had been retired before then. In fact, only a few soldiered on until October 29, 1983, when the last ones were operated in revenue service. I have seen them in museums, State Fairs, and I even ran into a pair of them rotting away in Cooperstown, NY years ago unexpectedly while driving home from a work conference.

However, I am in the minority because I think the Pennsylvania Railroad's maroon and Brunswick green paint schemes were pretty boring. Instead, there are three schemes that I think are really sharp.

The first is Amtrak's "bloody nose" or "circus" scheme. Amtrak painted only about a half-dozen or so in red, silver, and blue, and one of them can be seen in the shot below dated March 1980. Note the boring black engine directly behind it.  

Those who want to see an Amtrak bloody-nose GG1 can visit the New York State Fairgrounds in Syracuse, NY. Also, the Summer 2015 issue of Classic Trains magazine had an excellent article on an alternate Amtrak scheme with red and blue stripes that ran the length of the GG1's body. Frankly, I am glad Amtrak went with what they did.

The other two schemes belonged to Conrail. Their GG1s were inherited from Penn Central and mostly consisted of patched out black or Brunswick green bodies with "CR" stenciled on the side. But, Conrail did try two alternate schemes. The first was a bicentennial paint job from 1976 on #4800, "Old Rivets", named because it was the first GG1 off of the assembly line and the body it was riveted together instead of welding like the later engines. The shot below is from September 12, 1976. Wow, what an explosion of color! I love it, but it isn't for everyone. (Maybe I should have saved it for one of my July 4 posts.)

I saw two models of this engine recently. An HO scale brass model sold at a train show in December for $150. I passed, but a friend bought it. At another show, a Kato N scale model sold for $75. I showed it to my wife, but she said it was too gaudy and didn't want me to buy it. So I didn't. But I won't give up on it yet. I think I want one in O gauge for my next layout (for fun). Since most manufacturers use a GG1 mold without rivets (which is prototypical for most GG1s), all of the commercial models of bicentennial #4800 are missing the distinctive rivets. I guess the colorful scheme is so loud most people don't miss the little bumps.

Here is what #4800 looked like a couple of months later in November 1976, along with a couple other GG1s. It stands out in a sea of dark gray, black, and rust.

By 1978, the bicentennial celebrations were over and Conrail was ready to move on. So, it repainted #4800 in solid blue with a "can opener" logo. Shown here in September of 1979, it still cuts a striking image. As a Conrail fan from an early age, I love this scheme too. 

A couple of years later found #4800 in May of 1981 with faded paint but still in decent shape.

When most people think of the GG1 they picture a fast-running Pennsylvania passenger train on the northeast corridor. Or, maybe they remember a Lionel model they had as a kid. Few would even cast a sidewise glance at these engines. But I think they are awesome!

For more information on GG1 paint schemes, an excellent online resource can be found here.