.jpg)
CP Executive train in Albany

Wednesday, December 27, 2023
D&H train in Voorheesville (1985)
Here is a shot of a D&H/Guilford train going through the diamond in Voorheesville on December 29, 1985. I believe that it is heading west out of Albany. It will be interesting to see how the train scene changes in Voorheesville in 2024.
.jpg)
Monday, December 25, 2023
Merry Christmas!
MERRY CHRISTMAS!
But the angel said to them, “Do not be afraid. I bring you good news that will cause great joy for all the people. Today in the town of David a Savior has been born to you; he is the Messiah, the Lord. This will be a sign to you: You will find a baby wrapped in cloths and lying in a manger.” Luke 2:10-12
Not much to report at the moment modeling wise, but Harrison received some trains this year under the tree. In the end, that is a good thing. 😀

Friday, December 1, 2023
Harrison's first Lionel layout
Though Harrison is free to pick whatever toys he wants, he really likes his wooden trains. I think most kids do these days, and I personally believe that Thomas the Tank Engine has done more to interest kids in trains and model railroading in general than any other promotional campaign. Still, I don't actively push trains on him.

But, I bought him a Thomas train set last year for Christmas and he enjoys watching me run my HO scale layout in the basement (had I known this fact months ago, I never would have redesigned my layout to remove the option for continous running. Sigh)
He plays with a 4'x4' layout on the floor but the curves are very tight and the train can't go fast before it skyrockets off at the corner. Something had to be done. But, the new layout had to be semi-portable or at least movable, it had to fit under my layout, it had to be cheap in case he lost interest, and it had to have some green scenery to draw Harrison's interest. So, I dug into an old Model Railroader special issue magazine from the late 1980s that I had as a kid. It featured a roll-around O scale layout designed by Jim Hediger which looked like it would work.

I started in September with a pair of wooden dolly carts I had left over from Harbor Freight. I cut them apart to salvage the coaster wheels and built a frame about 14" tall (a good height for Harrison) from some 1x2" lumber. This later proved to be a mistake.

The layout itself is a piece of plywood split down the middle. To get this home I had to wait until November when I purchased a larger vehicle- my Toyota Rav4. I love it, and it can just barely fit in a piece of plywood which I had cut to size on the night before Thanksgiving at the store. The plans called for 3/8" thick and 3/4" thick plywood, and that must have been a typo. It couldn't be both. Splitting the difference, I used 1/2" plywood. The two outer edges are framed with 1x4" boards.

The ends are framed with pieces of 2x4" board. This is important because they need to be beefy to support the hinges which will be mounted on them.

Here is Harrison's current O-gauge layout, mounted on a 4x4' cork board. I bought the board on Craigslist and had to transport it on the roof of my Toyota Corolla while holding one side with my hand sticking out the window. It was a slow trip, but thankfully a short trip. Clearly, a larger layout was necessary. The other green board is something I use for photos.

The right side of the table with flipped over and two more 2x4's were mounted along the edge on the underside. Then, the caster/leg assembles were set in place.

I didn't want to glue the wheel/legs in place, so I instead glued and screwed blocks cut from 2x4" lumber on each side of the legs. The wheel assemblies slide out, but friction keeps them in place except when they need to be removed.
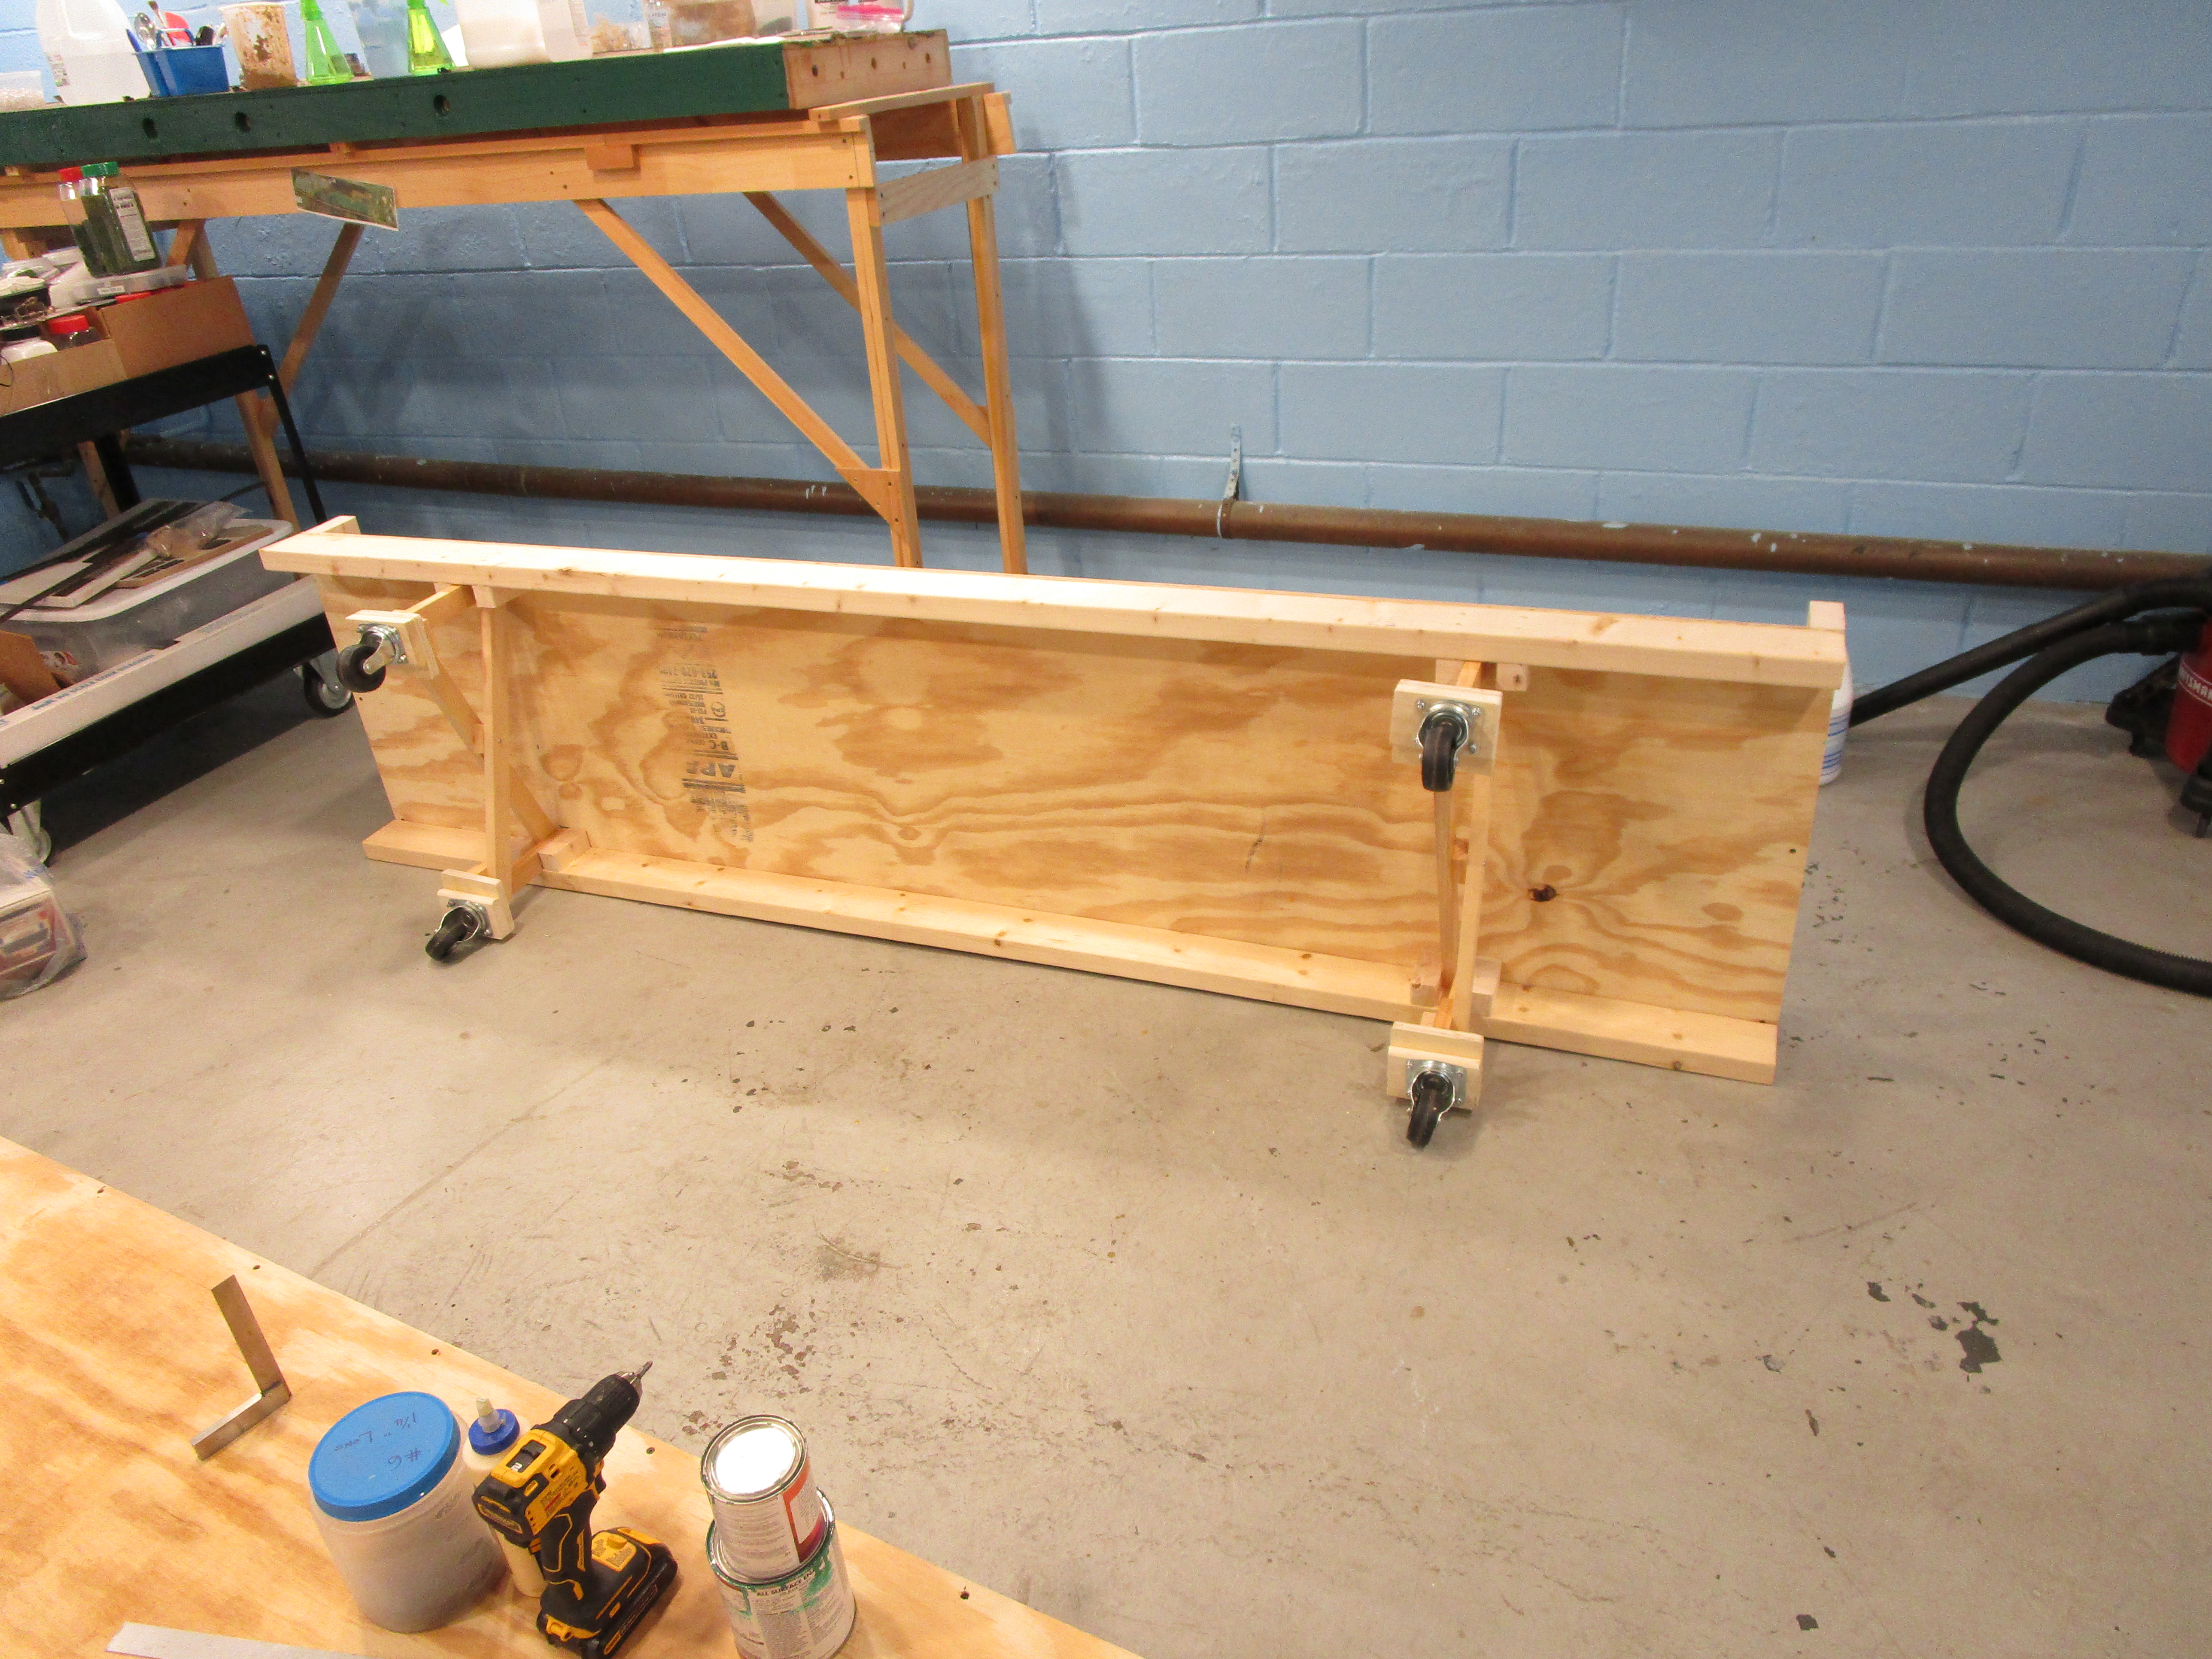
As it turns out, the cheap plywood on the Harbor Freight dolly delaminated and broke so I removed the casters and modified the leg assemblies to use a solid 2x4" instead.

The non-wheel side of the table also had 2x4" braces underneath along the two sides as well. I then mounted a pair of 14" tall legs made from 2x4" lumber on the left hand side to raise it up in height to match the right side table. Hinges will hold them together later.

My wife helped me carry the two pieces outside and I went over everything with my power sander. Since Harrison won't know any better, I rounded over all the sharp edges and removed all splinter areas that I could find. Then, I started to paint them the same green that I used on my HO layout fascia. I thought a 1/2 pint of paint would be enough, but I was wrong. When I went to buy more, the store's paint mixer was broken.

The next day, I bought another pint of paint which I thought would be enough, but I was wrong. It barely gave everything two coats. But I like the way it looks. The color is "Jungle Green". I am thinking about adding some indoor/outdoor carpeting but haven't done it yet.

A pair of heavy duty 6" strap hinges bought on Amazon were installed. None of the big box stores carrieed what I needed, so they had to be ordered online. They look and work great though. I replaced the mounting screws with longer wood screws.

A pair of handles were installed on the top part of the layout to assist in flipping it over. I also screws on some rubber "bumpers" on the corners to leave a gap between the pieces... helpful for getting fingers between them if necessary.

Some cheap building kits (Lionel MPC era, old/dirty Plasticville, etc.) were glued up and painted to go on the layout. There was no point in building something nice that a toddler would destroy. Note: Harrison won a raffle at a local show and picked out a light-up police car. He was also given a very old, plastic cow toy at the same show.

There you have it. Harrison's first real train layout (Brio toys don't count). Naturally, the track isn't attached but when a final track plan is picked we can do so and cut the track at the fold line. Until then, he is content to play with it as is. It might not be much, but it cost only about $100 and it doesn't take up much space once folded up and rolled away.

Subscribe to:
Posts (Atom)