CP Executive train in Albany

CP Executive train in Albany

Wednesday, May 29, 2019

Trip to Baltimore

My birthday typically falls around Memorial Day weekend. This is very convenient for me, as the long weekend usually provides an extra day to schedule day trips to visit various train museums or tourist railroads in celebration of my birthday. Past recent excursions have been to the Arcade and Attica Railroad in 2015, the Berkshire Scenic Railway Museum in 2016, the 2-Foot gauge trains in Maine in 2017, and the Essex Steam Train in 2018. This year, I decided to plan a trip to visit the B & O Railroad Museum and the city of Baltimore.

This wasn't the first time I had been to the museum; when I was younger, my father took me here while visiting my Uncle who lives in DC. But, it had been over 20 years since my other visit and I think 15 years since the terrible snow storm caused part of the roundhouse roof to collapse. I thought it would make for a great trip, and the ability to take in the railroad exhibits through older and much more informed "adult" eyes was an opportunity not to be missed. So, I booked a hotel over the winter and started planning things to do that would appeal to both myself and my wife.

Though the name of the museum implies that the focus of the exhibits would be on the B&O (and all its successor railroads), in reality it is much more than that. The B&O was there at the very beginning. It is the oldest railroad in the USA, which means studying the B&O is studying the development of railroads and history of railroading in America. Inside its roundhouse are perhaps twenty old or recreated steam locomotives from the very basic four-wheeled "Tom Thumb" types to the "Americans" and ten-wheelers that won the west. Each is beautifully preserved with colorful (gaudy?) paint schemes that demonstrate the pride that existed at the time. As I explained to my wife, it is comparable to car enthusiasts who paint racing stripes or flames on their autos today. I really like these older engines, and have a couple in HO scale. I even flirted with building one in 1/8 scale but the grades at my local live steam club would have severely limited its potential.

Elsewhere outside are other pieces of railroad equipment in various stages of decay. Some look pretty good, but some are faded and rusty. Not everything can be kept indoors and the museum has made it a priority to store their best pieces under cover. As such, while the cranes, boxcars, and diesel engines outside are nice to see I didn't spend a lot of time on them. I will note that they occasionally rotate their equipment as when I was younger they had a C&O streamlined steam engine as the corner piece of the outside area. Now, the steamer is inside under cover and this Geep is in its place. Without shade and protection from the elements, it will soon too lose its luster. But, even these pieces are interesting.

The museum also has several seasonal or rotating exhibits, and this Memorial Day the focus was on trains of World War I. We arrived I think on the first day it was open. Admittedly, I didn't find it very interesting as it related to the railroad efforts domestically but the portions of the exhibit that discussed foreign railroad construction were fascinating. I was glad to see a diorama built by fine modeler Bernard Kempinski, whose United States Military Railroad blog I follow. He published a book about modeling war trains which I hope to purchase, and this diorama was probably built for that book. My wife thought the backdrop painting scenes were really well done. I liked how it didn't seem like a forced diorama because of all the open space captured in the scene.

Also on display was one of the French "Forty and Eight" cars, (which is somewhat visible on the upper right placard. Per Wikipedia: "Forty-and-eights were French 4-wheel covered goods wagons designed to hold 40 men or eight horses. In 1949, France sent 49 Forty-and-eights to the United States laden with donations from citizens of France in thanks for the U.S.' role in the liberation of France, one for each of the then forty-eight states and one for Washington D.C. and Hawaii to share. Called the Merci Train, it was sent in response to the Friendship Train America had created two years earlier to aid France in the dire immediate aftermath of World War II. Over 700 boxcars worth of donated supplies were collected across the U.S. and shipped across the Atlantic via donated transport." Of interest, we saw another car in Maine two years ago at the Boothbay Railway Village which I assume was Maine's surviving car. This car was on display here for the first day, and there were lots of volunteers on hand who had helped with its restoration.

Our Train Ride's motive power
One optional add-on at the museum is a train ride. It is essentially a push-pull ride down the spur that connects the museum to the active CSX tracks. The ride is in restored B&O coaches, or for an extra fare you can ride in the observation car and receive complimentary snacks and drinks (chips and soda, basically). You don't have to think hard on which option I picked! We got the two seats closest to the observation end (a group of old ladies who got in first picked some tables by the kitchen area... fools) so we had a great view. As to that view, we saw abandoned stores, run down strip malls, a metal scrap yard, a police horse barracks under construction, and the B&O restoration shop's exterior. The mystique of the train didn't match the Glacier Express but hey... it was a train ride! We saw with two people, one of which sounded a lot like Peyton Manning. I could have listened to him talk for hours. The other guy had done some contract work for the A&A. You just couldn't pick two better companions (besides my wife, of course).

Outside, they had other things for the kiddies like a carousel, some train rides, and a nice garden railway. I liked how it was elevated on a raised bed formed from pressure treated wood. I hope to have a simple garden railway in my backyard someday, also raised up, though with stone or brick wall construction. Some of the trains just rumbled on their own merry way, but others didn't move until you pushed buttons on the outside of the garden's fence. Most of the trains again were decorated for the B&O or its successor railroads. It was well done, though stuff was starting to fade here too. The southern sun and heat... ugh. 

After we left the museum, we walked to the harbor. Our destination was the National Aquarium which is located in the inner harbor, as are various historic ships such as the U.S.S. Constellation (the largest and last sail-only ship in the U.S. Navy. There was also a submarine, the U.S.S. Tursk, which I think I went in with my father when we visited here years ago. There were also paddle boat rentals, which include some that were shaped like dragons and others that were larger and decorated like pirate ships. There were even larger pirate ships that you could pay to ride around in. In a battle I am not sure I would bet on team sub/warship or team dragon/pirate ship. But, it was a hot day and everyone seemed to be having a good time.

Outside our hotel (which was located right next to the Orioles' Camden Yards) was a light rail line. Unfortunately, the Orioles were away the weekend we were there or I would have gone to see my favorite baseball team in action. If I had more time to explore, I would have researched where it went and how much it cost to ride it. Just getting on and taking it to the end would have been fun. I did that once with my father on the Boston MTA's Green Line, and it was a good way to see the city. The light rail cars have their own traffic signals to follow when they cross major roads, though I don't know what happens when a car is stuck blocking the track. I suppose a gentle push to help it along wouldn't be out of place.

The next day we went to the Maryland Zoo, and I saw some interesting birds that I had never seen before. They had net-enclosed areas where you could go in and the birds were within only a couple of feet of you. One swooped down in flight and I thought it was going to take out my wife. We also saw pink flamingos (did you know that they really exist? I thought they were just goofy decorations at trailer parks) and penguins. I have a fascination with penguins, especially the African ones that you can observe without being in Antarctica (which I probably will never get to in my life, in no small part because there aren't train rides there).

At one of the zoo's food vendors I purchased some Dippin' Dots ice cream. I had seen signs for it but never purchased it before. This place had six flavors including cookies and cream (and some colored specks that must have been stuck to the spoon from another flavor) with real Oreo pieces. Though they are the "ice cream of the future," it was introduced in 1988 so it over 30 years old now. It was an odd thing to eat, and I wouldn't be surprised if it takes another 30 years before I try it again. It is like eating those Nerds candy, except that it sometimes melts and sometimes just makes your head cold. Very strange.

The zoo had a train. I had to ride it. The train skirts the edge of the zoo and appears to be an afterthought, though hopefully the zoo will expand around it so that you can see more. I think it was 16" gauge, but I can't be sure. It is a Chance brand train, modeled after the C.P.R.R.'s "C.P. Huntington," though sadly the large single wheels on each side had been removed. While talking with the operator, she said that those non-functional wheels sometimes caused the train to derail so they were taken off. I originally didn't hear the train while we were there so I feared it was closed, but I finally heard the screech of metal and knew it had to be close. It looked really nice and later I had a chance to ride it.
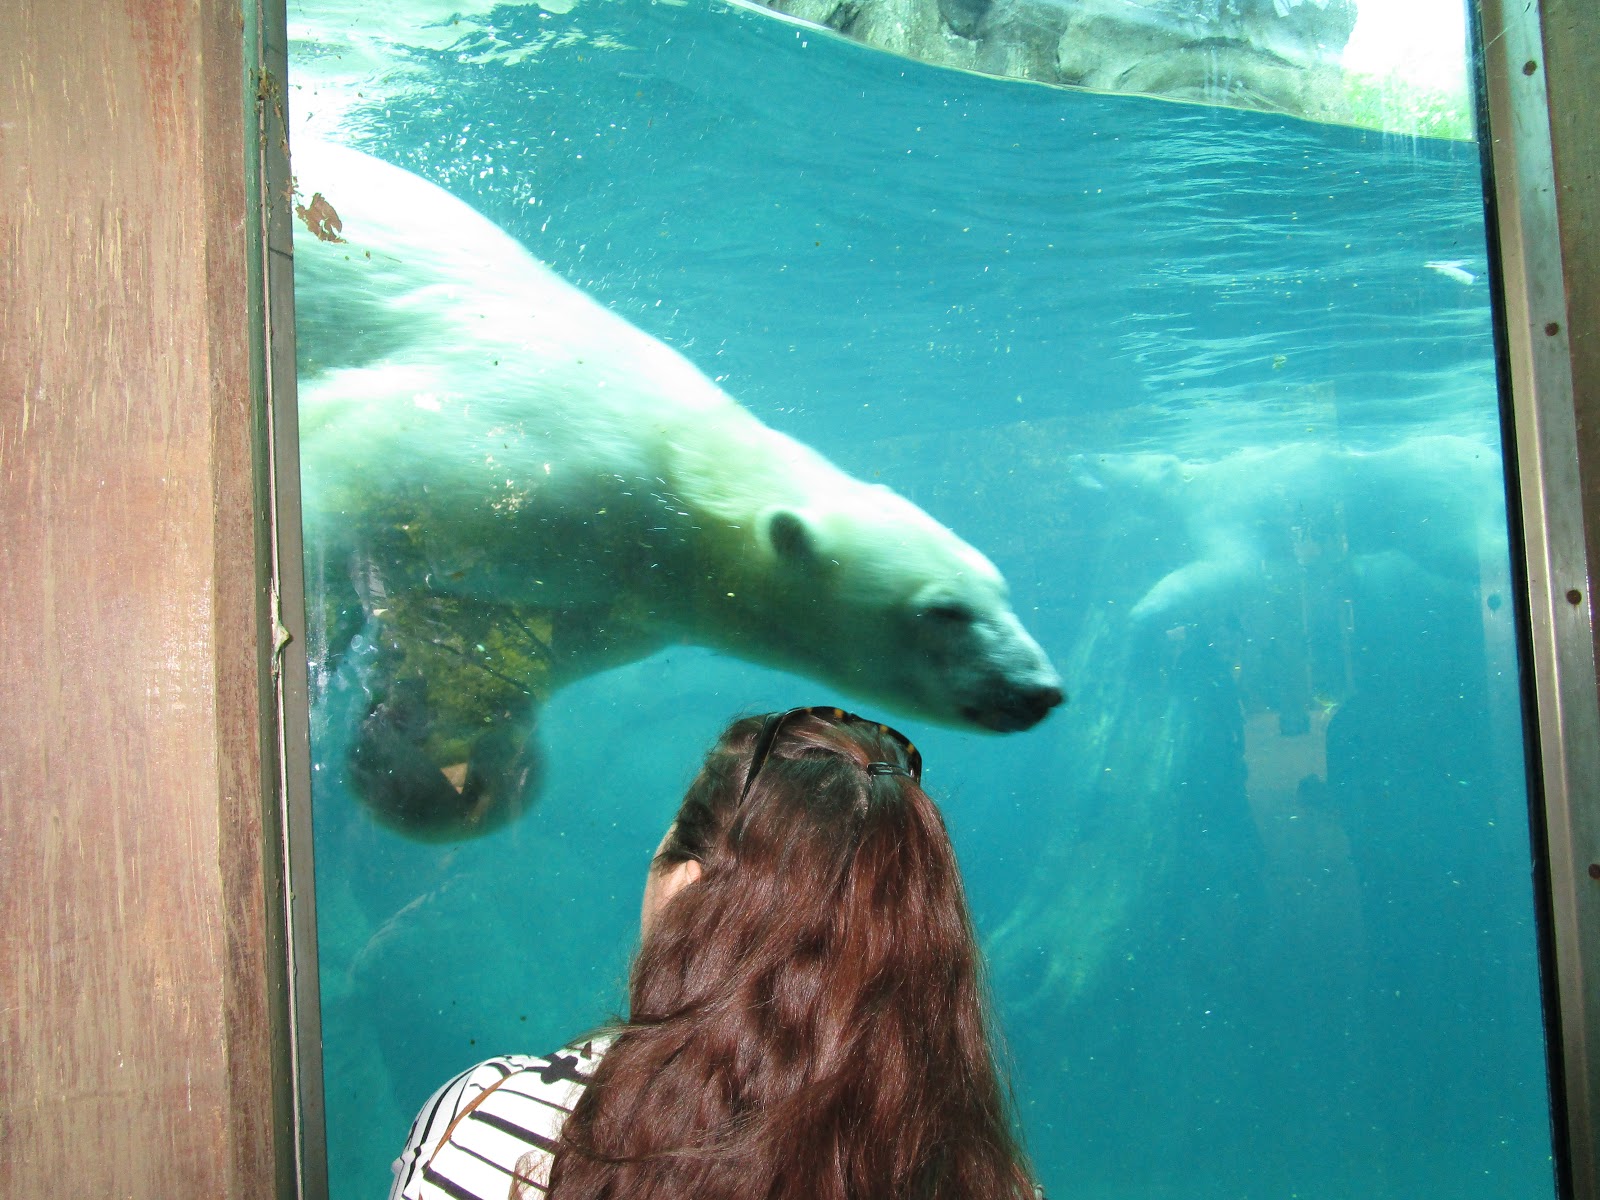
I love polar bears, and they were having a blast swimming in the pool at the zoo. And why shouldn't they? It was over 90 degrees outside and humid. Much of the afternoon was overcast which helped, but at times it was really hot. I remember the heat and humidity for sure from my trips to D.C. I had purchased a new camera for the trip, as my old Kodak's battery wouldn't hold a charge, and a real test came in trying to shoot a moving polar bear behind glass underwater in a poorly lit area. I think it did okay, and here I think it is trying to kiss my wife. I am going to keep my eye on him in the future.
It was a great trip. I had fun. I saw a railroad museum, rode on two different trains, saw dozens of trains in and around Baltimore and on our drive down, and had light-rail pass right near our hotel. I am sadly one year older, and the gray hair has started (my wife lovingly refers to it as "silver"... bless her heart). But, as trips go it was one of my favorites.

Wednesday, May 8, 2019

Then and Now: passing through Cohoes

Here is a slide I recently purchased. It is dated March 1984, which is just 2 months before my layout's time frame. The train is heading south and it just about to cross Spring Street in Cohoes. It is on the mainline, and the track to the right of it is a passing siding (once probably part of the double track all the way from Kenwood Yard up through Watervliet). It was retained here I think so that the locals could do a runaround move for freight cars destined for Mohawk Paper, which is the track on the very right. Right before spring street is breaks to the right and crosses in the middle of an intersection (see here). I can't imagine what it was like to look out the windows and see the D&H just 50 feet away!

This passing siding currently was disconnected on the southern end, so it is just a spur, as seen on this Google maps image. However, on my layout it serves as the only passing siding available. All the trees along the ROW are blocking the views of the houses, and the houses that match with the upper picture are blocked by the foliage. As an aside, when my wife and I were house-hunting we considered walking through one of the house next door to this one pictured. It was priced significantly less than similar houses elsewhere, and I assume it was because of its proximity to the tracks. But, we decided to pass.

Monday, May 6, 2019

Loading MOW equipment on flatbed truck

I was in Arcade, NY last week for a stockholder's meeting for the A&A Railroad. As I was driving through Java I saw down along the tracks a little yellow truck. I thought perhaps it was parked, but as I pulled over and watched it I noticed it was slowly moving away from me. I turned around and drove to another road crossing and saw it drive through, doing what looked like 5MPH at most. There were two people riding it and I wondered if they were doing some track inspection. I don't know if I have ever seen it before, but likely I have and took pictures of it. It would make for an interesting modeling project, what with the welding and all the other tools and supplies loaded on it.

The A&A received a State grant last year and has been hard at work using it to refurbish the line north from Curriers to North Java. That involved a lot of track MOW equipment. As I drove into the Town of Arcade I noticed some of it was parked alongside the firehouse. And one of the pieces was being prepared for loading onto a truck. Having never seen this before, and with a couple of minutes to spare, I pulled over and took some pictures. It was quite interesting actually. The pictures tell the story, and within about 5 minutes it was on the truck. I couldn't stay to see the end of the process and how far they shifted forward the MOW unit. It was physically pulled onto the trailer via a chain and hook, much like a tow truck.


Friday, April 26, 2019

Call in the crane train! (1979)


In November 1979, the D&H had to call for the wreck train. This shot shows the train in Rotterdam heading South. No idea what the need was based on, but I thought it made a nice shot. I plan to model the MOW train in the future, but by then nearly everything was just blue instead of this snazzy blue/gray/yellow scheme.


Monday, April 8, 2019

New Toys (and disappointments) - Dremel accessories!

Though I haven't touched it in several weeks, my excuse for the lack of progress on my D&H bobber caboose has been that I have to drill some holes for marker light brackets. Those holes have to be small, and they have to be accurate. I recently bought a new pin vice, but I wanted to try my hand at using a Dremel 200 series motor tool to drill small holes. This requires two things: a #4486 keyless chuck (to hold the drill bits) and a speed controller (to slow down the RPMs so that you actually drill the plastic before the bit snaps and flies off to wherever. I purchased the chuck on EBay. BE WARNED: there are many Chinese knockoffs also on EBay under the same listing. I assume the Dremel plastic clam shell packaging means mine is authentic. I looked at foot switches, but then at a recent train show I found this.

Unfortunately, I then contacted Dremel to confirm that they were safe to use together and they responded that they were not compatible. Since both the Dremel and the speed control contain rheostats, they will "work against each other and burn out the motors." To use the speed control, I need to purchase a 100-series Dremel tool. LAME!

So, I might just try the chuck and the slow setting on my Dremel 200-series and see what happens. If anyone is interested in the speed control, I will give you a good deal on it!

Thursday, March 28, 2019

Controlled Chaos

I have a lot of projects going on at once. I assume you do too. There are times when I feel that I need twice as much work bench space, but in reality were I to get it I would just fill it up with more junk. Not shown in this picture is the full size banquet table a couple of feet away from my work bench. On it, I have two 7.25" gauge projects underway: a battery electric locomotive and a caboose. I am almost too scared to go to the basement because there is just too much stuff to clean up even before I can resume progress on a project. I would like to think it is controlled chaos (or "KAOS" to all you Get Smart fans) but it isn't. It is a disaster area. Soon, the weather will be nice outside and my modeling time will disappear, which means this upcoming weekend might be my last free one in a while. Where did the winter go?

Tuesday, March 19, 2019

Scratchbuilding Flatcars - Part 1 (the frames)

My D&H bobber caboose is coming along pretty well. Since I was on a building urge, I decided to start working on my next car. Or two cars, actually! I need to build 8 cars total, and 4 must be scratchbuilt. I figured that working on a flatcar would not only be a good simple starting point but once mastered I could adapt the skills learned there to work on more ambitious cars (which I am waist-deep in researching). A search online took me to the NMRA Lone Star Region's website and among their clinic presentations was a four-part series on scratchbuilding a flatcar from styrene. It literally breaks down every step from start to finish, and suggests the appropriate styrene for all of the popular modeling scales. It is a fantastic resource.

While I think I know the two prototypes I am going to base the cars on, for right now it is just important to start building. I printed out the slides and wrote down all the sizes of styrene I needed. After consulting with my stash, I realized I needed a lot more so off to the hobby store I went. I swore years ago I would never turn into the kind of guy who hoarded hundreds of sizes of tiny little white strips of plastic. Oh, how things have changed. I am starting to outgrow my "shelving system" and will soon need to build more of come up with a system that holds more.

Using my Northwest Short Line Chopper, a fresh Xacto #11 blade, and an old chisel blade that I rarely buy replacements for (I should, though), I started construction on a Saturday afternoon. The only real difficulty I encountered was keeping track of the fact that every quantity had to be doubled because I was doing two cars. In preparation for the project, I had purchased an HO scale ruler (another thing I thought I would never need) though I only got a cheap one for $3 on Ebay. I like clear rulers more than metal ones, because it is easier to see the stock. Little dots were marked on the lower edges to indicate where the beams would be shaped.

Then, portions of the ends of each beam were laid out and cut away. It was a bit tedious but not too much so, and as long as I was close it was okay. No one is really going to be holding up a ruler to the underside of my car to ensure that all are identical. That being said, I found it much easier to use the chisel blade to chop along the cut lines instead of trying to line up a metal ruler along the lines and score with a #11 blade. Personal preference, I suppose. The cut lines were cleaned up with some emery boards I bought at the supermarket. The two inner beams on each car had to be notched for the coupler pockets which will come later.
The bottom edge of the four longitudinal beams have a small piece of styrene glued on the bottom to form a flange cap. Sort of like an L-girder. While there must be easier ways to do this, I did it one edge at a time. First, I glued an oversize piece to the middle of the beam and held it in line with my metal square (which is a really useful tool for all types of model construction). Then I moved onto the next beam, and by the time I was done with that the MEK was cured from the first one. Then, I worked on the diagonal piece, and to keep it firmly engaged with the main brace I wedged it between the square and another pieces of straight aluminum stock I keep in my workbench for occasions like this. Since each beam had two ends, this process was repeated 16 times. Finally, the remaining short edge was done. After everything had cured fully for a bit, I trimmed the flange to final size.

Next, the two inner beams were glued together with a spacer piece of styrene that ran the hole length. After that cured, another piece was glued over the top to make sort of a cap. Side note: all of this is explained in great detail with pictures on the web link I referenced, and I am probably not using the proper terms. Then, some C-channel was notched for the couplers and glued to the ends of the center beams. It is important that these channels be perpendicular to the center beams but there really isn't an easy way to check that with a square. So, I built it on graph paper... one of my useful tricks.

Next, the two side beams were glued to the end channels and again I used graph paper to ensure that everything was square. The side beams were super flimsy at this point so it had to be handled delicately. Finally, eight pieces of cross bracing (bridge beams) were cut out and carefully filed along one edge per the plans and then glued between the sides and the main beams. There was absolutely no way a square would fit in the frame so I taped the frame to graph paper to prevent it from shifting and then glued each brace in, one at a time. I had to hold it in position with pliers and drop in the MEK. It was very Fiddly.

But, at the end of the the first weekend I had two car frames. As my last step for the night, I tried to use some Testors Putty to hide any gaps or scratches, but I used the wrong filler. After a time of sanding, scraping, and prayer, I think I managed to salvage them. The next weekend, I began adding some longitudinal braces, which in this case were Plastruct L-angle. I had to notch the car frames to fit these pieces and at first I tried a razor blade (too fiddly), an Xacto knife (too slow), and a small square file (just plain annoying). But, my motor tool did the notching in seconds, and once the plastic cooled any slag was easily removed.

I don't particular enjoy working with ABS plastic because it doesn't bond as easily as styrene. I started with MEK but the parts kept popping of the slots. They are thin and delicate and not perfectly straight, so adjusting one led to another moving. Even with superglue, I still had problems. I really need to buy that accelerator that I read about. Once all the pieces were in the frames, I weighted them down with the close pins and let it sit overnight. The braces still need to be trimmed to length but I will do that later as even looking at them the wrong way would likely cause them to come unseated.

The car deck was next. While the finished car will have wooden deck boards on top, you still need to add a steel underframe to it. I drew out the floors per the plans and laid them next to each out (with a loop of blue painters tape underneath to keep them from moving) and used my scale ruler to lay out the stake pocket locations. Those are the dark areas on the sides that will eventually get cut away. If you think the lines got confusing, you would be right. I used orange marker first and then blue to figure it all out. Watching TV during the process didn't help. But, these sides will be face down and no one will ever see my mess of a layout job.

Finally, I glued the frames to the deck. Once I had them where I wanted them, I flooded the inner joints with MEK and especially focused on the ABS longitudinal braces. Now that they could be retained in the slot and secured to the underside of the deck, they weren't going anywhere. I used hand pressure to get good bonds, and then put containers of lead shot on top of each frame to keep everything perfectly set until the glue cured. Once that happened, those pesky braces were be rock solid and I was able to safely trim them. Then, I made sure all of the corner joints were square, as I am sure the judges will be focusing on that.

One thing that concerns me is that later in the process I am going to have to cut holes and slots for the brake piping and hardware to go through. The plans just cavalierly say to cut the slots. I don't believe the frame was strong enough before adding the deck to cut slots (it would break), but it sure will be hard to cut them afterwords. I guess we shall see. I had to add more cross braces which involve maneuvering tiny pieces of styrene into the frame and then gluing them with MEK. I cannot even imaging the dexterity and eyesight required for an N scale car. Finally, bolster locations were built up for the trucks to eventually mount to.

Three weekends of work at a relaxed pace and I have two car frames nearly ready for final detailing.

Sunday, March 17, 2019

D&H Sign!

I was recently given the opportunity to purchase a beautiful D&H sign from the family of Glen Sauter. Sadly, he passed away in 2018. While he primarily modeled tractor trailers and trucks, and frequently exhibited at the Albany Great Train Extravaganza, apparently he had some interests in trains. From the information I was able to gather, the sign was recovered from the Watervliet Yard Offices, which I assume were Colonie Yard Offices. It is made out of hardboard, not metal, and it is in pretty good shape for its age. Mr. Sauter's widow told me that it was over 50 years old. 

I know nothing else about the sign but would love to hear from anyone with more information. I am very happy to have obtained another piece of D&H memorabilia with provenance.


Thursday, March 14, 2019

Uh oh... wrong tube!

With my caboose project nearly finished as far as styrene fabrication goes (it still needs some work done, however), I decided to start my next scratchbuilt car. Or two cars, actually. I will discuss them sometime in the future, but for right now I want to relate an unfortunate story. After building the frames for these two cars, I decided to fill a couple of cracks with Testor's Putty. You know, the whitish stuff that never seems to stick where you want it to and makes a mess when sanding? Yup, that stuff. Well, I used it on these two cars and it worked beautifully. It flowed nicely into the joints, it was easily removed with a blade from areas I didn't want it, and it wasn't grainy at all. I couldn't understand my good fortune but it finally was doing what I want model putty to do. Later that evening, though, I noticed it was sticky. I hadn't waited the full 4-6 hours so I left the cars alone on my workbench for a week. Then, last weekend I tried to sand away the excess and it was still sticky. That can't be good!

Even the D&H couldn't avoid a train wreck in 1985.
It turns out I didn't use putty at all. I saw to my horror that I had used the white "Hardener" tube from a 2-part JB Weld metal epoxy! I rarely keep it on my workbench but I had put it in the area where I store glues (it is a glue, after all) and wasn't paying attention when I pulled it out. I managed to scrape most of it off the models with a chisel blade, but I am not sure if that will be enough. Hopefully, I managed to avoid a train wreck!

Tuesday, March 5, 2019

Matte Medium, Scenic Cement, or White Glue?

I am gearing up to do some ballasting in the future, so I started gathering supplies. I don't profess to be a scenery expert, and in fact it is one of the aspects of the hobby I enjoy the least. But, I am smart enough to know where to go for helpful advice and tips... Dave Frary! He is the author of the popular book on scenery, and I have several editions of it. He is a big proponent of matte medium for securing scenery and ballast and after building several layouts I also think it works best for me too.

White glue is much cheaper and can be found in any store, but it has two drawbacks that I have noticed. The first is that it sometimes dries white, or shiny, and that just looks terrible on scenery. If you bother to read the forums online, you will find heated discussions on whether it is the glue that causes the shininess or not. Don't believe me? Go ahead and Google it. In a couple of hours when your head hurts, come back and finish reading this. My experience is that it can leave things shiny. The second drawback is that the glue breaks down if it subsequently gets wet, something that frequently happens with me when I put down "layers" of scenery materials during initial scenery, ballasting, and final detailing.

Some also claim white glue leads to "quieter" trains over ballasted track, and others say the same thing for matte medium. Who knows?

Matte medium dries hard and inflexible, and isn't susceptible to further applications of water. That means that you can't redo stuff by soaking in water and having it become flexible. I am okay with that, but not everyone is. I switched over to Woodland Scenics "Scenic Cement" and it worked great but it was pricey. When I heard that it was just repackaged matte medium, I decided to go straight to the source and make my own.

Dave Frary in his book (page 32) explains how commercial matte medium sometimes contains talc powder, which is useful for artists but not for us modelers as it can also make scenery turn white. So, he advocates first diluting the matte medium with water and then letting it sit for a week or more so that the talc settles to the bottom. The stuff on top, which is the adhesive and water that is useful, is then decanted into another container and you are ready to go. Since I have a lot of ballasting ahead of me, I decided to get started with this process.

I went to the store and purchased a bottle of Matte Medium, which is normally $17 for 16 ounces. Since every craft store seems to mail my wife coupons each week, I snagged one and paid only about $8. Not every store has it, though, and most store employees don't know what it is. Then, I searched high and low for a suitable jar and finally settled on a large pickle jar... once washed, of course. I don't even eat dill pickles!

The recipe is to take the matte medium from the store and pour it into the large jar. Then, rinse out the container with three additional portions of water (I used water that was filtered through our Brita filter) and a tablespoon of rubbing alcohol or dish soap to break up the surface tension. You are supposed to let it sit for at least a week, but since I didn't need it right away I let it sit for a month. After that, I poured the top liquid into a large juice container and the smaller matte medium container (I peeled off the label so I wouldn't be confused down the road) and left the talc at the bottom. Boy that stuff is sticky! I had to use a metal spoon to pry it off of the bottom of the glass jar. But, with the talc thrown out, I washed out the pickle jar and it is ready for the next batch.

Friday, March 1, 2019

50 feet (600") Required

Reading is an important part of everyday life. My job involves reviewing contracts, and I not only read for the big picture but also for the little details. That is where the devil hides. So, imagine my great surprise when not 10 minutes ago (after I started typing this blog post, actually!) I realized I had made a mistake. A wonderful, glorious, mistake. This blog post was originally going to be titled "75 feet (900") Required" but that is incorrect. It is now titled "50 feet (600") Required." And what does that mean? I am going to tell you!

As part of the NMRA's MMR "Civil" Merit Badge requirements, you must build and scenic (with ballast, and drainage) 50 feet of track in HO scale. That can include, per their website, sidings and yard tracks. It doesn't have to be mainline track. But, somewhere along the way I got in my head that I needed 75 feet total. That is actually what is required in O scale, so perhaps the error is justifiable. But not to me. I just spent the past thirty minutes in my basement with a roll of twine and a yardstick measuring all of my track. My mainline (not including the lift bridge) is 453" long, my sidings are 205", and my staging yard not including the turntable lead or turntable stall tracks is 172." That totals 69 feet and change.

But I needed 75 feet, which left Mohawk Paper's spur to make up the difference. I also don't want to ballast Mohawk Paper now because the ground contours aren't defined yet, nor do I want to ballast around the turntable because I plan to rip it up after I earn my award. I didn't want to cheat and claim I had 75 feet ballasted when I didn't. So what was I to do? I didn't want to lay an additional 6 feet of track just to ballast it just for this award. So, I reread the requirement. It is so obvious...

And since I only need 50 feet, I am fine. I could even pull a Guilford and start "rationalizing" some of the unnecessary track.            ... that was a Guilford joke ... sort of ...

Wednesday, February 27, 2019

Playing with my grandfather's Lionel train (1987)

Me at age 5 in 1987
While going through some old pictures from my grandparents, I found this one. It has a lot of great memories for me. For starters, the train is probably a Lionel #1543 set. It came with the Lehigh Valley #627 44-tonner engine (perhaps the start of my love for GE centercab switchers?), a flat car with pipes, a gondola with red canisters, and a caboose. The sets were released around 1956, though I don't know what year my grandparents purchased them. They bought two sets, gave one to my Uncle, and gave the other to the neighbor's son who couldn't afford one. They were low cost sets. I don't know how much my Uncle used it, but whenever I visited my grandfather pulled out the plywood board painted green with a simple loop of track and one remote control track and off I would go! 

My grandfather later purchased some additional cars, including a red M&SL boxcar and a US Air Force boxcar with missile firing mechanism. Oddly, there was also an unidentified HO engine which is shown on the flat car. I wish I knew more about that. EDIT: It is a "Sakai" engine. See here for more info.

The Guidancetown buildings took some investigation to identify but they were a lot of fun to put together and take apart every visit. Also pictured are some other notable accessories: giant orange, purple and yellow alien creatures (I think they belonged to my other uncle); a stuffed dog and Boo boo; and and American flag. Oh the adventures we all went on.

Sadly, almost everything on the train table is now gone. The train disappeared from the basement after my grandfather passed away, likely by a visitor who thought it was worth a lot. I have faint hopes that someday it will turn up. The buildings and aliens are long gone, as are the stuffed animals. But, this past Thanksgiving I went down and removed the track from the plywood board. It was rusty as sixty year old track can be but I managed to save most of it. I cleaned it up and used it on my under the Christmas tree train set up this year. So, part of it lives on.

Monday, February 25, 2019

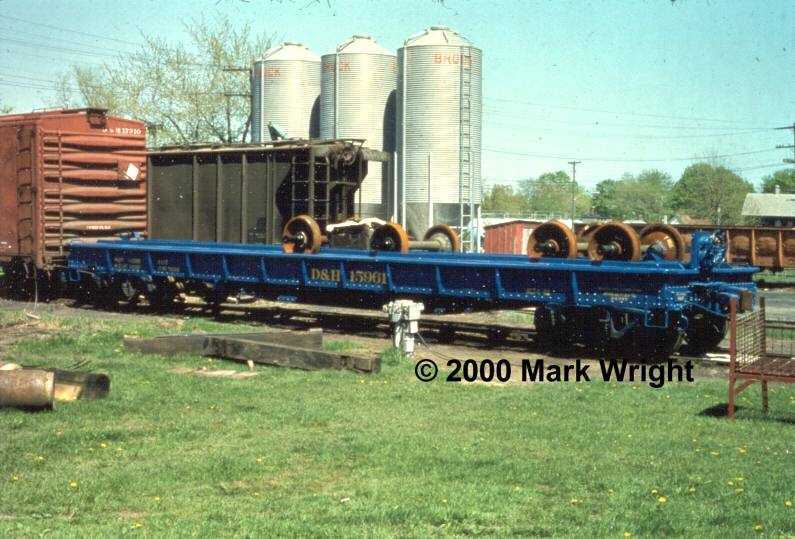
D&H blue wheel car #15961

Last summer I was scrolling through the internet and came across a website showing a D&H blue flat car that was set up to carry wheels. I was really excited that it seemed to be in excellent condition (perhaps it had just been repainted?) and I loved the blue color. During the late 1970s, the D&H went through a period of austerity when President Selig Altschul simplified paint schemes for motive power to a solid "blue dip" scheme (discussed elsewhere). Maintenance of Way (MoW) equipment such as the work passenger cars, cranes, and gondolas were also painted blue. I assume that this car was painted during that period.

I reached out to the photographer, Mark Wright, who has a website devoted to collecting G.I Joe figures. We talked about his photograph and he said it was from Rouses Point, but he couldn't remember when he took it. He had another three-quarter shot of the car and sent me both images in a high resolution format. He graciously gave me permission to post them on my blog, which I really appreciate. Other than these pictures, I have seen no references to it at all.

I would like to build a model of this car and hoped that someone would have more information about it. A post on the Railroad.net's D&H forum didn't result in anything, so I then asked on their NYS Railfan forum. If you have any information on it, I would love to hear from you!

Sunday, February 24, 2019

Scratchbuilding a Caboose - Part 4 (brake gear)

Lately I have been really enjoying the whole "modeling" experience. I can't explain it, but I love just sitting at my workbench with the radio or television on and working on any and all projects that cross my path. For this caboose, I estimate that I have about 25 hours invested in it so far. It doesn't make sense really. It is a tiny caboose, even in O scale. But, I have spent a lot of time just studying the drawings, making measurements, shopping for stock and parts online, cutting, gluing, sanding, etc. I am not complaining. They have been 25 enjoyable hours. (Had the caboose come out looking terrible like I thought it would, I probably would replace "enjoyable" with "wasted.") 

I am no stranger to projects taking a long time. I am building a 3.75" scale (roughly 1/3) working model of a Welsh narrow gauge steam locomotive to run on 7.25" gauge track. That has easily consumed 1,000 hours so far. And it isn't even running on air yet. If I am having fun I don't mind investing the time. And I don't rush myself, either. Sometimes, I will just sit at my workbench with my dog next to me and sort my styrene scraps into piles, or rearrange my tools, or do something else. Just the act of being at my workbench is therapeutic.

But, some projects need to keep moving on like my caboose. Like the brakes, which aren't shown with much detail on the prints I have. There were a pair of brake shoes which rubbed on the inside of each axle, but how they were connected to the single brake wheel at one end of the car wasn't shown. The prototype is enclosed in a glass box and there is snow on the ground, so I am not driving down to look. But, thankfully, I doubt the NMRA judges are either. So I am going to build a representation of the brakes based on what I could glean from the plans.

I started by looking at brake shoe castings online. Several companies sell them in O scale but they didn't really match what I was looking for. I needed small brake shoes and some of the castings were too large. There were some that looked pretty good but they were only available from the U.K. and I didn't want to place an international order. I found these for dirt cheap on EBay though the seller didn't know who made them. Do they look familiar to anyone? I only care about the shoe part itself I will cut away the rest and throw it out. Only one side is detailed, but that might not matter once it is all painted.

I cut away the brake beams from four of the triangle shoes. I then trimmed off the "bolt" that held the shoes onto the beams, and rounded over that corner to better match the prototype. They were too long so I also trimmed the top and bottom portions of the show arc. In the end, I am not sure how much time I saved by going this route. The portion of the shoes that attaches to the brake beams was cut to fit, and then two shoes were glued to each of the two beams. Thankfully, MEK worked on this black plastic as I really didn't want to use superglue or epoxy.

Then, I drilled holes in the bottoms of the underframe and then bent some steel wire to make a "U" shaped bracket that would fit into the holes. Then, I threaded a pair of shortened Athearn blue box handrail stanchions onto each wire. These stanchions were then glued to the brake beams which had the brake shoes previously attached, and then everything was glued to the underside of the caboose. I used superglue for all of the joints, which gave me a little bit of working time to align the shoes with the wheels but make sure they weren't touching or rubbing. It was fiddly, but surprisingly it all worked.

Next, I had to tie the two brake beams together and also to the brake wheel. The prototype was set up so that when the brake wheel was rotated it tightened a chain which pulled one brake beam into contact with the wheels. This was represented by using a length of steel wire and a couple of Grandt Line truss rod support brackets left over from a previous project. The wire was just left hanging for now at the area where the brake wheel will drop down, but the other end was bent into an L shape. This L fit into a vertical beam that I drilled two holes in (one on each end) and then glued to the brake beam closest to brake wheel.

The other end of the vertical beam was also fitted with another wire that ended in an "L" shape and fit into the hole. This second wire ran to the farther brake beam and was connected to it via another modified Athearn handrail stanchion. In all, it actually looks quite similar to how the plans laid it out. In all, I admit that I looked forward to building the brake gear and linkages because I thought it looked simple enough to pull off and I had never done it before. I am glad I attempted it. Sure, the leverage won't be there because my pivot points are secured with super glue but if this little caboose had its coupler link break I have confidence the crew could bring it to a stop!

The brake wheel casting is by Precision Scale Company and the shaft is some metal wire. I will install it later after the platforms are finished.

Oh, one of the other things I have been working on is having custom decals made for me by Modern Rails decals. Ricky Rupp, the owner, and I go back a long ways. He used to be in Western NY and when I lived there he made a bunch of decals for me for my Arcade and Attica Railroad projects. He also made me a custom set of decals for some D&H blue glass hoppers (which I might get around to working on someday). So, when I needed decals for this caboose I reached out to him. Thankfully, I had a scale drawing of the car and he send some proofs for me to double check on the actual model. They look perfect. The cost was quite affordable, and his turn around time is fast.