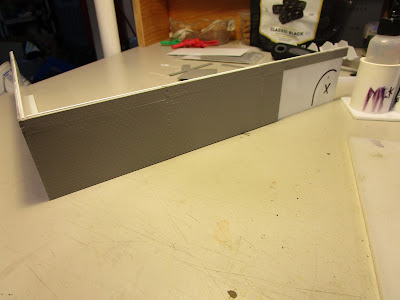
Picking up where I left off, I worked on the boxcar loading area next. When gluing the cement block sections to the rear wall, I didn't bother to add them to the area that would eventually become the loading dock alcove. Note that some of the block wall joints aren't perfect and that is because it is tough to join them at their edges, while at the same time adding the back-reinforcing braces, while not having any of the glue seep through the joints and smudge the block faces on the outside. This was the best I can do. It is scruffy looking, like the prototype, and can't be seen. But, I won't use small block wall pieces to make large walls again. Lesson learned.
The loading dock area was built by measuring out various angles and testing things with an actual HO scale boxcar on my layout. Because of the thickness of the block wall sections, getting the angled joints perfectly aligned was difficult. The prototype had messy corners, and mine does too. The traditional method of hiding a corner gap in a block wall by scribing mortar lines in the filler wouldn't work here. I just filled them up with strip styrene.
For the loading dock door, I used another one of the Walthers' doors. They are great. I framed many of the exterior wall edges and roof edges with strip styrene. It was otherwise impossible to hide the thickness of the block sections, and it gave everything a clean look.
Unfortunately, I estimated the height of the building incorrectly and when it came time to test it on my layout (a process I did over a dozen times to ensure everything fit the way I wanted it to) I discovered that the loading door overhang area was too short. Oops! I had to fix this in two ways: I lowered the roadbed into this area and relaid the track, and I built up a foundation around the perimeter of the building with HO scale cork that was later blended into the rest of the scenery with ground goop.
The roofs were supported by styrene braces mounted just under the roof's edges. I used straightedges and levels to get everything properly supported, as I didn't want a sagging or slanting roof (which might have been prototypical). The roofing material added a lot of rigidity to the whole assembly.
Like everything else, each roof piece was cut one at a time to fit the actual measurements of the building.
Then, the edge seams of the roof were framed out with more styrene. This gives the impression that the block walls are the actual thickness of blocks and not just thin sheets laminated on. It also provides a cap to the roof. And, most importantly, it provides a nice clean appearance.
The inner portion with the lower roof, and the one oddball wall section, were lined out with block sheets and then framed like the rest.

The details on the roof were a bit of creative interpretation. If you look at the two pictures in the introductory post to this area you can see that the details on the roof changed in the ten years between when the shots were taken (2010, 2020). Also, part of the building is now covered in solar panels. What existed in 1984 is anybody's guess, but I decided to use pieces from two of Walther's Cornerstone Roof Detailing Kit (#3733) to add some vents and an air conditioner unit. I really wanted something small and square, but didn't want to scratchbuild them. The Walthers kit comes with a tremendous amount of things, and I should be set for the future.

I used some short round vents for the larger part of the building and some short square ones (that I cut down even more) for the side building. I also built up one of the smaller air conditioning units to put in the narrow trench on the roof. I might add some more things there too.


Awesome !
ReplyDeleteGreat job combining all the angles & wall textures, particularly the block "shifting."
Happy Thanksgiving,
KLS