CP Executive train in Albany

CP Executive train in Albany

Wednesday, May 28, 2025

Visiting the Conway Scenic Railroad

When I was elected President of the NMRA Hudson Berkshire Division in late 2022 I was given a bucket of old files. One of them was the original certificate of incorporation for our Division which was granted and dated June 06, 1970 in North Conway, NH. (More information about that event can be found on page 5 here). That got me thinking that it might be fun to visit there for our 55th Anniversary. So I put it on my idea list.

Several years later, I switched my modeling focus to something more generic in New England and I started watching a lot of videos on the Boston & Maine Historical Society's Youtube site. While doing that, I came to the realization that the Conway Scenic Railroad was a great place to experience B&M, and New England, railroading.


Also, my birthday usually falls on or around Memorial Day weekend and I like to celebrate by doing something railroad related. By riding the CSR, I could achieve all three goals at once. What I didn't realize was that I was going to have as much fun trainspotting on the way up and the way back as I did while actually there. 

We used my GPS (remember those?) to get there. Oddly, at one point I got off at an exit to put gas in my car and my GPS never had me get back on the expressway to continue the route. Instead, it took us through the back woods including through the New Hampshire National Forest. Though the skies were overcast the views were breathtaking. 


We stopped several times to pull over and take shots. In a matter of moments the colors seemed to change. We even passed snow at the very top peaks.


What I found neat was that we passed through many of the small towns I had learned about on the B&M's Youtube page. So, when we randomly passed steam engines, scenic tourist trains, or other landmarks I got to say to myself "Hey, I remember watching something about that!" None of it was planned, though I probably should have. I just haven't explored New Hampshire very much.


There were also some "tourist" moments where I said to Sarah that I needed to pull over and take a picture. These cars were at an antique auto museum we passed, and they were just sitting in the parking lot. They remind me of vehicles you would see in the Mr. Bean show.


We arrived at Conway and checked into our hotel, and then explored North Conway and the station. Though still overcast, I was able to take a lot of pictures without other people around. I was surprised how much of the town was built up around it. I assumed it would be in the middle of nowhere but there were dozens of restaurants, quaint shops, and the associated tourist industries. 


The next day we arrived early for our train, the "Valley Train Excursion", which is the shorter 1 hour trip to Conway and back. Having never ridden in a dome car before, I splurged for tickets in the best seat of the house. Many of the dome windows leaked water on the unsuspecting passengers below as the train rocked back and forth, but thankfully our window was sealed properly. Harrison loved the view.


I was extremely disappointed that our motive power was painted up for the NYC (in Conway Scenic lettering though). Being from New York, I have had my fill of NYC stuff. The CSRR have many engines in Maine Central yellow, Vermont Railway red, B&M maroon and gold and "Bluebird", and such, so do travel this far to sit behind a "local" (to me) engine was a bummer.


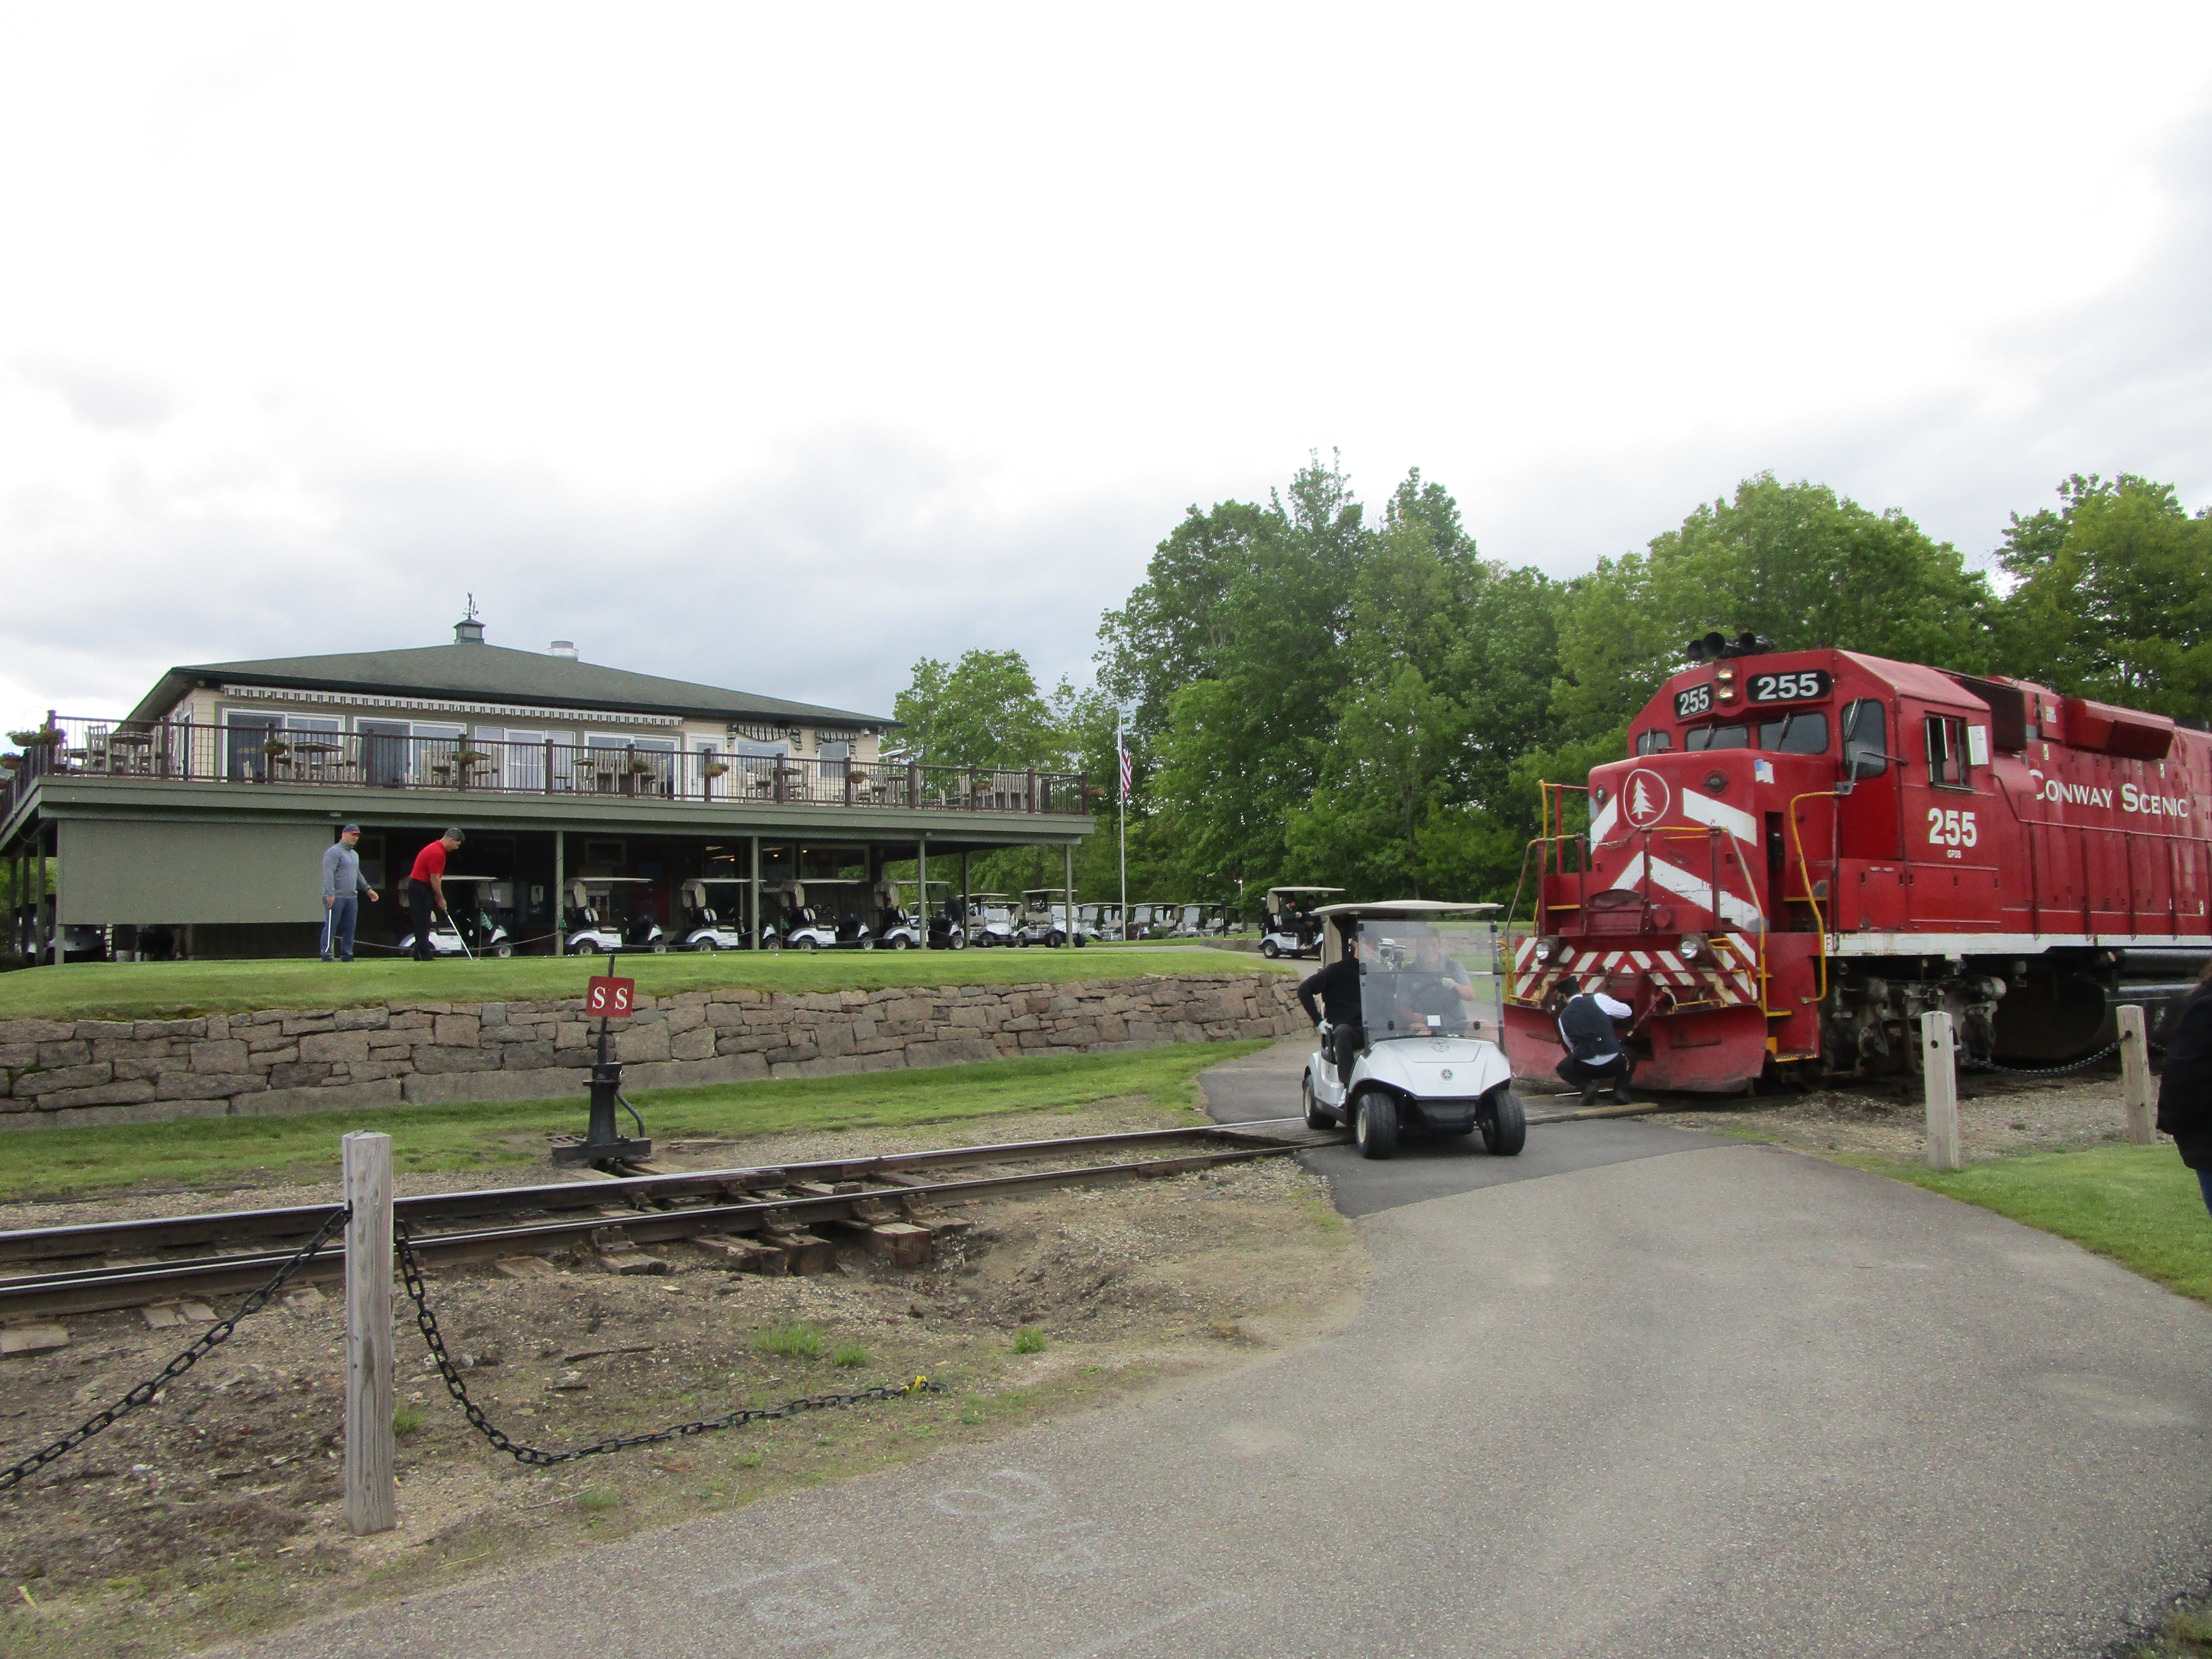
There is a golf course right next to the station, and you can even tee off OVER the tracks (though hopefully not when the train is going by!). Here, the motive power was stopped and the train crew were letting golf carts pass.

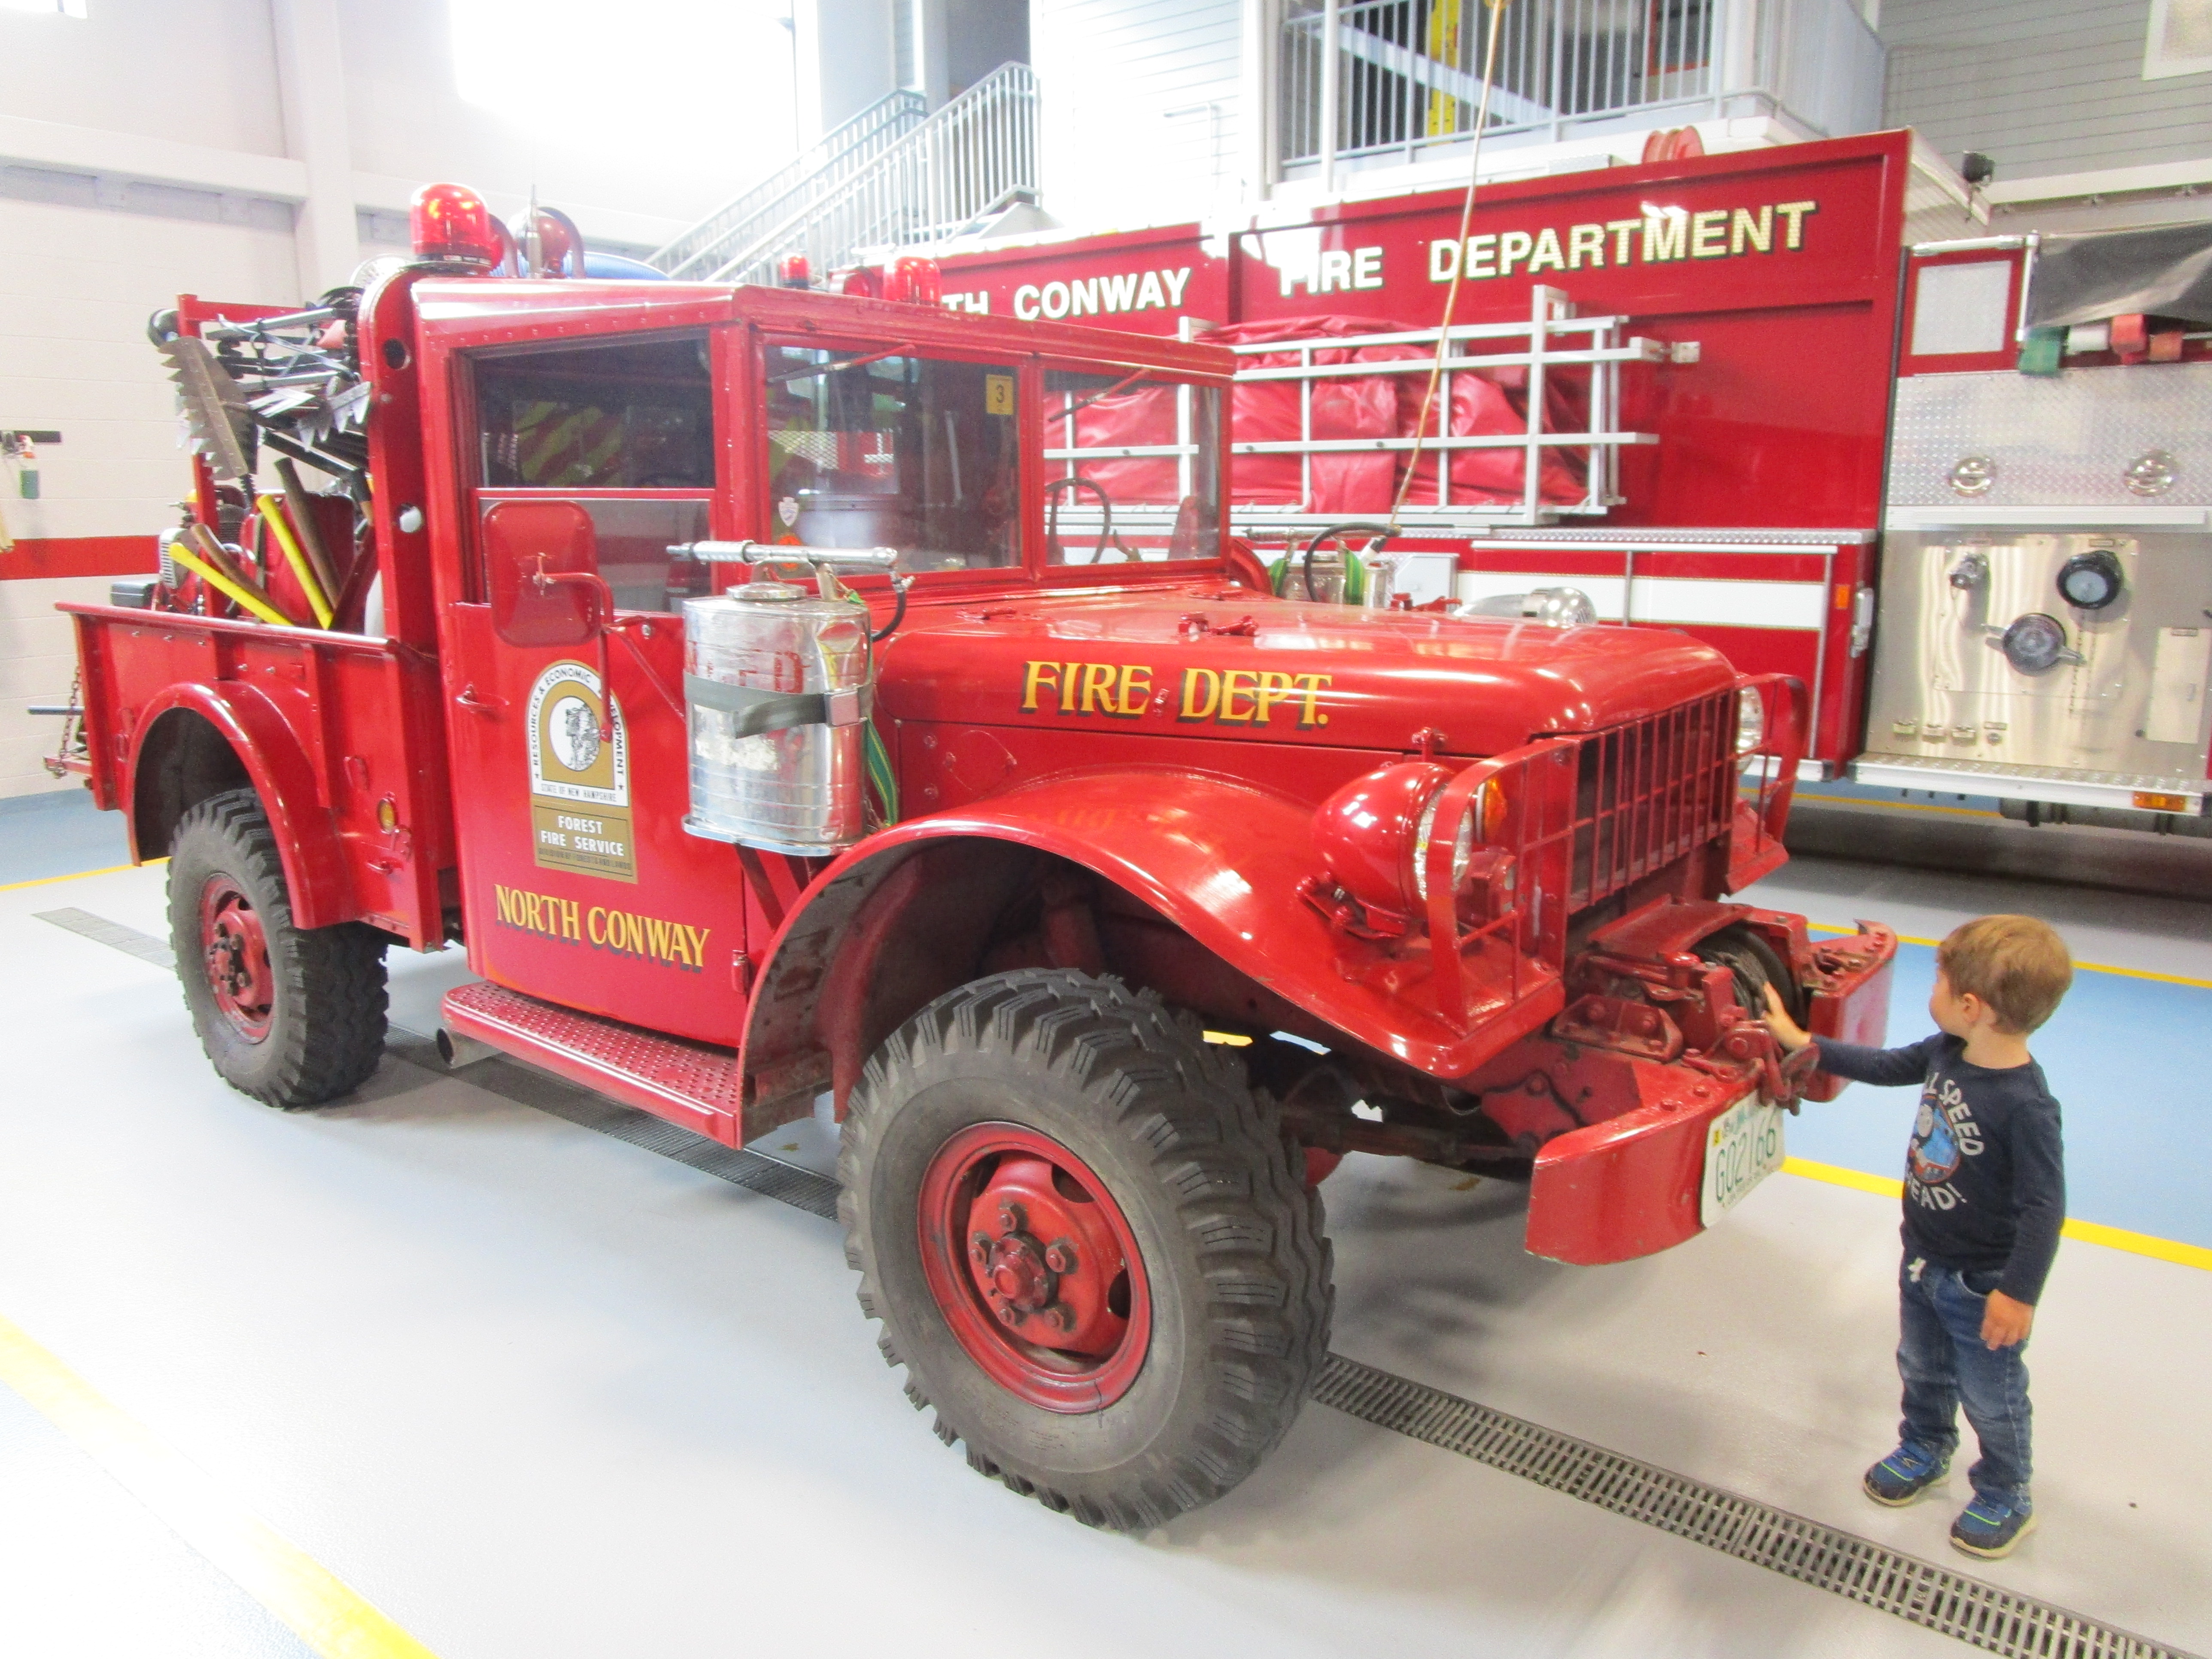
Also next to the station is a Fire Department, and they left their door open so we went in. They were gracious and let us walk around and look at all the fire trucks, which Harrison enjoyed. He said he liked this old one the best.

The next day we went back to the station again to take pictures of the trains in the yard. I took dozens of pictures as this was the only chance I got during the weekend when it wasn't raining. The F-units grabbed my attention but sadly weren't running that day. 


My favorite paint scheme, and what I hoped would have been pulling our train. 


We left and our GPS took us north, which seemed strange as we lived southwest of North Conway. But we followed the GPS. After about two hours we got to some really beautiful scenery where the tracks followed the road. I mad an offhand remark that we might actually see the "Mountaineer" train which left North Conway for Crawford Notch. Then, we turned a corner and there was the train hugging a cliff up ahead! It was as if God and our GPS had conspired to lead us to more trains. My wife took some shots on her phone as I drove. 


A mile later we arrived in Crawford Notch ourselves, just as the train was arriving. I couldn't have planned it better if I tried.


We said goodbye to the train and kept heading north as the GPS guided, and suddenly came to the Mt. Washington Cog Railway. We hadn't planned to visit because it was an hour from our hotel, and as it was later on a Sunday afternoon we could only drive by. 


Actually, my wife tried to talk me into buying tickets for it and I had to play bad cop and say "no". That was no fun, even if it was the right decision because we had at least four more hours to go. A couple of miles later and we passed another train advertising the cog railway.


As we drove home I needed to put gas in the car and Sarah suggested getting off at White River Junction because there was a McDonalds there. After eating, we went to a park nearby to let Harrison run around. It was located right near a pair of bridges crossing the water, and I realized how close we actually were to WRJ. When we left the park I drove to a gas station and deliberately headed towards the train station. And what did we find...


Viola. A restored B&M steamer and caboose. Harrison and I had fun looking it over and taking pictures. 


It was sad to leave, as we didn't see any more trains on the way home. But, in total we did pretty good and it was a great early birthday Memorial day weekend. (We went railfanning on Monday the next day and saw another nine trains in three hours).


Wednesday, May 21, 2025

End of the Line (May 21, 2015 - May 21, 2025)

Note: this post has been a log time coming. I actually wrote it in May 2024 but decided to wait a year before posting it in case I changed my mind. But I didn't...

I have been dissatisfied with my layout for several years, yet I struggled to find the strength (guts?) to tear it down completely. It isn't that I don't love the subject matter... I am still firmly in love with the Delaware & Hudson (though side research projects into the Boston & Maine, Maine Central, and Bangor & Aroostook have exposed many good things they offer a modeler). I think it was because my layout wasn't fun to operate, and I don't think it ever was.


I had several goals for my layout:

1.) I wanted to accurately model something to the best of my ability. 
I was well on my way to accomplishing that. Every detail on my layout matches the D&H Colonie Main to the best of my knowledge as it was in May of 1984. This proved to be a two-edged sword. I didn't have the hard decision making process of what to put where: the prototype already took care of that for me. But, if I didn't have a photograph of a certain area I was essentially "stuck" until I could figure it out, and the reality was I might never research the answer. 

Plus, I couldn't really freelance anything on my layout- whether it be naming a business after a family member, or running equipment out of my designated time frame, or building a structure that I wanted just for fun. I scratched that itch instead with my MMR structures. When talking with author Michael Tylick about this, he said "Of course you can build what you want and run what you want". True... but not if I want to stick to my vision.

In short, my striving to be as realistic as possible had trapped me. It wasn't all bad, but I wish I had more freedom. 


2.) I wanted a layout that would be fun to run AND prototypically operate. 
As it turns out, running trains in circles was just fine for me but I got tired off having to constantly clean the track and check the nine benchwork section joints (including a lift bridge) every time I wanted to run. It was frustrating at times, and it sucked the enjoyment out of the process. I know I made my layout more complicated than necessary to allow it to move, expand, and reconfigure, but in the process I introduced problems that wouldn't have occurred if I had built standard benchwork. In essence, by trying to allow it to live forever, I might have killed it from the start.

As for prototypical layout operations, mainly switching, for reasons discussed below it was never very fulfilling.

3.) I wanted the use layout to help me earn my NMRA Master Model Railroader award. 
This definitely did happen. The track plan and wiring were designed, built, and photographed from the very beginning work on my Electrical and Civil certificates. Along the way I built and included things to satisfy certain requirements that I otherwise didn't want (ex: a turntable and a section of super-elevated curves). But, it was definitely worth it to get those certificates.

And, the skills learned in scratchbuilding structures for my layout translated into earning my Cars and Structures certificates too. And I finally earned my award, MMR #776. None of my previous layouts have ever had enough scenery and detailing to qualify for the Scenery certificate, and this one won't either.  

4.) I wanted it to keep me busy
I have discovered I have more fun researching and building stuff for my layout than actually running it. That is true for a lot of modelers. Having spent several hundred hours working on it so far, it certainly has done that. I enjoyed all of the research involved in planning it, starting with reading books and scouring online websites for information on industries. Then, I went out to take measurements and pictures of existing buildings or search for older pictures of now-gone structures. I draw up scale drawings and sketched maps of how various elements in each Layout Design Element fit together. And this was before I cut a single piece of styrene or laid a piece of track. 


5.) I wanted to build a focused HO scale roster.
I have way more HO scale engines and cars than could ever fit on the layout but I enjoy putting together kits and detailing/weathering models. Whether it was engines, boxcars, TOFC flat cars, covered hoppers or cabooses, if it fit my era I wanted it. But, it is depressing to know that I can't see most of them because they are in storage. I remedied that for my engines with a display case, which helped somewhat. But running a 12-car train on my layout is a stretch, and nice long trains with multiple engines are just too much work to dig everything out, set it up, run it (and hope it didn't derail), and then put it all away. Also, since my roster contained just about everything I wanted, I stopped buying stuff.


So what went wrong?

I planned on building four sections representing the Capital District area of NY where the D&H ran. It was an ambitious project as I had never attempted scale modeling of actual prototypes before, but I jumped right in. 

My first section, the North Albany Yard, was almost complete. I just needed to add a few backline details like telephone poles and trees, but that never happened. Mostly because the money I could spend for detail parts which would just sit there would be better spent on raw materials to construct the next parts of the layout. Finish detailing is usually the last step in the lifespan of a layout, and I never got there. 

The problem was that the first section of the layout wasn't fun to operate as it just acted as a staging yard (on the operational tracks) and a demonstration of a yard being deconstructed (on the non-operational scenic tracks). I liked building it because it was so different from what I had done in the past, but once it was finished I didn't know what to do with it. Using the yard lead to make up and break down trains wasn't enjoyable because it was on a curve and hidden behind a hill, besides the yard could hold at most a dozen or so cars. And, you don't really need a staging yard if you rarely run trains!


My second section, Menands, was about 70% done. I needed to add a few more trees and details like telephone poles, as well as vehicles and figures. But I was pretty close to calling it complete. However, I had attempted to compress too much into the 7' length of this scene and that led to some visual and operational problems. My structures were too close together and prototypically operating them didn't work out as I expected. 

The track leading to Agway has a bend in it that prevented freight cars from actually reaching the modeled loading door. The spur to Colony Liquor just barely clears a 50' boxcar but it is hard to see when spotting one at the door. The third, Southworth Machinery, stopped receiving rail service in 1981 and I later learned that the boxcar spotted at the loading ramp (which I had assumed meant it still received rail service) was only used for storage. 

In conclusion, this section is a scenic feature that would be nice in a museum but not very functional to operate as a train layout. It was especially heartbreaking because I spent the most time building the structures on it and it was the very first part of the layout I designed at my old apartment. All that work for zero operational gain.


The third section was for Norlite and Keis Beverages. I never started it because to get there I had to model a road crossing on the corner section between this area and Menands. I was excited about adding operating crossing gates and sound, but even as I was researching it I realized my layout was doomed. 

Besides, Keis never actually received rail service during the time I model (or anytime at all, so I have been told) and I didn't have enough space to model the extensive Norlite quarry facility effectively. So, again both would have been fun to build but they wouldn't have made the layout any more fun to operate. Sigh.


The fourth section, which I already removed and stored in my garage after a redesign in September 2023, was going to represent the Cohoes' Mohawk Paper plant. Due to a sharp incline to reach the siding, I already had to rebuild it once to lessen the grade. The section was essential for any semblance of operation as it had the only passing siding on my entire layout. But, it too didn't add much operationally. 

The Mohawk Paper plant was allocated a tiny corner on the front of the layout, and most of the plant (like nearly every other one of my buildings) fell into the aisle. The scenery on this section would have been awesome though. A highway crossed the railroad tracks at grade, with a wall of trees behind it, and lots of residential houses along the backdrop. At least that was the plan. I realized it would not have fit into the scene only 2' deep and 7' long. So this section had to go. I never figured out what I would have replaced it with.

In sum... my four layout sections all provided me with interesting structure and scenery building opportunities but were not good as implemented for switching or prototypical operation. Running trains in circles was fun when it worked, but keeping the layout for that reason alone turned out to be a waste of space. Once I removed the Mohawk Paper section and eliminated the option for just letting trains run around and around, the layout ceased to serve any meaningful purpose.


So What's Next?

An old 2011 post by Trevor Marshall on his blog perfectly captured the state of where I was. To stop work on my layout would be to admit it was a failure, which it wasn't. But I haven't worked on it during the past two years except to trash parts of it. I can't blame it on lack of time. It is due to lack of interest. I don't want to press on with building a layout that isn't fun to operate, and the only way to save it would be to redesign all four sections again. One option I considered was to build two new sections (to complete the circle again) and perhaps model something besides the D&H on them (a farm scene? a station?). But that is just diluting what I have, and likely wouldn't satisfy me long-term.


My problem was I tried to stuff too much prototype main line into too small a space. I didn't know at the time that it would be a problem, but it was. 

So, on the tenth anniversary of my blog, I am declaring my layout finished. This isn't a decision I am making lightly, and it isn't impulsive. I have mulled it over for a long time. But it is the right decision. 

I am thinking about turning my North Albany section into a Fremo module, because I am really pleased with how it turned out. I may try and save the structures from my Menands section too.

I have been planning my next layout since 2020, and hinted at it for the past several years. It is a three-rail O scale railroad and features scale size (1:48) trains running through realistic but generic New England scenery. This allows me to build whatever I want and run whatever I want, and the larger size lets me focus more on detailing structures and scenes which I enjoy. A blog for for my the New England Northern Railway went live last fall.


This blog will continue as a catch-all for my various train interests. And, if I find more interesting D&H stuff I will definitely put it here. Only my O scale adventures will go on my new blog, so this one will live on. And who knows, I may someday return to model the D&H Colonie Main.

Friday, May 9, 2025

White Balance issues with my photographs

I have been trying to improve my photography skills when building my models, mostly because I am writing more articles for publication and I need clean, well-lit shots. To that end, I built a simple photo booth of sorts made from three pieces of inexpensive white foamboard taped together into a bottom/side/back arrangement. This provides plain white background, though the joints are sometimes visible. 

To keep it clean, especially when I am painting or weathering my models (which makes a permanent mess sometimes) I set a piece of white posterboard on the bottom piece of foamboard. I have several pieces of posterboard that I rotate, with one dedicated for oil paint washes. When they get grungy, I ditch them and buy a new one. This keeps my background prestine.

However, I have recently struggled with lighting. I need lots of clean, white light. When my regular desk light broke I replaced it with a color-adjustable LED desk lamp. This worked okay, but I couldn't always confirm that the light color was set at 3500k. It had no marked settings, and if I unplugged it then they reset. Also, I bought an inexpensive LED handheld spotlight to augment my desk lamp and I couldn't always guarantee that I had it set at 3500k either. Sometimes my pictures would come out yellowish or pinkish. Not good.

For shots of my layout, which rely on my ceiling's 3500k bulbs and the small handheld spotlight, they also came out yellow.

Even though software can fix this, such as the free online BeFunky photo editor that I use a lot for adjusting the light setting on my scanned slides, I wanted to correct the problem from the start.

So, I bought new inexpensive spotlights and special 3500k bulbs and set them up over my workbench. Now, everything was guaranteed to be 3500k.  And yet the pictures turned more yellow than ever. Grr. I knew it was a white balancing issue but didn't know how to fix it. 

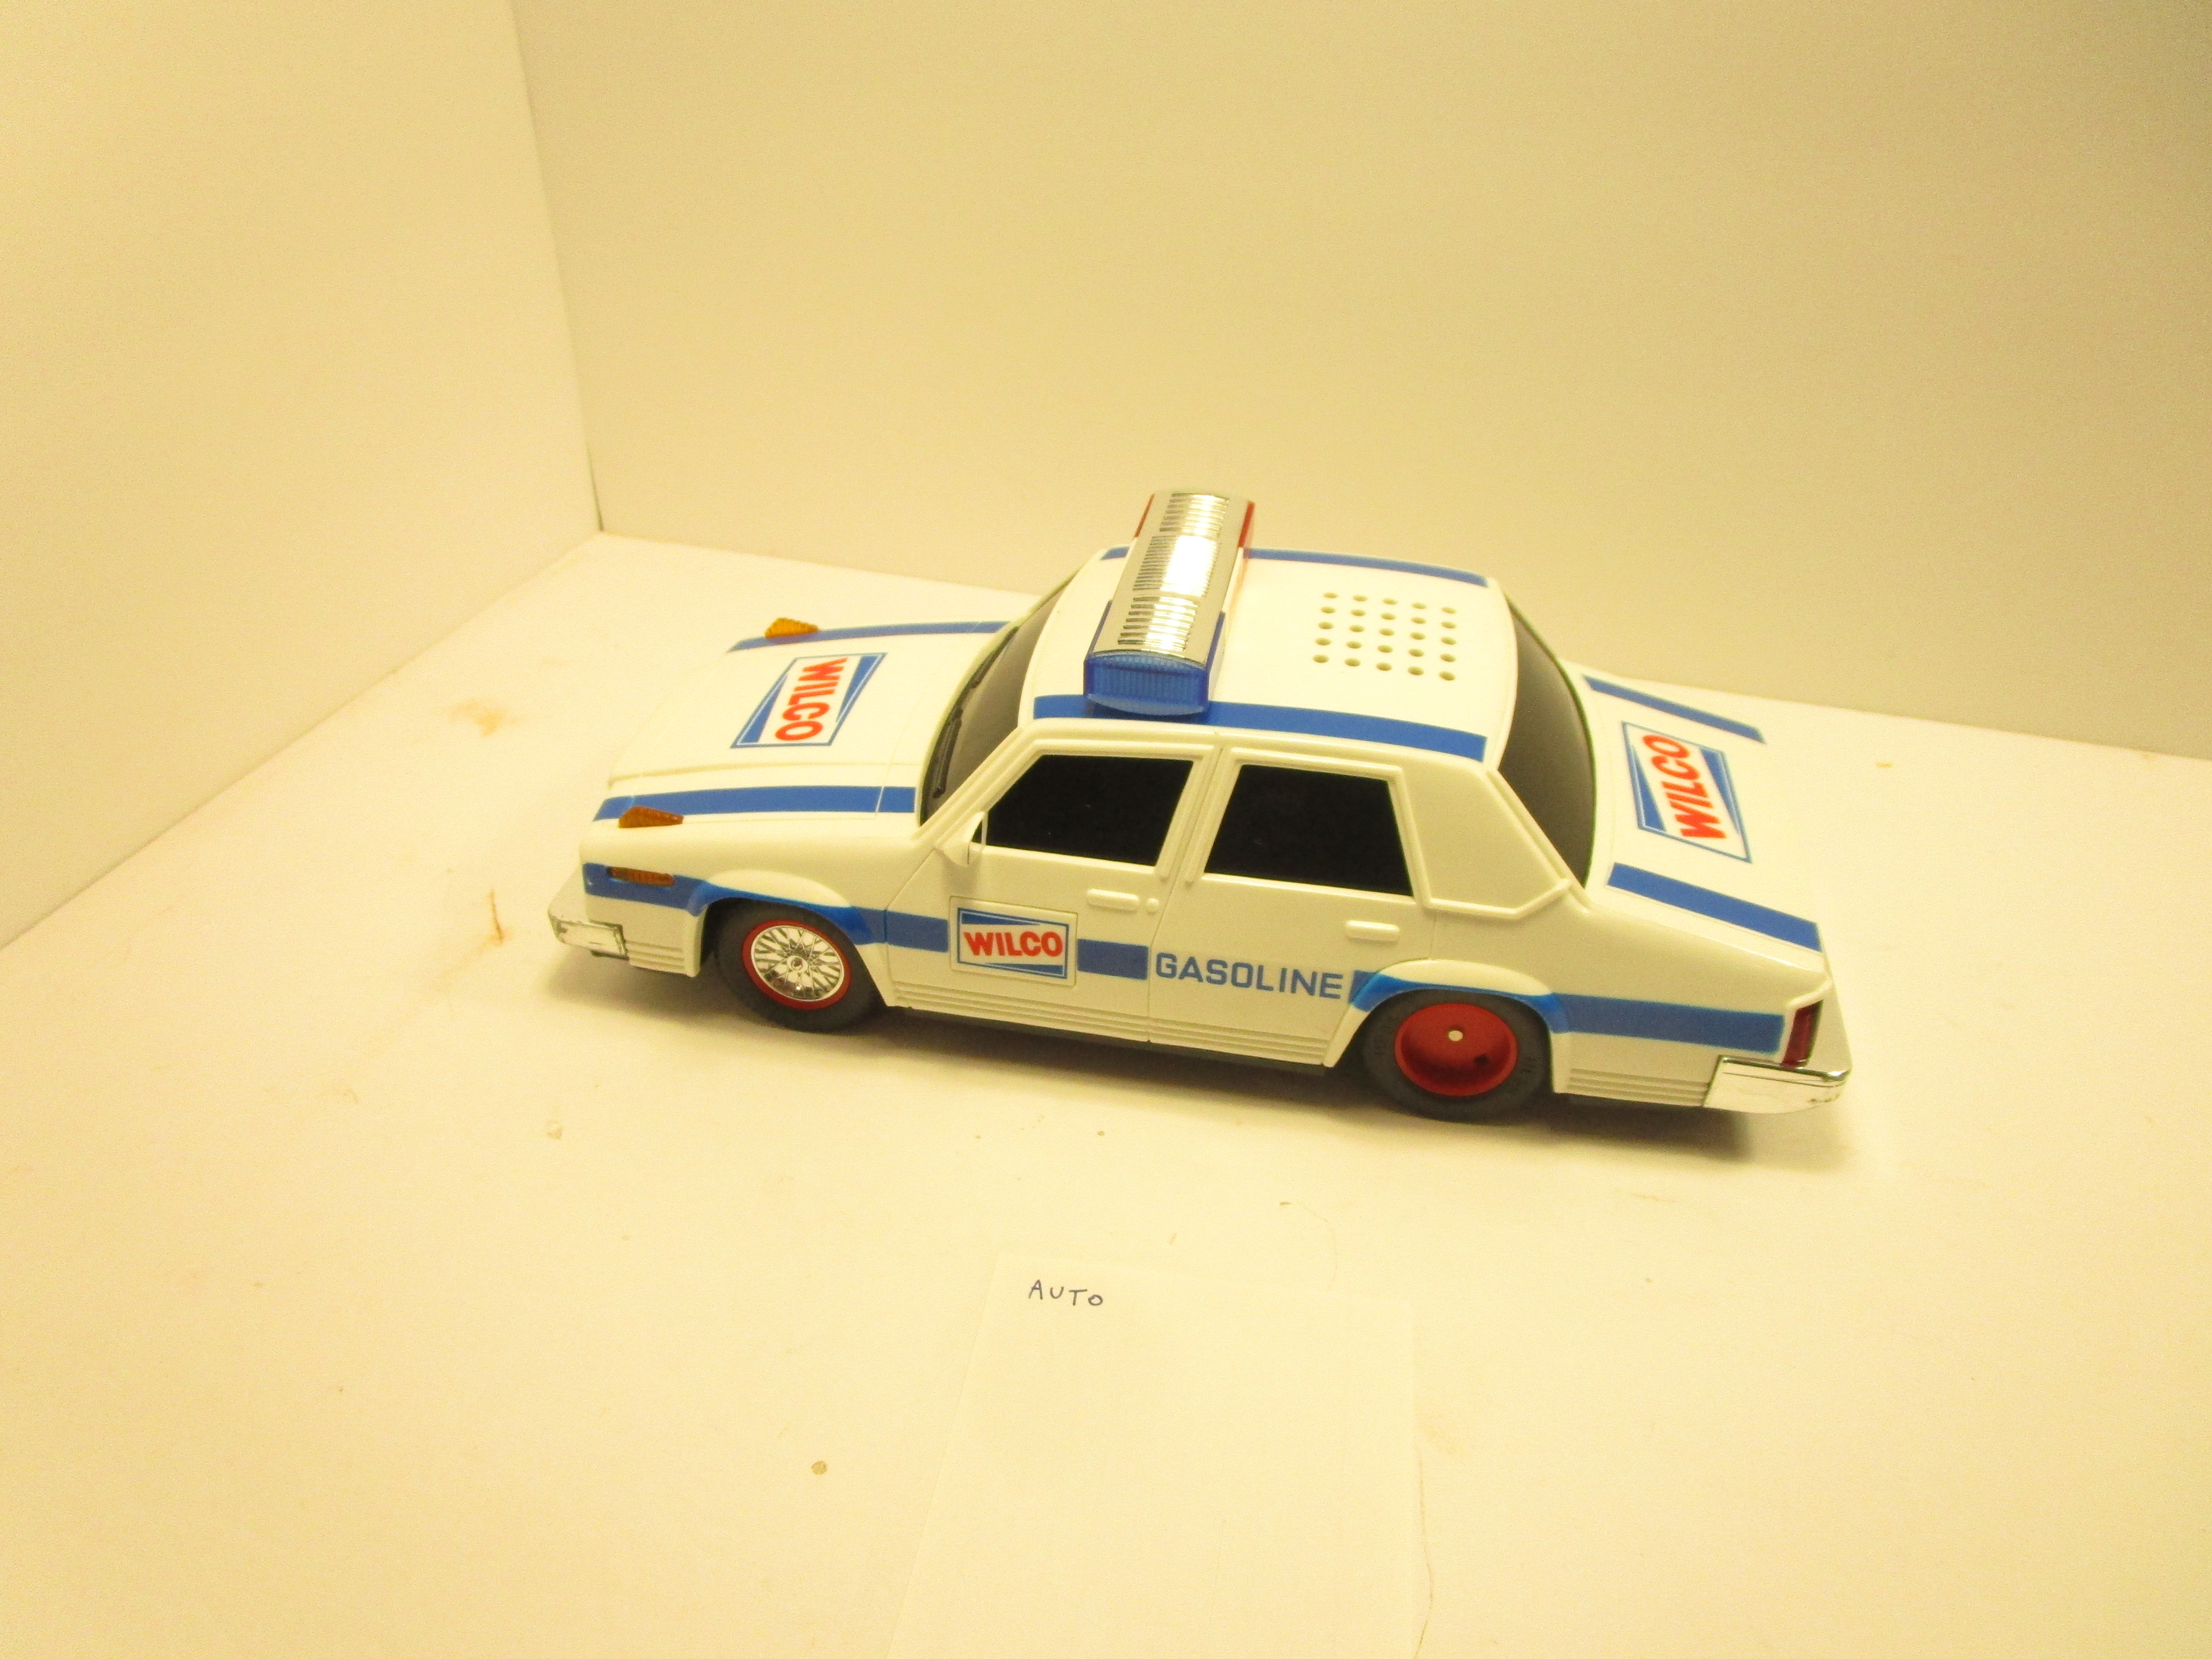
Finally, I read my camera's manual and found the white balance adjustment setting. Then, I set about taking a series of identical pictures of a model (my son's police car which was on my bench for repair) using all the different light setting to see what I liked best. Here are the results.

Auto select:


Sunny (outdoor):

Cloudy (outdoor):

Tungsten:

Fluorescent:

Fluorescent H:

I like the Tungsten setting best, followed by the Fluorescent (which is just leaning slightly into yellow). Everything else is much too yellow. 

I know this is basic level photography stuff but for some reason it only hit me now. At least I figured it out and can take better pictures.

Tuesday, April 29, 2025

A Day Out with Thomas at the Essex Steam Train

In 2018 our family visited the Essex Steam Train in Connecticut and despite the overcast weather we enjoyed ourselves. I knew we would be back eventually, but it was only when I saw last year that they frequently hosted the "Day out with Thomas" events that I realized what a great opportunity it would be. Our son Harrison loves Thomas the Tank Engine, as do I. I remember being enthralled with Shining Time Station in 1989 when it came out and still have some of my old Thomas toys from when I was a kid. So, this was a great time to combine our love for that cheeky little tank engine. My wife Sarah came along for the ride, though I think she enjoyed it too. 


A "dummy" Thomas was available to push the back of the train, and there were plenty of opportunities to take pictures of it between trips. It had an operating steam whistle that an Engineer activated throughout the trip, though he looked somewhat grumpy. Maybe he drew short straw?

The real muscle was provided by a Chinese-built SY mikado that was modified after a tragic fire to look more like a New Haven engine. However, if you knew where to look (like the unique pilot) you could see its Chinese heritage. A full history of the engine can be found here.

Would you believe I didn't take a single picture of the front of the engine? What a dope. (Well, in my defense, for much of the time I was holding Harrison's hand or carrying him).


As the train rolled out of the station Thomas "pushed" at the rear. What a really useful engine!


Percy was also on hand for pictures, as was Sir Topham Hat. And yes, I had my picture taken with them. Deep down, I am a kid at heart too.


I bought tickets for two different train rides, with time to walk around the museum and gift shop and eat lunch in the middle of them. Sadly, all the excitement (and the 2.5 hour car ride to get here) was too much for Harrison and he ended up falling asleep as the second train pulled out of the station. I know he still had a great time though.

Friday, March 28, 2025

Overnight caboose rental in Chester, Mass. (2024)

Last fall our family rented the caboose located at the Chester Railway Museum, a place I had visited the year before. When we had the chance to return and rent the caboose, I jumped at it. I love cabin camping, which I freely admit isn't the same as camping in a tent. But it can still be fun to cook over a fire, sleep in sleeping bags, and enjoy the great outdoors. ALL while trains roll past you all the time! I loved it so much I wrote about it in our NMRA newsletter. But I forgot to mention it here online, so below is my recounting of the experience:

“I don’t think this is going to be a five-star review” my wife starts out, but I quickly cut her off and respond “I know, we should be able to give them six stars!” She flashes me a well-known look that says “that’s not what I meant” and then we both stare outside the window as a long freight train rumbles by. The sun is rising through the windows and Harrison awakes. 

Last October, the NMRA Division went to the Chester Railway Museum for a station tour. In addition to some boxcars and a tank car, they had a former Rutland caboose painted up for the Boston and Albany that could be rented for the night. We even raffled away a night in it this past spring. It’s been on my list of places to go since then and I finally made it over for a Friday night. Being a train event, Harrison had to come. Sarah tagged along too, perhaps because she didn’t want to miss out on all the “fun”. 

When I called to confirm with Dave, the friendly caretaker, a few days before I asked how many trains he usually saw. He told me that trackwork had led Amtrak to bus passengers between Albany and Boston, and daytime freight trains were slow. It was discouraging but sleeping in a caboose is still good. We arrived at 3:45 on Friday, and within an hour an Amtrak train rolled by. We waved to it and walked next door to the only pizza place in town for dinner. While waiting for our food, another Amtrak train flew by in the opposite direction with two engines, a diner, and three coaches. Go figure. 

When we got back Harrison kicked a large ball around the yard and Dave showed us all that they were doing to repaint the outside of the caboose. They received a railroad grant and were putting it to good use. Some boxcars had been repainted by the Sheriff’s Office, in a program similar to road-cleaning crews. 

After an evening of smores, which Harrison managed to wear as much as he ate, we went into the now-empty station to clean up. We literally had the place to ourselves, and I imagined it was just as a station master of old felt every single night. 

After reconfiguring the bunks into a “double” bed so that Harrison was corralled into a corner, we sat down to watch some Curious George. He was sleepy around 8PM, so we turned it off and went to bed. 

What we didn’t figure on was the 8:03 westbound, but we had a blast looking out the window as the moon lit up the cars. The whole caboose shook too, adding to the experience. Harrison was jumping up and down on the mattress with excitement. He wasn’t going to be sleeping anytime soon. It got quiet again and we heard “Are you?” over and over as Harrison called out asking where the train was. We hoped he would fall back a sleep, but he didn’t. I can’t blame him. The 9:27PM mixed train didn’t help either. No point in counting cars when all it does is wake him up more. 

The next train was either closer to midnight or 1AM, but both my wife and I can’t remember. She says I was sleeping, and I say the opposite. We may have each seen a different train as we were both exhausted by then. I didn’t even bother to sit up and note what direction it was heading. I did note that the moon looked lovely.


Around 2:30AM I had to answer the call of nature (don’t get old) and as I unlocked and walked into a perfectly still train station that morning it was eerily quiet. Too quiet. Ghosts of trains from a hundred years ago rolled by. Or perhaps it was my imagination. What was real was the 3:00AM train that they both slept through but I dutifully looked out to watch. 

We all remember the 5:56am CSX train that served as Harrison’s wake up call. There was no going back to sleep now. We sat on the beds and ate fruit and then got up for the day. I began packing while Harrison was running around looking for trains. We decided to wait for the next one and then go to breakfast, which is located on the “other side of town”. In Chester, that means a two-minute drive. 

As we talked with Dave we heard a train horn in the distance. Harrison and I ran to the caboose and climb into the cupola to wait for it to pass. It took forever, and we heard horns from both directions. Confused, we watched as one rolls down the hill at 8AM while another train in the other direction slowed to a stop. We sit and wait in the cupola, hungry for breakfast but not wanting to miss the train. I didn’t check the track arrangement before coming so I wasn’t sure it was parked for another train, waiting for a crew change, suffering some mechanical issue, or ran out of fuel. 


We wandered back to the station and they started to paint it some more. Thirty minutes later the train finally begins to move. Harrison climbed onto my shoulders and we waved to it. The engineer responded by turning on the ditch lights and blowing the horn several times especially for us. As it crawls by I saw a flatcar carrying pipes followed by two with steel plates loaded on them. I am writing an article for a magazine about modeling both so I asked Sarah to take pictures of them for me. She agrees, but as they come close enough to shoot a westbound auto train blasts through out of nowhere and completely obscures the shot. Oh well. 


After, we went to breakfast and when we get back we played with Dave’s dog Major. He likes to fetch but apparently has lost a lot of balls in the ditch. Case in point, I threw a red ball and he knocked it into a gully. I dug it out for him, but it was actually a pink ball. The red ball is still down there somewhere. Dave said this happened all the time. We enjoy the weather and watch a 10:15 train go by, and then we head for home. 

In the course of eighteen hours we saw, heard, and felt a dozen trains. I got to experience cabin camping at its finest, Harrison got to eat marshmallows and watch trains, and Sarah got about four hours of sleep. Can you believe all of this costs only $70 a night, or $120 for the weekend? I can’t wait to go back! 

Monday, March 17, 2025

T-Trak Japan: Festival (part 2)

I worked on odds and ends in the weeks leading up to the show. Here is what the "finished" module looked like when I was done. 

I wanted to add a perimeter fence along the tracks to protect the festival attendees, and the Atlas hairpin fence looked great. But it was delicate and would be prone to breaking on my module as I took it to shows. So, I instead used some white plastic fence pieces I had bought years ago on Ebay. They were oversize and came with giant light bulbs (which I didn't use), but it was certainly sturdy enough. I cut off the ornamental trim from the top and sprayed them black. Then, tacky glue and temporary toothpicks held them in place. 

The tents and food stands were then glued down in a pattern that faced the layout's viewer, even though logically it might have made more sense to have some face away from active railroad tracks. I spent so much time painting them that I wanted people to see them! There is a large area in the front for perhaps a stage or dance area or something (which I haven't decided on yet).

Then, I added more N scale figures. I really like the Tomytec ones because they are only about $1 each, come painted, and are available in multiple time periods and styles which match my eclectic Japanese module. I need many more figures to make it a "Festival", but I ran out of time.


My road crossing needed gates. Japanese gates are yellow and black, in contrast to American style ones which are white and black. I first bought a Green Max brand kit (#2153) that came unpainted, but unfortunately the masking and painting of the yellow and black stripes put an end to the project. I now see they sell a painted kit (#2642), so maybe I should have bought that. I then discovered that Tomytec sells a painted kit (#114-2) for less than $20. They looked good so I ordered them. 


Assembly consisted of gluing the gates to the posts. When I went to install them, I realized I made a mistake when I designed my layout. I assumed that they would be located to protect cars driving on the right-side of the road. I later learned that Japanese drivers use the left-side. There was plenty of room for the gate in front, but the one in the back is very close to the building and I had to remove the crossbucks as they aren't visible. Only the gate is. I also had to shim the ones in the front up with stripwood, and cut down the base of the one in the back right. I then painted the wood black.

Another cameo I wanted was an old Japanese trolley or tram or engine set up for public display on a plinth. What I didn't have was a junker Japanese trolley or engine that I could use, and I sure didn't want to buy a nice new Kato model just to have it sit there. So, I reached out to another American modeler with a Japanese N scale module named Brad (see his blog here) and it turns out he had acquired a pair of old trolleys for the exact same purpose. He graciously gave me one of them (THANK YOU!) and I incorporated it into my module.

It was an unpowered tram that came with a molded display base of sorts representing cobblestone. It was missing its pantograph, though based on the picture in the instructions it looked so clunky that I would have chucked it anyway. I don't speak Japanese so I can't tell you what brand it is, but the bottom of the base is molded with "F-Toys REO". So who knows?

I securely glued it to the cobblestone base, and then that was attached to the layout. I added some scenery around it, and also refreshed the scenery along the front of the layout by the tracks and along the retaining wall on the left. 


I asked a friend to reprint another resin Shinto shrine gate ("Torii") to replace the one I broke, which I painted. I attached pieces of cut-off nails to the bottoms of the legs because I don't like drilling resin. It is too prone to crack. Then, I drilled matching holes in my scenery. The gate isn't glued down but instead just sits there, and it is easy to remove for travel if necessary. 


As I was putting away my supplies, some of which I hadn't touched in several years, I discovered another two packages of figures (about 20 more)! So, I adding them. A few were left in reserve for when I get the "performance stage" area finished, as well as the area behind the buildings on the right-hand side which would presumably be people's backyards.

Some glamour shots. The Inn and forest path:


The farmers' market and festival:


The road crossing and tram on display (with a woman getting her picture taken by it):


With that, it was ready for the show. It performed well and people really liked it. I did discover that my backdrop was several inches taller than most of the other people's, and it turns out that the club tended to prefer 10" tall backdrops (mine was 12). I didn't like how my module didn't fit in, and I also thought that the extra height drew people's eyes up and away from my models. So, when I got home I trimmed the bottom off by 2" and resinstalled it.

Monday, March 10, 2025

Master Model Railroader #776

It's official! I am now Master Model Railroader #776. It took about 15 years' of work, though the last 8 were really where I made my push to finish the required certificates. I submitted the paperwork last September, narrowly missing the NMRA's Northeastern Region convention in Rochester (my hometown... bummer), and I was notified in November that I had earned it. My modeling biography, which is posted below, was featured in the February issue of the NMRA magazine.


I have shared much of my journey on my blog, problems and all. I had a lot of fun and am very proud of what I accomplished. However, I am quick to point out that I never could have done it without the help of my friends and support of my family.


Biography
My start in the hobby is a common tale beginning with a train set at a young age and lots more trains in various scales from my parents over the years. My grandparents loved to take me to the train station to see trains come and go, and one of my favorite times was when the family rode a steam-powered excursion railroad on Father’s Day. Trains were, and still are, an addiction!

When I moved to a new city in my twenties I searched for local model railroaders and joined a live steam (7.25” gauge) club. A digital camera and a willingness to write led me to author a half-dozen or so articles on various aspects of the 1:8 scale trains including prototypical operation with car cards and the nuances of various steam locomotive designs. When I realized that I could use these towards my Model Railroad Author certificate I decided to try for my MMR. It was quickly earned but since I only had a tiny home layout which was still in the plywood stage my journey stalled for a while.

When we bought a new home years later I based my next HO layout based on the Delaware and Hudson in Albany, NY in 1984. I made sure to incorporate as many Model Railroad Engineer – Civil and Model Railroad Engineer – Electrical elements as I could so to earn both certificates at the same time. This included installing a turntable, super-elevating curves, and adding block control even though I didn’t really need them.

Scratchbuilding track scared me because everything seemed fiddly and small, but when I found a stash of LGB track buried away I decided to handlay a turnout using this large code 332 rail based on an article in a magazine. I had to learn some new skills along the way, like how to handle a blowtorch without burning down the house, but I managed. Spiking rail is fun when you can easily handle the spikes. A diamond crossing based on a Fast Tracks template and a gauntlet track soon followed and before I new it, I had my two certificates.

Around this time local modeler Bob Hamm (MMR #322) offered to teach classes at his house on how to develop modeling skills. I jumped at the opportunity and started scratchbuilding an O scale D&H bobber caboose. This was selected for its simplicity and larger size which would make it easier to form parts. It took a year or so to finish but it was my first scratchbuilt car. Bob taught me a lot along the way but stressed most of all making the parts yourself if possible. He was right. It was fun, it led to more merit points, and it allowed me to more closely replicate the prototype.

I decided that I wanted the challenge of scratchbuilding all eight cars instead of modifying commercial kits. But that would be a lot of work, so I searched for something that would be easy to build. I found the NMRA Lone Star Region’s website which has excellent tutorials scratchbuilding flatcars. I used those instructions to build a pair of cars with custom loads. With those done, I wanted to push myself so I took what I learned on how to build frames an made a Borden “butterdish” tank car with a styrene-over-wood-former body; a B&M steel milk express car complete with fabricated plug doors, corrugated ends, and paneled roof; and a shortline MOW boxcar/flatcar. Jumping scales again, I built a Great Western Railway cattle wagon in OO scale and a Maine two-foot gauge ice cream dairy reefer in On2. This dabbling in O scale would come back to haunt me later on.

I insisted the Bob Hamm and another mentor, Kevin Surman (MMR #528), conduct the merit judging on my cars. They are very skilled modelers but also very tough, and I knew if they passed my cars that I must have done something right. All eight earned merit awards and my Master Builder – Cars certificate was done.

That winter I told my friend Irwin Nathanson (another accomplished modeler) that I wouldn’t work on Master Builder – Structures because my current HO layout wasn’t the right place to put them. Then I realized I could build each structure on a cheap wooden base and set them in my display case. This gave me freedom to do lots of different things and I was off to the races. I made a list of things I wanted to try: full interior detailing; lighting effects; a farm scene to pay homage to my wife’s family; several wood structures (I prefer working in styrene); a model based on a local industry; a structure in N scale so that I could appreciate how much of a challenge it is to work in the smaller scale; a church to pay homage to my Christian faith; a structure based on plans by noted draftsman Harold Russell; etc. I also decided that all twelve would be scratchbuilt, but I wouldn’t superdetail them all. Then I combed through magazines for plans and drew up others myself.

I started with what I considered the hardest building first: a brick warehouse with multiple levels and angles and a huge billboard sign painted on one wall. It was based on a picture in a railroad book and still existed near my house. It took several years to build and it barely squeaked by merit judging (it was too modern and “simple”) but that was good to know for the future.

A wooden house on a hill; a rustic tar-paper shack; a milk station; a fully detailed gas station with interior; a wooden coal trestle; a church; an “uncovered” railroad bridge; a big red barn with full interior detail; an N scale maintenance of way station; a hobby shop complete with fiber optic and LED lighting effects; and a wood and steel sandhouse based on my favorite shortline followed.  

Unfortunately, I only earned three merit awards but two more were very close and Bob and Kevin offered excellent suggestions on how to improve them. This was done to get me to five merit awards. But I knew I needed to build one more structure that would “wow” them and it was obvious they loved old wooden buildings. Hence, my decision that the Hamm & Surman Lumber Company needed a new wooden board-by-board engine house for its steam locomotive #13 (it was my 13th structure). It worked and I had my certificate.

My Chief Dispatcher certificate was possible thanks to the work of Doug Dederick, who organizes “OpTober” operating sessions on various local layouts every year. It took me five years to get enough credits, but they slowly added up. One stumbling block was that I didn’t have a home layout that I could serve as Dispatcher on, and you need those hours. Who would open up their layout to a complete newbie and let them Dispatch it for 10 hours? My friend John Valachovic did, and without his help I never would have earned it.

My last certificate was Association Volunteer and it was perhaps the most rewarding as it involved me assisting with my local Division, and at the National level, with train shows, open houses, and other events. I met a lot of great people and interacting with the public who wanted to learn more about model trains and the NMRA as an organization was very enjoyable. I never thought I would talk with NMRA President Gordy Robinson about British Railways and other such things (another interest of mine).

The MMR process was a lot of fun and it pushed me to learn new skills. Wiring, soldering (torching?), scratchbuilding craftsman style structures, researching and drawing scale plans, handlaying track… all of it was because of this program. One of the only good things about the pandemic was that I had a lot more free time to work on this.

I worked in multiple scales (N, HO, OO, On2, O, G, and 1:8) to accomplish the certificates. Most of my builds are online at my blog which serves as a diary of my efforts and may help someone in the future learn things to do (and not do). I also discovered a love for superdetailing and building larger models, and my new layout is O scale “hirail” with three-rail track because of this. My toddler son also loves my trains and is already becoming a model railroader himself. It is a really fun hobby!

Certificates Earned:

Model Railroad Author 

Model Railroad Engineer – Civil

Model Railroad Engineer – Electrical

Master Builder – Cars

Master Builder – Structures

Chief Dispatcher

Association Volunteer

Sunday, February 9, 2025

My Little Helper

 While Harrison has his own Lionel layout, he has really taken an interest in the O scale layout I am building. As such, I try and think of projects we can work on together. So far, he has helped me squeeze closed "suitcase" connectors during my wiring projects; he has squeezed the trigger on my cordless drill (while I hold it steady) to screw in wiring clamps; and he is always willing to test track clearances and such.


After all the "work" is done, he likes to test out the track by rolling some of his trains back and forth. He has to stand on a stool to reach, but he is learning to be careful and balance properly.


Sarah and I were discussing recently whether his interest in trains will last throughout his life or wane as he gets older. I have no idea, but as she put it: "You really do a lot of train stuff with him". It is true. I don't mind if he has other hobbies in the future, but I will always try to include him in mine if he wants.


Until then, I will take all the help I can get!


PS: I have learned to add temporary buffers to the end of the tracks to keep the trains from rolling off. So far, they have worked.