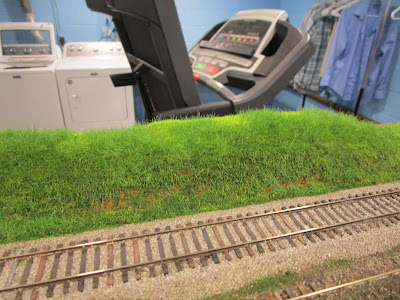
I only realized recently that I hadn't worked on the background ridge in my North Menands section of the layout since December 2020! Wow, where did the time go? Admittedly, I am not very good at scenery I didn't want to mess it up so I left it alone and focused my attention on structures. However, it was time to move on with the process. This entire project was done over the course of a week, spending between 5-15 minutes a night after I put my son to bed. I much prefer working in larger chunks of time, but since I had to constantly wait for glue to dry along the way it worked out well.
Here is what I was hoping to model, albeit during a much greener time (May) then is shown in this late October 2012 photo. The ridge on the left runs behind the tracks, and just to the other side of the trees on that hill is a cemetary. A neat opportunity to model something different, but space probably won't allow it on my layout.
I had done a lot of the scenery between the front of the layout and the ridge, so I didn't want to mess that up by reaching over it. But, the backdrop in this area is removable and access to the rear is easy from the laundry area. The ridge already had a coat of Ground Goop applied, along with several colors of ground foam. But it didn't look go, and static grass was the answer. So, I started by covering the track along the ridge with paper towels and spraying them with water to settle them in. They would serve as shields to capture errant static grass fibers.
Then, Woodland Scenics' Static Tac glue was drizzled onto the terrain and brushed around with a cheap 1" chip brush. One thing I noticed right away was that the Woodland Scenic's glue was a lot thinner than the Aleens tacky glue I had been using. Also, I didn't spray the entire area with rubbing alcohol first before applying glue. I had read that you needed to get everything wet (hence the alcohol) for the static charge to be fully transferred from the end of the probe to the layout area you are working on, but that didn't seem to be the case here.
Then, a layer of mixed green 2mm grass was applied consistently along the ridge. The back area (facing the camera) didn't get as much because it wouldn't be seen from normal layout viewing angles. I used a shop vac with a stocking over the end to capture excess grass and help it stand up, but 2mm stuff usually comes out straight.
This is really bright stuff... but it does reflect the fresh spring growth in the area. And, the colors will change as the scenery process continued.
The next day, I added more glue and then applied a layer of dark green 4mm grass over top.
When the glue dried it looked a bit better.
Finally, I went and applied four different shades of ground foam and other scenic materials to further break up the monotony of the color palette.
It helps have a rolling cart filled with scenery supplies at the ready.
I also keep the nine scenery materials I use the most used colors in a separate container. They are: fine cinder ballast; fine gray blend ballast; fine screened real coal; super fine screened real dirt; fine brown ballast; fine dark green foam; fine mixed green/yellow foam; and medium light and dark green foam.
Once the foam was on, I sprayed it all with alcohol and applied more matte medium cement to lock it all in place.
And when I say "applied", I took no chances. Loose foam could easily roll down the hill onto the tracks and get into the engine's gears, so I made sure that stuff wasn't going anywhere. Because of the humidity, it took several days for the white appearance to disappear. I was getting pretty worried, actually.
With a train in front of it and from this high perspective, it doesn't look as massive as the prototype. From eye-level, though, it works okay. I didn't want it so high that it appeared like a mountain. Besides, I still need to add some large bushes and trees along the ridge and they will add to the overall height.
This is a step forward. And even though I hate making trees, I will try and not wait another 2.5 years before I work on this section again!


No comments:
Post a Comment