
This structure started out with an idea I had to add miniature Christmas lights to one of my buildings. My layout, set in the month of May, wouldn't (or shouldn't!) have Christmas lights still up, so I had to look elsewhere. I started to think about adding lights to one of the twelve structures I was scratchbuilding and a house would seem a natural fit, but I didn't really want to build a house. A commercial store might have Christmas lights, though, and a big window on the front would allow me to add at least some form of an interior. While searching through my recent Model Railroader magazines I saw Pelle Soeberg's article for a scratchbuilt small, brick store in the March 2018 issue and it called to me.

But what type of store to build? At first I considered doing a full winter scene with snow on the sidewalks, snow on the roof, and perhaps it would be a department store selling Christmas decorations and train sets inside. But then I thought... why not just make it a train store? My dream job is to own a hobby shop with my wife that sells trains and other craft items. It won't ever happen, but a store like that exists in Rochester called "Dan's Crafts and Things."
Pelle called for using Walthers' brick sheets for the walls, which I didn't have. But, I did have some N Scale Architects "Modern Brick" sheets (#50001) left over. I first drew up my set of plans based loosely on some of the dimensions in the article. I liked the stepped upper roof profile along the sides, but changed the entranceway to look older and combined all of the smaller windows into one larger display window on the front.

The plans were drawn on the styrene, but I didn't want to cut any openings before I had the door casting in hand. So, I went to the local hobby store to see if they had some suitable modern door castings I could use for the front (the rear door and window casting came out of my scrap box).

Well, the hobby store had nothing per se but I really hated having to order a part online and wait several weeks for it to arrive. Digging through their racks of old parts, I found a Design Preservation Models modular building kit named "Street Level - Steel Sash Entry" (301-71) that had molded front doors that looked old enough to fit in with my brick building, and classy enough to be part of a store with my name on it. For less than $5 I was sold.

The sides were cut out first, and I made sure that the stair-step arrangement on the top edges corresponded with rows of bricks so that it would look clean. I then laminated the thin brick sheets onto 0.040" styrene, also cut to the proper profile.

The back wall was cut out and attached. The 123 blocks held it all in perfect 90-degree alignment. I didn't go overboard with the bracing as part of the interior is visible from the front, though I plan to add a back wall inside so that you could see through the store.

Styrene strips were attached to the rear and sides to support the roof, which for now will be left off for easy access to the inside for detailing and wiring. Corner braces were added where they wouldn't be seen.

The front wall was modified from the original plans and the door opening and window openings were cut out. I was feeling pretty good about the whole thing...

... until I remembered I hadn't cut away the portion of the front wall where the bricks are recessed. I wanted to keep this architectural detail, so I had to cut it open while trying to support the structure from the back and not have it break apart (or cut myself in the process). I managed, but it wasn't fun.

The recessed brickwork was added, and the door casting was also glued in from the back. It took a lot of gentle filing with a sanding stick to get the opening perfect for the door, but ugly gaps were not allowed here!

I also reinforced the back with more styrene. I figured it would be helpful for future lighting effects.

The rear door and window were also glued in. It was okay to attach them now because I planned to paint them the same color as the walls.

The stepped roof ridges were capped with styrene strips.

The exterior was painted with Rustoleum "Satin Nutmeg" paint. I was careful to lay on light coats as Rustoleum comes out really fast. I didn't want a dark brick color, or a red color, so this light tannish brown seemed a good compromise.

Moving to the interior, I hid the bracing behind false walls. Since the roof isn't removable, the backside of the front wall won't be seen so I didn't bother to make one for that.
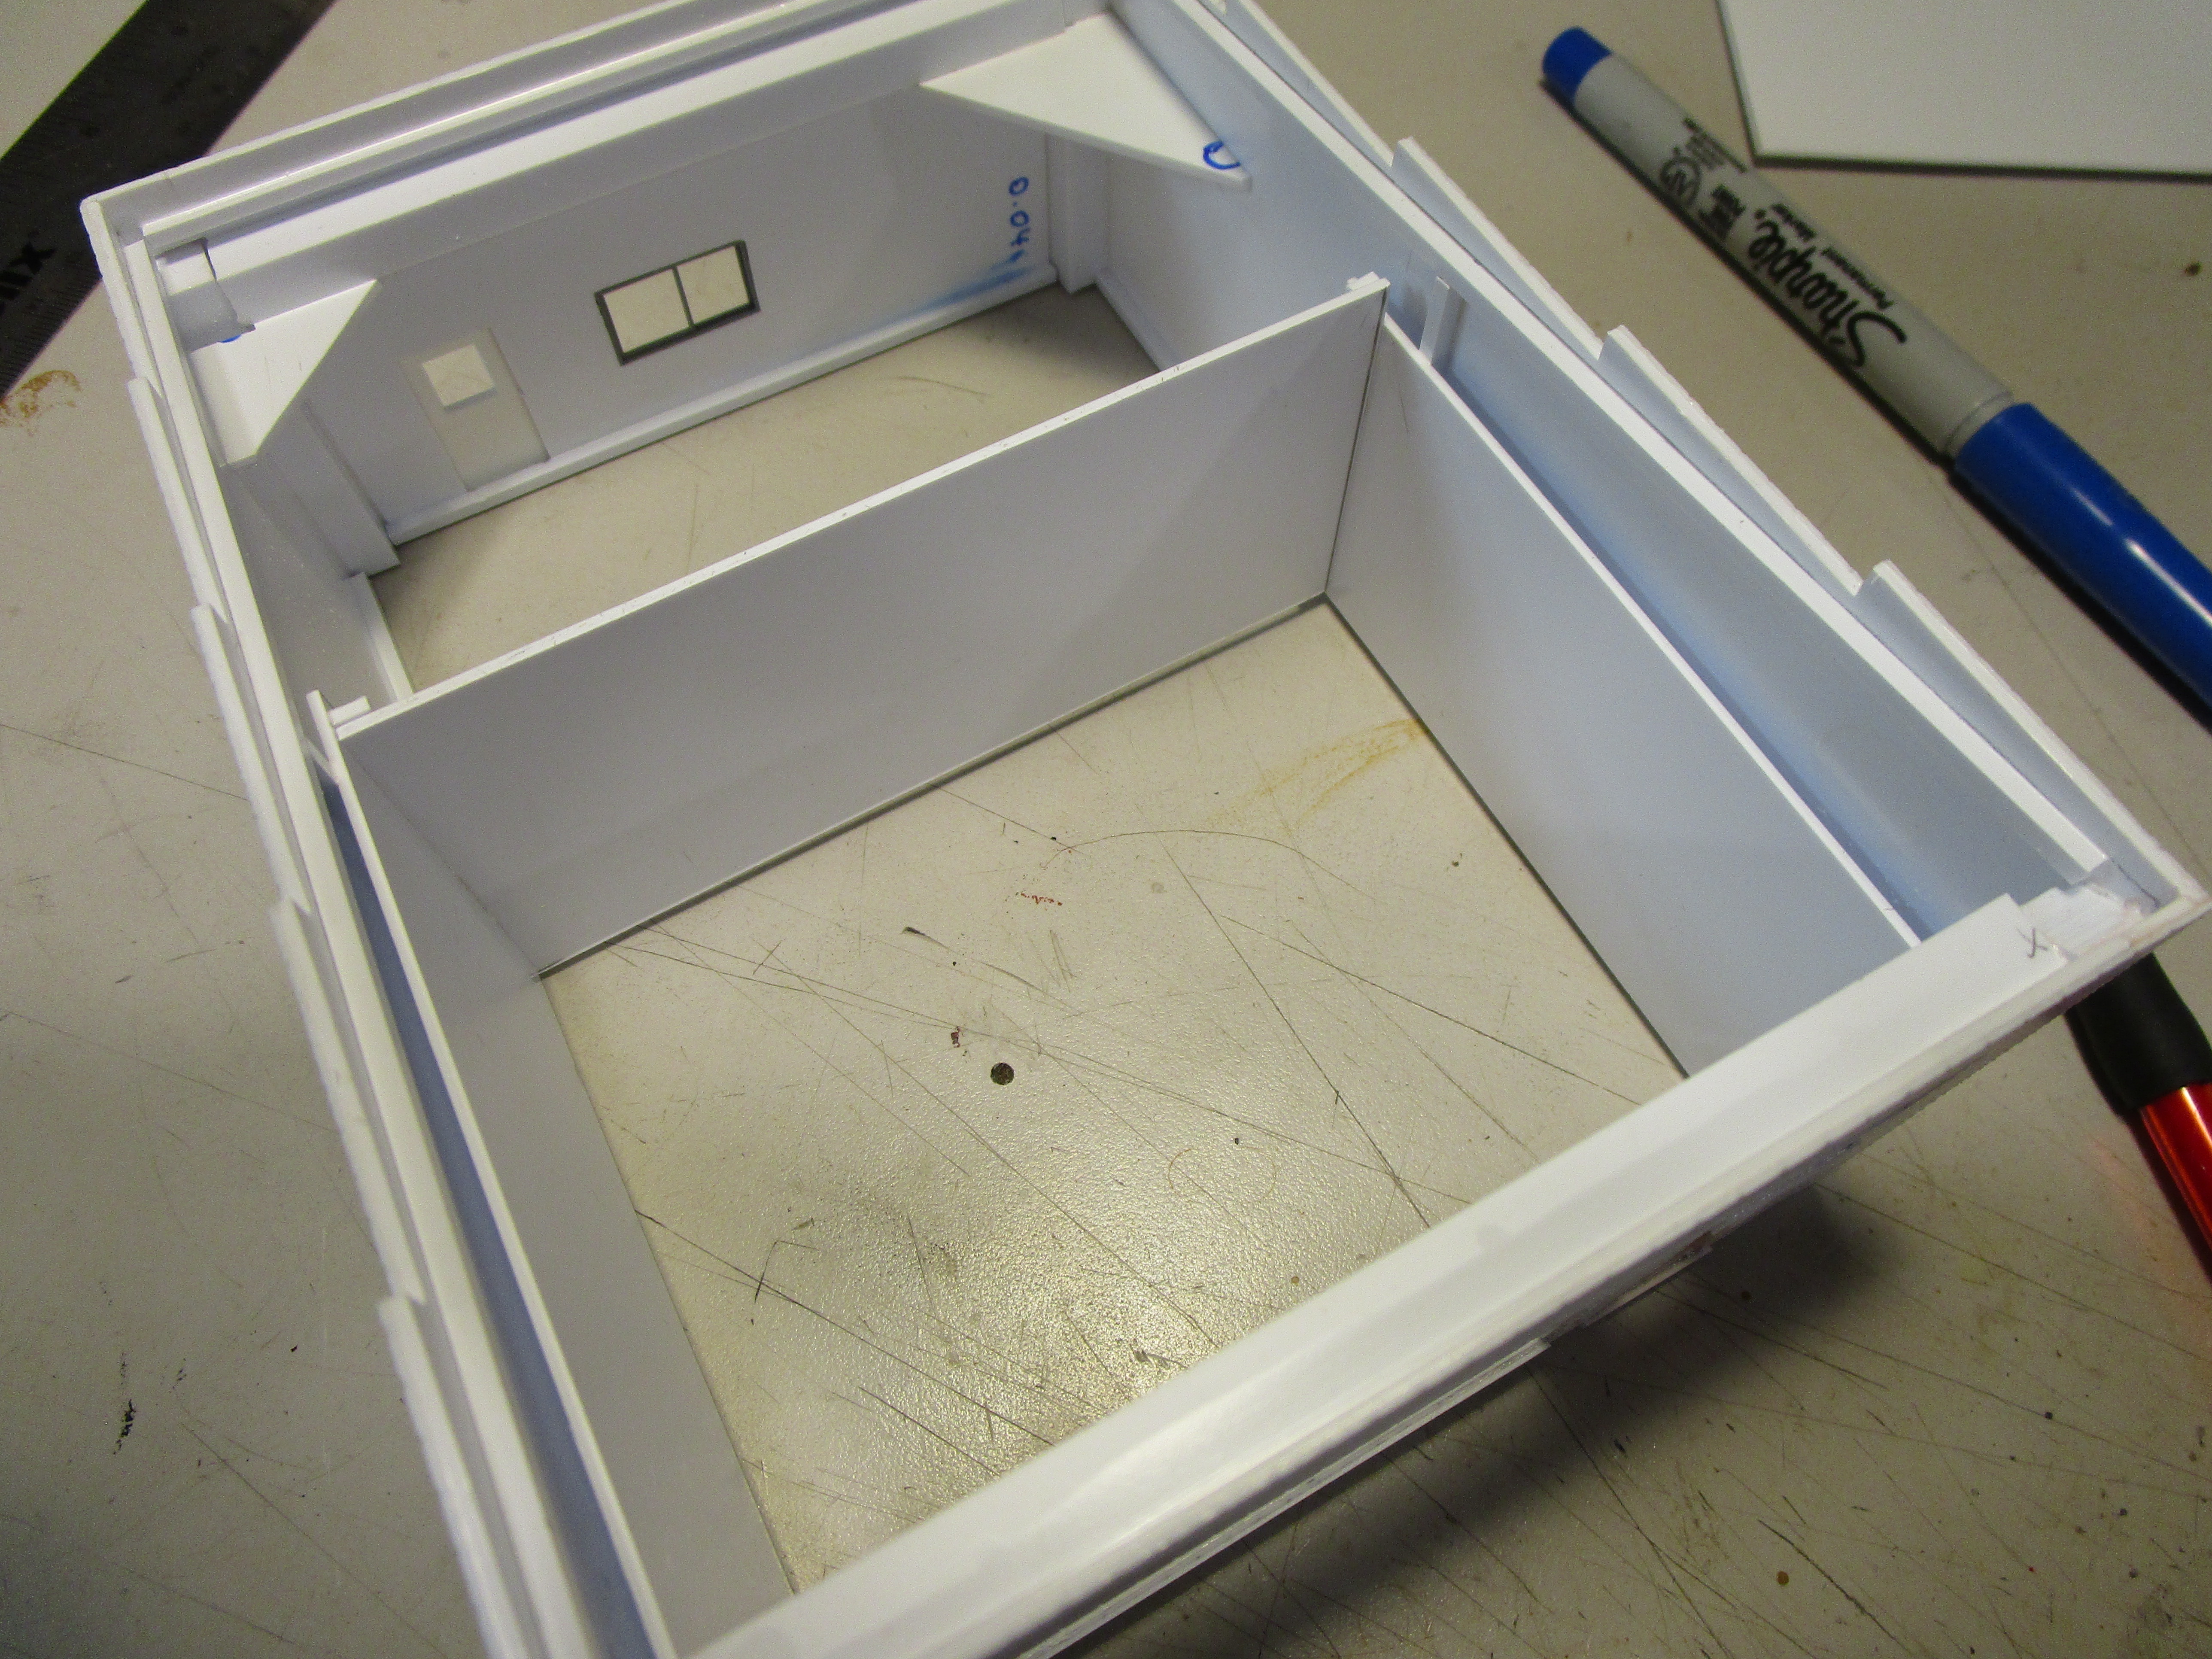
I attached some supports along the two side walls which will eventually hold up the interior ceiling. I also put a Pikestuff door along the back wall so staff could lock up the "back room" when they aren't around.

The shelving units are styrene L-angles (Evergreen #294). It is much easier to work on things like this when they aren't attached onto the walls first. The counters are pieces of Evergreen 3/8" I-beam (#297) that I glued separate counter tops to.

No train store is complete without a layout, and I built one with benchwork made from strip styrene. It was painted green with a black road and a blue pond in the corner. I drew a figure eight "track plan" on styrene, cut it out, painted it gray, and drew on "tracks" with a fine point marker. The train and the structures are tiny bits of wood painted bright colors to be seen. The train is close to G scale.

I wanted to light the interior of the store, and I had a bunch of small surface mount LED lights that were prewired to accept 12 volts. I checked and they were still pretty bright on 9 volts (important for later), so I made a ceiling from styrene and drilled holes in it for the light to shine through. I wanted to hide the ugly appearance of the LED light boards.

Wiring just the 9 lights with 2 wires each confirmed that I hate dealing with wires. It isn't the soldering itself that is difficult but stripping the insulation off of the thin wires. They just keep breaking on me. (Based on this experience, I decided to not use small prewired 0402 LED lights for the exterior and instead went with fiber optic cable. It turned out to be just as difficult, perhaps more so, and I really need to just learn how to strip tiny wires better). I taped all the wires together and into bundles and checked with a 9 volt battery. They all still worked... yay!

Before I could install the ceiling lights, I had to finish the store interior. The store's back wall is decorated with "movie posters", band posters, and pictures of model and real trains. I found the images online, shrunk them on the computer, and printed them in color. They were cut out and glued to the walls. I also test printed some sign graphics for the front and side of the building. Total cost: sixty cents.

The base is a piece of Evergreen scribed 3/8"-square sidewalk (#4512) that I painted light gray. I masked off the back room area because I thought that I might be gluing stuff to it directly and wanted a strong joint, but in the end it didn't really matter. I framed the edges with 1/4" square styrene to elevate it, and left one corner notched and open so that I can run wires under it. Otherwise, once it is glued to the wooden base all wires would be visible or else need to run under the wood.

The structure was glued down to the base and then a black oil paint wash was applied to the walls and sidewalk.

Next, I started adding all the shelves full of trains, toys, and board games that I had made. I had to prop some figures (Bachmann and Woodland Scenics) up until the glue dried. They are a bit overdressed for a train store, but oh well. There is even a tiny basset hound toy on the end up the upper shelf in the back because I love basset hounds.

The front window and door were glazed with thin, clear styrene that I attached with Canopy glue.

I tested the building with the ceiling lights on and am happy to say that they worked great and everything was really bright.

I changed paths mid-route and decided instead of Christmas lights I would do marquee lights on the outside. They would still be really colorful, but I couldn't find small enough fiber optic cable to be convincing as tiny bulbs (and didn't want to use the 0402 LEDs.) But marquee lights are larger, and fiber optics from LEDs to holes seemed promising. (Note: check out David K. Smith's excellent website where he mounted tiny 0402 LEDs on an N scale station. Wow, is he good!)
I turned to Lighthouse LEDs, and they had a lot of choices of pre-wired, colored LEDs and fiber optic cable. I wasn't sure what size was best so I got 1.5mm and 1.0mm diameter cable (I bought 30' of each, but realized later I needed more) and six colors of super-bright pre-wired LEDs that run at 9 volts. Because my ceiling lights are 12v but work on 9v, and these are 9v, everything can be wired together and run off of a simple 9v battery. I won't need resistors or anything fancy.

I tested some cable and an LED with the battery to see how bright it was, and it was pretty good.

Then, while listening to an NMRA virtual meeting I drilled out the 48 holes around the perimeter. I wish they were perfect but the first few are a little off. I later learned to start the hole with the tip of a knife, then drill it open. I used a #55 bit, which allowed the fiber optic cable to just slip through.

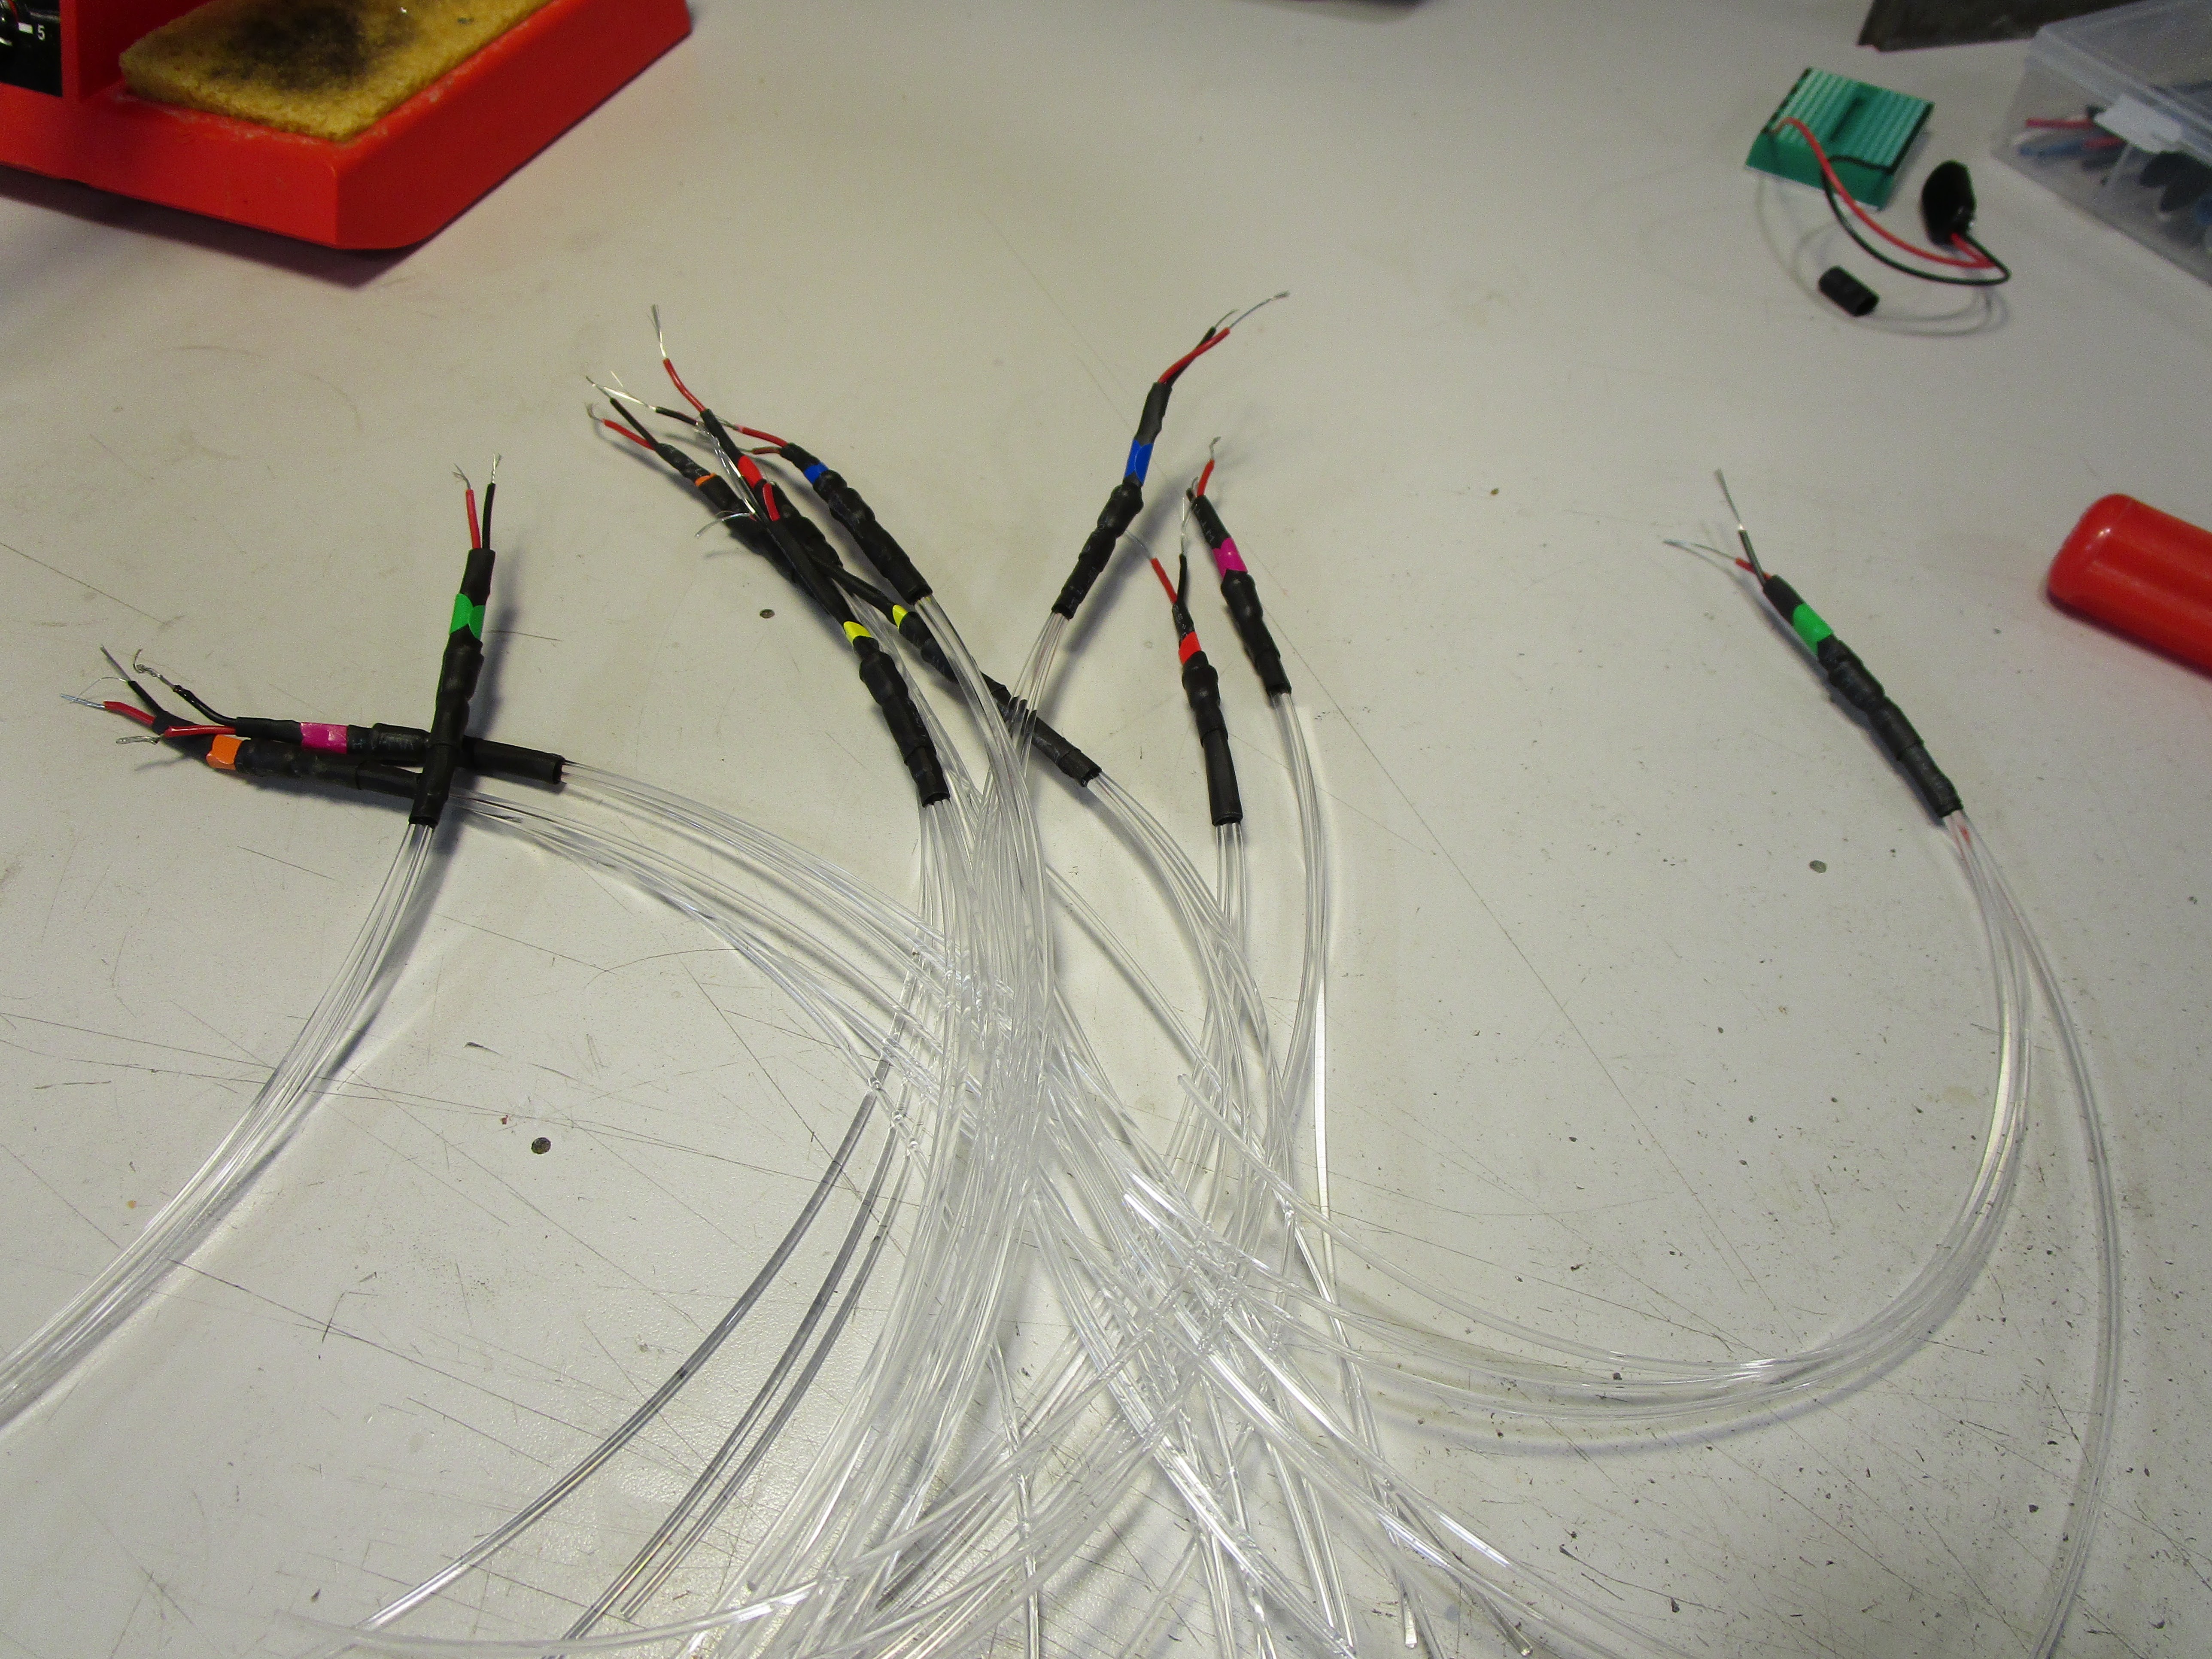
Each of the 12 LEDs (2 of each color of red, orange, yellow, green, blue, and purple) was connected to four stands of 1.5mm fiber optic cable for a total of 48 lights. I had to use multiple layers of heat shrink tubing to get a solid connection. Unfortunately, my heat shrink tubing assortment had 2mm, 2.5mm, 3.5mm, and 5mm and what I really needed was 3mm tubing. But I managed. Had I been mounting this to an actual layout and had a lot more room to hide the tubing, I think I would have actually used one LED per fiber optic strand. Because my first attempt at wiring this failed, the wire leads on each LED were extremely short and I had to solder extensions onto them (and yes, I had ordered double the LEDs required and this was actually my third attempt!) In all, there are over 50 solder joints in the finished building (and dozens more from my past experiments that did not work)!
One cable at a time was fed through the hole in the front of the building. I had a color diagram of what I wanted- actually two, as one showed the front view and one showed the reversed interior view. I double and triple checked everything, but still I made one mistake.

Because the cables were prone to pull back in during installation of later ones, I used a candle and a match to fuse the end of each one into a "lens" whose diameter was too large to slip back through the hole.

As I installed them I left them oversize as I wasn't sure how I was going to handle it.

I was concerned I would need to hide the LEDs under the building, which would require me to build a box to sit under the sidewalk base, but the LEDs just managed to fit in the back of the building. It was tight, and there wasn't a lot of wiggle room because the LEDs and ends of the cable had to remain in alignment. If I were installing it on a layout, I could easily hide it all underneath the benchwork but here I wanted it self contained. Clearly, the 0402 LEDs would have been a much better choice for tight spots like this.

The wiring was brought underneath and soldered up with the ceiling LED lights, and then it all was connected to a terminal connector on the corner of the base.

Everything is powered by a detachable 9 volt battery.

The fiber optic cables were then trimmed shorter and the ends fused again. I had to use a match to get into the close areas, and set part of the building on fire in the process (oops!). Some paint made it better, but the scars are still there. Looks like I am not getting my rent deposit back.

The roof is a piece of styrene that I painted matte black.

Wanting to try something different, over the styrene I glued pieces of 120 grit sandpaper. It was gray, the color I wanted, and it sort of looked like fine gravel that you sometimes find on the roofs of buildings. I weathered it a bit with finely ground black charcoal so it wouldn't look so stark.

The air conditioner unit is from Walthers (933-3733) mounted on pallets from Preiser, and then everything was painted silver and drybrushed to weather them. I was originally going to mount it on the roof, but I think behind the store on the ground looked better. I built a simple smokejack from styrene tubing.

With the roof on, I was pretty confident that the fiber optic cables were not going to move around anymore inside the building (at least not enough to fall out of their holes) so I took a thin chisel knife blade and sliced the fiber optic cables flush with the bricks on the front. Naturally, this caused some of the paint on the brick to get gouged so I touched that up after. This is what it looks like with the lights on. Unfortunately, the purple LEDs are a lot dimmer than the other colors and some of the yellow aren't as bright as I would have liked. Part of that is because of the coupling between the LED and the fiber optic cable, and part of that is because the yellow LEDs just weren't as bright as some of the other colors. No going back now though.

I next considered adding an awning to the front of the store. I think normally this would be a nice touch, but when I mocked it up it blocked some of the lights and I don't think any store that went to the trouble of adding so many lights would restrict their view with an awning. So I left it off. I did add a store sign that I designed in Microsoft Paint, printed out, and laminated to a piece of styrene. My first attempt was a little to large, so I shrunk it a little.

Another sign went on the side of the building.

My last big decision was whether to press on with the "winter" theme and add snow and icicles, or leave it as is and add some grass and weeds around the edges. Honestly, I am a bit scared to add the snow right now so I am leaving it as is. Some ground foam was applied to the base of the building because I hate weeding, and knowing me I would let these HO scale weeds just keep on growing. The trash cans are from JL Innovative (#718).

And with that, I am calling this building finished. I learned a lot about colored LEDs and fiber optics and hope to figure out some way to use them on my layout in the future. I may come back and add snow and if I do it will be easy enough to brush away the ground foam.

If you happen to find yourself walking by my shop sometime, take a minute and watch that train go round and round inside...

Super cool!
ReplyDeleteThanks!
ReplyDelete