Now that all three buildings (here, here, and here) were finished, it was time for the scenery around them. When I completed the third building in January 2022, I wasn't even sure if I was going to continue with my HO layout. My heart isn't always in it, and sometimes I feel ready to move on to new projects. But I think I was just burned out on buildings. So I left it to sit for a while instead of tearing it down. Now I feel better, so I picked up where I left off.
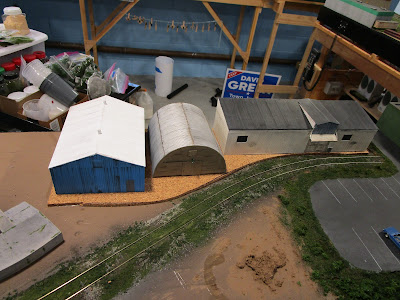
The first thing I did was glue down some nominally 1/4" thick sheet cork, which acted as a foundation to raise the buildings up a little.
Then, I did a final check with the buildings in place to make sure they looked okay. It had been over a year since I had even touched this area of the layout and I had to get reacquainted with it.
It wasn't a pretty scene, what with the odd curves of the track and pile of old, rock hard ground goop that I had left from a previous session. It took a bit of chiseling to get that off!
Ground goop was really too thick for job at hand, as all I needed to do was add a thin layer of texture around the buildings and blend the track to the area of the structures. What I really wanted was Sculptamold, and that is what Model Railroader usually used for this sort of thing. But when I went to the basemen to get it, I realized I had none. Not wanting to hold the project back, I made up more ground goop.
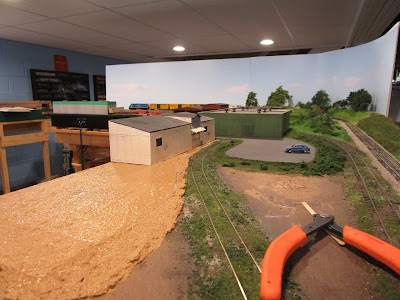
The stuff is really thick and despite thinning it a bit with water, it wasn't prefect. Worse, my brand new bag of "fine" grade vermiculite was much coarser than my older stuff. Perhaps different brands have different definitions of "fine". But I pressed on. I put a coat over everything including the sheet cork, then used a scraper to remove it from the cork. This left a very thin layer that filled in the holes in the cork and provided a little adhesive power to hold the buildings down.
Some gaps were left around the building, but they didn't last long. Besides, they were on the backside of the buildings which can't be seen anyway. (Note that car was only used to help space parking lot lines... it won't stay on the finished layout!)
Next, real dirt and various colors and textures of ground foam were dumped around and between the buildings.
Soon enough, the gaps in the foundation were hidden.
Larger pieces of vegetation were planted behind the buildings. In real life, this area is massively overgrown.
Then, rubbing alcohol and matte medium were applied in copious amounts to hold everything in place. Note that the triangular area at the bottom is due to get some trees, but I still need to make them.
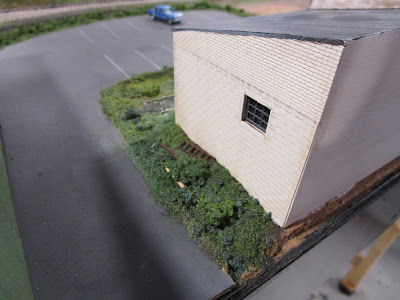
In the alleyway between the buildings, I hid pieces of stripwood, old castings from my parts box, cut up sprues, and other junk. Instead of making them all visible, I put more ground foam on top so that they peeked out from amongst the weeds. I think this is more realistic.
The end of the row of buildings near the entranceway to the parking lot got the same treatment.
Finally, I went around the edges of the building with the same gloss black paint that I used on the fascia.


No comments:
Post a Comment