
The eight types of track I wanted to model are:
(1) operational mainline – well manicured roadbed though a few pieces of vegetation are growing;
(2) well maintained roadbed- well manicured roadbed but the rails have been removed;
(3) maintained yard tracks- ballasted with cinders and with some weeds growing therein;
(4) old yard track- very rusty rails with heavy ballasting of cinders and dirt and lots of weeds;
(5) decrepit roadbed- ties remain in the dirt and weeds but rails were unspiked and lying on ties;
(6) abandoned roadbed- ties are barely visible in the dirt and weeds and rail is gone;
(7) recently dismantled roadbed- well maintained ballast but rails/ties have been removed; and
(8) removed roadbed – the ballast was excavated down to the bare earth.
(7) recently dismantled roadbed- well maintained ballast but rails/ties have been removed; and
(8) removed roadbed – the ballast was excavated down to the bare earth.
 |
| The layout ready for scenery to begin |
 Next, I started to work on coloring wooden ties for the areas of the track that would have rail removed. As it turns out, I had previously purchased a bag of 1,000 ties from the Fast Tracks people to use in filling gaps between sectional track when laying the mainline several years ago. I discovered that while they were a true 7x9" profile, they were too tall to fit under the rails. It was too much work to thin them down, so I switched to thinner stripwood. But now I had a purpose for those ties so I put about 600 into a container containing rubbing alcohol, India ink, and black craft paint to sit for about a week. When they came out, I left them to dry on wax paper. My fingers were gross!
 Next, I built a jig out of styrene which allowed me to arrange a bunch of ties in a row and then lift them off together in unison with some masking tape applied along the top. I used styrene strips, cut into pieces, as spacers between the wood ties. I didn't try to have everything tight, as slipping the ties in and out easily was more important then a perfect spacing. In total, the fixture was about a foot long which seemed a reasonable size. Once the glue dried and I started using it, I found a couple of spaces that needed slight modification to widen them up. I taped the tie's package to the jig so I will remember the brand name in the future if I need more.
 Running along the back edge of the layout section was the active mainline and the remnants of a second mainline track. The track had been previously ballasted but I added a little bit of ground foam here and there to represent the spring growth that the D&H seemed to be unable to keep under control. Next to it for a length is a well graded section of roadbed with ties in pretty good condition. The rails were removed and set in the ditch between the tracks, and a couple of new ties are also ready to be installed in the working adjacent track as part of annual maintenance.
 I applied a basic layer of Woodland Scenics black cinder ballast around the three working yard tracks. I had both medium and fine ballast sizes and I generally prefer fine for HO, but in the yard for the first layer I used the medium. I tried to keep it off the tops of the ties, but in certain places I added little mounds. I then went over and lightly sprinkled the fine stuff on top and around the edges, and the combination really made a big difference. Between the live yard tracks (in the picture on the right, the three forward-most tracks) I dumped more ties in the dirt to look like another track that had already been removed.
 The yard tracks had to be operational, so I was careful not to go crazy with the ballast and dirt. Still, I wanted it to look like the pictures and have it clearly ready to be condemned. These ties were left all black, which because I had colored them with the ink/paint mixture left them blotchy and shiny in places, and faded in others. They looked like decrepit old ties and the shiny parts resembled creosote and oil pretty well. To stop cars from rolling off the ends of the track (which in theory extend beyond the edge of the layout) I used low-profile nails which catch freight car axles but aren't visually obtrusive. Another torn up track is visible in the foreground.
 |
| the foreground track is a "dummy" while the one behind it is operational |
 One really neat detail that I wanted to replicate was a track switch that had been partially removed but the frog was still left in place. There were several examples of this in the pictures I had of this yard, including one on the mainline where a siding had been pulled but the main track still used a switch point for one of the running rails. I had a really old Atlas code 83 #6 switch in my parts box from at least 15 years ago, and it finally got its moment of glory. After gluing it down, I used a chisel blade to remove the molded plastic support sprue that ran between the ties underneath the curved rail. The prototype sure didn't have it. I also added the crossed ties which are surely a modeling cliche but I like the look of them.
 I laid out a couple of lines of ties waiting to be removed. Pieces of flextrack were chopped up into scale 39' lengths and handpainted with my leather paint. These, and extra stained wooden ties that I had colored earlier, were added for scenic details such as a support platform for surplus track frogs, and piles of ties ready to be shredded. Another siding had rails that clearly hadn't been used in years and they were unspiked and carelessly left on top of the ties to await some future scrapping operation that might not ever come. One rail was tipped over, and some ties were dumped on top of the rails. Most of the ties I handpainted into different colors, but some I left black.
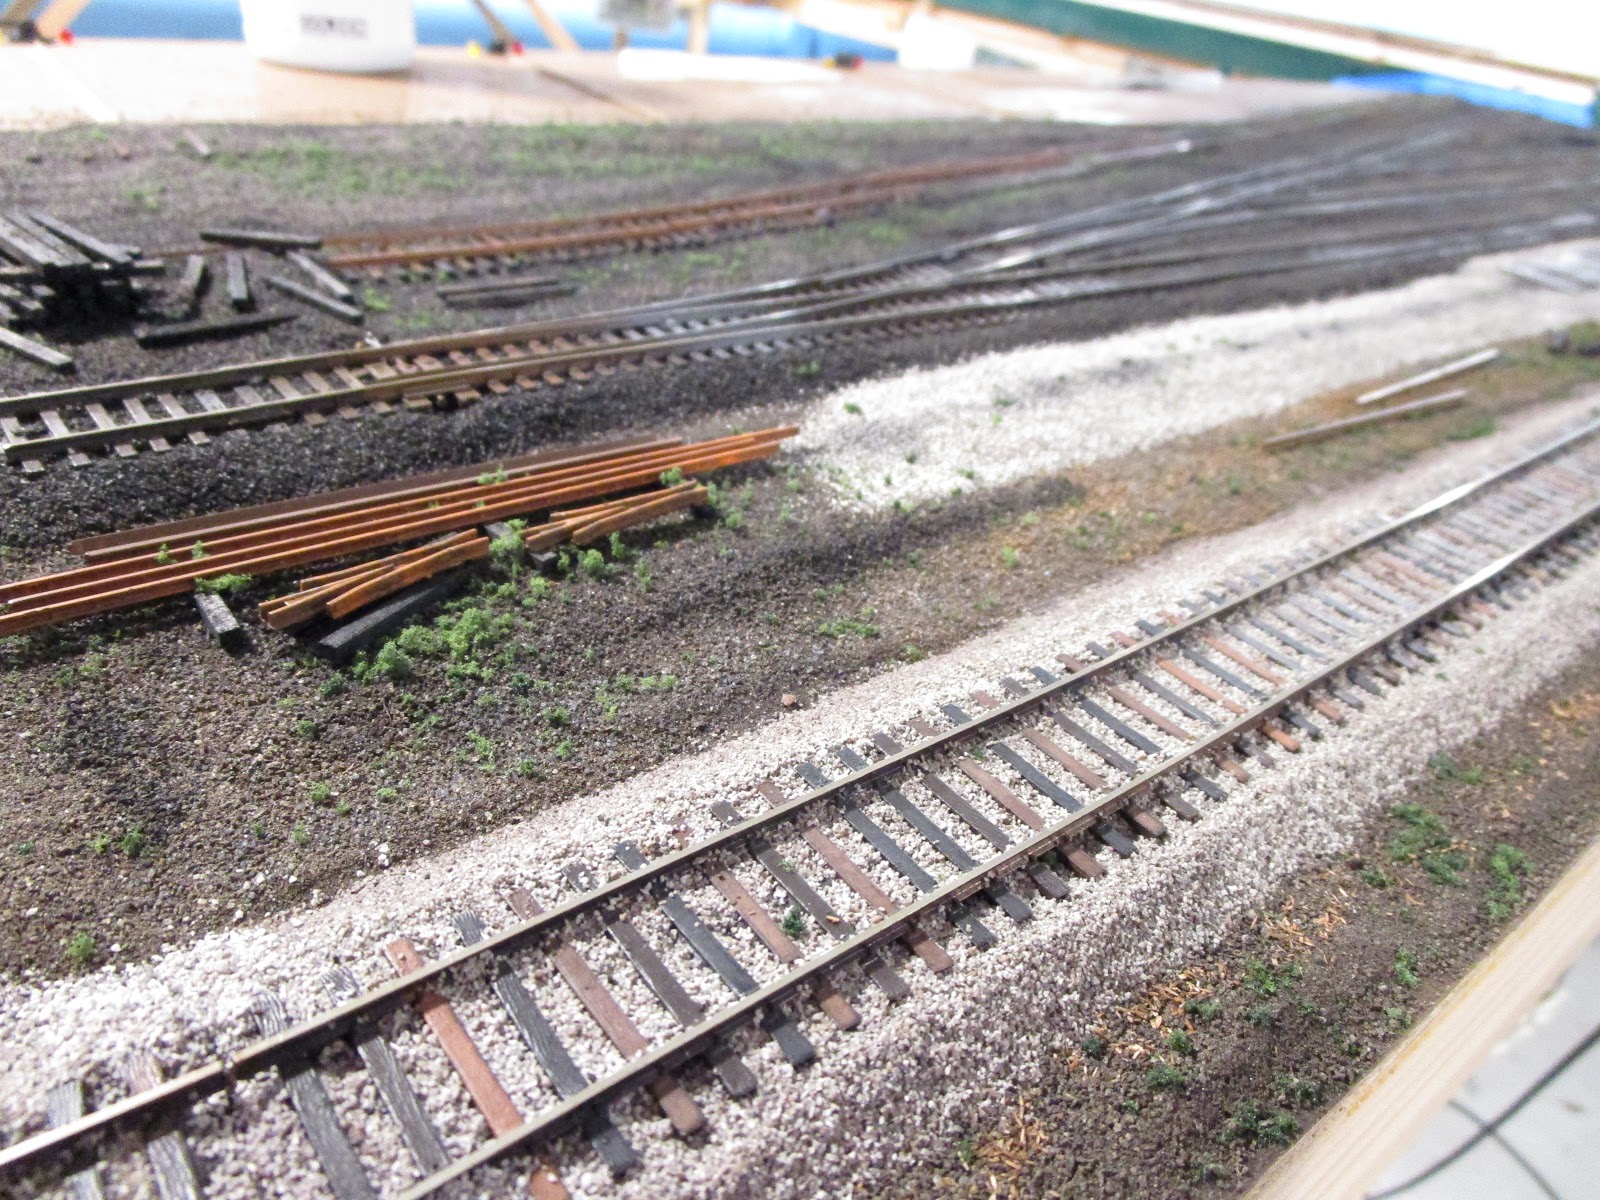 Some areas were modeled with just the ballast roadbed. One section had neatly laid ties which transitioned into a ballast bed with the remains of track visible on the edges (rails, ties) and dirty, greasy residue running along the center. Then, it abruptly ends and there is an area with just plain dirt and weeds and such. I think I might park a work truck or some other piece of equipment here to indicate that this place is still being reviewed. There wasn't as much evidence of vehicle roads along the mainline in this area, but I wanted to keep that option open when I laid the track. I think the break between the mainline and the yard gives the later some breathing room.
 And here is where we are now. I have lots more to do, including installing a backdrop and some trees and telephone poles along the back. In the foreground, I want to add a rail-served structure and maybe another one that has lost rail service. Modeling the month of May means lots of greenery, and that means static grass! Ground foam is nice, but static grass is the next step towards realism. And I want to add a lot of it. I will need to buy a machine and start experimenting but I am excited about that next step. All in all though, I am really quite pleased about where my layout is right now. It is fun to finally get to use the artistic side of my brain.
Note: because the backdrop wasn't in place yet, some of the pictures were taken from one side of the layout and some were taken from the other side. This last picture showing the overall scene was taken from the outside looking in.
Well, it all looks very well thought out and well done as well. I really like the whole "feel" of the project.
ReplyDeleteJim @ JSSX
Thanks!
ReplyDelete