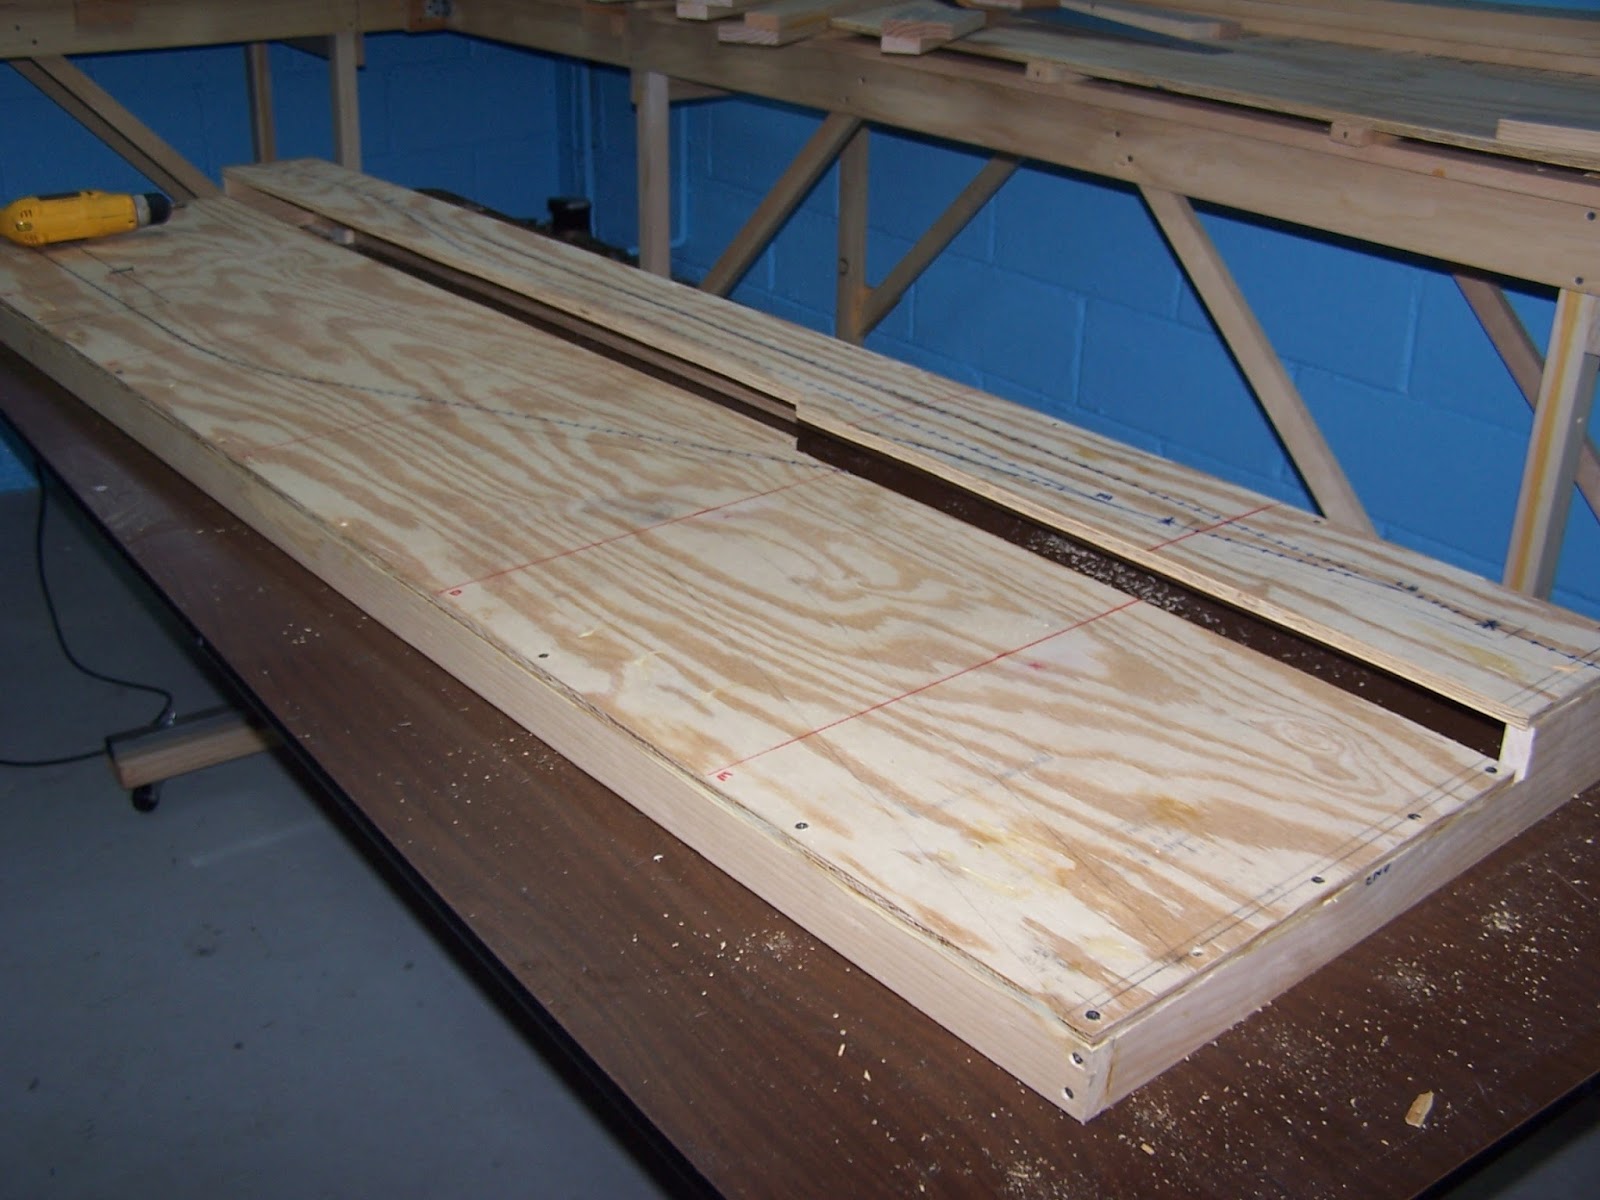
While I was working, I decided to put on the soundtrack CDs to Star Wars Episodes IV-VI. Five hours later, I had a different plan. I would make sure the tops of the sections were level and then bolt them together, to be semi-permanently joined. Once the track is laid and wired up, I likely won't be taking them apart or moving them again except in extreme circumstances (such as remodeling the basement, moving to a new house, or re-configuring them. So, I put them upside down on my work table and drilled for 1/2" diameter bolts. Of course, it took me three trips to two different hardware stores to get the right number (and size) bolts, nuts, and washers. That's how it goes.
This blog will be a record of my personal journey in researching, building, operating, and finally sharing my HO scale layout based on the Delaware and Hudson Railway's "Colonie Main Line."
CP Executive train in Albany
Sunday, August 20, 2017
Benchwork: leveling / adjustments & Mohawk Paper
Then, I started placing the sections together on the supporting framework. Some of the cross-braces were moved to better support the corners. Some leveling was necessary too. It was frustrating, because no matter how hard I tried to make each of the sections perfectly square and even (with the plywood neither extending beyond or coming up short) with the 1x4" frame it wasn't perfect. Had I not been building a sectional layout, it wouldn't have mattered as much. Even worse, my 1x4 " lumber wasn't a consistent thickness (sometimes as much as 1/8" off) but I didn't realize it when I was building my sections. Thus, leveling the L-girder supports didn't help and the benchwork just didn't line up.
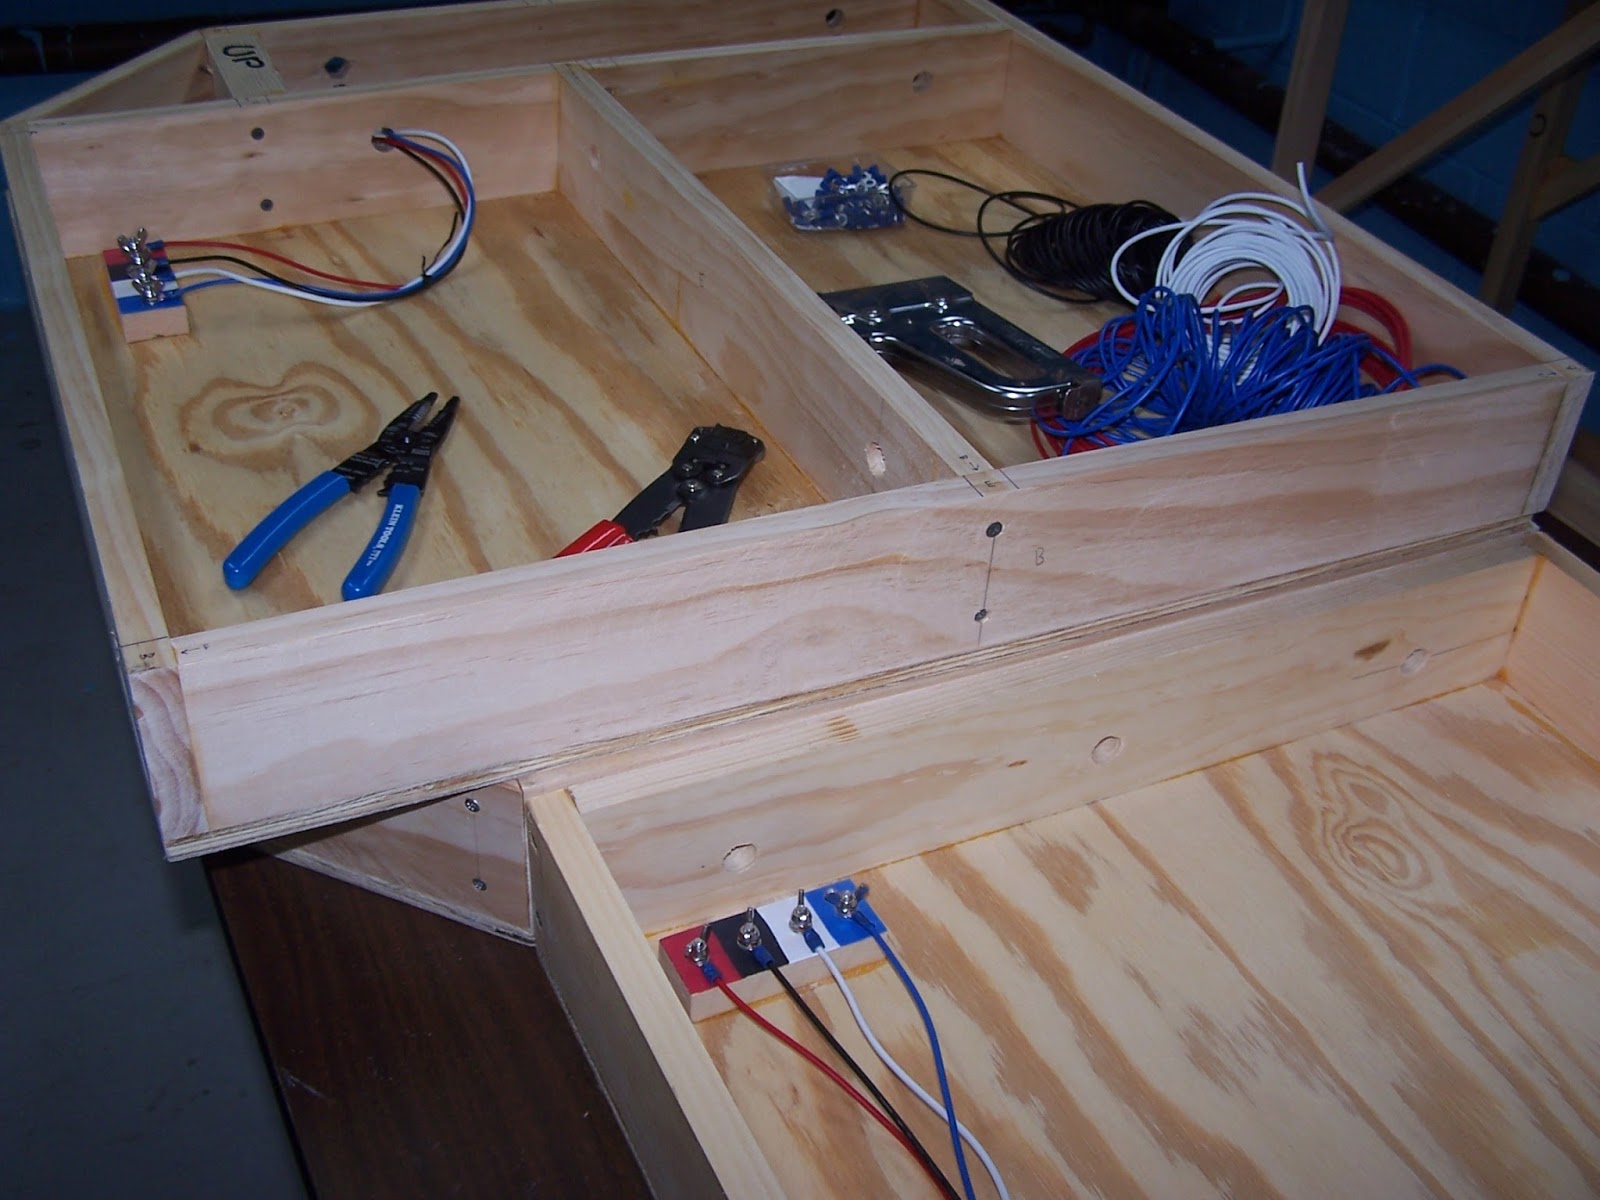
Deciding to put it on hold for awhile, I ordered a bunch of wire in four colors and prepared to pre-wise the bus lines for the layout sections, Each will have four 14 gauge wires running the length of the sections. Red and Black wires will be for track power (DCC bus lines), and Blue and White will be power for the Tortoise switch machines. The cross braces were already drilled with holes for the wires to safely pass through, but the ends presented a problem. I stapled a twist tie in a couple of places to the underside, and it is easy to use that to secure the loose wires (but allow for easy adjustment later). I thought about buying screw terminals but accessing them every time I wanted to disconnect the wires to remove a section seemed problematic. So, I made some with 1/4-20 bolts and wing nuts mounted into holes drilled in some wood trim I found lying around.
While I was working, I decided to put on the soundtrack CDs to Star Wars Episodes IV-VI. Five hours later, I had a different plan. I would make sure the tops of the sections were level and then bolt them together, to be semi-permanently joined. Once the track is laid and wired up, I likely won't be taking them apart or moving them again except in extreme circumstances (such as remodeling the basement, moving to a new house, or re-configuring them. So, I put them upside down on my work table and drilled for 1/2" diameter bolts. Of course, it took me three trips to two different hardware stores to get the right number (and size) bolts, nuts, and washers. That's how it goes.
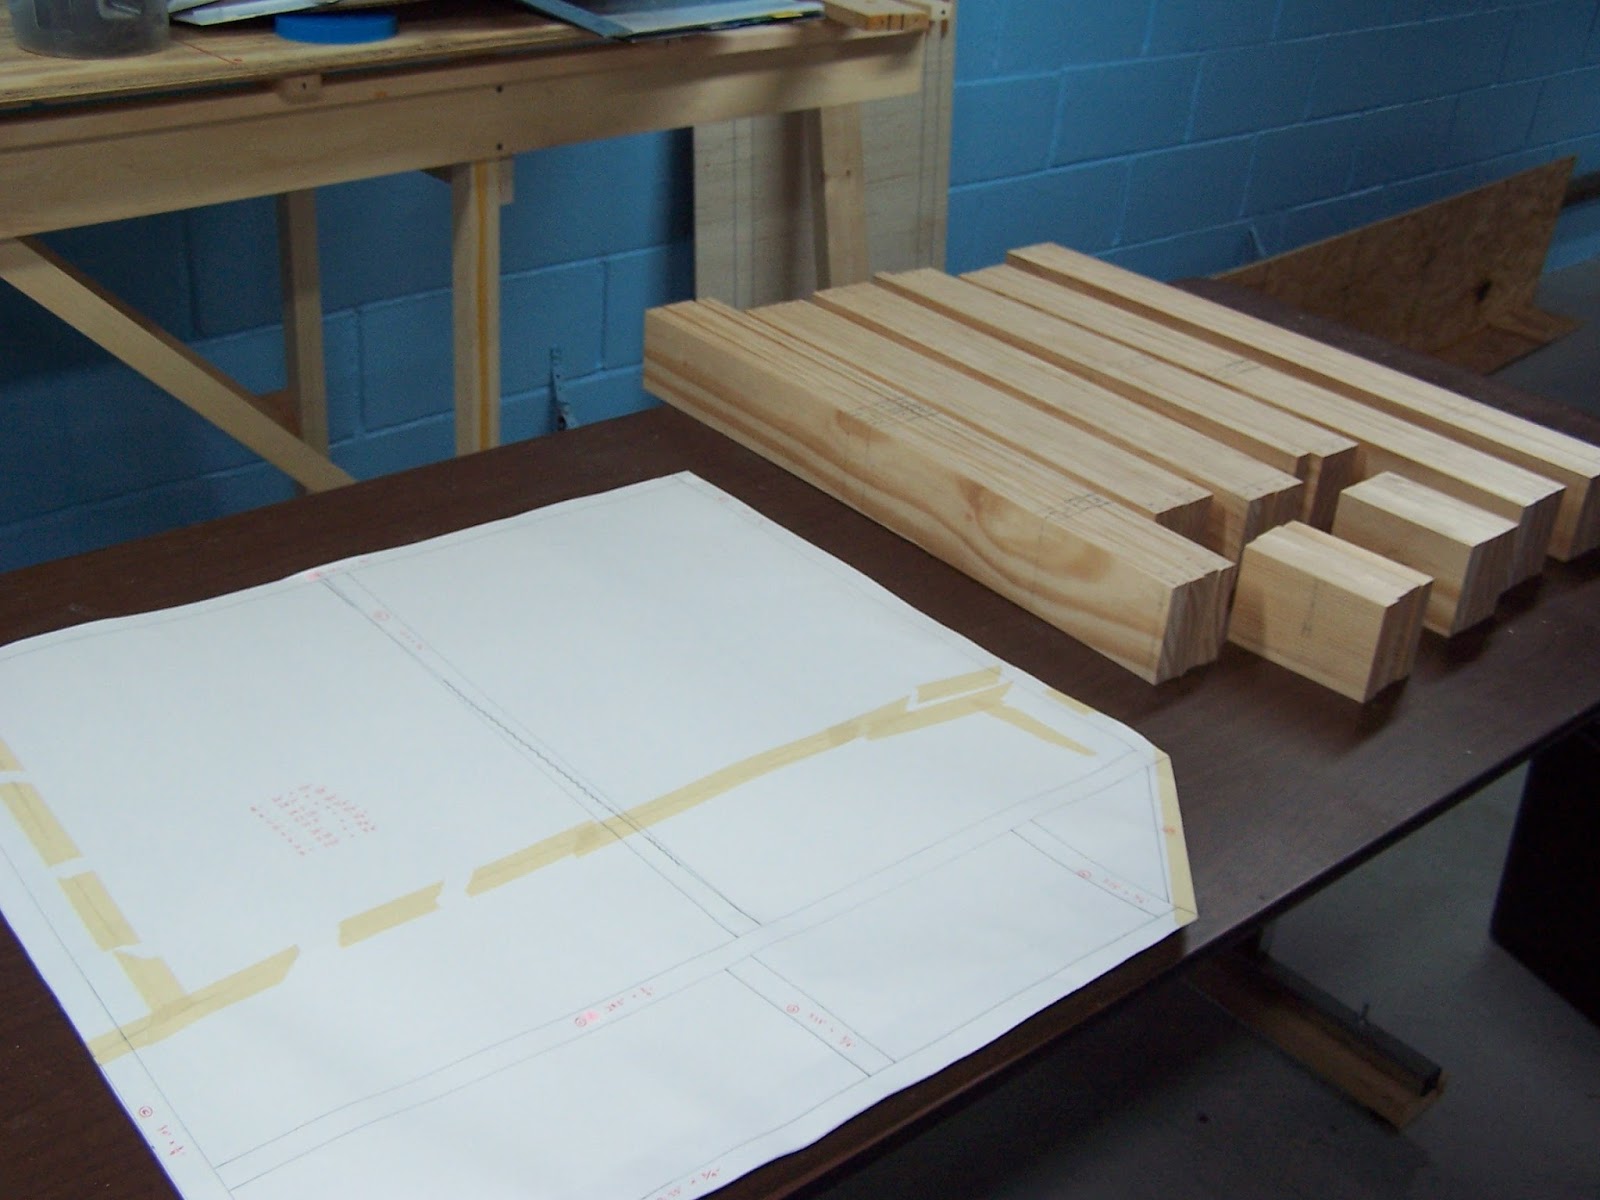
Next, I decided to put my new jigsaw to use. I had previously sketched out how the Mohawk Paper module would look, which is a bit interesting with its multi-level right-of-way, intersecting streets, multiple crossings, and even a bit of track that is "hidden" in a small forest. Building benchwork here would require thinking from the ground up. I planned on doing a "cookie cutter" approach until I saw an advertisement for Woodland Scenics foam incline risers. They are available in 2% and 4%. I will check them out. Had I decided to have the plywood make the ramp, it would have involved a grade on an "S" curve and the joints at the top/bottom of the grade likely would have been badly joined.
I then cut the intermediary crossbraces, which needed to be trimmed along the top. Instead, I made them all out of the thinner (in height) wood I had, and added a full-height piece of 1x4" lumber on the back end. This is a big clunkier, and certainly a little bit heavier, but it also meant I didn't need to use the jigsaw constantly. And, they are consistently high throughout. Another decision was necessary here, and it is somewhat of a big one. I could either make the ends of the section full-height 1x4" (actually 3.5") or cut it down so that the scenery on the lower part of this section can cascade onto the adjoining sections. I mulled it over and chose the later. The lumber for this section was another $20.
While it looks somewhat silly now with the roads ending at the next piece of benchwork, if I ever expand the layout I will be able lengthen the scene without having to hack away the end 1x4s. Besides, there really is no easy way to do this considering the corner sections on either side are definitely not going to be ramped to meet the lower area. When I take pictures of this section, I will just need to be careful with my viewing angles.
With the benchwork now 75% of the way around the area, I only need to work on one more corner section and the straight section for the "entrance" side. My goal of having a train run around the mainline by the end of 2017 seems realistic. However, since I don't know what I am modeling for the fourth section, I need to do some more research. Running total for benchwork is now $586 + $20 for the lumber for the Mohawk Paper section, so $606 total.
While I was working, I decided to put on the soundtrack CDs to Star Wars Episodes IV-VI. Five hours later, I had a different plan. I would make sure the tops of the sections were level and then bolt them together, to be semi-permanently joined. Once the track is laid and wired up, I likely won't be taking them apart or moving them again except in extreme circumstances (such as remodeling the basement, moving to a new house, or re-configuring them. So, I put them upside down on my work table and drilled for 1/2" diameter bolts. Of course, it took me three trips to two different hardware stores to get the right number (and size) bolts, nuts, and washers. That's how it goes.
Monday, July 24, 2017
Summer slow-down
My layout building hasn't ground to a halt yet, but it surely has slowed down. And not, I would argue, entirely due to me. It was getting a bit humid in the basement so last year I bought a good dehumidifier. However, its bin would fill up at least once a day and that meant I had to empty it once a day. Unfortunately, that entailed going up the stairs to our kitchen or bathroom... once a day. Lugging water isn't fun, especially with a golden retriever at the ready to trip you.
So, I hired decided to install a mess sink in the basement last summer. But, we had trouble figuring out how to tie it into the plumbing. So, this year I hired a professional to do it. Unfortunately, plans outside of my control have kept the plumber away from doing it. Once the sink is in, I can have the dehumidifier drain directly into it. This will save me wear and tear going up the stairs... and the basement will be truly dry.
On the bright side, the plumber I hired is located in one of the buildings served by the D&H on the portion of the layout I am modeling! He is located in the old Agway, right between the Colonie Liquor and the Southworth Machinery. He offered a tour of the place, which I will accept in the near future.
It is hard to justify spending a whole day in the basement when the weather is nice and there are chores to do. So, the layout sage continues...
So, I hired decided to install a mess sink in the basement last summer. But, we had trouble figuring out how to tie it into the plumbing. So, this year I hired a professional to do it. Unfortunately, plans outside of my control have kept the plumber away from doing it. Once the sink is in, I can have the dehumidifier drain directly into it. This will save me wear and tear going up the stairs... and the basement will be truly dry.
On the bright side, the plumber I hired is located in one of the buildings served by the D&H on the portion of the layout I am modeling! He is located in the old Agway, right between the Colonie Liquor and the Southworth Machinery. He offered a tour of the place, which I will accept in the near future.
It is hard to justify spending a whole day in the basement when the weather is nice and there are chores to do. So, the layout sage continues...
Monday, July 10, 2017
WW&F #3 coach build (part 2)
I had taken the time to measure the wooden frame piece from the kit (9+3/4" long x 1+7/16" wide) before soaking the cars, in case it warped horribly and had to be replaced. The truck mounting screw clearance holes are inset 1" from each end and about 1/4" in diameter. With those dimensions in mind, I looked in my supply stash and pulled out some 0.060" styrene sheet. I know people who love working in wood and have large inventories of stripwood but I prefer styrene and always have tons of it around. I had some 0.125" thick stuff that I thought about using but I was concerned it might be too thick and raise the interior up an unacceptable amount. After cutting and using methyl ethyl ketone (MEK, or "Methel Ethel kill me quick" as some of my friends call it) to attach the floor to the ends I confirmed the 10" spacing between steps. Then, I attached the middle portion of the frame and made sure it was in line.
I then used small square styrene strips to rebuild the frame members on the underside. I didn't bother to do the ones along each side of the frame, as they will get cut off in the table saw. Once the frames come back, I will glue styrene strips along all of the edges to restore them.
One of my strongest impressions of the cars was of the heavily varnished, ornately carved interior walls and trim. To that end, I painted the insides of the cars with a brown paint. Actually, I drybrushed them to build up color because I didn't want too much paint to seep onto the front or cause the body to warp. The brown I picked is actually lighter than the real wood, but because the car doesn't have interior lighting (I removed it) and will be dark inside, I think it will work. I don't want it so dark that it appears black. I may spray it will Glosscote to represent varnish, but I doubt it will be readily visible anyway.
Thursday, July 6, 2017
Benchwork: corner sections
I had the lumber yard cut more 15/32" plywood for the corner tops. I discovered I could get three 30" square pieces from a standard sheet, and hopefully the remaining pieces can be used to make the fourth. I may need to add additional bracing for that one to support any extra joints. Before I attached the plywood, I needed to cut and install the diagonal piece on the front of the corner sections. I discovered that some of the plywood was cut a little short in length (they apparently did not factor in the width of the saw blade), and some of my joints weren't perfectly square. Since I own a right-angle clamp, I should probably use it! So, I had to do some judicious sanding with a sheet sander I borrowed and some 40 grit paper.
Total cost for the four corner sections: $85 for the 1"x4" lumber, and $19 for the plywood, for a running total of $586. I have often wondered if I should have bought pre-made Sievers benchwork. For each of the 7-foot modules the cost would have been about $106 (a 48" long piece and a 36" long piece) and I would have needed four sides for a total of $425. Four 30" corner modules would have been $225 total. Shipping would have been $130 (20% of order). So, about $780 and that doesn't include the plywood top, or the legs, or the L-girders. I would also need to adjust cross-brace spacing and angle the corner sections. But, the benchwork would be perfectly square. Did I make the right decision? I don't know. Quality benchwork is an investment, and it isn't all about dollars and sense. Because I am making mine sectional, there are a lot more joints and plenty of room for error. But, I wanted to be able to say I built it myself. Before I lay any track I will finish all the benchwork and take stock at whether it is to a high enough standard to proceed. If not, Sievers it is.
Wednesday, July 5, 2017
WW&F #3 coach build (part 1)
My wife was visiting family over the fourth of July break, but I had to work so I was home all alone. With all this free time available, I cleaned off my workbench (mostly) and decided to try and work on this kit from Deerfield River Laser. My goal is not to construct a nut-and-bolt accurate model of the coach, but instead a "good enough" representation of the car we rode in. I am not a Maine 2-foot expert, nor is my wife... the two people who this car is for. Ironically, despite going to the WW&F and knowing I was going be building a model of this coach, I didn't take a single detailed picture of it. Idiot! The other coach in the WW&F train was B&SR #11, loaned from the Boothbay Railway Village.
Online Resources
As for online resources, there are two great links. Scot Lawrence, a railroad historian and modeler with many diverse interests, bashed to Bachmann coaches together to come up with a SR&RL RR coach of the proper length. His coach construction website contains many helpful tips and tricks, and he has also offered to help me with my project. Eric Shade, a frequently contributor to Garden Railways magazine, is building the same coach in 1:13.7 scale to run on Gauge 1 track. His build thread contains lots of pictures as well as some great drawings he made. Blue Mount Model Co. also makes some WW&F freight car kits which might be a fun diversion too in the future.
Online Resources
As for online resources, there are two great links. Scot Lawrence, a railroad historian and modeler with many diverse interests, bashed to Bachmann coaches together to come up with a SR&RL RR coach of the proper length. His coach construction website contains many helpful tips and tricks, and he has also offered to help me with my project. Eric Shade, a frequently contributor to Garden Railways magazine, is building the same coach in 1:13.7 scale to run on Gauge 1 track. His build thread contains lots of pictures as well as some great drawings he made. Blue Mount Model Co. also makes some WW&F freight car kits which might be a fun diversion too in the future.
Beginning Construction
I disassembled the cars and then followed the directions to cut the frame at the two locations required. The spacing between the two sets of end steps is supposed to be 10", so depending on how accurate you cut and how much you remove when filing and cleaning up the edges you may need to adjust the filler pieces accordingly. My steps were about 1/16" over 10", and not knowing how accurate I had to be I filed some more of the steps down. Then, I carefully attached everything to the wooden floor piece. I started at one end and worked my way down, using a straightedge to keep the plastic pieces straight. Upon final measurement, I had 10" exactly. I used a combination of super-thick superglue from Loctite and wood glue to attach everything together. The kit is designed to reuse the metal weight which I secured to the floor.
Also, I plan to strip the paint before sending the pieces to be sawed. The roofs should be easy to do in 91% isopropyl alcohol, but the frames are another matter. I should have stripped the paint BEFORE building them. If I soak them now, the thin wood will warp and twist. However, I may risk it anyway because if it warps I can always replace the wooden pieces with styrene, which I prefer over wood anyway. And, the weld joint will be stronger than the superglue joint. Many things to consider...
Tuesday, July 4, 2017
New Book: Building a Sectional Layout
I was flipping through my most recent issue of Model Railroader magazine and they had a full-page advertisement for a new book by Pelle Soeborg titled "Building a Sectional Layout." Hey, I thought, I am building a sectional layout! While I think much of what is in this book probably has appeared in MR already (I remember an article from a couple of years ago by him discussing his benchwork), it seems that I might get some useful bits of advice from him.
Specifically, I am really concerned about my benchwork joints. Some of my sections didn't come out perfectly square, though until I clamp them all up I won't really know the extent of the problem. If I were going to cover everything with a layer of foam then I could hide the joints below. While I will certainly be flipping the sections over to do the wiring, once that is done I probably will never take the pieces apart again except for rare situations (moving to a new house, remodeling the basement, etc.) Certainly not on a regular basis like an NTrak module. So, it might be easy to hide the joints with scenic "Ground Goop" and just let it be.
But, the track joints will still be an issue as far as expansion and contraction. I have seen several methods ranging from removable track pieces to soldering rails to PCB ties at the joint. I have an idea what I am going to do, but I want to do some more research. This book will help with that.
Admittedly, he models the west and mid-west regions of the USA. I think he does a fantastic job of it, but that area of the country doesn't really interest me. I think it is because I find Union Pacific railroads to be somewhat boring and overdone. But, I have several of Pelle's other books on freightcar detailing and weathering and he is a good author and excellent photographer. In short, I can't wait to get this book!
Specifically, I am really concerned about my benchwork joints. Some of my sections didn't come out perfectly square, though until I clamp them all up I won't really know the extent of the problem. If I were going to cover everything with a layer of foam then I could hide the joints below. While I will certainly be flipping the sections over to do the wiring, once that is done I probably will never take the pieces apart again except for rare situations (moving to a new house, remodeling the basement, etc.) Certainly not on a regular basis like an NTrak module. So, it might be easy to hide the joints with scenic "Ground Goop" and just let it be.But, the track joints will still be an issue as far as expansion and contraction. I have seen several methods ranging from removable track pieces to soldering rails to PCB ties at the joint. I have an idea what I am going to do, but I want to do some more research. This book will help with that.
Admittedly, he models the west and mid-west regions of the USA. I think he does a fantastic job of it, but that area of the country doesn't really interest me. I think it is because I find Union Pacific railroads to be somewhat boring and overdone. But, I have several of Pelle's other books on freightcar detailing and weathering and he is a good author and excellent photographer. In short, I can't wait to get this book!
Monday, July 3, 2017
Arcade and Attica Railroad - 100th Anniversary
This past weekend my wife and I went to Arcade, NY, to celebrate the Arcade and Attica Railroad's 100th anniversary. This is a railroad that is near and dear to my heart, and it has been a part of my life for 30+ years. When I was younger, my family used to come to ride the train every year. In the past fifteen or so years, I haven't been able to make it back as much but I try to ride it when I can. However, as a shareholder of the company, I also usually attend their annual meetings.
Originally a three-foot narrow gauge railroad in the late 1800s, it went through a series of corporate changes (and a widening of the gauge) until 1917, when it formally became the Arcade and Attica Railroad. Primarily a freight hauler, in 1962 the railroad decided to reacquire a steam locomotive and began running excursions using ex-DL&W "Boonton" combines which, from what I understand, are pretty rare. It later purchased some coaches too. The A&A still uses the same passenger cars to this day, which is a pretty remarkable accomplishment.
I have been riding and photographing the line for decades, even though it hasn't changed a lot. By now, I pretty much know all the good photo opportunities. Rarely do the train consists change either (I would love to see a boxcar in the mix sometime) and the steam engine always faces North. However, after rebuilding the wye in Arcade recently the railroad decided to turn the train engine around for a couple of weekends. One was their official 100th anniversary celebrations during Memorial Day weekend (sadly, I was in Maine), and this July weekend was the other. I couldn't pass up the opportunity.
My wife and I decided to take pictures of the first train of the day, and ride the second. It was raining off and on during the first trip, and I questioned our logic. But, the decision was made so away we went. There had been a lot of rain over the past week and various areas were flooded, making some pictures challenging and others impossible. But, we made the best of it and my wife has really turned into a great helper for me. She will have the camera ready for when I jump out of the car, or point out good places to shoot from. She has connections to the railroad too, as her grandmother lived a couple of houses down from the enginehouse.
We rode the second trip and spent nearly the entire time in the open-air gondola. Whenever we go on train rides, we always try and get to the open car if possible because it is so much easier to take in the sights and sounds of the passing countryside. It used to be open at the top and you would get covered with water and coal bits that came up the stack, but now there is a roof. That reminds me of the time we rode it on a date ten years ago and she wore a lovely white sweater... oops! The roof also provides some shade from the hot July summers, and it is a welcome relief.
The A&A's gondola is the same car that I rode in 31 years ago, and just as loud! My wife had to cover her ears for every road crossing whistle. When I was a kid I used to as well (that's me on the right in the white shirt with the blue sleeves... in 1987!) The locomotive has had several whistles over the years, which was discussed in an interesting discussion on an online forum. They use an even quieter ones for in town and use the louder one only for out on the main line.
Everyone has a "dream house" that they would like to live in. My dream house has always been a little place in Arcade, with a railroad that cut across its driveway. It doesn't look like a dream house, but the idea of seeing a train every day always makes me smile. The large parking lot next to the house belongs to the Arcade Fire Department, so I imagine the homeowners get to hear a lot of loud noises between the trains and the fire alarms. The steam engines burn wood while in town to cut down on the black smoke from making the houses and laundry dirty, which is a nice gesture.
When we arrived in Curriers we decided to take a picture before the engine cut off. We assumed we would have the front of the locomotive to ourselves, but beside my lovely wife is Dean, the fireman on our trip. I guess he managed to sneak into our picture! All in all, it was good to be back. I also got to talk to my friends down there and meet up with some people I knew only from online chat rooms and such. This little railroad is one of the most important things in my life. It is impossible to be in a bad mood when riding the train. It is my favorite place that I have ever been to. Even as I step off the coaches I fondly look forward to the next chance to ride it. A big "thank you" to Brad, Dean, Pat, Brian, Matt, and the rest of the gang at the A&A!
Originally a three-foot narrow gauge railroad in the late 1800s, it went through a series of corporate changes (and a widening of the gauge) until 1917, when it formally became the Arcade and Attica Railroad. Primarily a freight hauler, in 1962 the railroad decided to reacquire a steam locomotive and began running excursions using ex-DL&W "Boonton" combines which, from what I understand, are pretty rare. It later purchased some coaches too. The A&A still uses the same passenger cars to this day, which is a pretty remarkable accomplishment.
So successful was the conversion from steam to diesel power in 1941 that General Electric famously featured the A&A in their promotional material for their 44-tonner engines. In 1988, the A&A decided that it didn't make sense to keep two steam engines running for excursion trains so ten-wheeler #14 (former Escanaba & Lake Superior RR) was holed up in the engine house and consolidation #18 (former Boyne City Railroad) became the primary motive power for the passenger trains. They also have four centercab diesels: two 44-ton engines (#110, 111); one 65-tonner (#112), plus an 80-tonner (#113). Though two aren't used anymore, it is still a large stable for such a short railroad. The primary freight hauled is agricultural products for the area farms, usually in covered hoppers and tank cars.
We rode the second trip and spent nearly the entire time in the open-air gondola. Whenever we go on train rides, we always try and get to the open car if possible because it is so much easier to take in the sights and sounds of the passing countryside. It used to be open at the top and you would get covered with water and coal bits that came up the stack, but now there is a roof. That reminds me of the time we rode it on a date ten years ago and she wore a lovely white sweater... oops! The roof also provides some shade from the hot July summers, and it is a welcome relief.The A&A's gondola is the same car that I rode in 31 years ago, and just as loud! My wife had to cover her ears for every road crossing whistle. When I was a kid I used to as well (that's me on the right in the white shirt with the blue sleeves... in 1987!) The locomotive has had several whistles over the years, which was discussed in an interesting discussion on an online forum. They use an even quieter ones for in town and use the louder one only for out on the main line.
Everyone has a "dream house" that they would like to live in. My dream house has always been a little place in Arcade, with a railroad that cut across its driveway. It doesn't look like a dream house, but the idea of seeing a train every day always makes me smile. The large parking lot next to the house belongs to the Arcade Fire Department, so I imagine the homeowners get to hear a lot of loud noises between the trains and the fire alarms. The steam engines burn wood while in town to cut down on the black smoke from making the houses and laundry dirty, which is a nice gesture.
The picture on the right is me standing on the pilot of #14 in 1986, resplendent in solid black with yellow trim. While many consider that paint scheme to be the worst one that the A&A used (with perhaps the Halloween scheme of solid black and orange a close second), it is actually my favorite. I am sure that is entirely because it is what I remember from my childhood. Also, on the right are the wooden steps just behind the fireman, which were used to allow passengers to walk through the cab and get a tour of it. They recently brought that back, which is pretty awesome. I went through the cab on this trip but didn't take any pictures.
When we arrived in Curriers we decided to take a picture before the engine cut off. We assumed we would have the front of the locomotive to ourselves, but beside my lovely wife is Dean, the fireman on our trip. I guess he managed to sneak into our picture! All in all, it was good to be back. I also got to talk to my friends down there and meet up with some people I knew only from online chat rooms and such. This little railroad is one of the most important things in my life. It is impossible to be in a bad mood when riding the train. It is my favorite place that I have ever been to. Even as I step off the coaches I fondly look forward to the next chance to ride it. A big "thank you" to Brad, Dean, Pat, Brian, Matt, and the rest of the gang at the A&A!Thursday, June 1, 2017
Maine Trip - MNGRM (part 3)
The gardens were lovely, and they had a Children's Garden area that was especially enjoyable. They also had lots of hiking trails, a rose garden area, and several quiet areas where it was possible to get lost among the plants. I believe my wife really enjoyed it too, and it was more for her than for me. After an hour, a plant is a plant. But, they also had a kettle corn vendor on hand originally from Utica and we had fun talking to them about that.
Then, in the afternoon we went exploring for a lighthouse. Specifically, we went to the Pemaquid Point Lighthouse Park. I mean, why not. It is Maine, after all! We arrived in the mid-afternoon and walked through the fisherman's museum at the base of the lighthouse, then walked along the rocks. It was startlingly beautiful, and my first real impression of "the ocean." I have been to Boston a lot and seen the water, but this was different. The rocks on the shore were really cool looking, and we searched for some small shells to bring back. Along the way we slipped and got our shoes wet, but I suppose that is how it goes. It was pretty neat to see the dozens of buoys marking lobster traps below the water. Then, after a dinner of leftover pizza (from my birthday lunch) the sun set over the inn and I passed out exhausted from all of the walking we did.
Monday, Memorial Day, was entirely different. It was rainy, gray, and cold. I believe it was in the fifties, and we did not pack winter jackets though we saw some people in them. However, it was the last day of our trip and we planned to explore Portland and walk around the shops. The first stop was the Maine Narrow Gauge Railway Museum. Located along the coast, the museum ran along tracks that originally were standard gauge belonging to the Grand Trunk Railway. When Edaville closed in 1992, the MNGRM stepped up and purchased a lot of the trains and shipped them up. They have quite a collection, housed indoors in a formal museum, as well as at least 8 coaches outside which they use for excursion trains. The ride isn't all that long, along the coast and back, and today proved to be especially difficult for them.
We arrived around 10AM expecting to miss the train scheduled to depart that hour, but were told that their regular engine wasn't working, their operable steam locomotive had been loaned out for the summer, and their back up engine wasn't starting up. So, there was no 10AM train but they hoped to get things working by 11AM. Despite having much to photograph outside, I only took a couple quick shots and headed indoors to the heat. Their collection consists of several coaches (including the only Parlor car in existence in the USA, the "Rangeley"), some freight cars and cabooses, and a steam engine.
Actually, they have two steam engines that originally ran on the Monson Railroad. A special note about them was that after the Monson closed the engines were sold to a scrap dealer in Rochester, NY, where they remained until found and sold to the Edaville Railroad. One engine as I said was on loan, and the other was on static display. They were located in Rochester in a junkyard at the corner of Lyell Avenue and Mt. Read Boulevard, only a few miles from where I lived as a kid. Pretty neat, if you ask me. Two-footers in Rochester yet!
My wife and I love riding the open-air cars, but today it was just too cold to do so. Despite that, we enjoyed our little trip out. We rode out close to an old swing bridge that was taken out of service in 1984. Then, we were allowed to disembark and walk around. Kids could sit in the engine (I think only kids could fit in it) and ring the bell... a nice touch. Then, after everyone had boarded again the train made its way back to the station. All told, the trip was about 45 minutes though it felt like a lot longer. On a nice day, I bet it would have been enjoyable and perhaps refreshing to ride along the coast and feel the spray from the water. Instead, we were subjected to cold water and our views were of a few boats and a lighthouse in the distance.
The staff were extremely pleasant considering the unfortunate situation they were placed in with the engine not working. There is a movement afoot to relocate the museum to a place that is better suited for it, and I do hope that they succeed. Everything we saw was in good shape and it really is a shame that they are located in what amounts to a run down warehouse in seemingly the middle of nowhere.
We took a bus tour around Portland and the driver/narrator told us all about the city. It was a bittersweet trip, as we wanted to enjoy it but it was so cold and miserable out. Plus, it was our last afternoon in Maine before a 6 hour drive home that evening. We went to another lighthouse, which was much nicer than the first even though we didn't walk around much outside. Then we checked out lots of little shops including a candy store, a popcorn store, a toy store, a potato donut shop (yum), a cooking supply store, and a general tourist trap.
Maine Trip - Boothbay (part 2)
After leaving the WW&F, we headed through Wiscasset on our way to the next train destination. Though I am admittedly not a big fan of seafood and have never to my knowledge eaten lobster, a vacation in Maine and a trip through Wiscasset wouldn't be complete without stopping at Red's Eats for a lobster roll. While waiting in line, we met a great chap from Canada
(Wendel) who was touring the USA. The 20 minutes in line went by quick and the weather was perfect for socializing and taking
in the views. I ordered the fried haddock sandwich with cheese, lettuce
and tomato. It was huge. The bun underneath barely held half of the fish and it tasted wonderful even though I ended up using a fork to enjoy it. My wife had
the lobster roll and she said it was fantastic. Wendel had the lobster roll and
scallops, which were huge (The scallops were as large as
an Oreo cookie)! However, the real show stopper for me was their fried
mushrooms. They were incredibly good.
We then headed off to the Boothbay Railway Village. This was arguably the first restored 2-foot gauge railroad in Maine and was started by a gentleman who wanted to own his own 2-foot railroad (who doesn't?). He built some track on his property and over time developed it into a tourist attraction focusing not only on trains. The photo at right shows that the track follows the land, with sharp curves and steep grades.

Surprisingly, the star of the railroad are engines that weren't built in Maine but originally were constructed in Germany by Henschel & Son. Boothbay currently owns four of them- two operating, one for parts, and one on static display- and a member owns a fifth engine under rebuilding. These engines were made famous in G scale by the company LGB. The train consists of a small coach that looks to be in excellent shape and which I suspect is a reproduction (it is too short to be an original 2-foot coach, likely a concession to the sharp curves at Boothbay) and a second car with benches.
Then, we lounged around on the pier in Wiscasset and took in the sun. While my wife talked with someone in the information booth, I looked at the ocean and noticed the remains of the pier where the WW&F came into town and interchanged freight with the Maine Central Railroad. By now, there was little left of the piers. as 80+ years of salt water had broken them down.
As it currently stands, it is a restored village of sorts with houses, barns, a blacksmith shop a town hall from 1847, a chapel from 1927, and several train stations. Restored inside these buildings are treasurers from a collection of housewares (including dozens of salt
shaker sets), antique firetrucks, and farm equipment. However, I came for the trains so I was focused on them.
They have several areas with trains to see. There is an old porter and some boxcars and a coach under shelter. They have a room with an extensive train layout that really got the kids excited (though the loud music and noise from all of the running trains gave me a headache.) They had a barn focused on 2-foot trains, with models and pictures devoted to each of the five railroads. They had an old 2-foot train that people could play on and in. They had some exhibits such as a boxcar gifted from France after WWII, and a caboose. But, the highlight for me was the 2-foot gauge train that encircled the museum grounds.
The weather was perfect, so we chose the second car. The train runs around the grounds past the car barn, workshop, through a station, into a covered bridge, past a pond, and then back to the original station. The trip is two laps around, though during the second loop the train stops at the far station for 5 minutes if people want to get off or back on from an earlier trip. It saves about 5 minutes of walking, but is a nice touch. I chose to get off at the 2nd station to set up for some photo opportunities. While I was waiting for the train, I saw several frogs and a turtle in the pond.
After the ride, we talked with the crew briefly (it was their last trip of the day, and I didn't want to hold them up from going home) and they offered to let me tour the shop the next day. Sadly, we had other plans. The gift shop was nice, but aimed more at the general tourist than the railroad buff. Sure, there were railroad things there but lots more "Maine" stuff in general. We heard about Moxie soda, and though they didn't sell it I vowed to find some to try.
All in all, I had a much better time than expected. I thought it would be a bit childish and to be honest, in parts it was. But, trains bring out the child in me so I don't mind. The train alone was fun to ride and though it didn't evoke feelings of riding in Maine it certainly was enjoyable. It felt like an amusement park train ride, but a train is a train. Since we passed this museum every day to and from the Inn where we were staying, I got to see the train depart multiple times. I wish I had an extra hour here to see everything, as 2 hours just isn't enough if you care to read and see it all.
Maine Trip - W.W. & F. (part 1)
Our room at the Beach Cove Waterfront Inn was absolutely perfect. They had recently renovated half of the rooms and the bed overlooked an inlet out the window. Though the scenery was more reminiscent of the Adirondack Mountains than coastal Maine, it was beautiful and relaxing. We checked in late around 11PM, and we could smell the pastries that they were preparing for next morning's breakfast.
The history of Maine two footers is a convoluted one, with there being five original 2-foot lines developed to bring railroad service to the smaller communities of Maine at a much cheaper price than regular 4', 8" (standard gauge) railroads. However, as one after another began to fail in the 1930s and 1940s some of their equipment was purchased by the remaining railroads. Then, in the late 1940s much of the surviving equipment was purchased by Ellis D. Atwood and transported to Carver, MA, to run on a loop of track surrounding his cranberry farm. He also built from scratch some cars for his visitors to ride on. His passed away in 1950 in a boiler explosion, his successor passed away in 1967, and the Edaville Railroad struggled on until 1992 when it was closed and most of the equipment was sold to the Maine Narrow Gauge Railway Museum.
As a result, some equipment I saw this weekend could have been: (1) original to one or more 2-foot railroads, (2) replicas of equipment built by Edaville, (3) cars built within the last 60 years purely to carry passengers without regard to historical accuracy, or (4) authentic reproductions built in the last ten years or so. As someone whose knowledge of 2-foot railroads is pretty thin, I just planned to take pictures and enjoy the ride.
The engine ran around the train, coupled up, and back we went. It was cool to see them couple up. We stopped at the middle station where the railbus (referred to on the schedule as a "second class train") was waiting for us. We didn't ride it, but it would have been fun. When we got back we wandered around and took some pictures and then visited the gift shop. Though small, it has an extensive collection of railroad books on Maine 2-footers, as well as the usual magnets, pins, etc. We saw a print on the wall for sale that we wanted to buy, but sadly were told it was out of stock. I did come away with the book The Maine Two Footers by Linwood Moody, which I planned to purchase to read during the trip.The staff were friendly and in abundance. I am not sure if it was their first public run day of the year, or a training day, or all the volunteers just wanted to "play trains" but there were probably 8 people on the crew for a two-car train. They were instructing at least one person in the duties of a brakeman, which was important here as the coaches are controlled with handbrakes.
All in all, the WW&F was fun and represents a lot of hard work by its volunteers. We didn't stay much longer as I am not sure what else there would have been to see, but when they put in the sawmill and provide demonstrations it will add something else to do. I was quite impressed with the place and wish them luck in the future.
Subscribe to:
Posts (Atom)