

Online Resources
As for online resources, there are two great links. Scot Lawrence, a railroad historian and modeler with many diverse interests, bashed to Bachmann coaches together to come up with a SR&RL RR coach of the proper length. His coach construction website contains many helpful tips and tricks, and he has also offered to help me with my project. Eric Shade, a frequently contributor to Garden Railways magazine, is building the same coach in 1:13.7 scale to run on Gauge 1 track. His build thread contains lots of pictures as well as some great drawings he made. Blue Mount Model Co. also makes some WW&F freight car kits which might be a fun diversion too in the future.
Beginning Construction
 With that being said, I had to make a pretty big decision upfront when ordering: do I build it a scale 7.5' wide which will match the other Bachmann On30 equipment, or 6.5' wide to match the true Maine 2-footers? The engine I plan to use, a Bachmann Forney, is a scale 7.0' wide which is just right for a medium-sized Forney. D.R.L. offers the kit with ends of either width and you need to specify when ordering. I choose the "narrow" ones. I will mount the cars on standard On30 trucks (which will allow me to run the car on HO track) but should I ever decide to convert the cars to the proper On2 it will just mean swapping trucks.
 It is a really nice kit, and only the second laser-cut wood kit I have built. It uses Bachmann On30 coaches as donors for parts. Specifically, for each 2-foot coach you needed one and a half Bachmann coaches. This is because the Maine cars are 46' feet long, but the Bachmann coaches are much shorter. The kits essentially involve taking the Bachmann cars apart, splicing the roof together (4 roofs will yield three finished 46' long roofs), and also splicing the frames. The kits come with instructions on where exactly to cut to do this, and they provide wooden spacers for the frames. But, it all relies upon those Bachmann coaches and I had none. So, after looking on Ebay I was referred by D.R.L. to the On30 Swap Meet Yahoo group. Bingo.
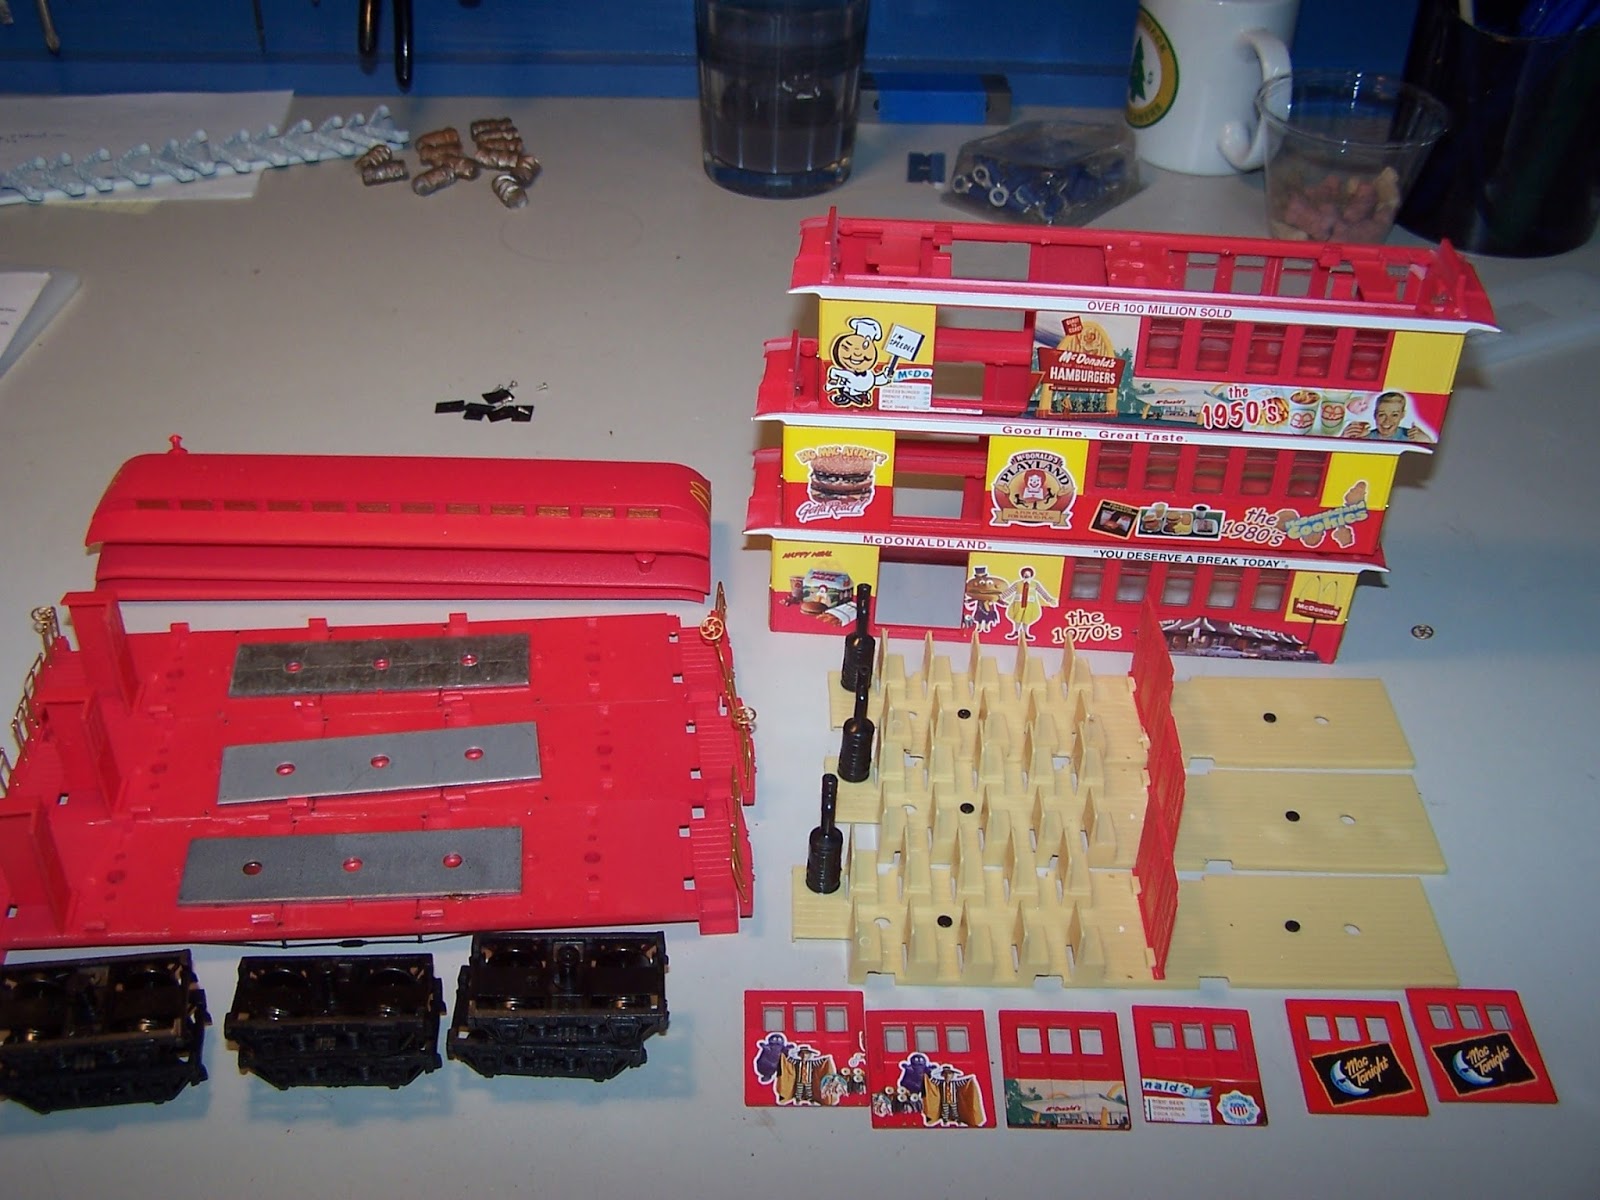 I saw a listing by someone there for cheap ($20 each) On30 coaches, but they were painted in various unrealistic "Collector" schemes. I didn't really care what I got, but I did want them to all have the same color clerestory windows (thanks Scot for the head's up!) I bought three cars- it doesn't matter if they are coaches or combines- from the seller and waited to see what arrived. When I opened the box, I was surprised to find McDonalds cars. Apparently, they must have authorized a special train set. The cars were decorated to celebrate different eras in their history, and there looks to have also been a caboose offered. I used to work as a manager at a McDonalds, and I got a kick out of them.
 Then, the kit provides you with small pieces of wood to glue to the bottom of the frame spacers to represent the floor beams. They were a nice gesture though they seemed a bit oversize for what they were supposed to do. I still used them, but likely once everything is painted black and hidden in the shadows of the car they will not even be visible. The kit is also designed to reuse the existing truss rods and end railings, but I elected to just clip them off. The railings were bent anyway, and trying to remove them was tough. I figured I would break them anyway, so I will replace them with Grandt Line parts (#3821) and wire in the future. All in all, this part of the project went pretty smoothly.
 The roofs were going to be a bit more complicated. To end up with a scale 46' long roof, I needed to combine two. Also, since the cars are going to be narrower than the stock Bachmann cars, I would then need to slice the roofs lengthwise and remove portions, and then glue everything up. I knew I didn't have the knife skills for the narrowing, so I contacted Scot (he had the website linked above) and talked with him about it. He has a miniature table saw that he purchased when he was building 2-foot coaches, and he readily agreed. The cuts to the roof are specifically called out, and the final roof is supposed to have the same spacing along the clerestory sections. Using those as a guide, I put some tape on the roof and then used a machinist's square to start the cut. I tried to hold the saw as vertical as possible.
 The first cut went pretty well, and I labeled each roof piece so I wouldn't mix them up. Because Scot was gracious enough to help, I figured I might as well make a second roof up in case I built another car in the future (or screwed this one up)! The second one didn't come out as nice. However, plastic putty and some sanding should take care of hiding the seams for the most part. I then used some styrene from my supply to reinforce the roof joints. The kits come with a piece of wood to be superglued in place, but I wanted to use styrene because the plastic welded joints would be stronger than the superglue. I didn't want the roof coming apart while being put through the table saw. I also reinforced the sides of the roof.
 I was feeling pretty good at this point when I decided to read the instructions about narrowing the roof. That is when I realized they weren't in the kit, and a sick feeling came over me. I rushed to my computer upstairs and went to the DRL website and found the instructions on not only narrowing the roof but also narrowing the frame. At this point, my frame was pretty well put together and I didn't want to take it all apart to remove a 1/4" strip down the center. The only other option I had was to just build the cars the same width as the Bachmann cars (7.5 scale feet) and order wider ends from D.R.L. However, Ed talked me off the cliff and suggested I just remove 1/8" from each side of the frame. While not an easy thing to do, Scot again offered to do it with his table saw. So, I think I am back on track. While the instructions for narrowing the roofs and frames are on the website, it would have been helpful if D.R.L. had included in the kits with narrow ends. Perhaps in the future?
Also, I plan to strip the paint before sending the pieces to be sawed. The roofs should be easy to do in 91% isopropyl alcohol, but the frames are another matter. I should have stripped the paint BEFORE building them. If I soak them now, the thin wood will warp and twist. However, I may risk it anyway because if it warps I can always replace the wooden pieces with styrene, which I prefer over wood anyway. And, the weld joint will be stronger than the superglue joint. Many things to consider...
No comments:
Post a Comment