
I wanted to do something different for one of my MMR structures. O scale would have resulted in a large building, and I had already built a few models in O scale already, so I thought small... N scale. Every N scaler is aware of the online "N Scale Encyclopedia" database and its accompanying railroad blogs where the modeler, Mark, has scratchbuilt lots of N scale structures. I have followed his website for over 15 years and decided that I would draw inspiration from him and do something in 1:160 scale myself.

Casting a net for a suitable prototype to copy, I knew I wanted it to be something that would have railroad track near it. That meant stations, depots, MOW structures, and/or rail served industries. Having done several brick buildings recently, I wanted a wood sided structure (though built from styrene, which I prefer). I searched Model Railroader magazine and found an article by Howard Lloyd in the January 1997 issue for a simple passenger station. It looked promising, and it had nice roof lines and windows which made it more than a four-walls-and-a-roof proposition. One of his pictures showed it on his layout where he had added additional extensions to make a Maintenance of Way (MOW) facility. I liked it a lot. When he mentioned that that the prototype station was based in Benton, Wisconsin, I was hooked!
Going about it backwards, I first asked my friend Doug for a piece of Atlas code 55 flextrack. He is an excellent N scale modeler and I wanted to use something nicer than the Peco code 80 track that I had lying around. Wow, was this stuff good looking. Atlas did a great job with it. Then, I photocopied the HO scale plans to N scale and picked up some Evergreen v-groove styrene siding (#4040). I laid out the walls on the stuff and cut them out.

It turns out I made the first three walls incorrectly with the wood boards running vertical instead of horizontal. But in N scale, that meant very little was wasted as each wall was about the size of a quarter. This was kind of fun! As I cut out the window and door openings I installed the castings, which were so small that I had to use microfiles to clean out the openings. Tichy window (#2509) and door (#2503) castings were used throughout.

The walls went together quickly and I used small, square bracing in the corners. One end has a sliding doorway with a door made from some grooved styrene rotated 90 so the boards ran vertical, and glued on.
The edge joints and roof joints were braced with more square styrene. I had to be careful not to install any where it would cause interference with window castings, other walls, or the roof. I didn't bother to follow the instructions in the article and just figured it out as I went along.

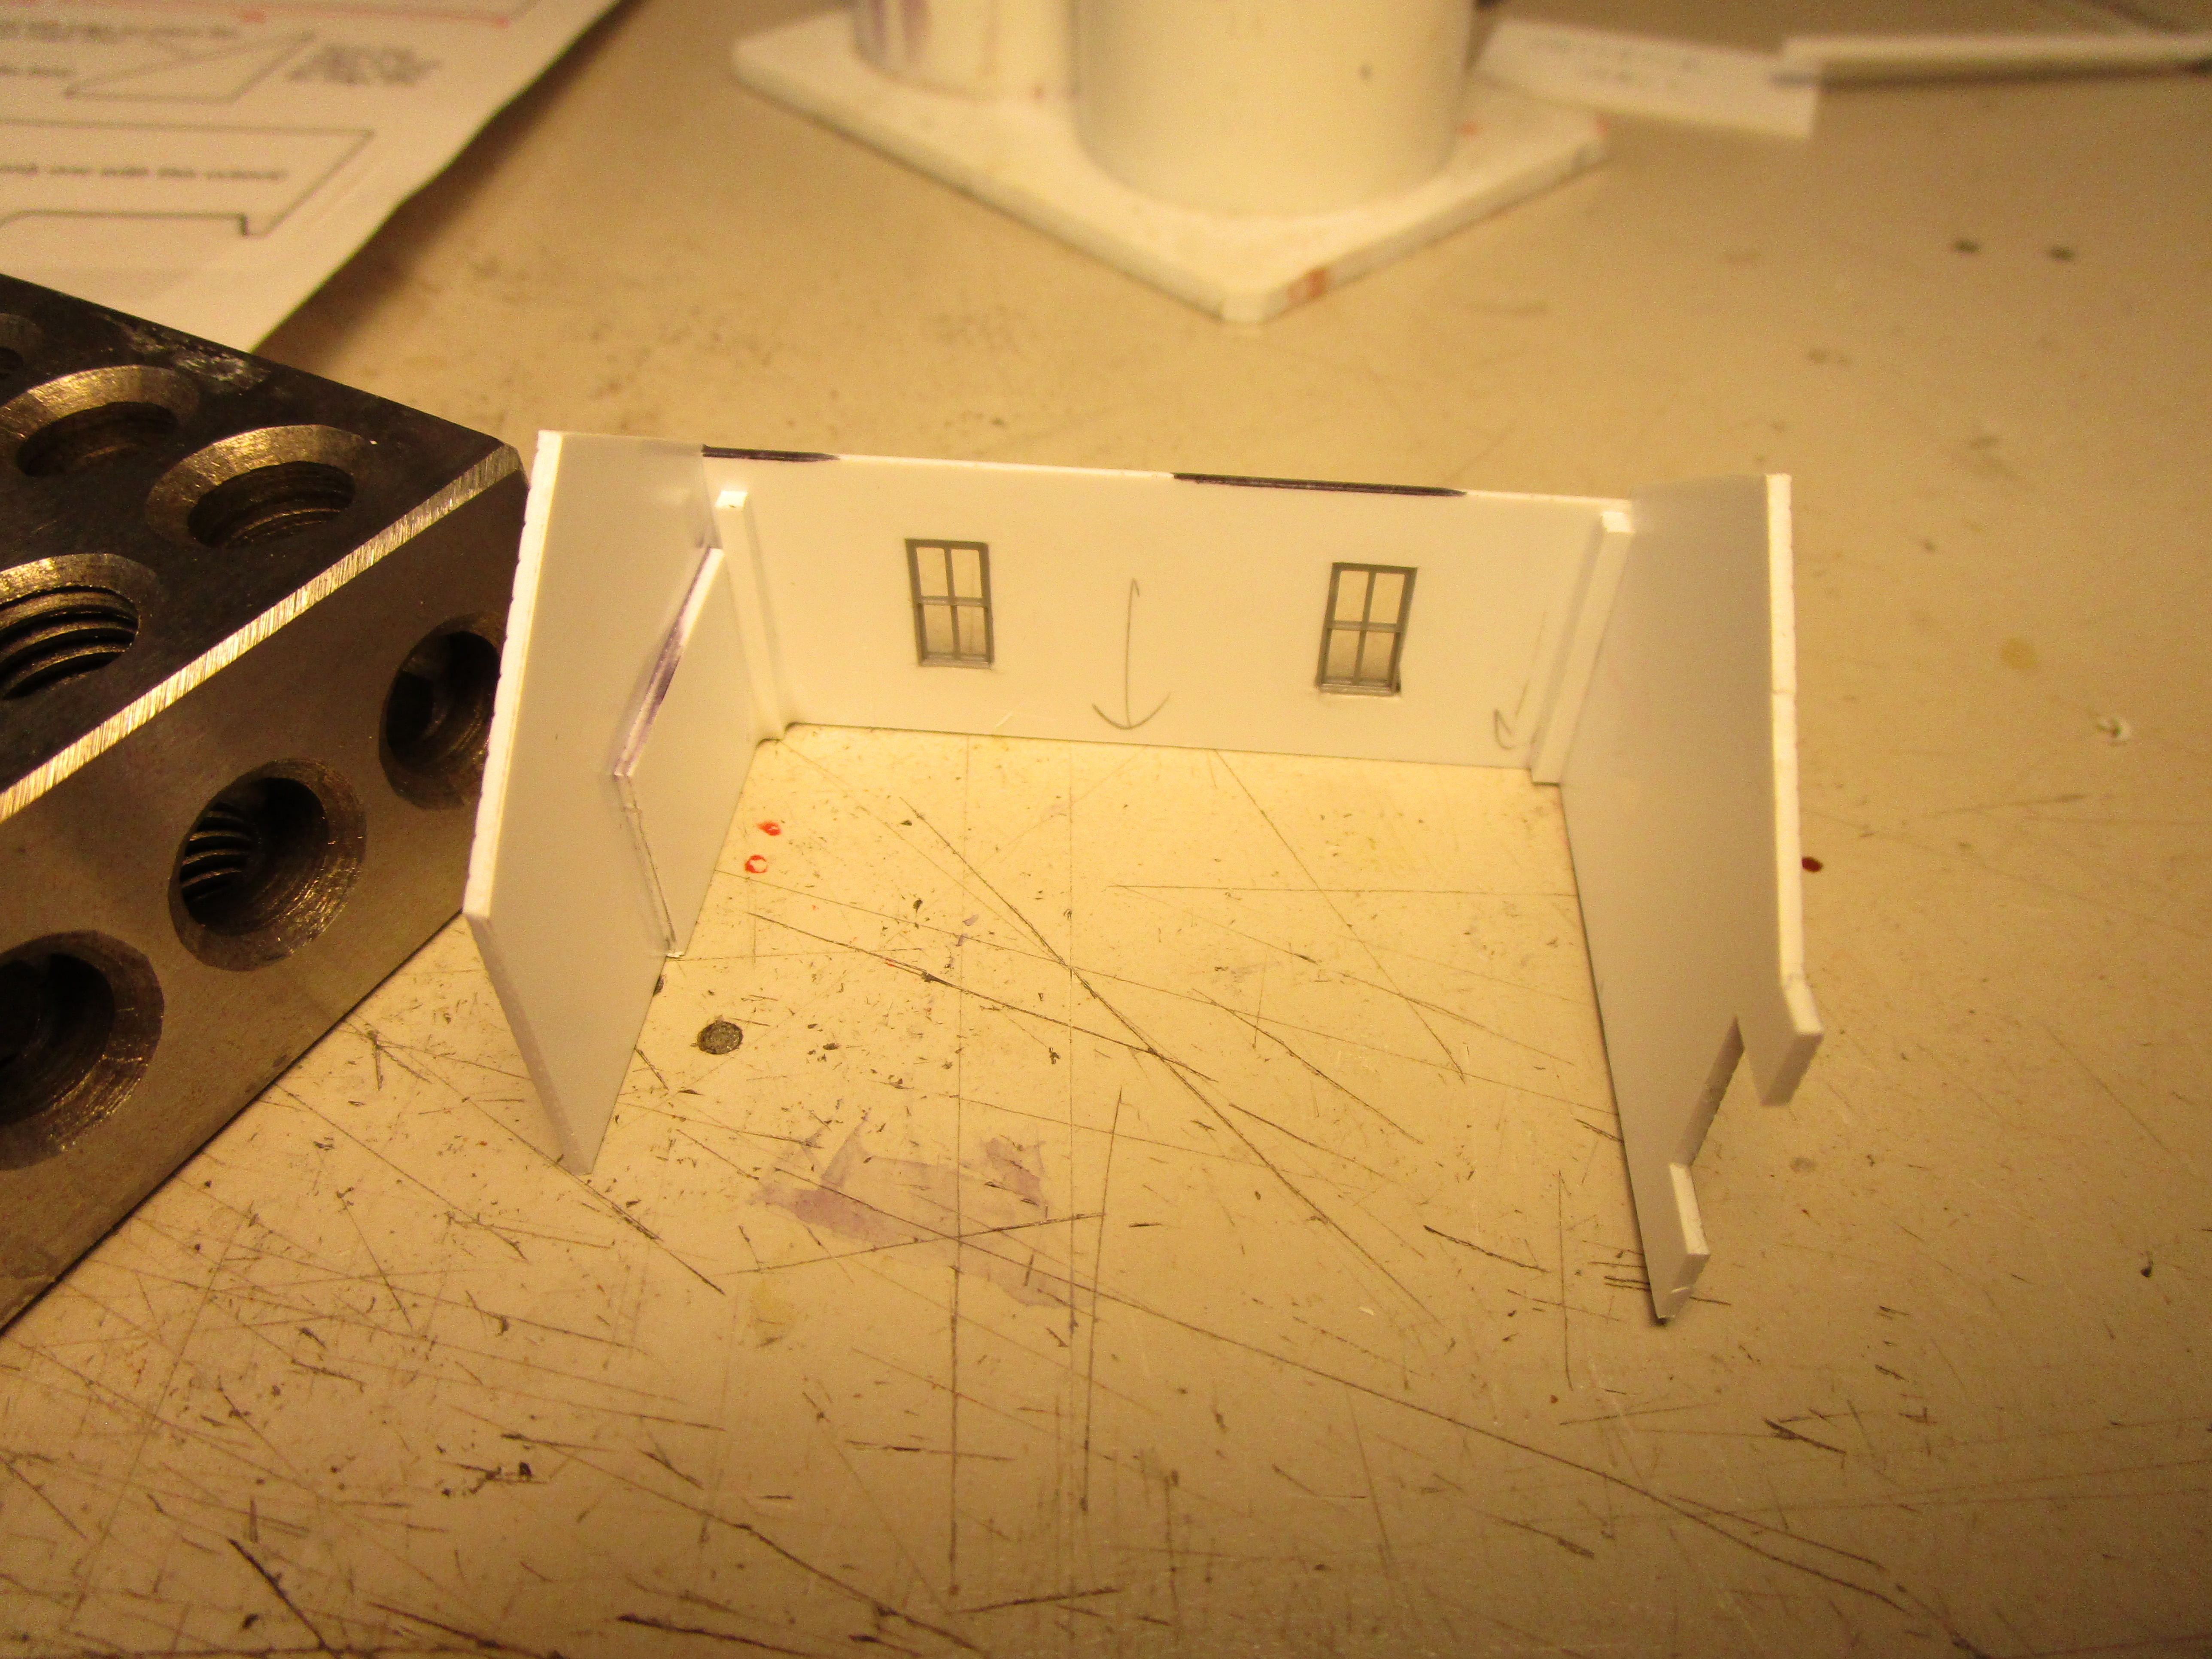
I was concerned that the building would warp if I left it overnight unfinished, so I assembled it all in one session (about an hour total). I built it on graph paper to keep it all nice and square. I added thick styrene braces connecting opposite walls together to hold them in alignment, but I didn't add a floor at this point as it would have prevented me from inserting the window glazing from the bottom after the outside was all painted.

The large double window on the front was supposed to be a larger Tichy casting, but I bought the wrong one. So, I took two of the regular window castings, filed the inside edges slightly thinner, and glued them together in the window opening.

By the end of the first night I had a pretty simple looking depot. The extension on the front was a bit of trial and error, because I rounded all of the wall dimensions to the nearest board, so some were a little taller than called for. And the cutaway for the window casting on the end at the corner was a bit complex and I had to think it through. But it came together pretty well.

For perspective, here is what the station looks like next to a dime. Tiny, eh?

The roof was a little bit more complex than a regular roof because of the front extension. The image below has both sides cut and ready to be bent down the middle.

The roof over the extension took a little bit of cutting and filing but nothing too difficult. Everything is so small that it was hard to get it perfect, but the roofing material will hide any gaps.

The corners then received some Evergreen 0.080" L-angle (#292), which was a bit oversize for N scale but anything smaller didn't hide the corner joints sufficiently. I had to notch it out to go around the end window in the corner. And yes, that window on the end in the corner is one board higher than all the others on the station. I wonder if you would have noticed if I hadn't said anything?

The roof joint was braced with round styrene rod I dropped into the gap and then secured with glue. You can also see the bracing I used to keep the walls aligned. It isn't pretty, but it works.

The end sliding door that I referenced earlier was framed out with tiny strips of styrene. They were roughly the size of the diameter of a piece of mechanical pencil lead.

The MOW shed that adjoins the station was originally built with plain styrene to look like steel walls. But, I didn't like the corner joints or the lack of rivets, and I certainly didn't want to attempt adding N scale rivets...

...so I sheathed the sides with more V-groove siding, but this time I oriented it vertical to distinguish it from the station. I then added trim at the corners and under the roof eves.

A cheap Life Like N scale boxcar was cut up because I wanted the door. I later realized that I should have used a 40-foot boxcar with a smaller door, as this one was a bit larger than I was expecting.

The boxcar door was glued on, and some tiny Evergreen 0.060" c-channel (#261) was attached above it to look like a sliding door track.

The end of the MOW shed that attaches to the station had some styrene applied where it would be visible, and a scrap metal door from a Tomix kit was added. But, most of the wall that attaches to the station was left a bit rough as it won't be seen.

I had intended the shed to be a lot shorter in height than the station building. But, I had primed the station building white and it was off drying, so during the entire construction of the MOW shed I never compared its actual size to that of the station. Instead, I based all my dimensions off of that boxcar door. When I finally stuck the two buildings next to each other, I saw that my shed was a monster and nearly as large as the station itself! But, it is uniquely mine and I am sticking with it.

To fill in the seams at the peak of the roof I used superglue gel. Honestly, once the shingles are on I am not sure how noticeable it would have been but it was easy to do. I then primed the shed white and later painted both it and the station with Krylon "Terra Cota" colored paint. I didn't want another red building nor did I want another brown building, so this seemed a good compromise. I then started to hand-paint the window castings a different color to make it a little bit more fancy but that was a disaster. Even with a tiny brush, the color breaks would blend together so I quickly washed it off. Now I understand why Mark (of the Spookshow websites referenced above) grumbles so much when he does it. It is impossible!

I wanted to model tar paper roofing, and I had some large Avery self-adhesive labels, so I cut them into strips and pressed them on. I figured the texture of the paper would look more in scale than rough strips of masking tape, and because they were self-adhesive I wouldn't need to mess around with glue.

Sadly, they wouldn't stay down. Rats! So, I brushed over them a coat of thin super glue. Oh well, it was a nice try.

The smoke jacks are Tichy castings (#2548) that I inserted into holes drilled in the roof after threading them through cardstock squares to look like steel flashing.

The roofs were painted dark gray and then drybrushed with various shades of gray and black, while the smoke jack was highlighted with brown. The sides of the building were given a black oil paint wash to bring out the details of the grooved boards.

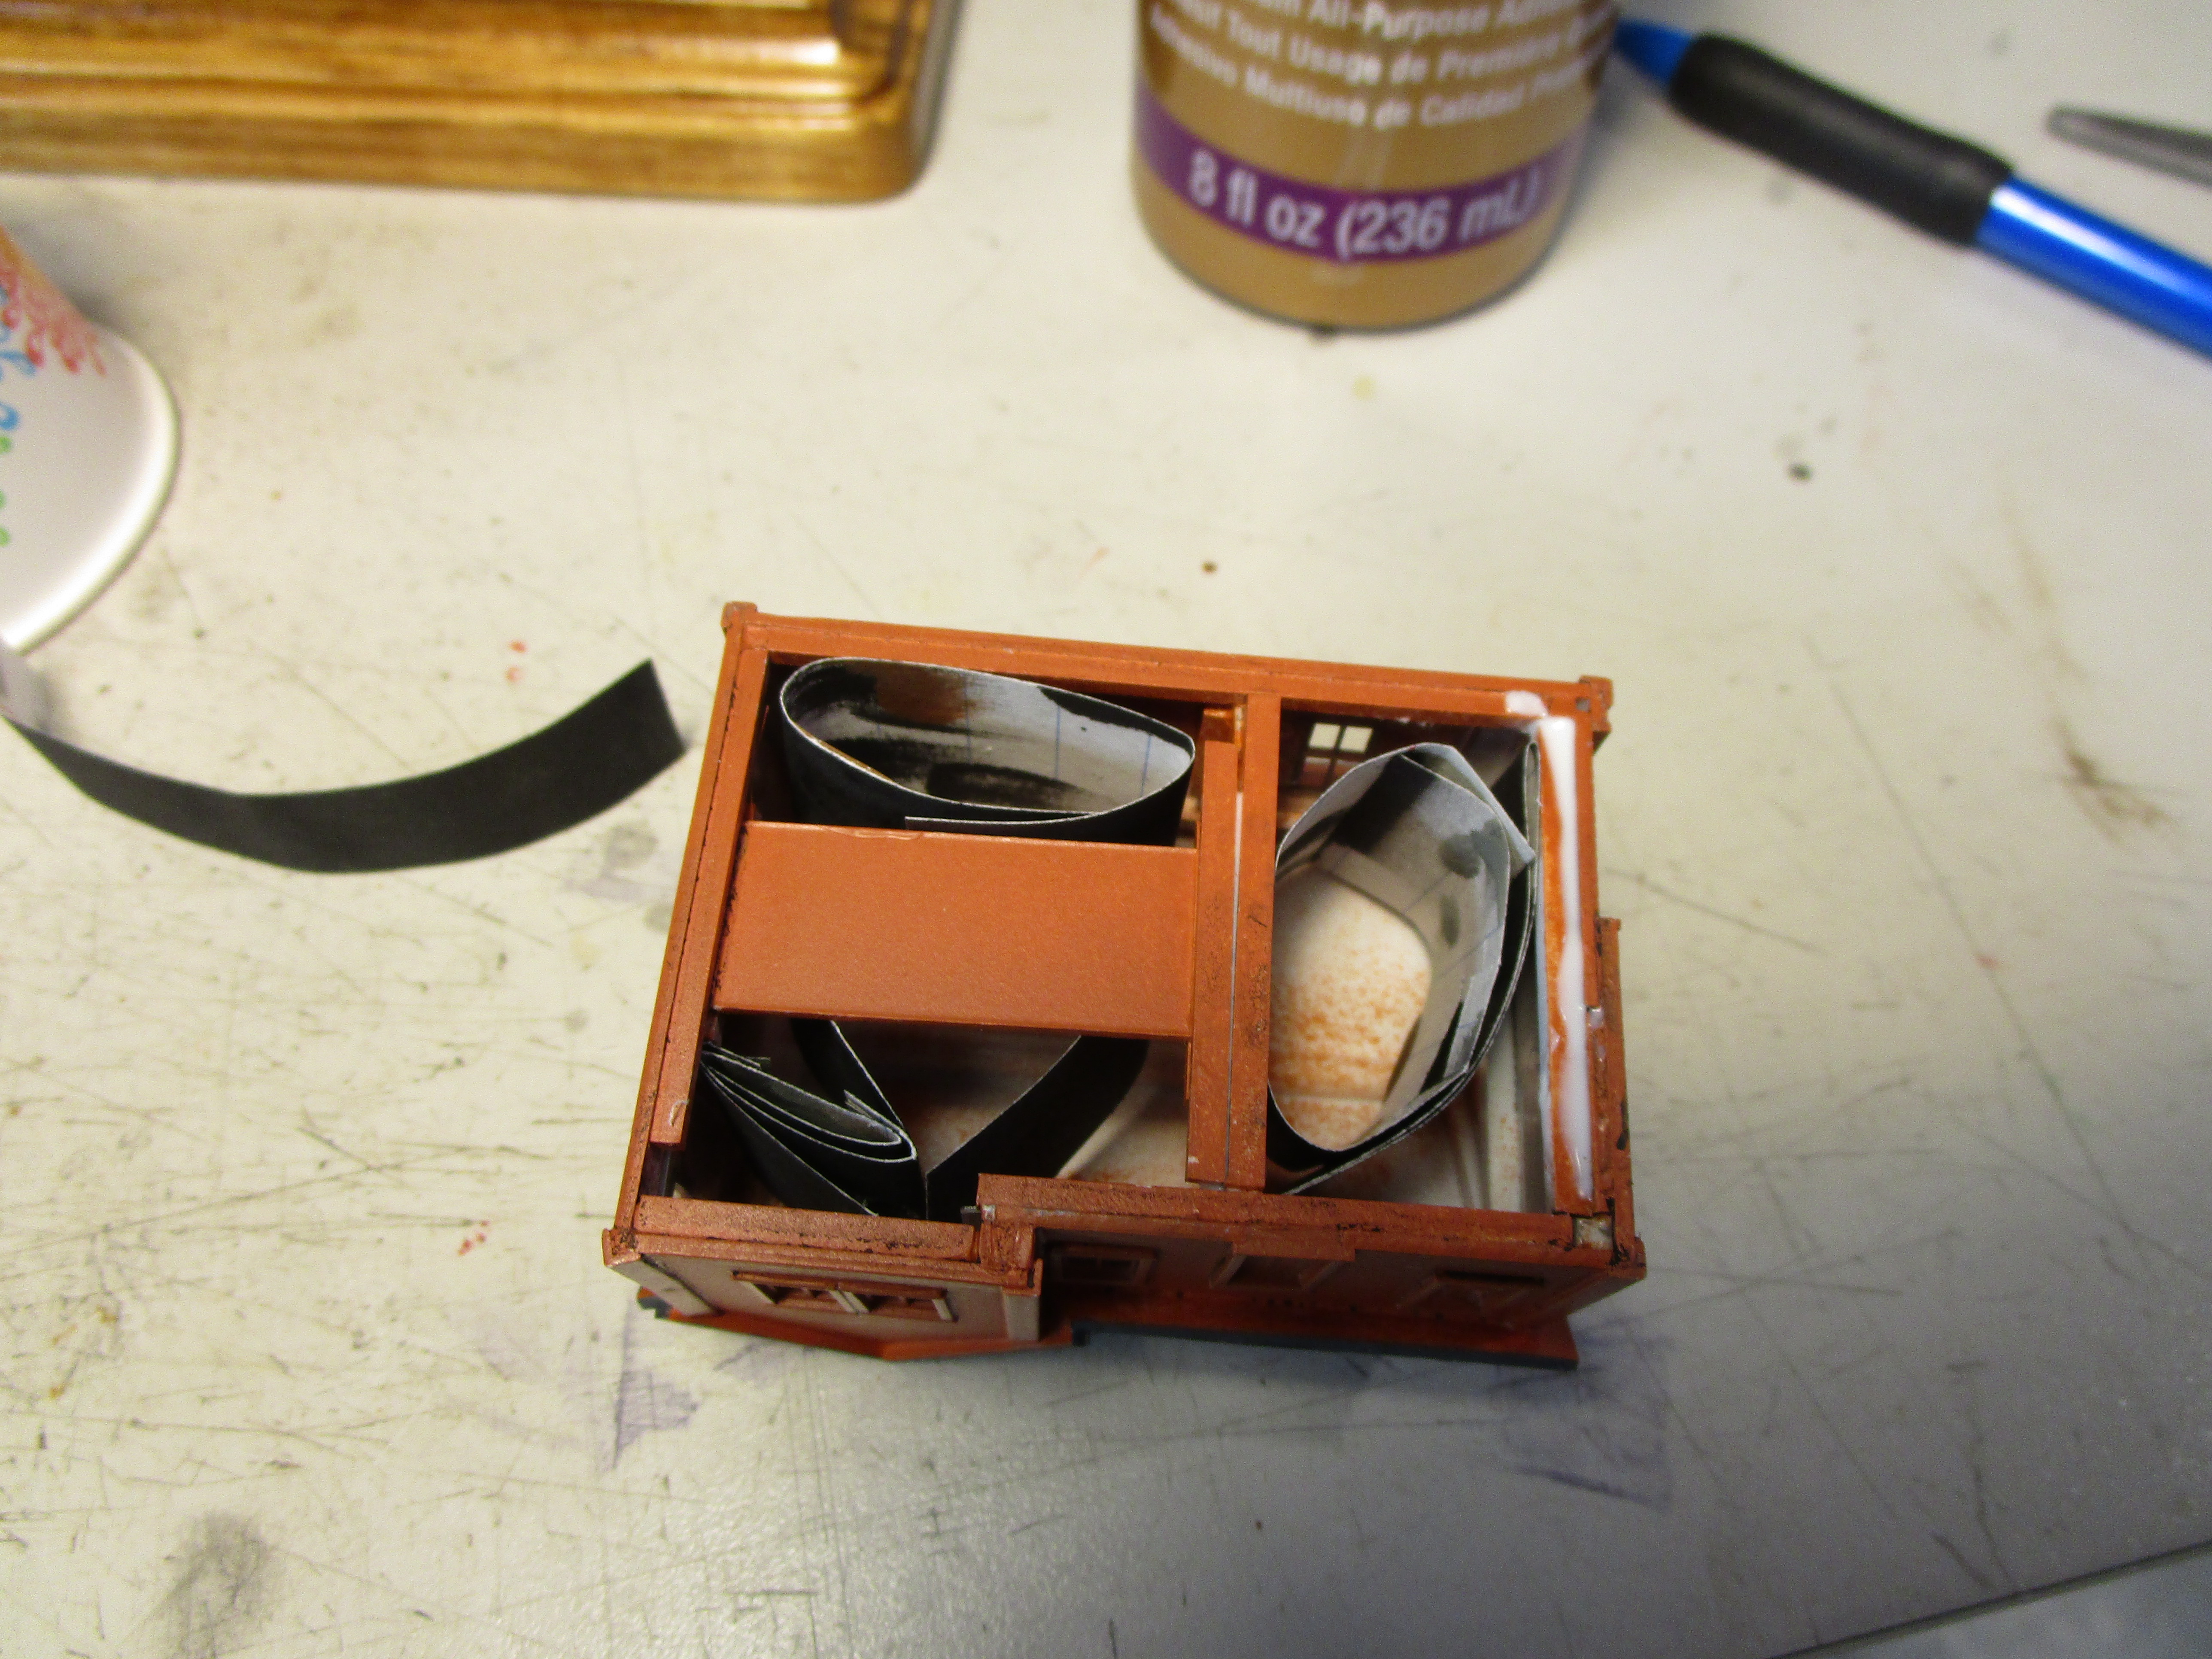
Clear styrene was cut into tiny pieces and used to glaze the windows. Then, I took some black painted cardstock and rolled and/or folded up pieces and wedged them inside the station. These effectively blocked the view through the windows, but when you get up close and look you can see the shapes and outlines of something... anything... inside. I went this route instead of trying to make curtains or drapes for the inside of a MOW station.
I also cut some 0.040" styrene pads to sit under the buildings and raise them a little up off the cork. These were painted black and then the station buildings and their associated pads were glued to the base. Because the stations are elevated a little bit, I was able to surround the structures with ballast and dirt and it didn't look like they were sinking into the mud.
The base is another wooden plaque that I stained and polyurethaned. I then attached some N scale cork roadbed down where the track and station's foundation would go.

The Atlas N scale code-55 flextrack was sprayed it with flat camouflage paint before painting the railheads a lighter brown. Painting the tiny rails was a challenge.

I next applied Woodland Scenics' fine gray blend and cinder ballast to the track. I glued the buildings down and then applied cinder ballast around them. Doing one side of the wooden base at a time, I also applied cinders and ground foam right up to the edge. I love ballasting and found this step a lot of fun and relaxing for some reason I cannot fathom.

To aid with ballasting into tight areas I developed a special ballast spreading tool. It might look like a cut up drinking straw but don't be fooled... it is much more sophisticated than that...

Finally, it was time for details... the fun part. I started with an Atlas telephone pole in my scrap box. It was painted brown, weathered, and the top cross bar was trimmed off. I then painted the insulators and diagonal brackets silver, and finished it with Tamiya translucent paint. Pretty nifty. I considered adding some string to to line... but then came to my senses.

I had a speeder car of unknown origin in my parts box just waiting for some future project, and this was it. I had previously painted it yellow with silver trim, so all I had to do was weather it up. A piece of flextrack was cut up and mounted to make a storage track for the speeder, and some stripwood was cut up to go between the ties.

A freight car truck was cut up and the wheels and sideframes were painted brown and weathered. Some Model Power barrels were painted silver and dry brushed rusty orange (they originally came molded in blue... who at Model Power thought that was a good idea?), and a Bachmann road crossing sign was modified and weathered.

The last detail was a pile of old, creosote soaked railroad ties. I took some stripwood and split off pieces that were about the same dimensions at the Atlas track ties, and painted them up. After gluing them into a random pile, I was ready to call the building finished.

This was a fun structure to build, as it really allowed me to "cut loose" and detail it using some of my N scale things I have been hoarding onto for years like that speeder car. But, it also was a reality check that I made the right decision to focus my D&H layout on HO scale. There are many times when I wonder if I should have built it in N scale so that I wouldn't need to compress my scenes. I could model full structures instead of partial ones that abruptly end in the aisles, and I could let the structures spread out more instead of having things so cramped together.

However, building just this scene showed that I don't like working in the smaller scales. Oh sure, if you mess up a part it isn't very expensive to redo it as the buildings only take up 1/8 the size of an HO scale building (1/2 the length, 1/2 the width, 1/2 the height). But the room for error is so much smaller. File a window opening a little too much and the window castings falls through. Get the corners a little off from 90-degrees and the L-angle trim won't hide it. And forget about trying to paint things like window trim and brick-a-brack. Since scratchbuilding is something I really enjoy, I would be very frustrated if I had to attempt it in N scale. And most likely I would give up on my plans of modeling the D&H and just use generic "fill in" structures. That would lead to a lack of satisfaction.

I hold N scale modelers in very high esteem now. People like Mark at the N Scale Encyclopedia who scratchbuild nearly everything must be out of their mind. I can now understand what he goes through to make realistic buildings. My friend Doug, whose layout I visited on Friday night and woke up early on a Saturday morning inspired to build the Albany Tomato Company, has built a tremendous layout and every time I look at it now I will better appreciate all that he has accomplished. I will stick with HO, and someday plan to move up to high rail O gauge, but I am glad I built this.

No comments:
Post a Comment