
 Before I got too far along I wanted to get my roads all figured out. In previous layouts, I have either used styrene forms filled with plaster (Woodland Scenics makes a useful kit) or cork roadbed covered with a thin coat of joint compound Aside from the sanding it worked well, but I had only modeled rural roads. Here, I was making roads and sidewalks and wanted to try something easier. Lance Mindheim had described how to model and paint roads off-layout and it was worth a shot. Plus, I planned to use Evergreen #4516 styrene sidewalks which were scribed 1/4" square and 0.040" thick and these would be easiest to glue to a styrene base. So, I transferred my plans to some 0.040" styrene sheet.
 It was around this point when I realized I had a slight problem. T-trak modules rely heavily on Kato Unitrak which has a pre-formed roadbed. This prototypically elevates the track from the layout top. Unfortunately, here I planned on gluing the roads straight to the top of the plywood. Where the road crossed the track, which was essential for my layout, there was a jarring height difference. If you look at Kato layouts online they use a preformed crossing that rises at such a sharp degree that I think a long car would bottom out. It looks terrible. I couldn't build up the road gradually here because my module was too short in depth. So, instead I raised up all my roads by gluing some 0.188" styrene strips around the edges and in the middle. Naturally, I ran out part way and had to order more.
 While the glue was drying, I worked on my Tomytec station kit that came in the mail. It is designed to work with Kato Unitrack so the height of the platform is okay and I didn't have to shim it up. But, this had a strange side effect of making the station lower than the level of the roads. In Japan, many layouts are temporary and things don't have to be "perfect" so this height difference isn't very important. I have an idea for how I am going to work around that. As I built the kit I added a few additional details and some interior lighting, even though it might make much of a difference in the end.
 I then started working on the elevated corner where the Inn will go. I went to the hobby store to look for 1/2" thick foam that I could carve and shape into a hill but they only had 1" thick foam. I was sure Home Depot would have 1/2" foam but I only needed about a foot square and didn't want to have a lot hanging around. As I drove back I considered making the hill with a cookie-cutter roadbed path and then the landforms with plaster or glue-shell (which uses white glue and paper towels or cloth strips). As we got near our house I found a sign on the side of the road that was in bad shape so I brought it home. I used tracing paper to draw my path on the sign and then cut it out with a box cutter. It is similar to corrugated cardboard but all plastic, which is important when using water-based scenery materials.
 The two back sides will have the hill rise above the plywood top. To protect the edges, I added a fascia cut from 3/8" thick basswood from the craft store. I glued scrap wood inside and just below the top to attach masking tape to. The front two sides will have a retaining wall but that needed a backer so I used some cheap wooden paint stirrers I had on hand (I didn't feel like going out again!). Before I glued the paint stirrers, I made sure to check clearances with the blue Kato loading gauge. I was cutting it close, but it all fit. Then, I secured the top of the hill area to some more scrap wooded blocks I had and used thumb tacks for temporary support.I also added some ground foam to liven the area up.
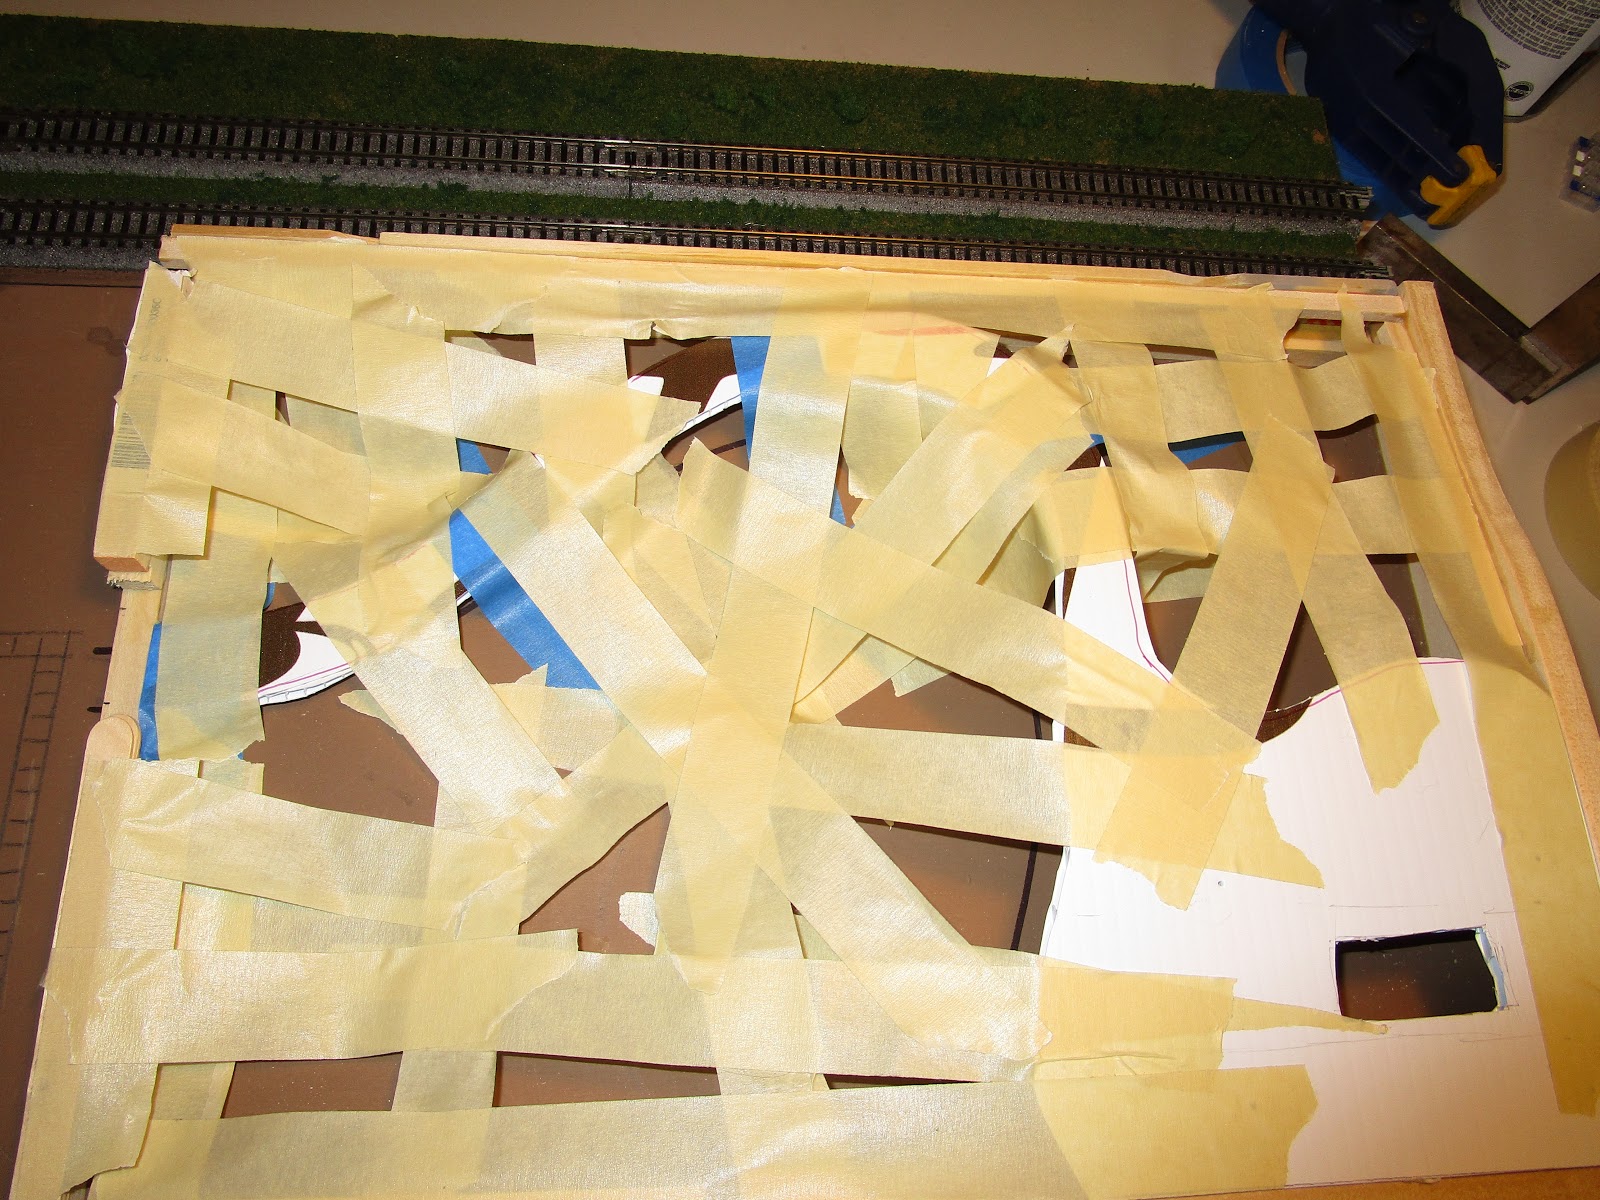 The next day work was closed due to a blizzard, so I worked on more scenery. I really like using painters tape but it didn't stick well enough to the plywood for me to trust it to support wet glue-soaked paper towels. So, I switched to masking tape and I swear I have the worst roll ever made. It is a name brand roll but it always splits down the middle when I am pealing off a piece or tears when I don't want it to. The job here took at least twice as long as it should have otherwise. Maybe someday I will buy a new roll... maybe. You can still sort of see the path, hidden in the Van Halen-esque patterns. The hole in the hill is for the wiring of the lights for the Inn.
 I then cut up some regular (not industrial brand or cheap stuff) paper towels into 2-3" square pieces. Finally, I mixed some hot (ouch) water and white glue together in a temporary container and dipped regular white paper towels into it. I used my fingers to wring off the excess and then placed them over the tape. I remembered to protect the station and tracks after I was part way through but thankfully before any damage was done. I overlapped the pieces a little but I didn't strive for two or three layers' thickness. Then, I set it to dry for a day or so. After a couple of hours any small issues like corners sticking up or large creases can be fixed, but otherwise you just need to let it sit.
 Once it is all dry, it is crucial to seal the surface for subsequent scenery layers as otherwise the alcohol or wet water would cause the shell to collapse. The original article called for lacquer paint (if you can find it) but I substituted a thick coat of green enamel paint. The color isn't critical because it will eventually be painted over with my brown, earth colored paint. That being said, if you do need to purchase oil paint you might as well pick a color that is reasonably close. Sherwin Williams still sells tint-able oil paints, which the big box stores don't have. This green was leftover from a 7.25" gauge riding car project I worked on over the summer that I painted up for the Burlington Northern. A different option is to coat everything with a layer of waterproof wood glue, which is even stronger.
 After doing this, I added an initial layer of ground foam and foam clumps which look a bit like bushes in N scale. Then, I secured the styrene retaining wall to the wooden supports and discovered I had a problem. A very small problem. The distance between the wall and the track had disappeared and a clearance gauge just barely touched the vertical supports of the wall. I tested a bunch of N scale equipment and everything went through just fine, but would Japanese N scale trains clear? Maybe not. Compromises here could lead to disaster down the road, so I used a knife and saw to cut out the front wooden support and shifted it back about a 1/4". A spare piece of wood was the perfect size to support the glueshell in the front, and latex caulk sealed the joints.
 As for the retaining walls, I first looked online but in the end I realized that I had a ton of styrene lying around and if I built them myself I could customize them to suit the exact layout situation that I needed. I built the wall closest to the tracks first, using a base of 0.040" styrene with a top piece of Evergreen #166 and vertical rails made from #164 (those numbers are so I remember them in the future). The short side of the wall was trickier, as the path only comes down part way and there will be a staircase up to it. Not having the stairs in hand, I estimated their height and built the wall accordingly. Gluing the two pieces together involved a bit of Italian ingenuity.
 Once everything had cured, I sprayed them with some beige colored spray paint and let that dry before moving on to weathering them. I didn't want to add any graffiti, which seems pretty rare in the pictures of Japan I have seen. I also didn't want them to look derelict with cracks, or run down with vines growing on them. But, they couldn't look brand new either. I quickly built a "test wall" using spare styrene and painted it the same way. Then, I weathered different sections with different amounts and strengths of black dye/alcohol washes until I found what I liked. Once the entire assembled wall was given this wash and allowed to dry, I glued it back on the repaired layout.
 Moving on to the streets, they were given a wash of soap and water and once dry were sprayed with a dark gray primer. I didn't focus too much on the areas that would be covered with buildings later one. After a week or so, I masked off the roads with painters tape and then sprayed the sidewalk areas with a lighter gray paint I had. However, once the tape was removed the paint colors were so close in color (despite the paint can caps being very different) that I decided to repaint the sidewalks. I re-masked the streets again and then drybrushed the sidewalks with a lighter color paint. After that, everything got a treatment of my alcohol and ink wash. Finally, I used some dark pencils to make streaks representing "weathering" and "tire marks" on the road surfaces. Traffic lines are still to be added.
 By this point, I started working on some more of the structure kits I had ordered. The 30-60 day delay from ordering to receipt of them had caught up with me and I only had three on hand, besides the grade crossing parts. For the kits I removed or discarded the bases, touched up some of the painted edges and picked out some of the details I liked, and then glued them to the styrene road base. I had calculated on the buildings being larger than they actually were (because the overall published dimensions included the oversize bases) so I have lots of room behind the building for additional detailing and scenes.
 And this is where the project currently stands. Having picked up scratchbuilding my freight cars again, this will go on hiatus for a little bit.
No comments:
Post a Comment