CP Executive train in Albany

CP Executive train in Albany

Wednesday, May 31, 2023

D&H train at Voorheesville (1992)

I have posted a bit about Voorheesville lately, so I thought I would at least tie it to the D&H somehow...

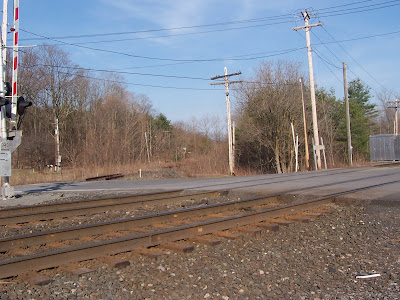
Here is a shot dated December 1992 showing GP38-2 #7307 about to cross the CSX diamonds (barely visible at the bottom of the image). Even though the D&H tracks were here first, the D&H had to contact CSX for permission to cross. The train is heading for Albany. 

Here is a picture from about the same perspective taken April 30, 2010. The exact same dark green pine tree on the left side of the tracks can be seen in both images!


Sunday, May 28, 2023

D&H boxcar #50159 (1983)

There is something special about this picture of D&H "I Love NY" boxcar #50159. It isn't the striking blue and white scheme which I love and have written about in the past, or that it has the cool green "Operation Lifesaver" emblem (and wish decals existed for). And since it is only about a year old there isn't much rust which is nice, but that doesn't make it special. 

Nope, I love it because it is dated May 28... my birthday!


Wednesday, May 24, 2023

A Return to Voorheesville

I spent last Saturday morning at Voorheesville as part of our local Hudson Berkshire Division (of the NMRA) meeting. It was well attended and three trains went by during the two hours I was there. However, I was mostly interested in how the track connection rehabilitation between the former D&H (now N.S.) and CSX was coming along. I hadn't been here in a year.

The answer is... it is progressing. There was evidence of brush clearing for the right of way though the track will need some serious surfacing and the road crossing is due for a replacement. Further down the line I have seen pictures of welded rail already being laid. 

There the track curves towards the CSX track, the business inside the curve (formerly a NYC hay barn) has cleared away some of its junk.

The switch tying the connecting track to CSX is still there, though there is no chance a double-stack train would make it through that S-curve. Likely they will remove the switch and reallign the entire curve to make a smoother transition.

Some partial track, either being prepared for laying down or stripped for parts, was on the ground. I would have inspected it closer but was warned by the sign.

Finally, one shot of an interesting load. They look like aluminum ingots, as if they were steel they probably would have flash-rusted by now. The straps were a bright neon green.


It was a fun morning and I can't wait to come back when the project is finished.

Saturday, May 20, 2023

No Smoking Policy

While I am definitely anti-smoking (except for ribs) I guess an exception can be made for Alcos. Ironically, though, there is no exhaust at all to be seen from C424 #455. I wonder if the photographer was a bit disappointed about that. The image is from 1988.


Tuesday, May 16, 2023

Simple projects: Adding Guardrails

One of my purchases at the January train show in Springfield was the book Model Railroading with George Dutka. George has several blogs on various New England themed railroad subjects (links to his blogs are on the right of my own) and I always enjoy his postings. So, when I saw that he had a new publication for sale at the show I had to buy it. I also got a chance to talk with him, which might have been the real reason I bought the book!

Over the past three months I have been savoring it, reading little bits before bed. Needless to say, it is chock-full of useful modeling projects for all builders but I especially enjoy that all the pictures show New England railroads. It makes me wish I was freelancing my layout (my next layout will be) so that I could encorporate more of his structure kitbashing and rolling stock modeling ideas. 

However, I was able to glean at least three ideas for my current layout. One of them is guardrails. I have a dead end road on part of my layout adjacent to the of Albany Terminal Warehouse and wondered what to do with it. Rix Products makes guardrail kits, but somehow I never knew about them until I read the book. Well, I quckly ran to the computer and ordered a set online.

It's a pretty simple kit and it comes with enough parts to make several smaller guardrails or one longer one such as might be found along the side of a highway. The instructions explain the process for putting it together in its various iterations, but the parts schematic was a little fuzzy. It isn't impossible to figure out, and the small number of total parts helps, but it could have been a bit clearer.

I cut out one middle piece and one extension piece (actually, I first cut out two extension pieces because I mis-read the diagram) and glued them together, The guardrail's curved end things were attached next, though they first had to have some flash removed. Finally, three legs were cut out and installed. It went together quickly but the soft styrene didn't really want to stay straight. For my location it was fine if it looked like it had been hit by a truck once or twice, but for a brand new highway installation it might have been more problematic.

Next, it was painted silver, drybrushed light gray to give it an oxidized and chalky appearance, drubrushed with with dirt and rust colored acrylics and sprayed with Dullcoate. Finally, three holes were drilled into the layout and it was glued in place with white glue. Ground foam and dirt finished the job. Some random junk could probably get dumped in the area too, but I am happy with it right now.

All told, not including the drying time it was probably a 30 minute project. I have never had a layout go so far into the "scenery phase" before such that I could spend time and money on small details like this, and I enjoyed it a lot. And, I have more guardrails left over which I can use for future projects.

Wednesday, May 10, 2023

More D&H anniversary steam excursion pictures (May 1973)

Some pictures of the D&H's 150th anniversary celebration were were featured last month. Here are a few more, which were taken in May of 1973. Information on the slides is noted when possible.


Both engines doubleheading at Westport (between Ticonderoda and Plattsburgh) in May 1973.

D&H #302 at Colonie, NY sometime in May 1973. Note the auxiliary tender.
D&H #302 at Colonie, NY on May 12, 1973. Look how clean she is!

D&H #302 crossing the Barge Canal in Waterford, NY on May 12, 1973. This is one of my favorite shots.

D&H #302 at Gouldsboro, PA on May 27, 1973.

D&H 653 at "Riverside" Vermont in August 1973. Maybe it was going back to Steamtown?

Taken in Lanesboro, PA.

I am going to guess somewhere "up north" in the Adirondacks.
 
I have no data on this picture, but the mixed consist of coaches (including what looks like Amtrak) makes me wonder if this was after the engine was returned and used on the Reading Ramblers but it hadn't been repainted yet.

While occasionally today there are mainline steam trains run using Union Pacific, Nickel Plate Road, or Norfolk and Western locomotives, rarely do they venture up into New England. Some shortlines in the area use steam engines, but they don't run at mainline speeds. I think the most recent "large steam" excusion in New York was when Norfolk Southern ran NKP #765 over the newly completed Letchworth Gorge bridge in 2015. And though you didn't ask, Union Pacific #8444 is my favorite large mainline steam engine because it was shown at the beginning of every episode of Shining Time Station.

Saturday, May 6, 2023

Inglenook "Slidings"

In the early part of 2020 I was dealing with a medical situation that required me to remain in bed for much of the time. Casting around for something to do, I decided that I would build a simple Inglenook Sidings layout that I could keep by the bed to provide a distraction from the pain. 

The premise of an original Inglenook Sidings layout is that a yard lead holding 3 cars plus an engine feeds into a three-track yard, with one track holding 5 cars and the other two tracks holding 3 cars each. In sum, you randomly determine an order of 5 freight cars and move the jumble of cars around the packed yard until they are in order on the 5-car track. More information can be found here. While some have integrated the concept into a realistic layout others just take it for what it is... a switching puzzle. 

I decided to make one that I could keep by my bed and use it to pass the time. But, instead of building another model railroad I decided to do it with Brio-style wooden trains. I figured they were cheap, durable, and easy to set up and play with (yes... "play" is the right word). Unfortunately, this occurred right as the Covid pandemic started and I couldn't attend train shows and garage sales where wooden trains can be had cheaply. I had purchased the track, but never got the trains and the online prices for them spiked. I later gave the track away to a friend.

However, at the recent January Springfield train show I worked at the NMRA table which had a display switching layout based on the Inglenook Sidings, and I found it to be pretty fun to operate. (I later discovered that it wasn't a true "Inglenook Sidings" layout because it had less cars on it then called for, and the yard lead was much longer than it should have been, with the net result being less congestion and easier switching). 

I came home and dug up the project again. I looked around my basement and found some scraps of styrene, a few wooden dice blanks, and paint... and came up with what I call "Inglenook Sliders"! To save space, there are no turnouts. A transfer table holds an "engine" and five "cars" (represented by wooden dice) and functions as the yard lead and funnels the cubes into one of three slots (holding either 5, 3, or 3 cubes). Cheap green plastic game chips, painted to match the color of the cubes, are used to randomly generate the car order.

I spent several hours carefully laying out the sidings, which were formed with styrene angle rails and lined with soft stripwood to prevent the dice from having their paint scraped off. I made sure the height of the transfer table matched that of the sidings and that it operated smoothly. I painted the cubes with multiple coats of paint for perfect coverage and then clear coated them with nail varnish. I even made an "engine" by gluing two cubes together. (I toyed with the idea of painting it with British Rail wasp stripes of yellow and black on the ends but came to my senses). Then, I ran upstairs and tried it out.

It was fun... for about a minute. Without the time constraints of physically shunting the cars back and forth, coupling and uncoupling them, and throwing the switches it quickly became a mental exercise that could be accomplished in seconds. It took me longer to tell the maroon and red plastic chips apart under the poor light of my bed lamp then it did to switch them into the proper order. In short, it was a failure.

But that isn't a reflection upon the original design. It is just that my own creation isn't the same thing as an operational model railroad. It is, instead, a colorful 3D math problem.

Coming full circle, my son Harrison now has dozens of wooden train cars and several storage bins full of track and accessories. We buy them used ("weathered") at rummage sales and Craigslist and get them dirt cheap. I could in theory build a "proper" (is that the right word?) Inglenook Sidings layout now, but my health issues are thankfully behind me. Someday, when Harrison is older, I may introduce him to the concept. For now, though, he is quite content to eat the trains and throw the track on the floor.

Tuesday, May 2, 2023

Green Island D&H Freight House (1970)

Here is something you won't see anymore... because it isn't there! The picture below is labeled "Green Island, NY" and is dated May 02, 1970. I had searched online maps of Green Island and drove around the area but couldn't find it. So, I did what any person should do: I asked a D&H expert... Dominic  Bourgeois. He literally wrote the book on D&H freight, and knew right away where this freight house was. This is a view of it facing south-east.

Dom even provided a map showing its former location. It is where I put the yellow star in the upper right corner. As can be seen, it was a mess of tracks. The railroad running east/west (up/down in the picture) was the New York Central's "Green Island Branch" of the Troy and Schenectady Railroad. (Check out Gino's excellent website for more info). The lines running north/west through the wye (left/down) are the D&H. Note that the D&H had to cross the NYC at grade, including through a track switch, to access its freight house! 

The map below shows what the area looks like today. In this shot facing west, the red star is where the building once sat. You can see some of the former railroad bridges at the west are still in place although abandoned, and the railroad bridge that was on the east of the building is now solely a highway bridge.

The I have literally driven past this place hundreds times and never knew that two large railroad yards had once been located here. The old NYC freight house still exists and it prominently says "GRIMM" on the end. Everything else, however, is gone.