
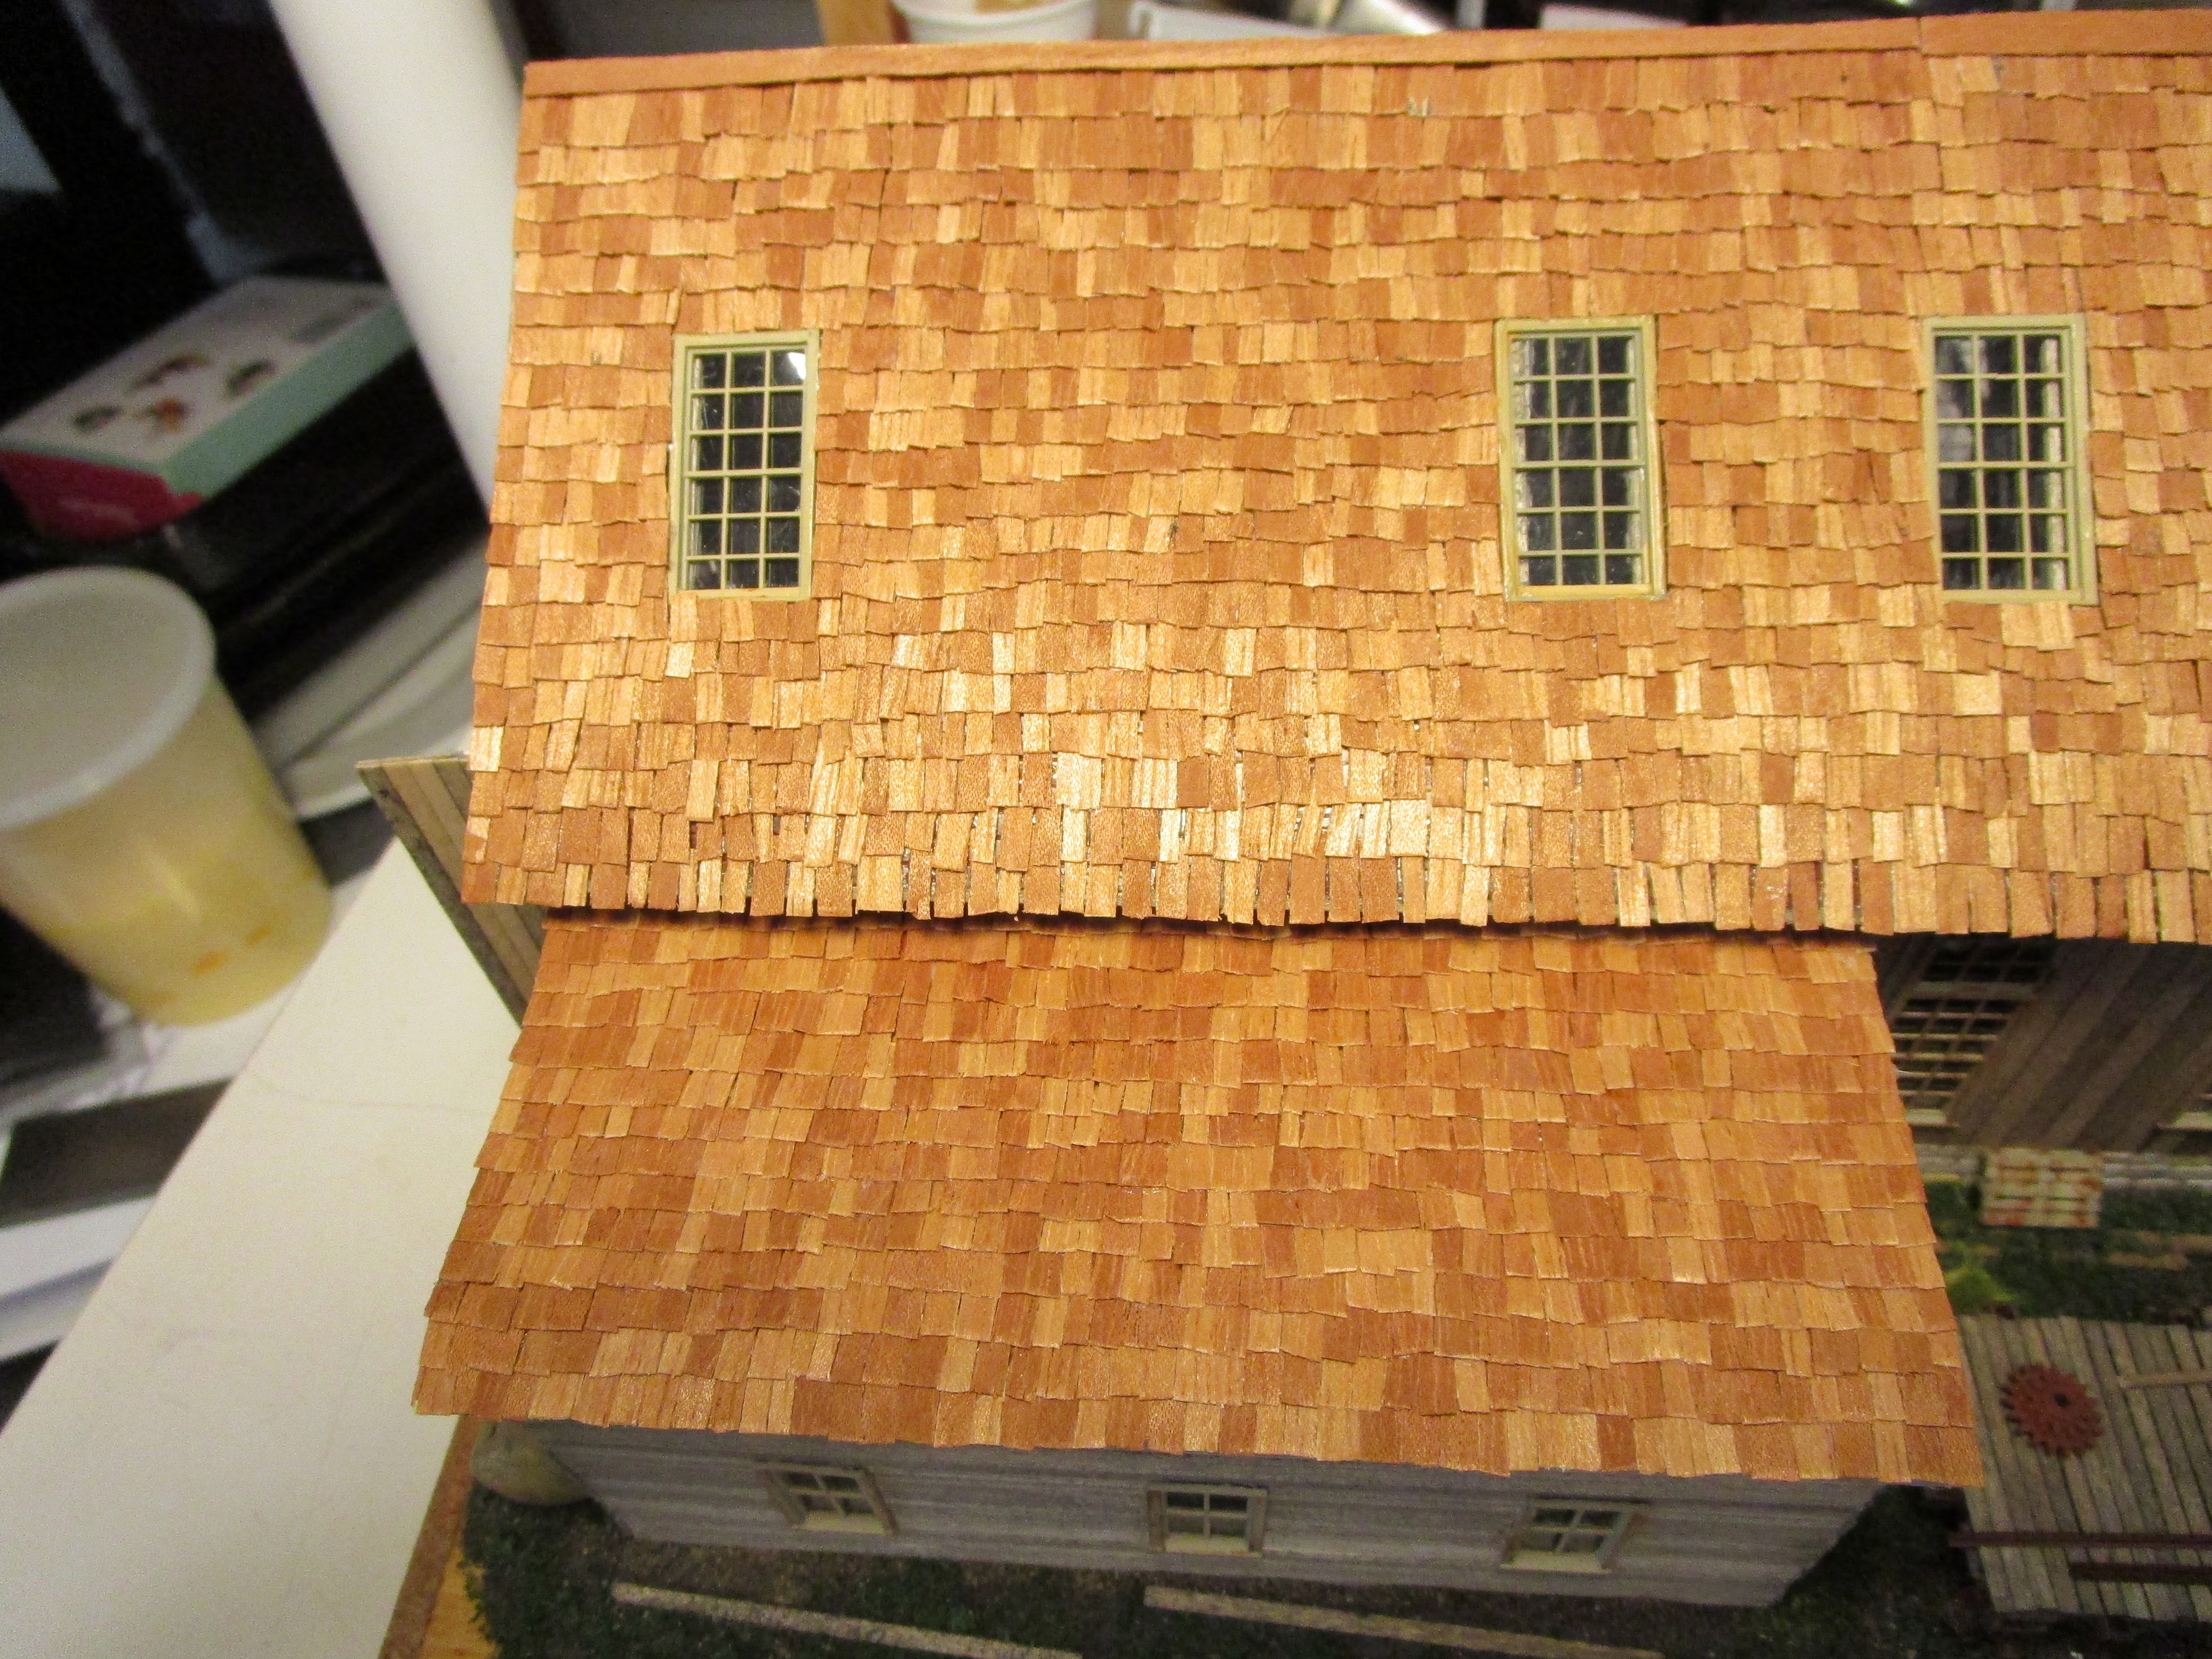
The second side of the roof went even easier. I was getting more efficient, and the shingles were getting placed tighter together. One downside I noticed with the steel weight technique was that in a couple of places extra glue squeezed out and turned dark green from a reaction with the steel. I had never seen this occur before with Aleene's tacky glue, and it kind of looked like mold so I didn't mind too much, but it was unusual. All the same, I wrapped the steel with pieces of clear packing tape to help mitigate it.

Finally, all of the shingles were on both sides up to the very top. It took a total of 2,952 individually cut and applied shingles! I know because I tracked them by counting each row as they were applied. There were 44 rows of shingles, and each one took between five and ten minutes. I am glad I did it, but it will be a long time before I use this method again.

Once that was done, I wondered what to do about the peak. Some real roofs have shingles bent or broken over the top and then nailed to both sides. This looked clumsy. Another option was a copper ridge cap, which would have looked great but probably have not fit in with the run-down railroad image I was going for. Then, while browsing the Menard's home supply website I found cedar hip and ridge caps for sale. They are basically long "L" shapes, each side being 16" long, that are nailed on the very top. I could model something similar on my structure. Perfect!

I cut a long piece from some of the leftover thin cedar sheets that I had, but when I tried to bend it over it cracked along the grain lines. So, I made it in two pieces and glued each narrow strip along the top.

To weather the inside I decided to emulate the prototype and used real soot and smoke in the form of burning styrene. Gerry had suggested it in his article, and I had utilized the method 20+ years ago to weather some Conrail diesel locomotive exhaust fans. It worked well then, so I thought why not. Well, the smoke had lots of particulates in it that floated around more than they stuck to the inside but a soft brush gave me part of the look I was after.

I switched to ground charcoal powder which was more effective. And this picture doesn't do it justice... trust me, it looks a lot less garish in real life. I aimed to have heavy areas where the steam locomotive's smokestack and blacksmith hearth would be located.

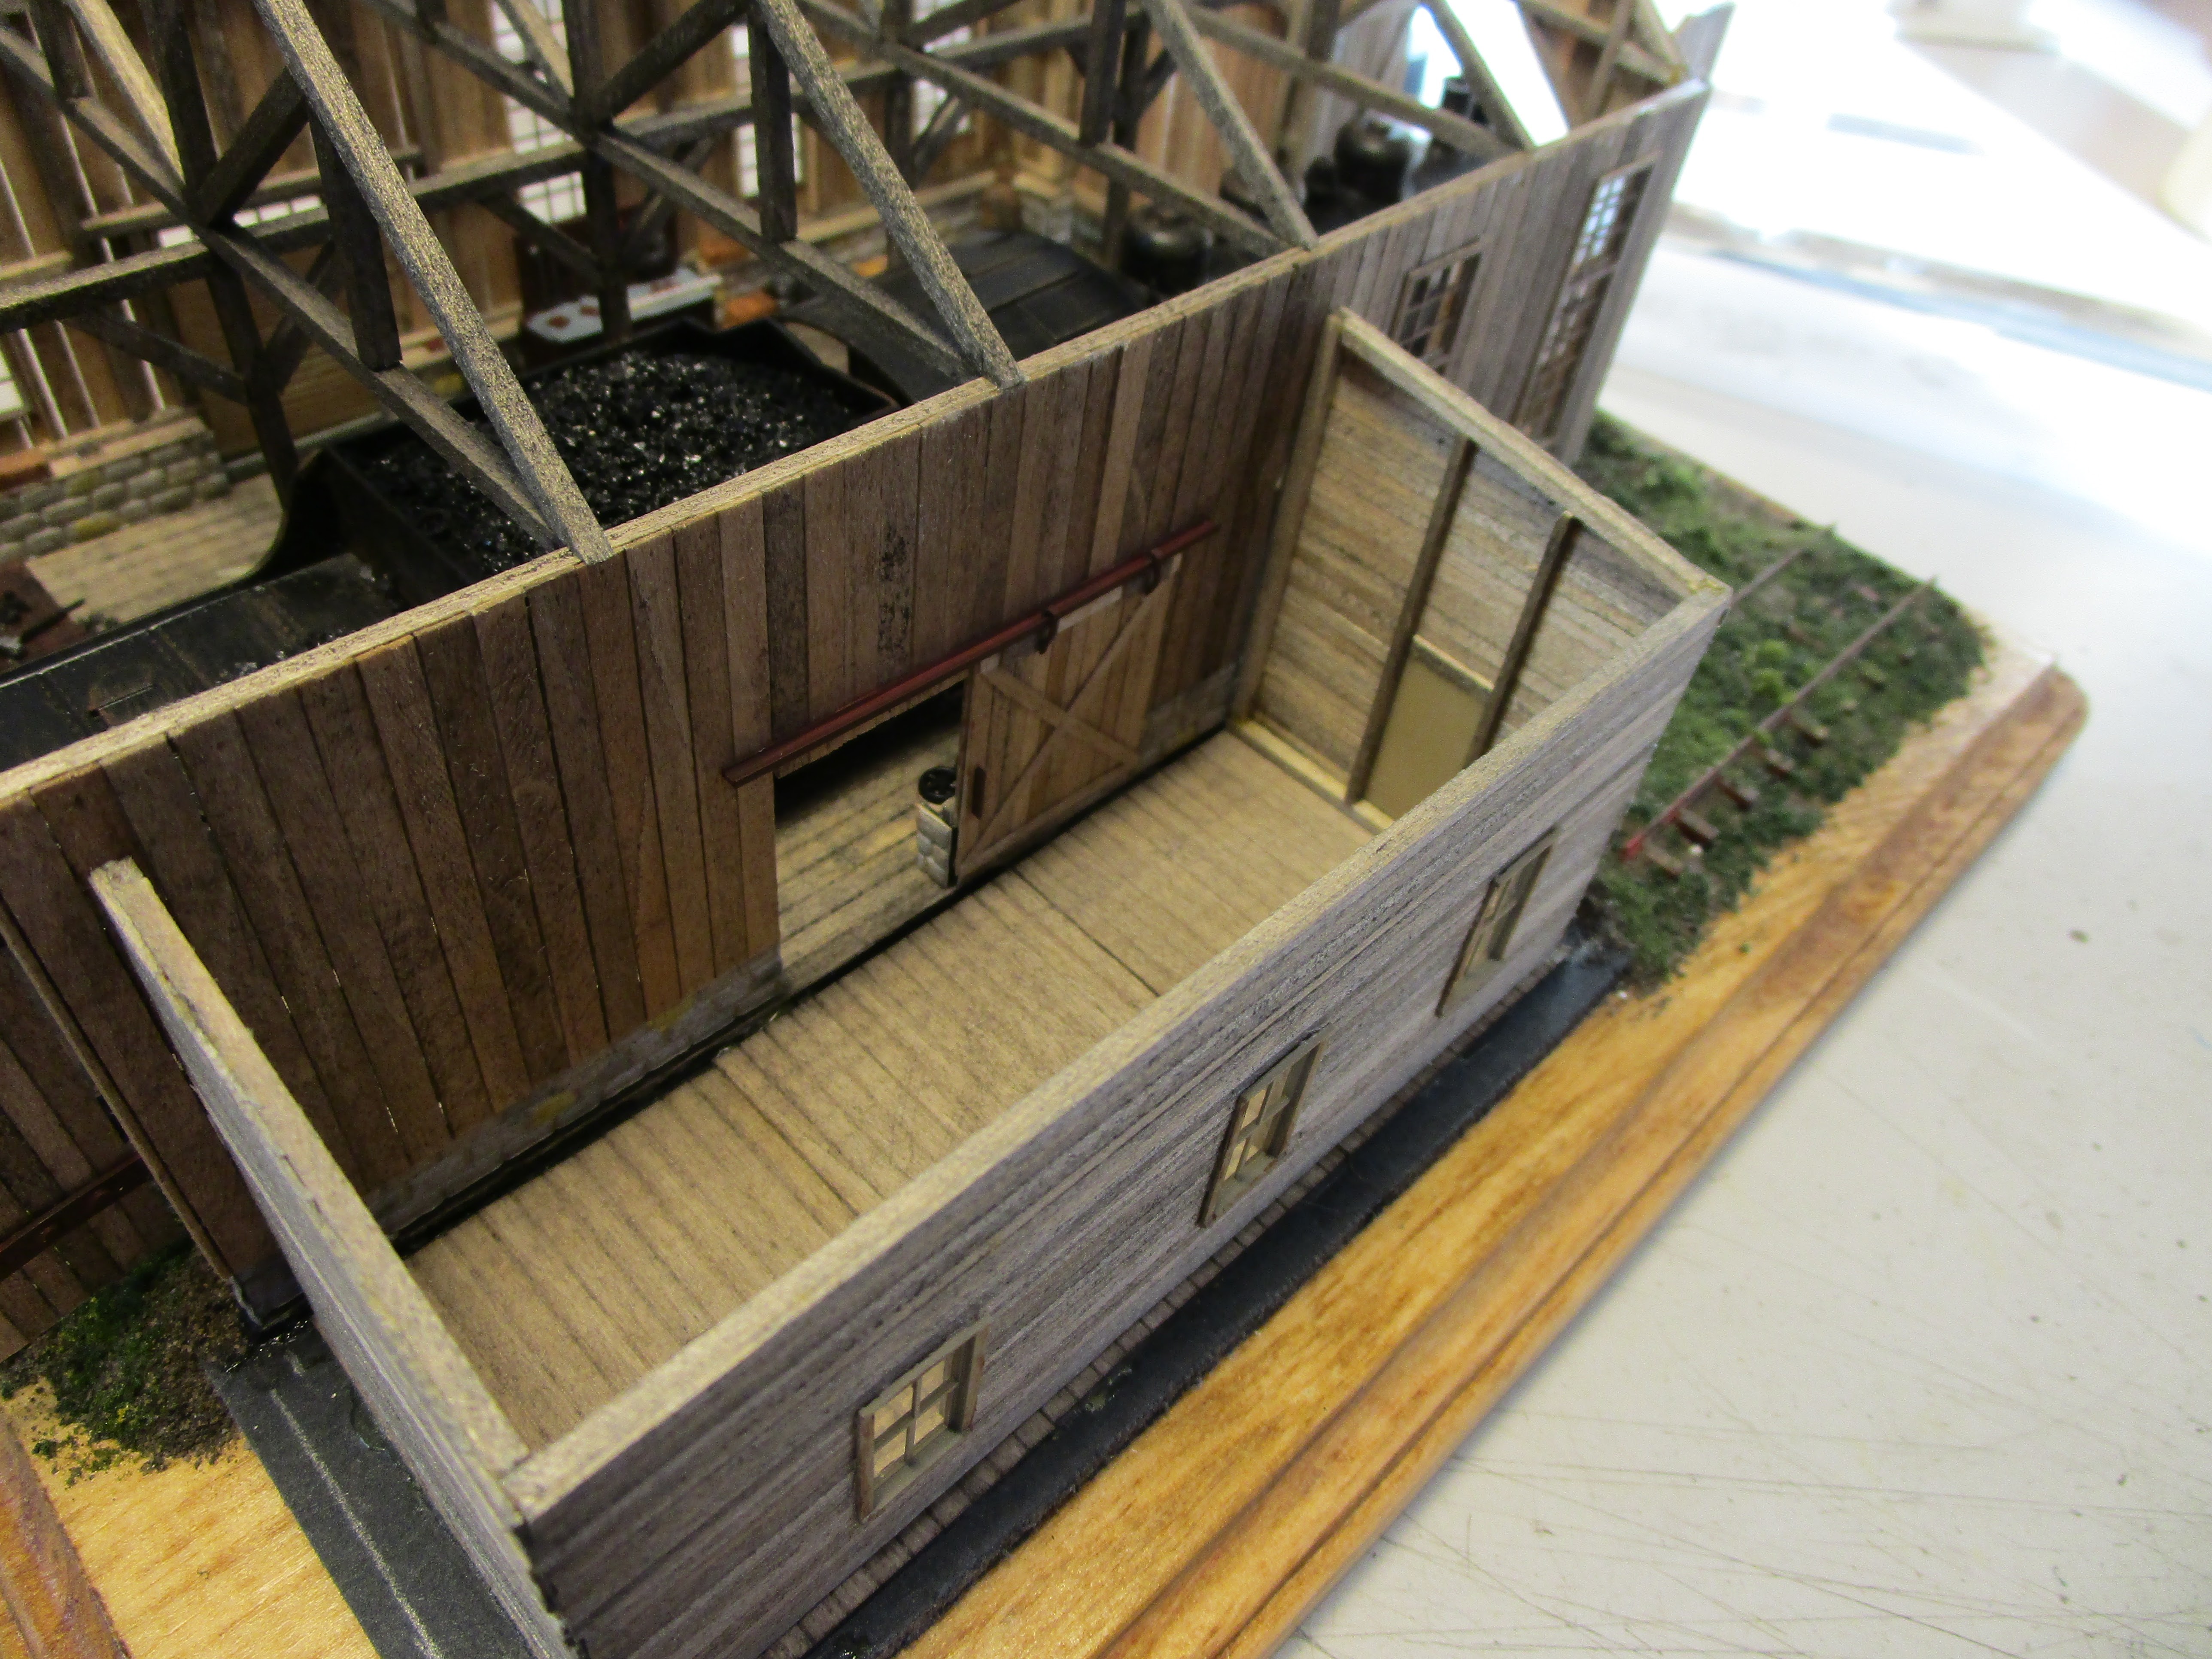
I could finally turn my attention to the woodshop extension. The original construction article made it a boiler house with a neat boiler casting inside, but I wanted something a little different. First things first, on the outside of the building I added some hardware so that the door which I had glued on already would look like it could "slide" back and forth. I used styrene C-channel for the track and some cut down and reformed Athearn blue box metal locomotive handrail stanchions for the hangers. The door handle is styrene.

I then began working on the actual extension. The same scribed wood which I had previously used for the engine house floor was glued down. Three pieces were necessary as I rotated the wood boards to run perpendicular to the main building. It adds visual interest, though credit to Gerry who thought of it first.

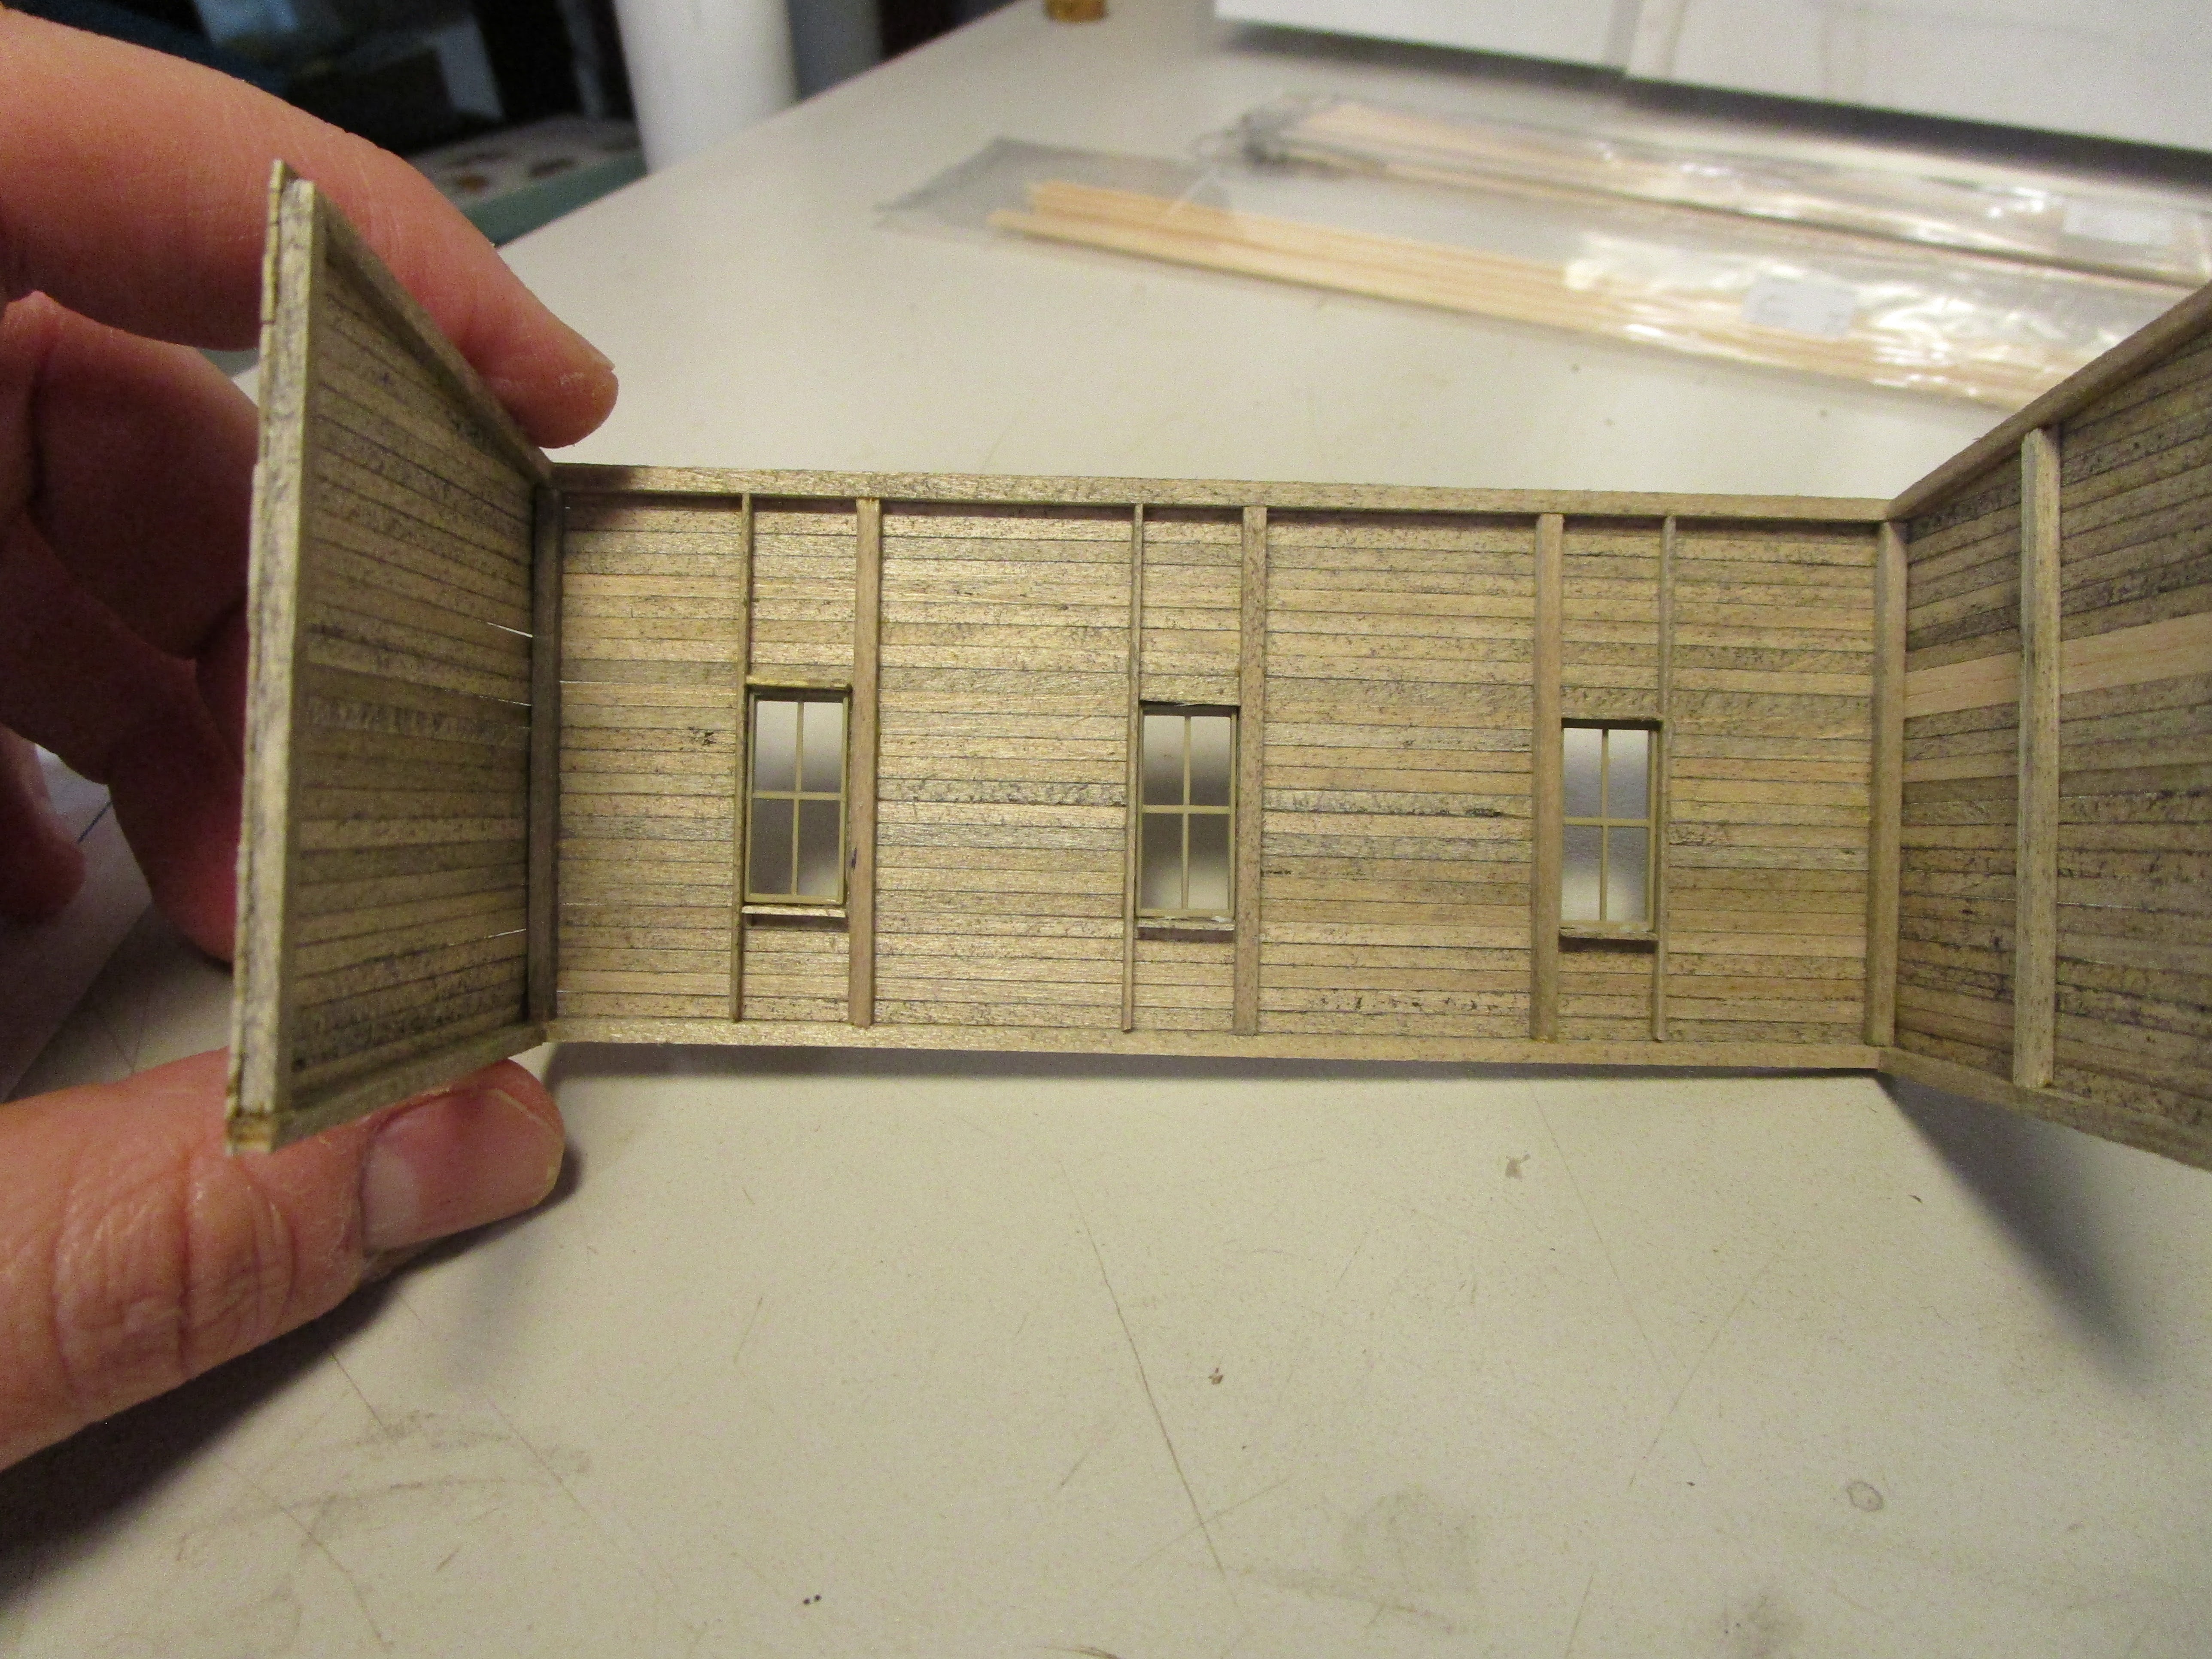
Then, I sketched up some drawings and started building the walls. They were framed with 6x6 posts, which might have been oversize but I thought that they looked good. I didn't frame in the windows at this time but I did mark on the plans where they would be located later on.

The walls were sheathed with horizontal 2x6 boards which contrasted with the vertical planking on the side of the engine house. After gluing on a couple of rows I applied weight and let it cure.

I attached the framing for one end wall and then added the 2x6 boards. I had to hang the assembly over the edge of my workbench so that I could weigh down the side boards properly. You can see on the bottom edge of the main wall how I left them longer than necessary. They were trimmed to length later.

I also used a sharp scribe point and my new Micro-Mark thin beam straight edge to add nail holes corresponding with the 6x6 wall framing.

Despite my best efforts, my first attempt at the side walls were a bit too tall and so I had to cut them down a couple of times until the peak of the extension roof fit under the overhanging engine house roof.
I did things backwards from real life construction in that the wall was built first, then I used a clear styrene template to lay out the window openings. They were marked in pencil and chiseled out with several different size chisel blades. You can just barely see the clear styrene template in the picture.

Then, I glued in the window castings (Tichy #8049) and framed out the openings on the inside with more scale 2x6 boards.
The Tichy door (#8025) was framed the same way. I raised it up a little bit off the floor and that meant I could save the bottom horizontal wall stringer and leave it as one piece. This maintained some integrity of the wall. The back of the casting is plain, but I plan to bury it behind stuff to look like it isn't used anymore.

I only used my light black ink stain to color the boards, avoiding brown because I wanted this extension to look like it was built at a later time and with a different species of wood. Similar to what Gerry did, I even left a couple of boards raw to look like recently-replaced wood. Considering I only used one color of stain, it produced a variegated appearance which I liked.

The windows were glazed with clear styrene and then the wall assembly was mounted on the base. The wall edges didn't line up perfectly with the side of the main building but the gaps were hidden with trim boards.
The remaining base around the woodshop was covered in real dirt and ground foam and secured with matte medium. I set the building in front of a fan to help speed up drying as I didn't want excess moisture to be wicked up into the wooden walls (which might cause them to warp).

An unknown resin casting that I bought more than seventeen years ago for an N scale layout was installed next to the building as a fuel storage tank. I had already painted and weathered it, so I just buried it in the wet dirt.

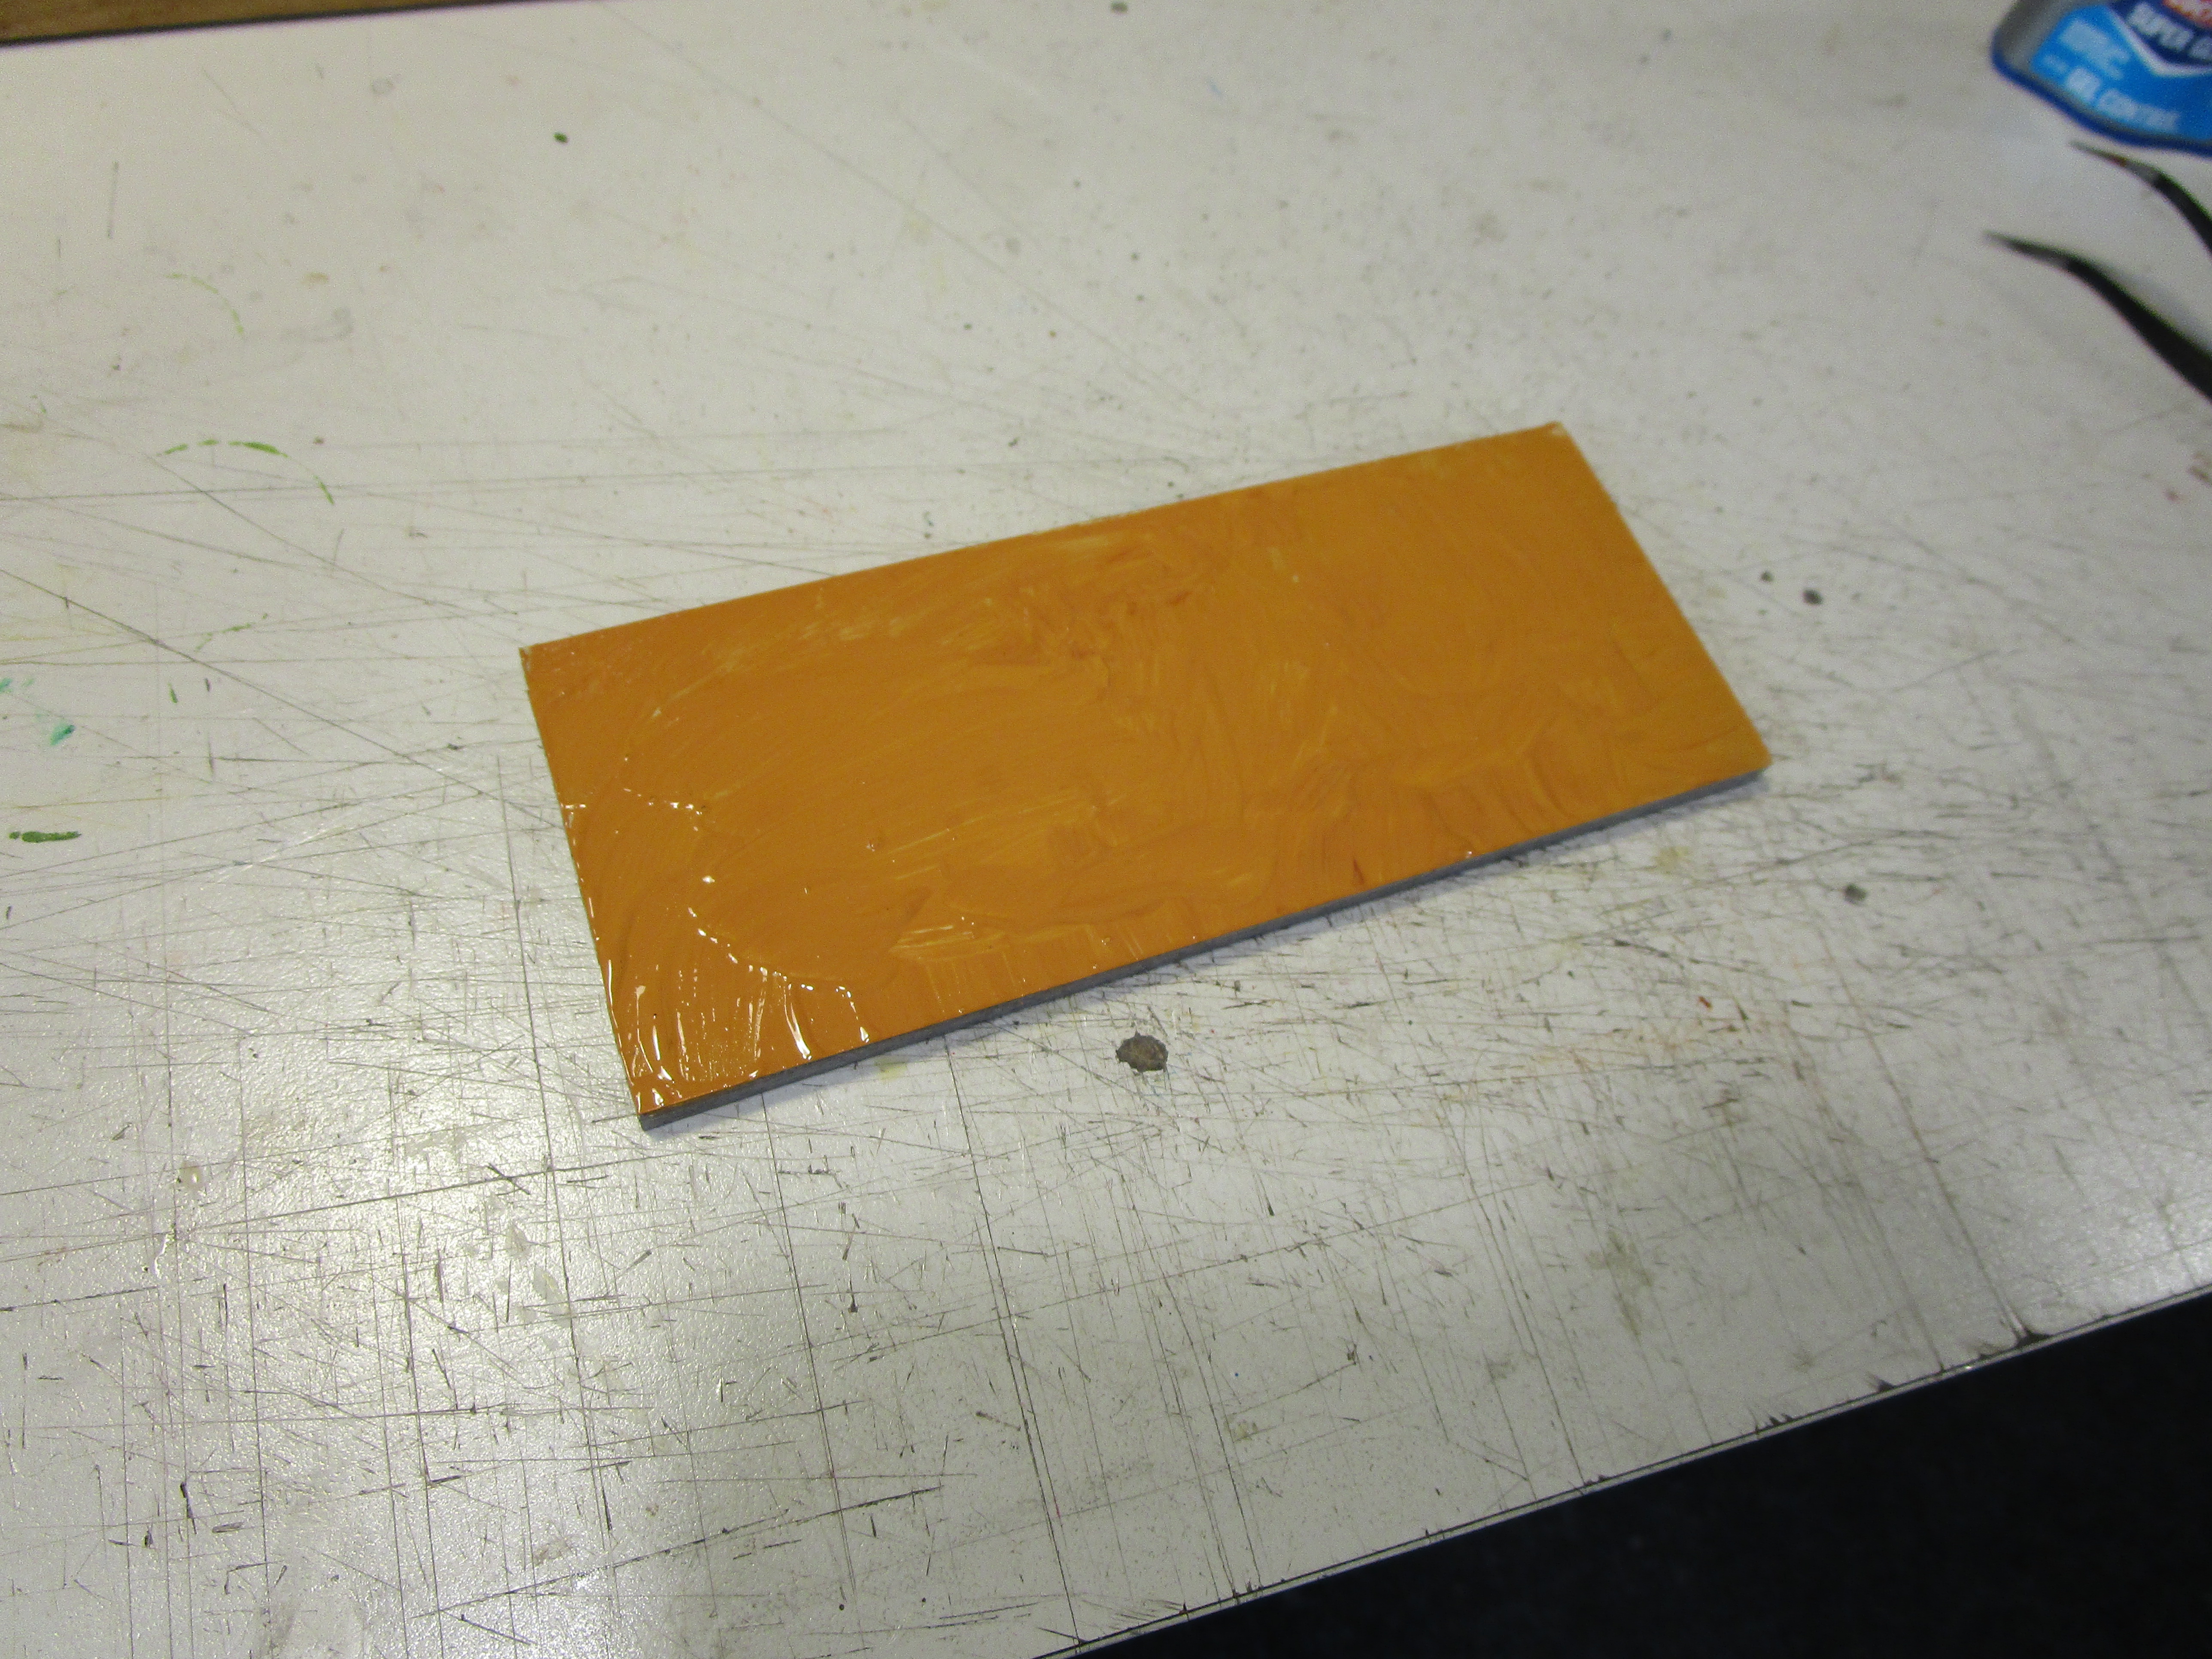
The roof is a thin piece of styrene to which I attached various 2x12 boards that were stained. Scale 24" lines were marked out where the roof joists would go. The roof was going to be removable, and the joists were being mounted on the roof itself and not the building (to allow access to the inside of the woodshop), so I couldn't have the joists go all the way to the front edge. It is a compromise, but I can live with it.

The joists (4x6 lumber) were stained and attached. Then, the three outside edges were framed with more 2x12 lumber.

The upper surface of the styrene was then painted a mottled mustard brown and maroon color to match the cedar shingles. Yup, just when I thought I was done those stupid shingles pulled me back!
The rows were attached and held in place with weights. This was more to keep the roof from warping and less to keep the shingles perfectly flat while the glue cured.

Once done, I trimmed any shingles hanging off the rear flush with the edge. For good measure I applied another thin bead of glue along the rear edge. and weighed it down which compressed the top row of shingles and let them dry really flat and solid. As it turns out, there were 666 shingles that went onto the small woodshop extension roof which proves the devil really is in the details. I didn't have many shingles left over either, which was fine by me.
To hide any spots of glue that might appear shiny I gave all of the roof surfaces a light misting of Dullcote. This also made the skylight windows appear dirty, which is realistic as I can't imagine anyone climbing up there to clean them!
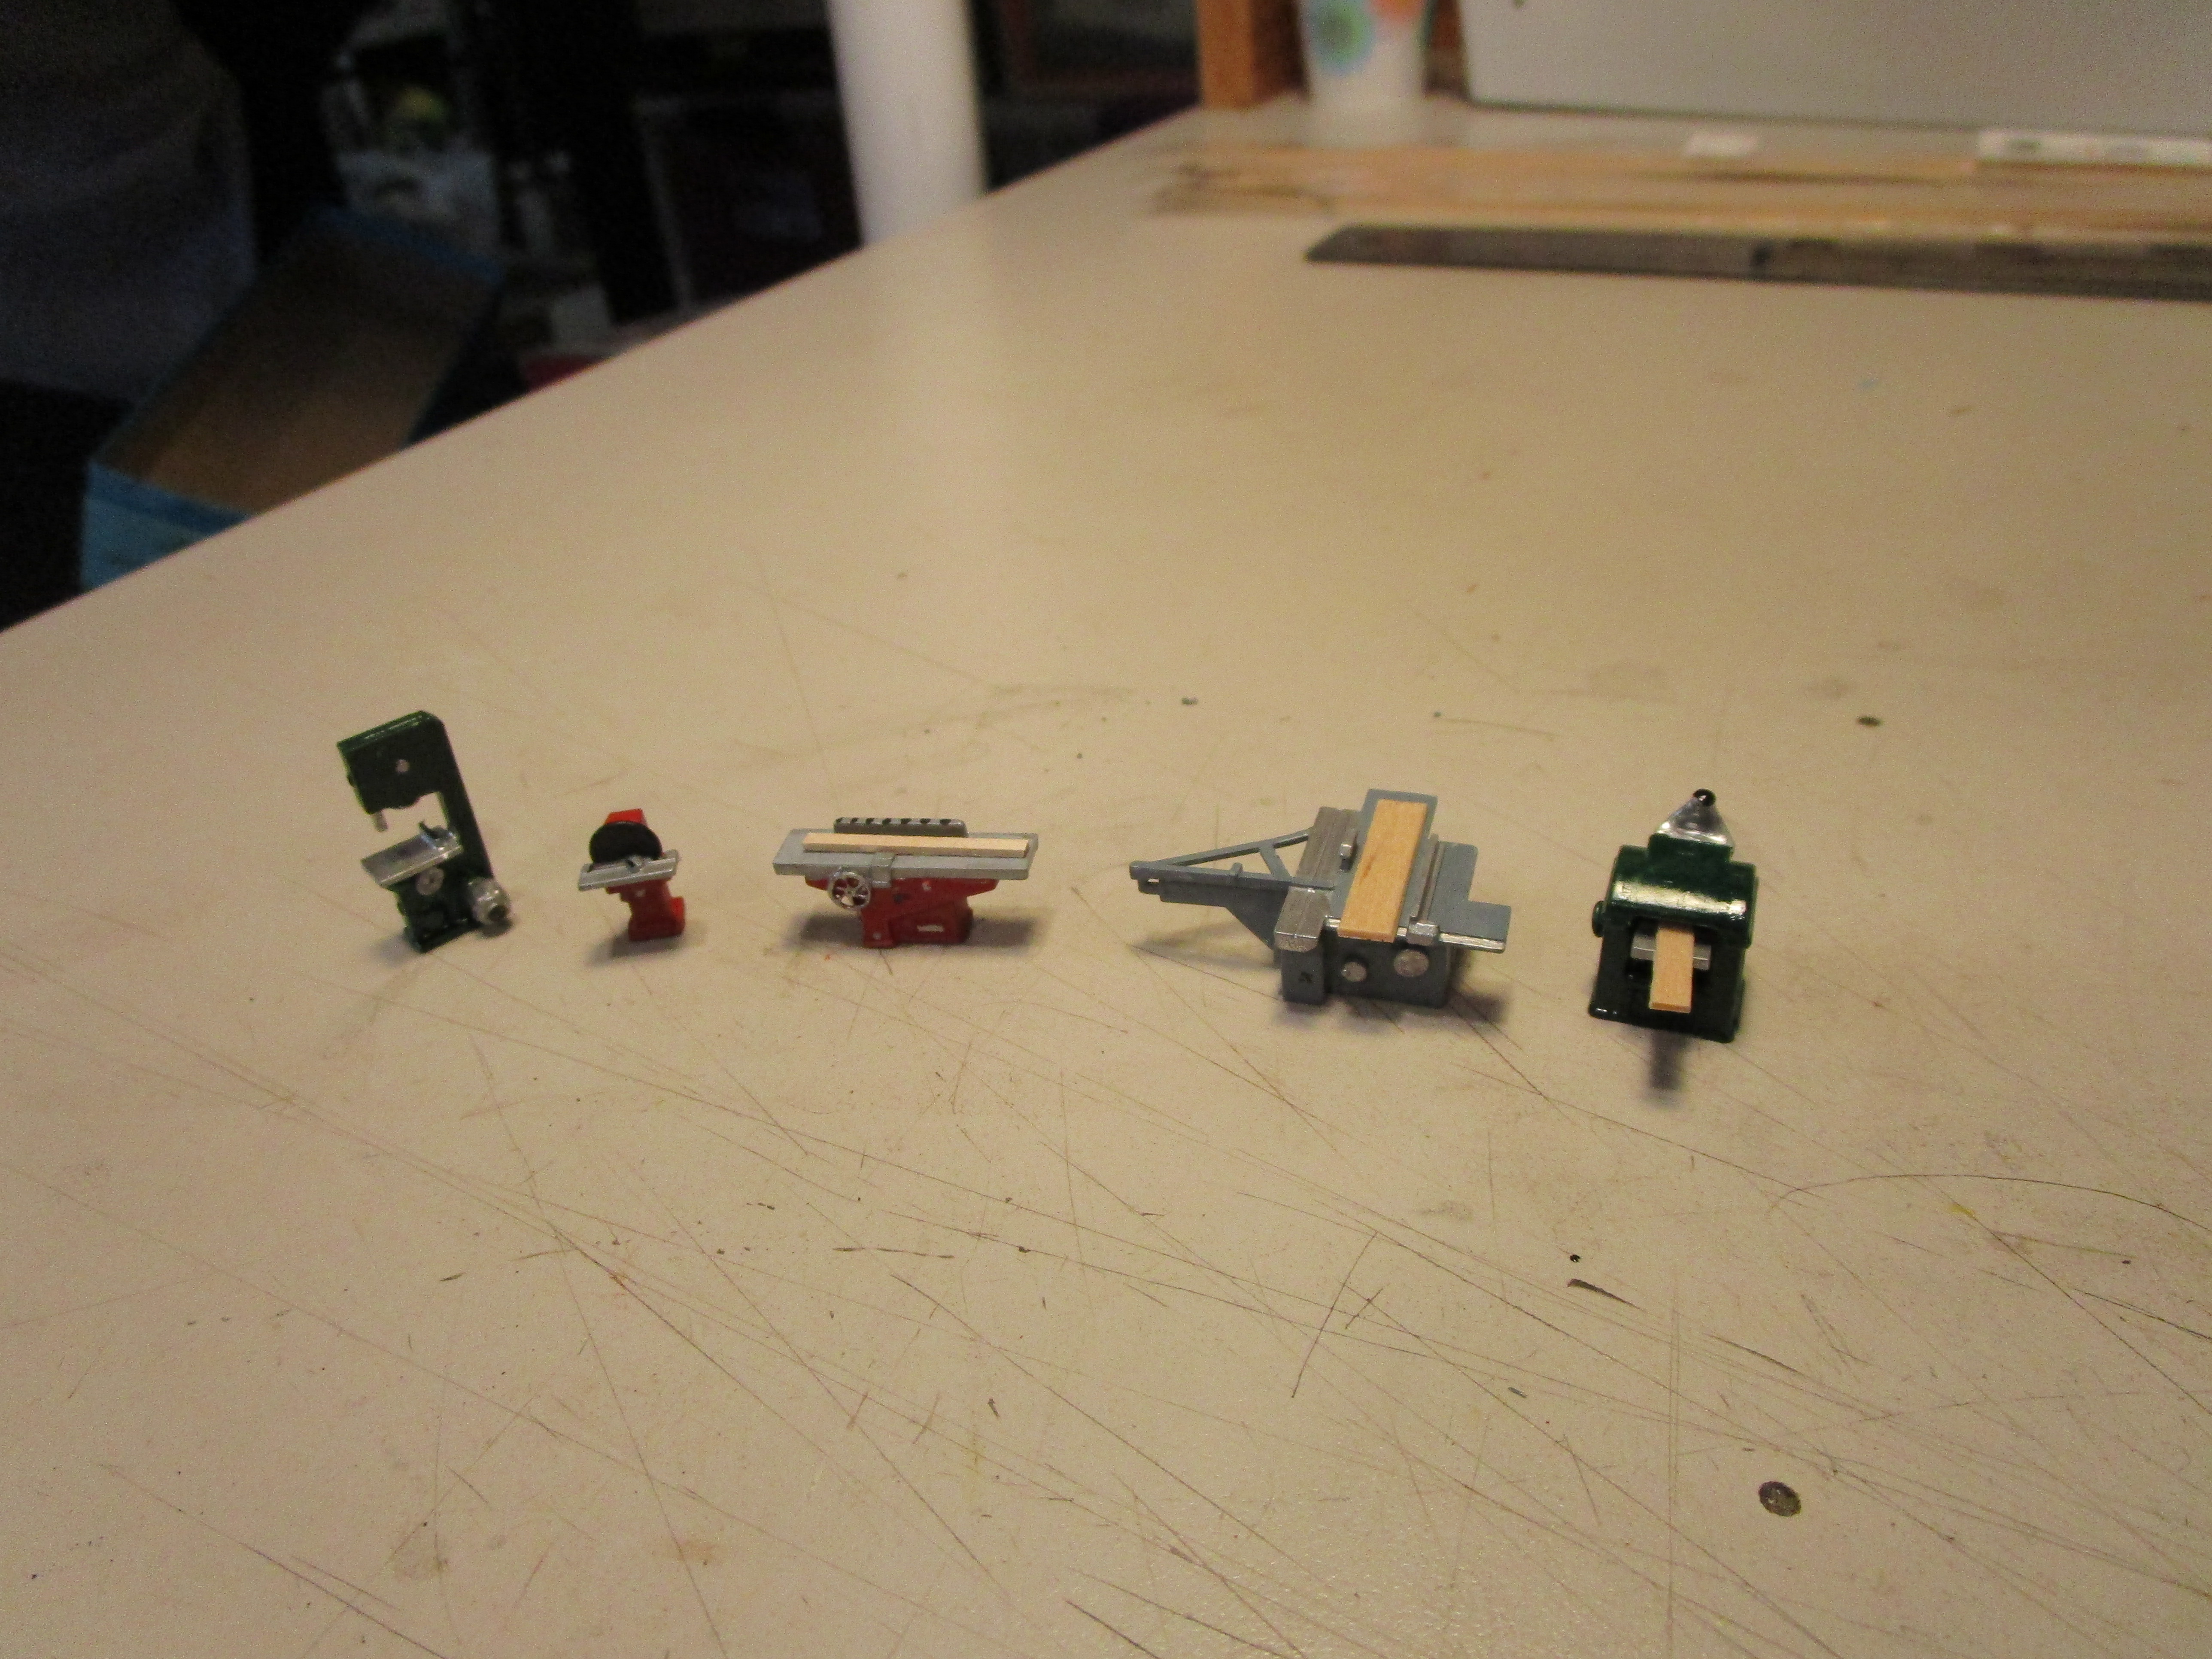
Turning my attention to the interior, I started with the machinery. I ordered a Walthers "Woodshop Equipment" set (#949-4183) which provided a lot of interesting tool castings for about $12. I expected them to be ready to place, but instead found that they were kits needing to be assembled and painted. That's okay... I love building kits. Some of the pieces were really tiny though.

Here they are assembled and ready for painting.

I didn't strive for perfection because they would be tough to see in the building, but I did want them to look somewhat realistic. So, I primed them light gray and then picked out various parts in green, red, gray, black and silver paints. Some real stripwood finished them off.
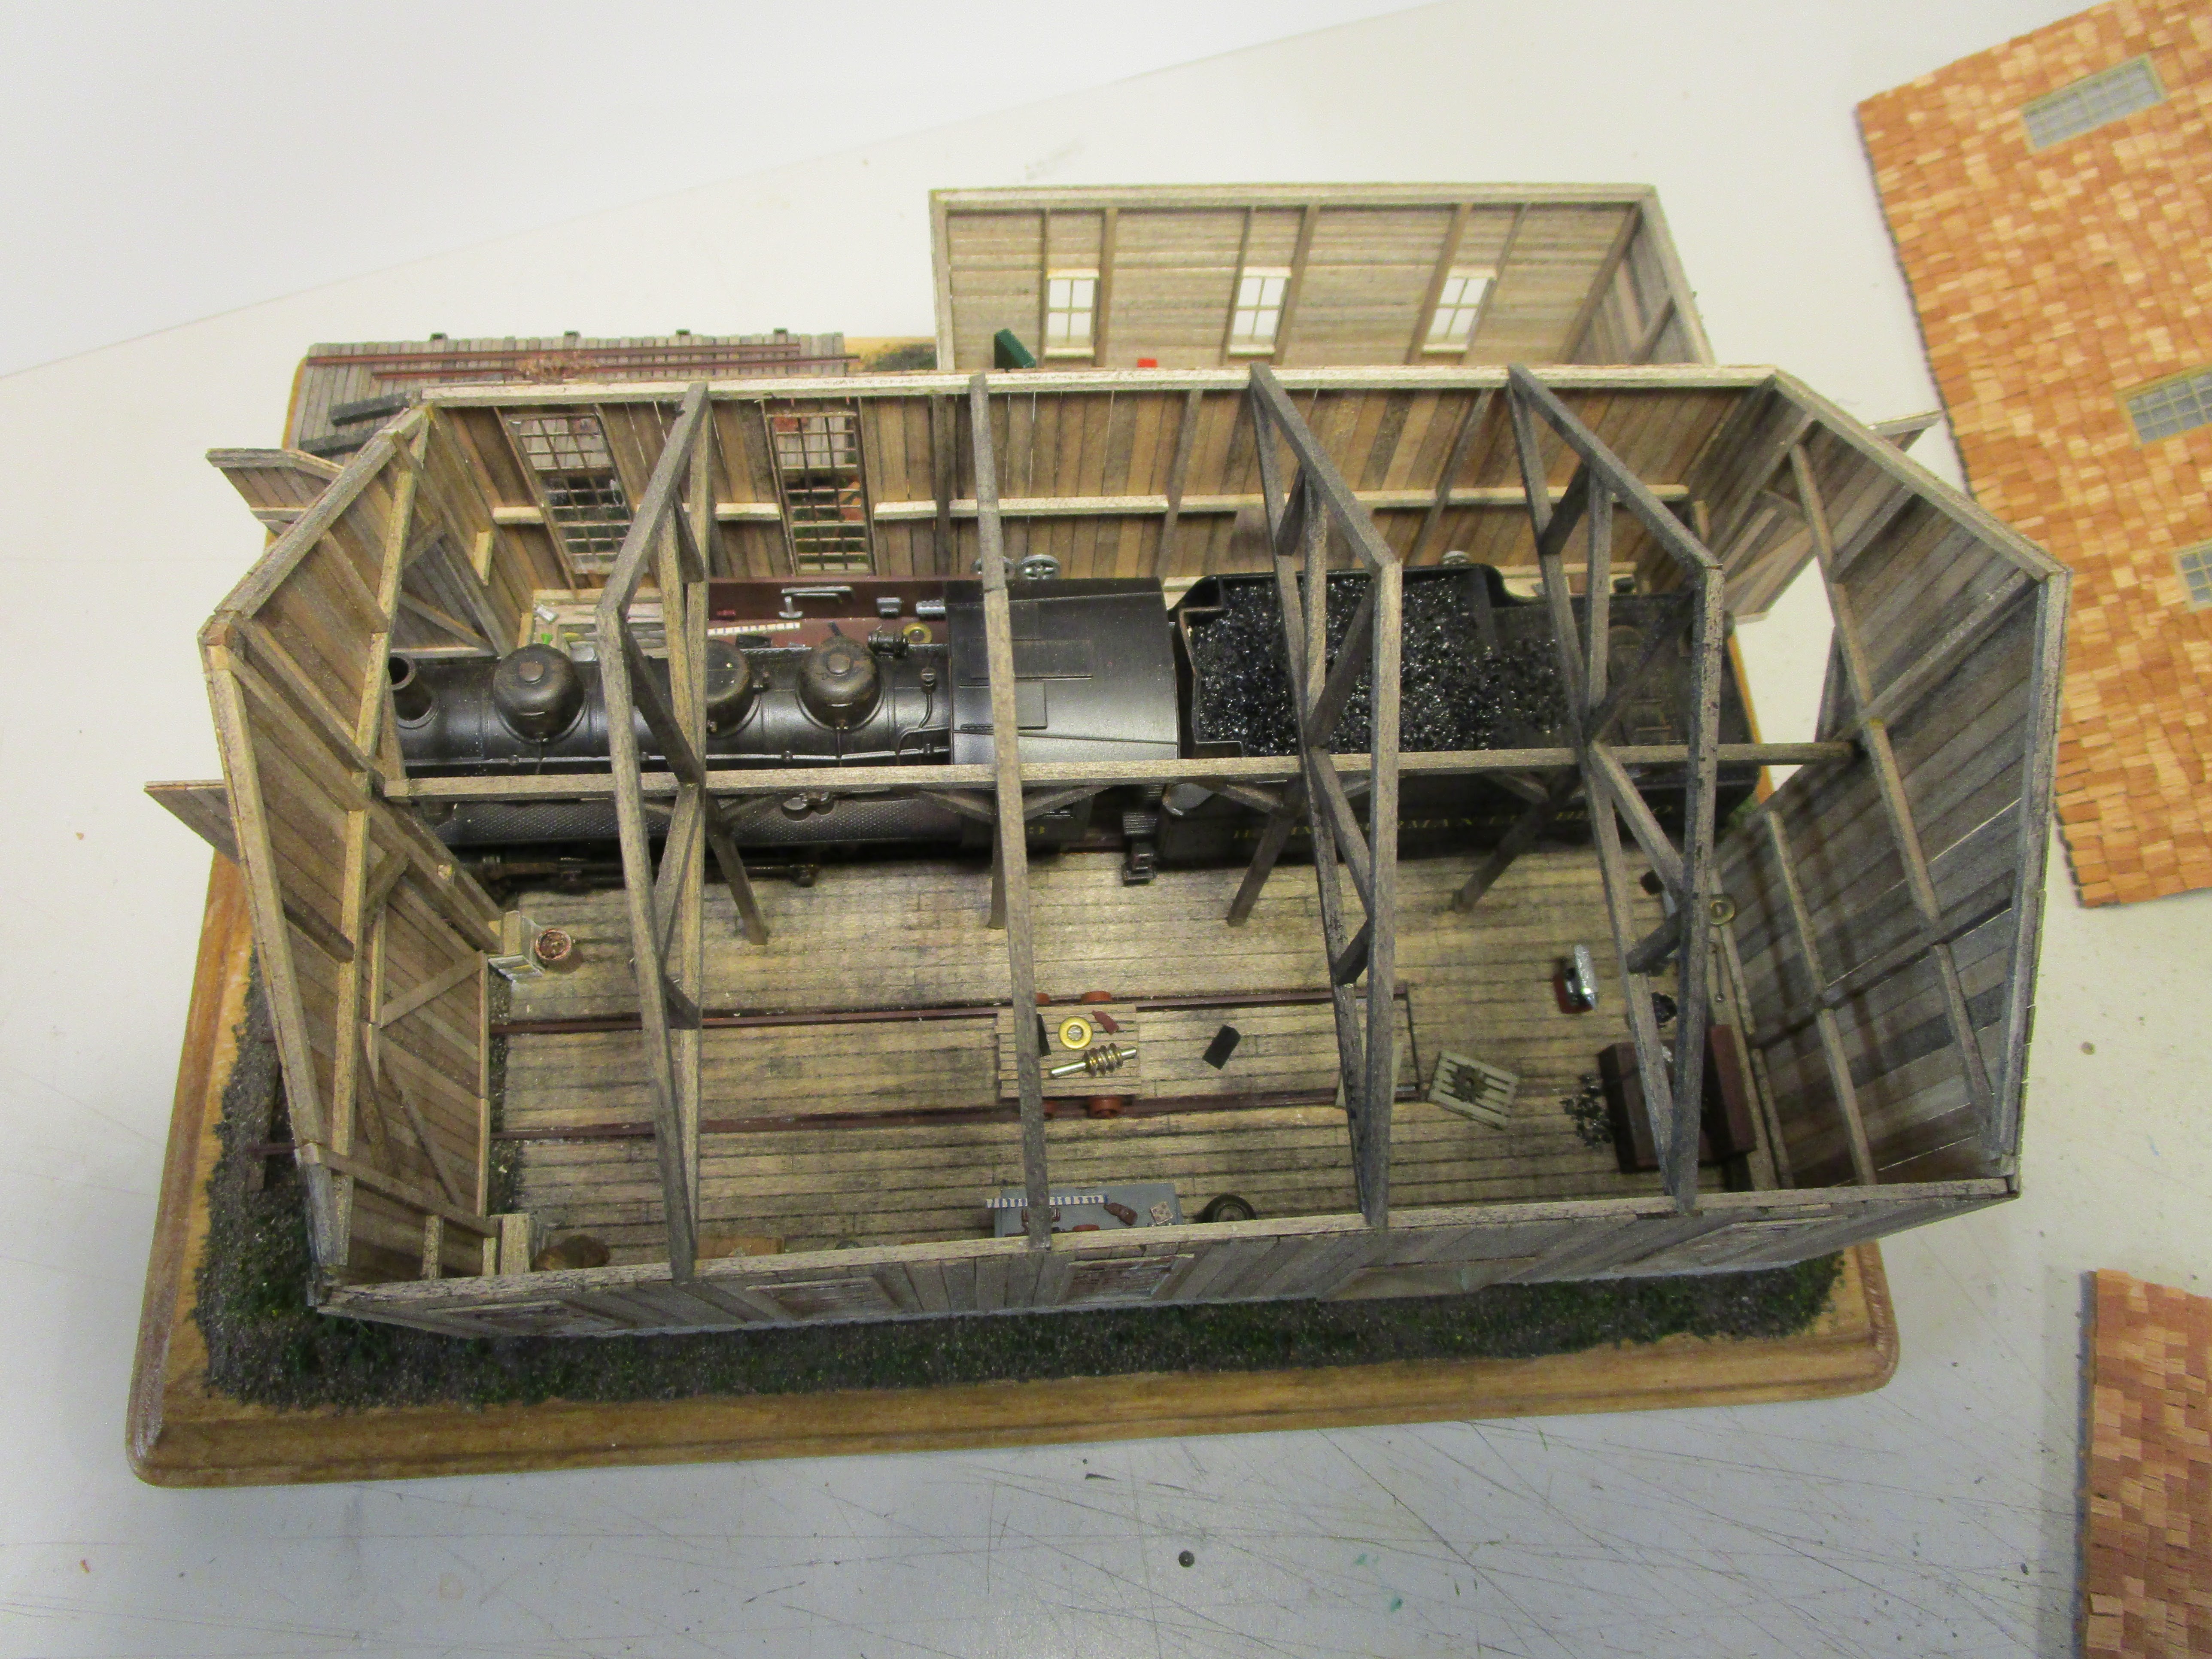
They were glued inside, and then additional pieces of stripwood, various castings, and real sawdust completed the scene. Note to others: don't blow into the building to clear out the excess sawdust without first plugging your nose. Ugh!

The inside is probably a lot cleaner than most work shops would be, but that's okay with me.

After this, I worked on the last empty corner of the base. The article called for a snazzy water tank but I went a different direction. I took some code 55 flextrack and modified it by removing every other tie and then respacing the remaining ones. It was weathered and installed on some N scale cork roadbed for a lower profile.

It was then buried in dirt and ground foam.

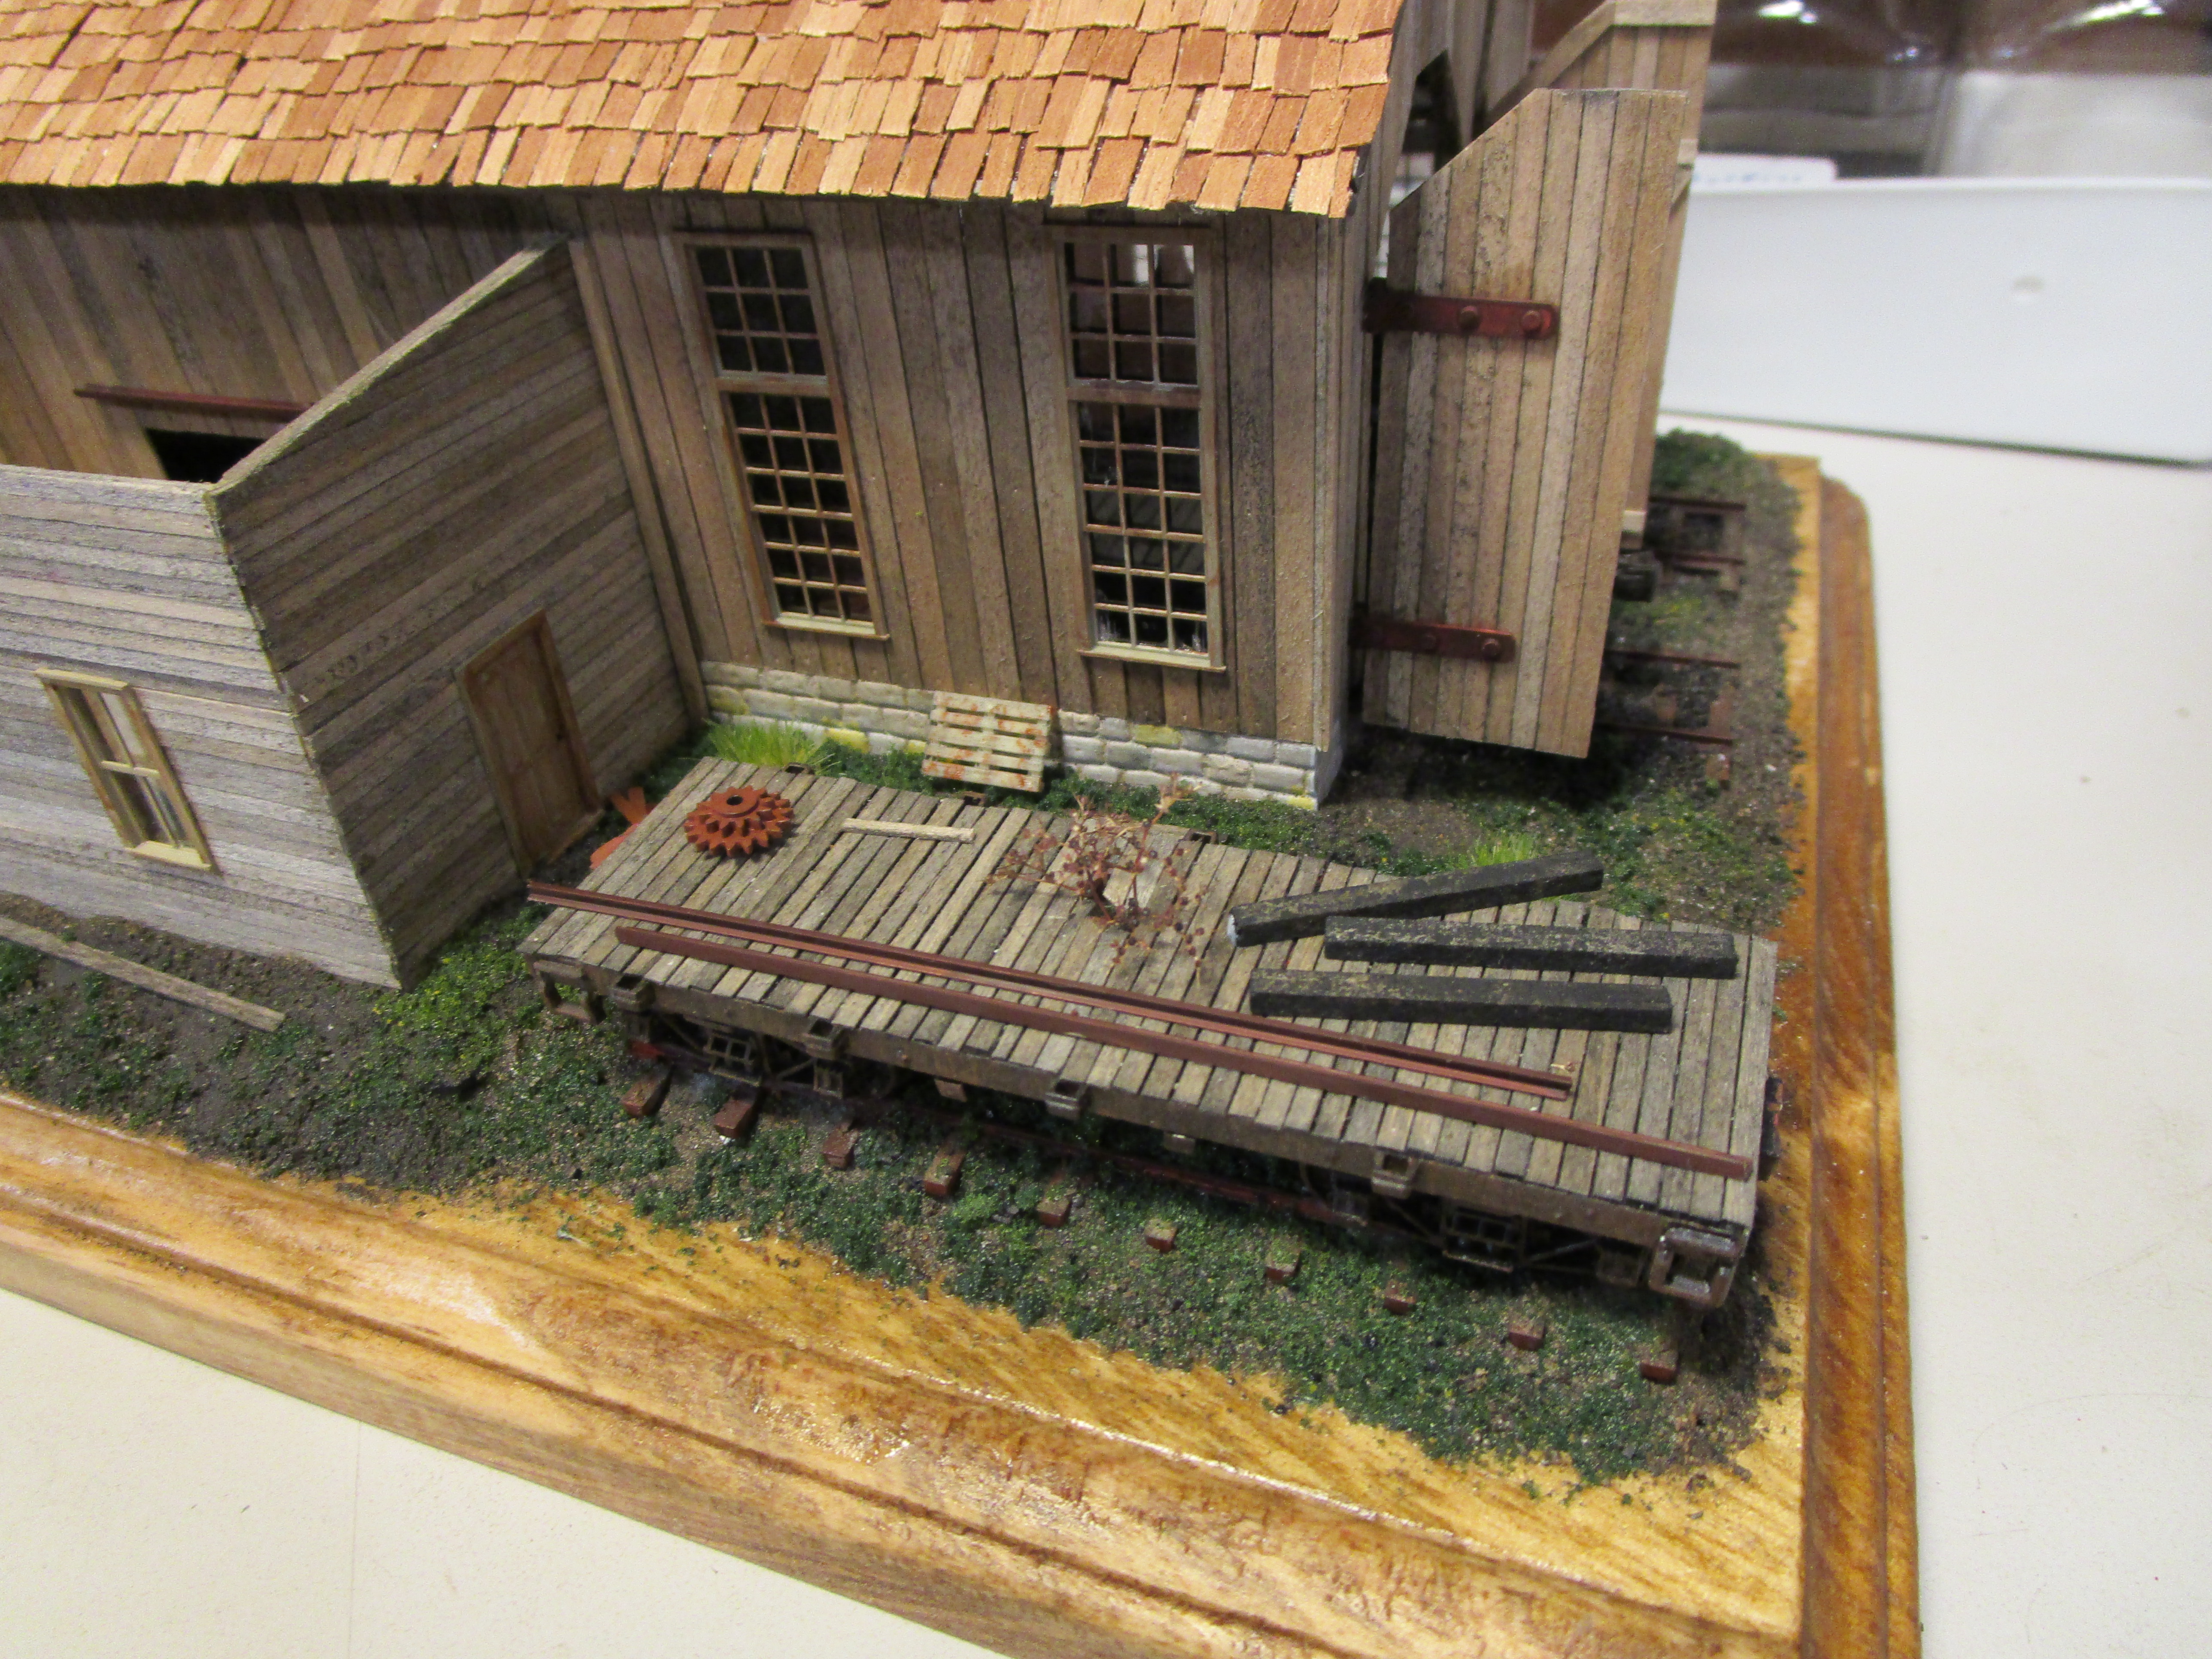
I decided to have a flatcar abandoned and rotting outside in that spot, and it started off as the Walthers' blacksmith kit that I looted earlier. As luck would have it, its short length was perfect for the location. I built it up (leaving off the blacksmith shop on top) and painted and weathered it. Then I got a great idea and decided to drill a hole through it, which would have been easier had I not already glued the metal weight on. But the idea came to me several weeks after I assembled it.

The deck was topped with a new layer of individual boards. I think they were 1x6 lumber. This not only looked better than the styrene deck but it also hid a lot of the holes that were molded in to secure the blacksmith add-ons.

Around the area where the hole was drilled, I broke some boards down. This looks like what happens when the metal substructure under the deck rusts away, and then the wooden boards collapse from lack of support. The other boards should probably be more heavily rotted though.

I then glued the flat car down onto the track with lots of superglue gel and weights. I sure hope it holds.

After that, a few bits of code 55 rail and some other random junk were glued on top, and extra cedar roof shingles were dumped in a pile in the corner. I even added a dying Scenic Express Super Trees branch growing through the deck for whimsy. That completed this part of the scene.
The blacksmith car kit also contained the pieces for a tiny handcar. The castings were oversize and clunky, and their black paint prevented them from being glued together. Worse, I lost one wheel and it rolled under my carpet and I only discovered it a month later. So, I threw out the wheels and substituted some even smaller N scale wheels which I painted and weathered with powders. A new wooden deck was installed over the molded one and then it was put inside the shop with some machine parts on top.

As a last minute detail, I added a couple of paper posters, machinist charts, and pictures on the walls that I scaled down to size. Every machinist needs conversion charts.

There is even a color poster of Harrison in the building, but you really need to squint to have any idea of what it is. But I know, and someday I will point it out to him. And with that, my engine house was finished.

I learned a lot of lessons by building this structure board by board. It is way more delicate than one made from solid wood or styrene walls. One mistake I made was in framing out the end walls. I made sure that the vertical pieces were single pieces of stripwood, but the horizontal members were cut to fit between them. I should have made all of the horizontal pieces solid, because I could have relied on the vertical 2x12 sheathing boards for strength. As a result, I broke the ends of the building at least a half-dozen times during construction because only a tiny 6x6 cross-section of wood was holding it all together horizontally and frequently the joints would shatter if I bumped the building (which unfortunately happened a lot, because I am ham-fisted). Thankfully, it wasn't too difficult to repair and it all added "character"... I think.

I also wouldn't use the vinyl brick sheets again. Unlike styrene, which is easy to join at the corners with solvent, you can't dissolve the vinyl to get nice tight joints and as a result it looks a bit fake. I tried to hide as many as I could but it was a losing proposition. Gerry likely used it when he built his model because that was the only thing available, but there are better options now.
If I want to build a roof completely out of wood, I will need to do more research on a good sublayer. Brass, cardstock, and scribed wood all gave me problems, though I suppose with a properly working Dremel tool the brass wouldn't have been so bad.

Also, no matter how hard I tried to push them together during assembly there were gaps that formed between the vertical and horizontal sheathing boards. Perhaps that is why board-and-batten siding was invented. I don't know, but I wish I could have made it more "insulated" on the inside for my crew. From a distance the gaps aren't really noticeable.

Another decision I made was to forego smokestacks for the main portions of the building. In my world, the skylights can be opened to release the copious amounts of smoke that steam locomotives give off. The original plans did call for a pair of smoke stacks, as well as slick walkways and water barrels for fire safety, but I wanted the simpler clean lines of an uncluttered roof. I may lose some merit points, but I can live with that.

The engine house cost about $150 in parts (more if I added in all my failed attempts at things), which really surprised me. I didn't realize how much scale stripwood cost until I had to order some... and then reorder more and more. Window castings, door castings, and detail parts were further expenses. That doesn't include the engine or the custom decals I had ordered, which weren't necessary at all but part of the fun for me building this structure. It gives me a lot more appreciation for the value of commercial "craftsman kits" that might cost $100-$200 or more.
All the same, I am ready to move to something else. Over the past couple of years I have scratchbuilt a lot of structures and am pretty burnt out right now. I suppose 3,618 shingles will do that to a person. I have a few interesting HO and O scale kits in my stash that I might work on for fun, but I want to turn my attention to scenery on my layout.

Hopefully, this building earns enough merit points to earn my Master Model Railroader Structures certificate. (Edit from the future... it DID earn enough points to a merit award, and it allowed me to complete my certificate requirements!)
way to go on the MMRS certificate! It was probably a very easy decision for the judges... it's a work of art!
ReplyDeleteThank you so much! It was a lot of fun to build.
Delete