
 Initially, I washed the car and frame and then primed both with some Krylon gray primer. Then, I sprayed the car with some really nice Tamiya red paint that I had specifically picked out at the hobby store. I am not terribly familiar with the Tamiya range but I know they make a lot of military paint. Obviously, they must also make a lot of automobile paint because the end result was that my boxcar body was a resplendent silver-flake red! It would look awesome on a guitar, but not on this. So, I used some Rustoleum "Colonial Red" spray paint to go over it. The stuff is really thick so I had to be really careful. "Light layers" and "Rustoleum" are mutually exclusive.
 I then worked on the frame. One dirty little secret about this car is that the underside on the replica is not actually painted but is just plain, exposed wood. Since I built my car out of white styrene I couldn't easily copy this. Painting it yellow and adding faux woodgrain pattern wouldn't look right. So, I painted mine red. After giving it a good coat of Testors Dullcote, I began drybrushing various shades of brown and black on the underframe. The Museum keeps the car in good shape but it is occasionally used in photo charters so it can pick up dirt and grime. And, during the warmer months it is on display next to a saltwater inlet so I am sure the metal gets rusty.
 |
| Showing partial damage. I ended up stripping the whole end. |
 As this point I was pretty dejected. I started to consider throwing the project in a box and leaving it for a while, but then I had crasy thought: "How would a Master Model Railroader fix this?" I soaked the car in lacquer thinner and stripped it all off, including two different colors of red and two different colors of gray. The problem probably was I used Krylon Primer, Tamiya flake red, Rustoleum Red, and then Tamiya gray on the roof. There likely an enamel vs. lacquer paint thing going on. Or maybe one coat went on too heavy over another. But, all the paint came off. After washing it all again, I primed it with Krylon gray (I love the spray nozzles on their cans).
 Then, I used Krylon "Pimento" satin red to paint the car. I was even more careful to apply extra light coats to the body to slowly build up the color. It went on beautifully. Finally, after a while I masked the roof and painted it gray with the Krylon primer that I used before. That worked too. Unfortunately, some of the wood grain that I scratched into the individual vertical boards was lost in the process, but in real life it is hard to see the wood grain from a couple of feet away. At the same time, I am just happy I got back to this stage when I thought I might have to trash it! After several days, I clearcoted the car and then prepared it for decals.
 The decals came from Deerfield River Laser who sell a laser-cut wooden kit for this car. I reached out to them and asked if they would be willing to sell me the decals separately and they agreed. Twice, in fact... sigh. The decals are made for them by Shawmut Car Shops and are close to what is on the replica car, though the font size and spacing is a little off. Not wanting to have custom decals made for this car, I took 'em as is and said "thank you." I was more careful with the Solvaset on the second attempt and they dried nice and straight. The car doesn't have much lettering on it at all, as all of the 2-foot railroads went bust before regulations required car data and such to be applied to the car sides.
 The car was lightly weathered. It sits on display by an inlet of the ocean in the town of Wiscasset for several months during the summer, so salt water and rain and wind allow it to slowly pick up a patina of age. That being said, I believe that the WW&F has repainted it at least once too keep up its appearance and I didn't want to go to far. So, I used brown and black oil paint washes on the body and roof to just add a little more history to it. The car is also used occasionally for special occasions where it is pulled by one of their steam locomotives, so I also added some real crushed coal to the roof. Then, everything was secured in place with a light spray of Dullcote.
I thought I should point it out here that my replacement trucks from San Juan Models did arrive. Doug was prompt with the shipping, and the new set he mailed me are beautiful. Nice and sharp molding, and perfectly square. And molded in black! But, I am happy I painted mine as it gave me something to do while waiting for the red paint debacle to clear itself up. So, now I still have two brand new sets of On2 trucks in the parts box for what? I dunno.
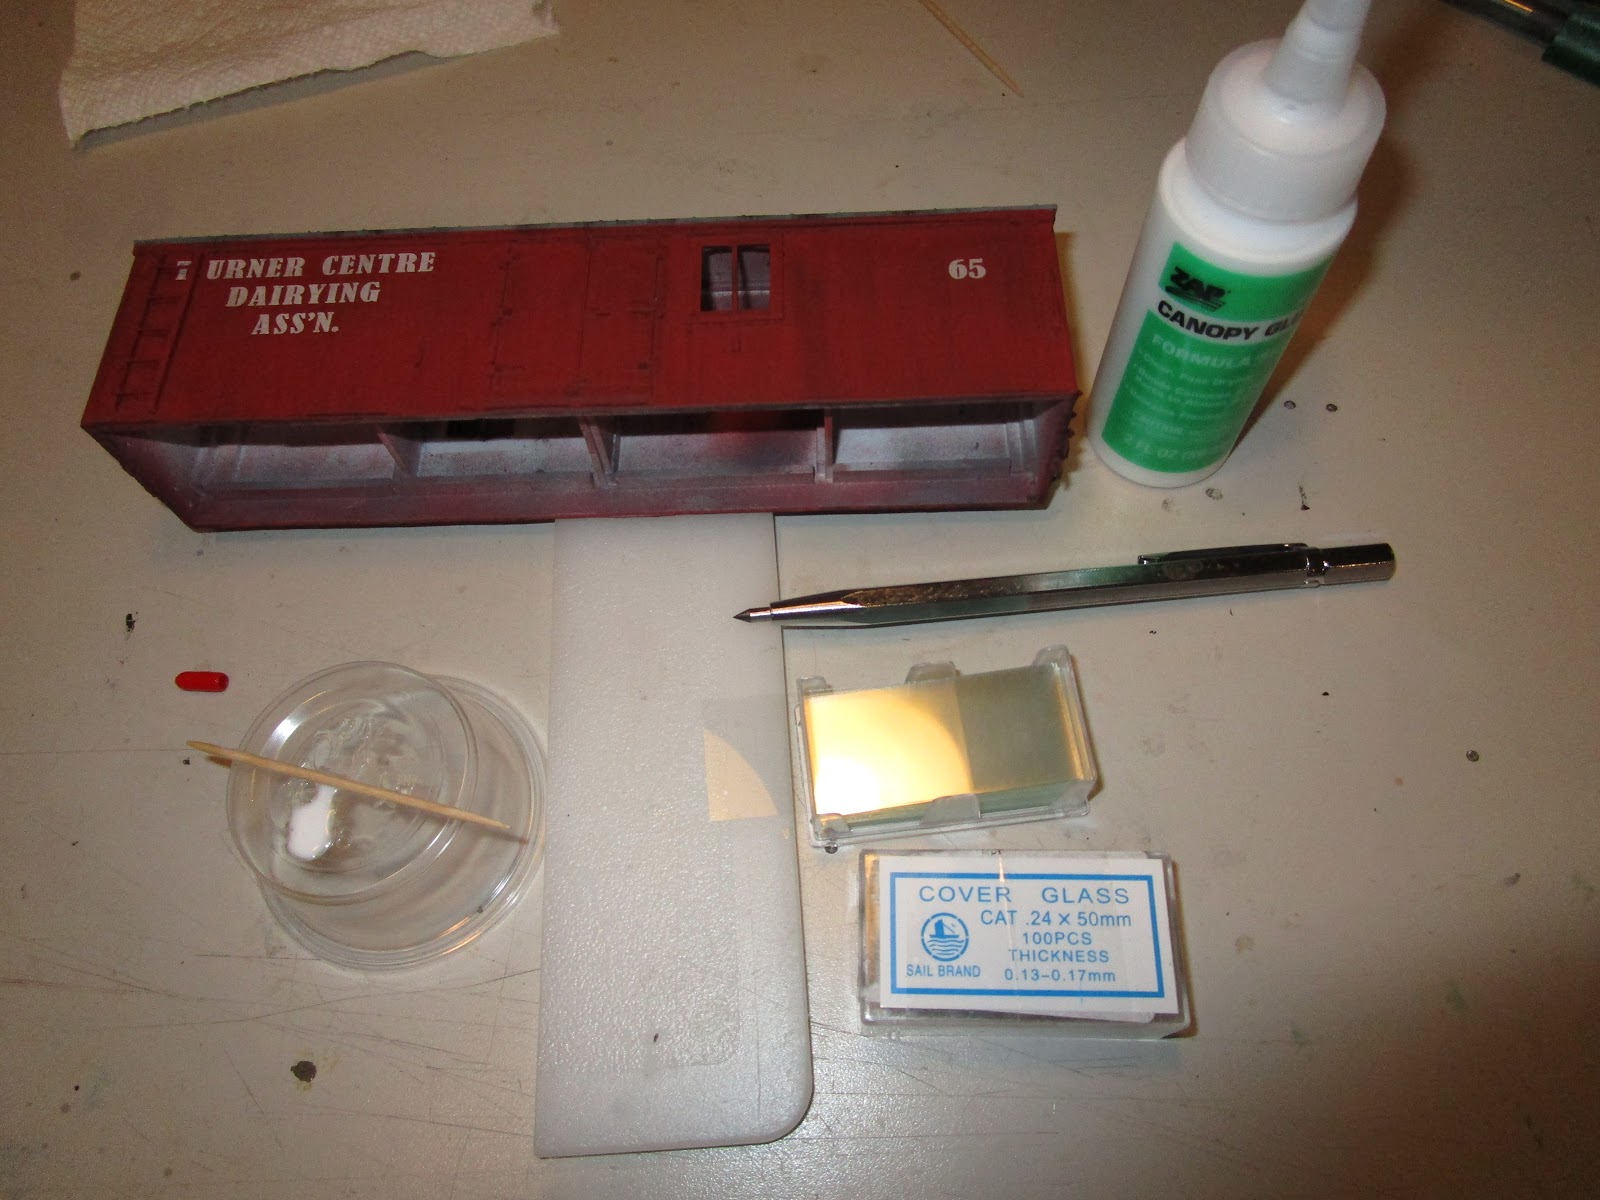 The last thing to do was install window glass in the two windows. I had purchased some thin microscope slide covers and they were secured from the inside with some canopy glue. The stuff works well for glass as it won't fog up like superglue, and it pretty much stays where you put it until it has set. I also painted the inside floor of the chassis including the lead shot boxes and such with a thick coat of cheap black craft paint. That way, should anybody peer inside they won't see that there isn't any milk loaded. And with that, all that was left to do was attach the frame to the body with some Arlene's Tacky Glue.
 And with that, this car is finished! I wish I could take better pictures but I shot 20+ and this was the best of the bunch! Despite some set-backs I am extremely happy with my model. It brought me back to a simpler time in prototype railroad construction, what with the lack of a roof walk, lots of foot stirrups, and graphics on the sides. Because it is On2 it surely will become a display case item, but every time I see it I will remember my last trip to Maine. And, during its construction I joined the WW&F Museum as a paying member, so I have a greater connection to it now. I can't wait until the next time the wife and I can find our way up "Down East."
No comments:
Post a Comment