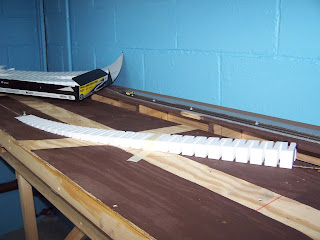
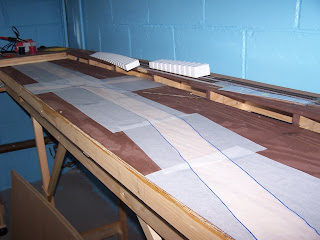
 When I first designed this section the most important scenic feature I wanted to capture was the elevation change which was caused by the siding dropping away from the main line, passing through a tiny forest of trees, crossing a road intersection, and going into the plant. I didn't want to do "cookie-cutter" style benchwork for the siding because that was too permanent a decision for the earliest stages of the layout design. So, I chose to use Woodland Scenics' foam incline sets. It is a pretty neat setup, and the fact that they came in different grades and were flexible was important for my plan. So, I left an abrupt elevation change of 1.5" in the area of the siding to be dealt with later. Well, fast forward a couple of months and I was playing around with strings and levels and such and I realized that I needed a 7% grade to make it work!
  Now, for a short siding I wasn't scared of 7% on its own. Trains using the siding would likely be one or two cars and an engine, so it wasn't too steep. But, compressed into the layout it would look silly, and be hard to build. Woodland Scenics inclines come in 2%, 3%, and 4% grades, and I didn't want to have to mount a 3% directly on top of a 4% to get the 7%. Plus the vertical curves at the top and bottom would be horrendous. So, I needed to reduce the grade, which meant raising the lower part of the benchwork. Because I had spent so much time marking up everything on the plywood, I first made a tracing.
 Then I went to the store to buy some 1/2" thick extruded insulation foam and ran into a problem. When I lived in Rochester, I could find it everywhere in various sizes (2x8', 4x8', 2x4') and in different thicknesses (1/2", 1", even 2") in blue or pink, but here in Albany it is very limited. I can usually only find it in 2x2' pieces that are 1" thick and green. Woodland Scenics makes foam sheets too, but they are small and very expensive. So, I considered ceiling tiles, which Jim Six discussed in the 2010 Model Railroad Planning magazine (and various places online). Unfortunately, they are only sold by the case at the store. They even had broken ones, which I offered to pay for, but was told "they arrived in a case, and will go out in a case." Thankfully, a friend had some lying around and I was in business. I first bought some 1/2" x 3/4" wood trim and glued it to the ends of the section to protect the edges of the tiles. I was careful with the glue so that I didn't accidentally glue the sections together!
 Next, I used tracing paper to capture all the sketches I had done for the roads. It was pretty easy, though I had to clean off the section to do it. And, let me tell you, I am running out of space to put all my tools, drawings, track, nails, etc. I might just buy a small folding table to have set up under the layout to hold all that junk. Next, I measured and cut the tiles with a utility knife and then glued them down to the top of the plywood. I made sure that the front was flush with the wood, and the back was allowed to have a gap if necessary. I used Loctite adhesive applied with a caulking gun, and I weighted down the top though it probably wasn't necessary. It doesn't have to be perfectly flat.
Then, everything got a thick coat of my brown paint (at least the once I am currently settled on... my third choice so far). Next, I transferred my roads and other dimensions back to the top of the ceiling tile. I used adhesive specifically designed for foam to glue in the section of the 4% incline that I had cut, and adjusted the curves sightly at the start and end so that it wasn't perfectly straight. My small wallpaper roller was used to make sure that there were no blobs of adhesive under the grade which would skew it one way or the other. I am not intentionally planning any cross elevation!
 The top of the foam ramp was at the exact same height as the top level of the benchwork, but I didn't want to try and cut the incline to slide alongside parallel with the top layer. So, instead I filled the gap with whatever I had on hand... some 3/4" thick wood trim, several layers of foamcore sheets, and a single layer of N scale (1/8" thick) cork. It looks like a dog's breakfast, but it will be covered up with scenery so it won't matter. More importantly, it creates a nice gentle start to the incline. Once that has cured, I can lay the actual roadbed and finish the siding down to the paper mill area.
No comments:
Post a Comment