My Christian faith is an important part of my life, so I wanted to build a church as one of my scratchbuilt structures. However, and perhaps not surprisingly, I couldn't find a single article in Model Railroader on how to build one from the last thirty years (heathens, I guess). So, I was on my own. But, rural churches share similar architecture with rural schoolhouses and there was an article in the December 1995 M.R. along those lines. So, that is where I started.

The article talked about how to modify and upgrade an I.H.C. #4104 rural schoolhouse kit. It is a very basic kit in the extreme, and certainly not something I wanted to start with for my own church. Here is a picture I found online of one... classy huh?

The article didn't have actual scale plans, but did show various dimensions and from those I drew up my own set of drawings. Some details would be changed but much of the inspiration was from that article.

I purchased a sheet of Evergreen styrene clapboard siding (#4051). I didn't enjoy working with at all because it felt very weird and unusual under my fingers. It was a strange, tingly sensation. As a wall covering though it worked great.

I planned to use Tichy 2/2 double-hung windows (#8025) which seemed perfect for a small, rural church. No arched top windows here. The opening were laid out on the styrene, but nothing was cut until I had the window castings in hand to make sure they fit. Lesson learned. And it took weeks for them to arrive... sigh.

I used knives and chisel blades to open up the holes, and files to get them to final dimensions. There were only six windows, so it went quick. Making sure to orient the clapboard siding the right way was the hardest part (up and down look alike unless you squint at it).

I decided to add a round, stained glass window to the top of the back wall and that was based around a Tichy casting (#8037) that I figured would be suitable. Circle templates helped to lay it out.

Walls went together quickly, and everything was braced to prevent warping. I plan to have an interior but it will only be visible through the windows, as I am not interested in making this roof removable.

The front entranceway has a small extension constructed along similar lines.

For a little bit of elegance, I decided to "upgrade" the front door to the church and picked out one that had a pointed upper frame. Made by Grandt Line (#5013), apparently it was modeled from a door on a D&RGW station in Durango. Narrow gauge station + church = modeler's mashup.

The roof peaks were braced with two pieces of styrene that I first glued together into a V-shape.

Looking around for some 0.040" styrene for the roof, I realized I had run out of small pieces. I still had most of a 4x8 sheet but that was rolled up and I was too lazy to unroll it. Casting my eyes around, I saw some 0.040 Evergreen 1/4"-square sidewalk scribed styrene sheet (#4516) in my pile. This styrene would be what the shingles were attached to, I assumed that the lines would make it easy to keep them straight. What a great idea!

I then added lots of bracing to the inside to prevent sagging. I knew a steeple might be going on top, and that could involve putting pressure on the roof while building it, so I needed it strong.

To hide the clapboard siding corner joints I used Evergreen styrene L-angle (0.080"). Anything larger looked out of scale. At the inside corners between the front extension and the main building I used thin strip styrene.

After that, I washed everything with soap and water and then sprayed it all with several light coats of Testors flat white paint. This was done before shingling so I wouldn't have to mask the roof. The styrene was already white, but actual white paint looked better and made the surface less shiny and gave it some texture. Finally, the roof was ready for the shingles. I was excited to use laser-cut Rail Scale Models shingles (#D5001 and #D5016). I first painted the edges of the roof gray in case gaps showed between the first course of shingles. It would look better to be gray and match, than white and stick out.

The cardstock shingles were given random streaks using my three solutions of India ink and alcohol (weak, less weak, and extremely strong). It looked like a mess as seen below until it dried, after which it still looked odd.

The shingles come in strips and I cut them off and glued them on with Arlene's tacky glue, one row at a time. I would do rows in between other jobs and such, and it went pretty quick. In fact, it was a lot of fun. Certainly more fun than doing a real roof in the heat of the summer. The scribed lines on the styrene actually proved very helpful for this process.

The overhanging pieces were trimmed with very sharp scissors once the glue dried (from my trusty Swiss pocket knife) and the scraps were then used on the front extension. The top of the roof was done with a separate roof-cap, also purchased from Rail Scale Models.

Then, the window castings were installed as was the front door. I also glued in the stained glass window casting, which cracked on me. I will try and hide the repairs, but replacing it would be difficult at this time.

I was feeling pretty good about the project, when I realized I hadn't taken into account the steeple. To be fair, I wanted to leave it off but my wife thought that all rural churches should have one and she was right. So, I would need to scrape off part of the roofing shingles where the steeple would go- otherwise, the joints would look terrible. But, before I took such an extreme measure to a perfect roof I decided to make the steeple first. If it came out bad, I would leave the church sans steeple. Strip styrene helped me measure the pitch of the roof.

More clapboard siding was cut out, notched, braced on the inside, and framed on the outside with L-angle styrene.

The pointy part started off as flat styrene with lots of triangles drawn on. I randomly picked the pitch of the steeple based on what I thought looked good. I didn't want it "too pointy".

These were cut out, glued together into a pyramid, and then secured to a square base. An octagonal flange was glued on the bottom which drops onto the square steeple part. The hole in the bottom was...

... so I could fill it with lead shot and then squeeze in a full tube of runny superglue. Once dried, the steep was extremely rigid. I normally would use epoxy but I was out.

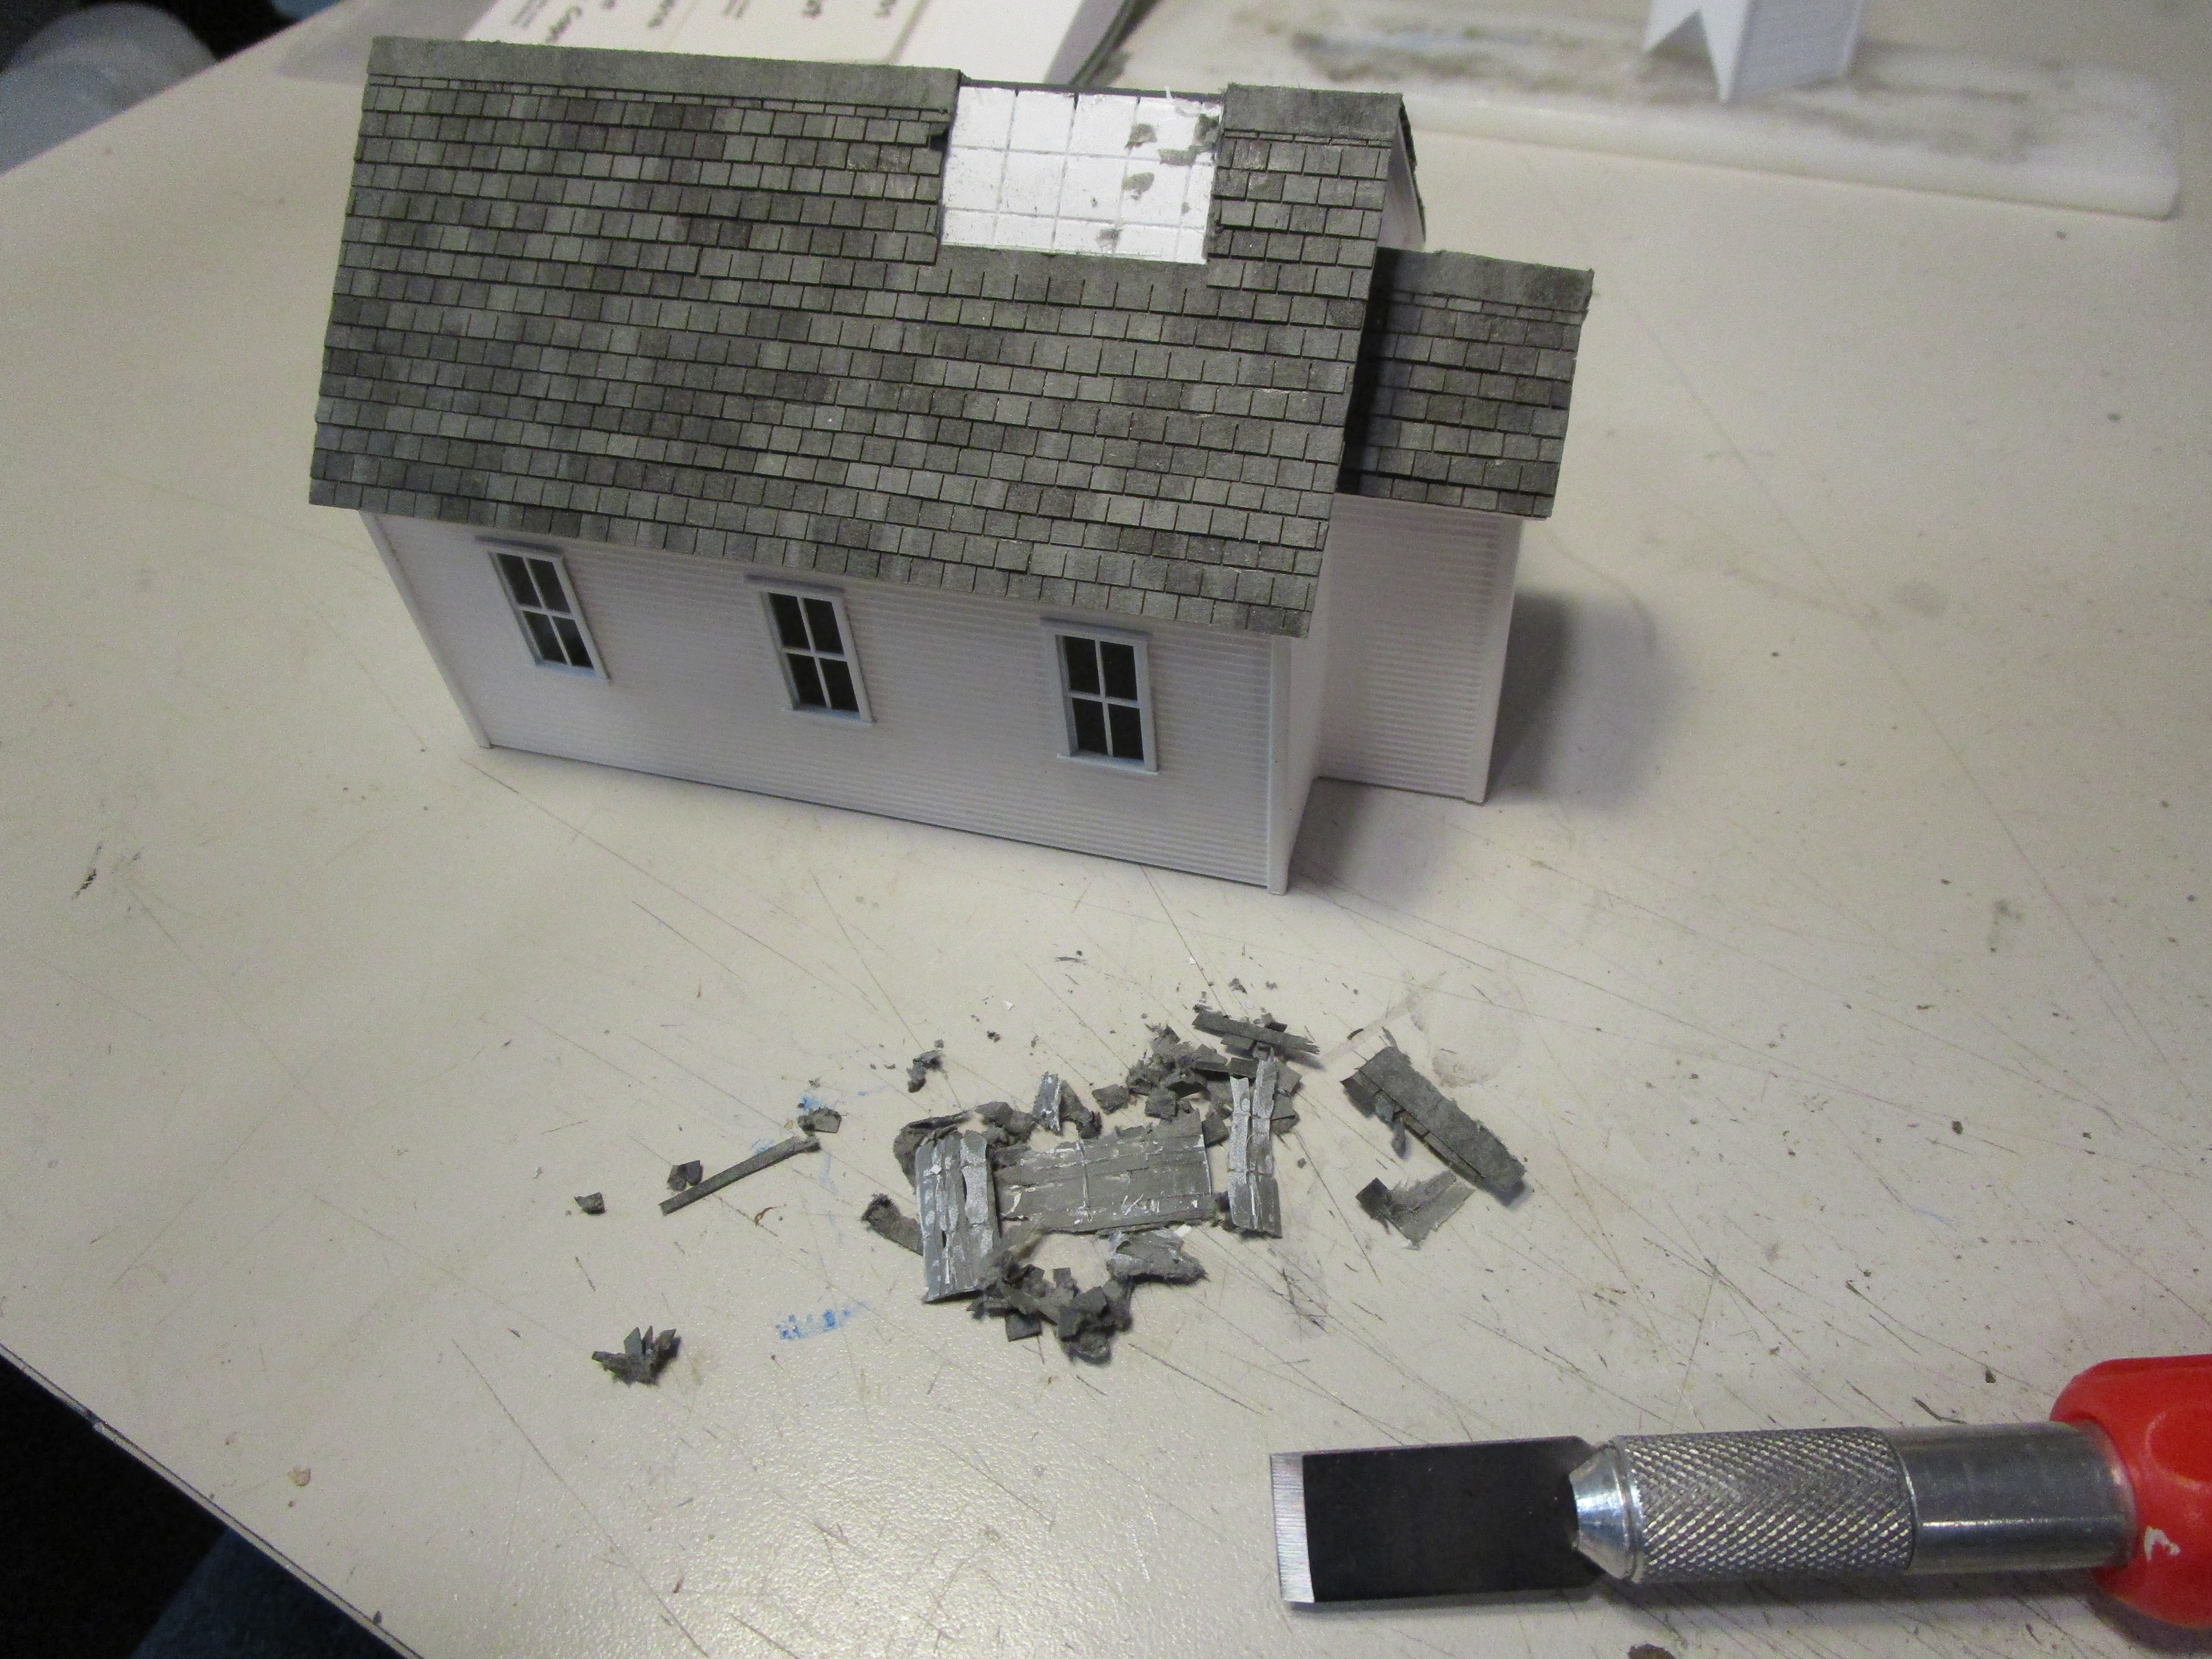
At this point, I was happy with the direction my steeple was going and I chiseled off the shingles from the roof where it would go. The tacky glue was extremely resilient and I hate to think how tough it would have been had the church been made out of wood instead of styrene. More than likely I would have had to glue on the steeple over the shingles and then add a second layer of shingles over the top of everything.

The steeple was secured to the roof with various shapes of styrene- mostly rods, which work at odd angles. I was careful with the MEK application as I didn't want it dripping through onto the shingles and ruining them somehow.

The steeple shingles were done the same way, except that I had to line up each row with the two adjoining sides. I did two opposing sides first, let that dry, then did the two other sides. A lot of trimming at the corners and backfilling with glue for support was necessary.

I then framed the upper edges of the steeple with strip styrene, painted white.

After that it was time to weather the church. I was leaving the shingles alone as they already had nice, variegated look to them. But, the sides were a stark white. I think they looked good as is but judges will knock you for points if you don't weather a model at least a little. So, I used some of my finely sifted real dirt and brushed it on the sides much like others do with ground chalk. It pained me to do it, but I exercised restraint. Then I sealed everything with Dullcote.

The side windows were then glazed with real, thin microscope cover glass. My diamond pointed scribe tool came in handy and I think I finally figured out how to do it. Only a couple of pieces were wasted in the process.

The stained glass window was another story. Access inside was tight, and there was no way I was going to cut a perfect circle out of glass. So, I used clear acrylic from an old kit. I cut a circle by chipping away the edges with my rail cutter and then rounded it all over on the belt sander.

I then set the acrylic on the casting and traced the lines of the strut pattern on the back of the window.

It was then flipped over and I painted between the lines on the front with translucent paint and nail polish. I wanted a more complex pattern but it just got sloppy so I stuck with the basics. Once dry, I used alcohol to remove the marker lines from the back.

Because the church isn't lit, the effect is barely visible. Oh well, I will bring a flashlight to the judging!

The last detail for the front was a cross. I glued up some stripwood, painted it gold, and mounted it on the front. I also added glazing behind the door's window. My wife suggested I install a bell in the steeple and incorporate a removable roof for that section but that was just a little too ambitious.

I next turned to the interior of the church. (Actually, I built this while waiting for the window castings to arrive). The floor of the church has red/gray carpeting, similar to what my childhood church had. I cut some styrene sheet to fit and then sprayed it maroon with a light overspray of gray. Though not very prominent in the picture, and not at all visible through the windows, it does look like mottled carpet in person.

I wanted to build wooden benches, but didn't want to use real wood. So, I cut up bits of styrene to look like the pews. To ensure every one was identical, I assembled them up against a square and used some wooden matchstick pieces as spacers so that the side/leg assemblies would all have the seats at the same height. It was crude but effective. I rounded the edges of the pews and then painted them tan to look like plain, finished wood.

The "upholstery" started off as really thin strips of styrene that I painted red, cut to length, and glued to the benches. For something so simple, I think it is pretty effective. The figure I used for testing dimensions is a metal casting that I liberated from a D&H crane I bought used.

The preacher is Bachmann Scenescapes "Businessmen" figure and most of the rest are the discount ones you find on Ebay. Their painting left a lot to be desired, but they will hardly be visible. Here is is what you get for $12: forty eight of the ugliest people you will ever see!

Two other figures from an old Bachmann kit, which were smaller than the rest, looked like they would work out as children. I used lots of Tacky glue to hold them secure because once it is all glued up, access to the inside will be impossible. I also built a communion table with bread and wine, a pulpit complete with message notes, and a potted plant that looks more like a small tree. I chose a wooden base with clipped corners to give a little elegance to the church model and glued the interior to it.

With that done, the church itself was glued down and there was no going back. I then sprinkled real dirt, ground foam, and Scenic Express "Spring Flowers" around it to give it an inviting appearance (and counteract the weathering I added). Pink and yellow wildflowers flowers were on one side, and blue and yellow flowers were on the other.

The front door was given a doorknob made from a cut down Life Like track pin, and two Bachmann figures shake hands before entering. The front step is styrene I painted gray.

And with that, my church was complete.

I had a lot of fun building it, and I think it is miles away from where the original M.R. article was headed. I enjoyed working with cardstock shingles and will use them again. I also think my wife's nudging to add a steeple (sans bell!) was a good idea.

I am already looking forward to the next structure, but my little display case is filling up with these buildings. I will have a small town in there before it is all over!