
 I had purchased some DVDs by Mike Confalone, produced by Model Railroad Hobbyist magazine, titled "Allagash Railway - Scenery modeling outside the box." Mike is an expert at capturing the dirty, rural New England railroad scene. He suggested using Rustoleum camouflage paint for a base layer on the track, and that is what I used. It is ultra flat, and the spray tip made it easy to get the paint exactly where I wanted it. I only painted a couple of benchwork sections for now, and in areas where both sides of the track can be seen I sprayed the front and back (eventually, backdrops will cut off rear views). Cleaning paint off the tops of the rails while it is soft is important, as is masking the switch points beforehand.
 He used thin washes of Pollyscale brand Concrete, Mud, and Dirt paint. I didn't have any of those colors in my stash, and since Pollyscale was discontinued a few years ago I instead went to my shelf of acrylic craft paints. I picked out a couple of browns, a couple of grays, a black, and a yellow that I hoped I could tint to look something concrete like (spoiler alert: I couldn't, so I gave up on the yellow). I asked my wife to pick up some small plastic cups at the store when she was out, and she found some perfect "condiment" cups that come with lids. I made a caddy by screwing seven cups to a board with tiny screws, and then placed more cups in each that contained the thinned paints. It is nearly impossible to tip over, and easy to move. And, the condiment cups have lids so I don't have the throw the paint out at the end of the session. Thanks honey!
 After doing some sections I began to think that the coloring was coming out a bit too garish. This will probably change after the ballast is in place, as instead of dark brown backgrounds instead I will have light gray ballast surrounding everything and those bright gray ties will blend in and the dark ties will stand out. Still, I went over the light gray ties (which appear white in the photos) with either brown or black to tone them down. One of the corner sections has a bit more experimentation on the color choices too, as I don't consider the corners permanent to my layout. They are just filled pieces until I can expand my layout.
The ratio of tie colors I decided on is this:
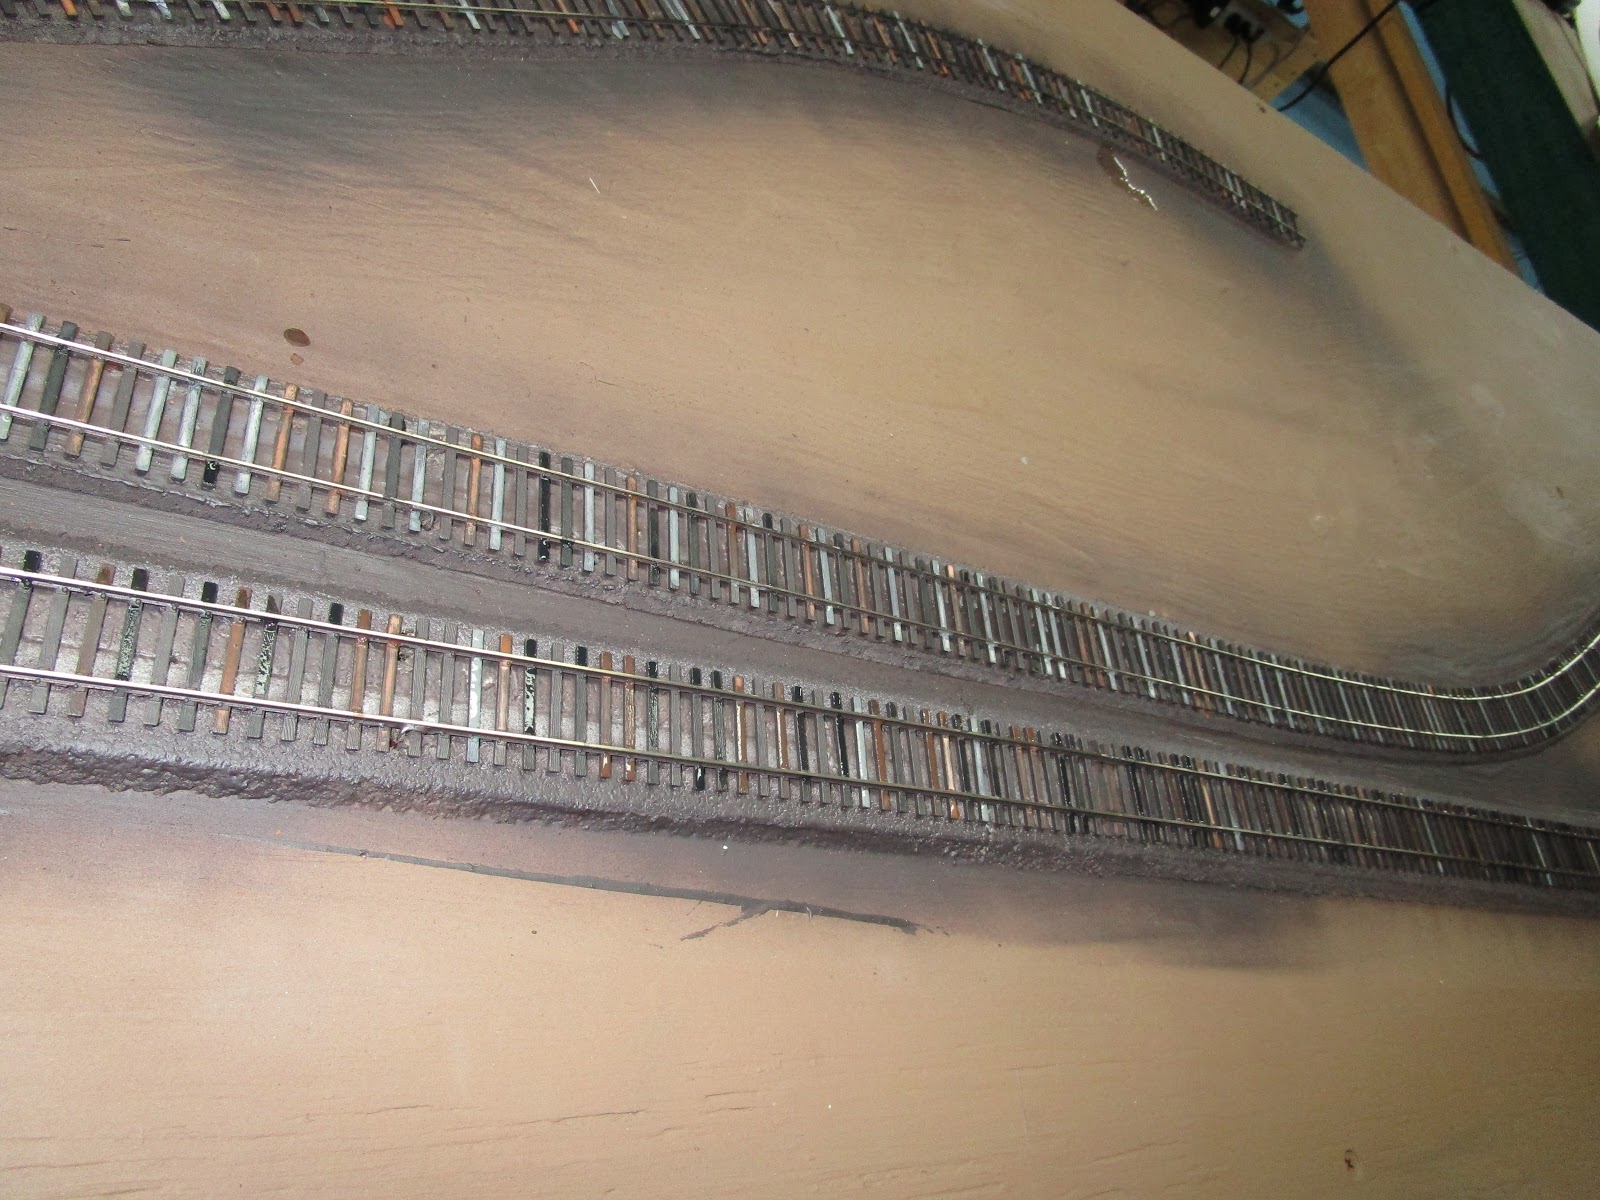 Mainline:
25% are dark brown
25% are black (which represent new ties)
25% are the Krylon camouflage brown
13% are gray
12% are light brown
Sidings:
20% are dark brown
20% are black
20% are the Krylon camouflage brown
20% are gray
20% are light brown
Note: for one or two of my sidings where the tracks were clearly left to rot away, most of the ties will be painted in shades of brown because new ties, such as black ones, wouldn't be found here. I may need to redo some of the ties.
I am pretty happy with the results. I did about 15' of track in about 75 minutes. I don't plan to do any more until I have done some ballasting, because if my color ratios are off (especially on the mainline) I want to know before I have painted the whole thing. But, I had a lot of fun getting back to the layout.
No comments:
Post a Comment