CP Executive train in Albany

CP Executive train in Albany

Tuesday, May 31, 2022

Harrison's first trainspotting adventure

On Memorial Day our family took a little trip to Voorheesville, one of my favorite local railfanning places. It is only about 20 miles from our house, and it is a nice place to go and relax for a few hours. The new bike trail (former D&H Albany Main) and gazebo were busy with lots of activity. But, we went for the trains... and this was Harrison's first time out to see them.

It was a little hot, so we didn't stay very long. And part of the time was spent walking on a portion of the rail trail. But, we did catch three trains while we were there. To protect his young ears from the noisy trains we kept Harrison back from the tracks, and he slept right through their passing. Oh well.

And straight out of the "are you kidding me?" files, we decided to order a pizza for lunch and have it delivered to the park where we were sitting. Several local pizzerias were closed, either because it was Monday or the holiday, but one chain had a location under 4 miles away and they were willing to deliver. So we placed our order, and in the process were notified that it would be over an hour to cook and deliver it. That was okay, though it seemed odd. When the delivery boy showed up, we found out that the local pizzeria was closed and the order had been sent to a different pizzeria that was literally 60 seconds or so from our house. They had delivered it 20 miles! Had we known, we would have tipped him more. But, when we placed our order the restaurant never told us.

Friday, May 27, 2022

D&H train with unpatched former Conrail units (1976)

The location of the below image is unknown but I suspect it was taken on the Penn Division. It is dated May 30, 1976, and I don't see any evidence that the nose of the lead engine #7319 was patch-painted and stenciled for the D&H. The transfer of this engine from Conrail had just taken place the month before, and it likely was pressed into service immediately.


Monday, May 23, 2022

D&H train holding for signals near Cobleskill (1984)

Here is a shot from May 29, 1984 of a D&H train near Cobleskill, NY. This is exactly one day after my modeled date of May 28, 1984. It looks like an overcast and hazy afternoon.

I love those old signal masts, and I couldn't resist this image as it shows the red and green clearly on the right. Obviously, that red is for the train parked just a few feet behind it! 

Due to recent developments in my life I haven't had very much time for model railroading lately. Hopefully, as things settle into some sort of "scheduld" I will be able to get back to the layout.

Thursday, May 19, 2022

D&H #7316 (1980)

Here are two shots of a D&H train led by GP38-2 #7316 near Lanesboro, PA on May 22, 1980. Engine #7316 was one of the first EMD engines to be painted in the third version of the blue dip scheme, this time with lots of yellow accents and nicknamed the "Zebra stripe" scheme. I think it looks really sharp. Note the snowplows are painted yellow and the corners are cut away, which permits clearance around electrified third-rails near NYC. 

Athearn released a ready-to-run blue box engine lettered for #7316, and I have a model of it in my collection. Thankfully, even in 1984 it hadn't weathered too badly so I was able to keep it still looking pretty good.

Sunday, May 15, 2022

D&H #17 in Fort Edward (1975)

Here is a shot of Alco PA-4 #19 at Ford Edward, NY on May 17, 1975. The paint is gleaming, and it should be considering that the engine had just recently been rebuilt by Morrison-Knudsen for use on the newly-created Amtrak "The Adirondack" train. 

I have heard that the D&H even had an employee who was assigned to touch up the silver paint on these engines every day, if required. They took great pride in them.

Wednesday, May 11, 2022

New Display Cabinet

As mentioned elsewhere (here and here), I really enjoy displaying my models and toys. It brings me great pleasure just to look at them while doing other things in the basement. Certainly, it is more fun than keeping them stored away in boxes. But finding suitable cabinets or display cases has been tough. Even with Craigslist, I have not seen many suitable ones for sale. 

One I purchased was a gorgeous cherry-finished wood cabinet, but it was too dark on the inside and the models weren't easily visible. So, I gave it to my wife and it is in her craft room. Another cabinet came from a friend and I like it a lot, but it is too small and additional matching ones aren't available. After much searching, I finally found this one on craigslist for $200 and jumped on it. I had to pay a little extra for delivery, but it was worth it.

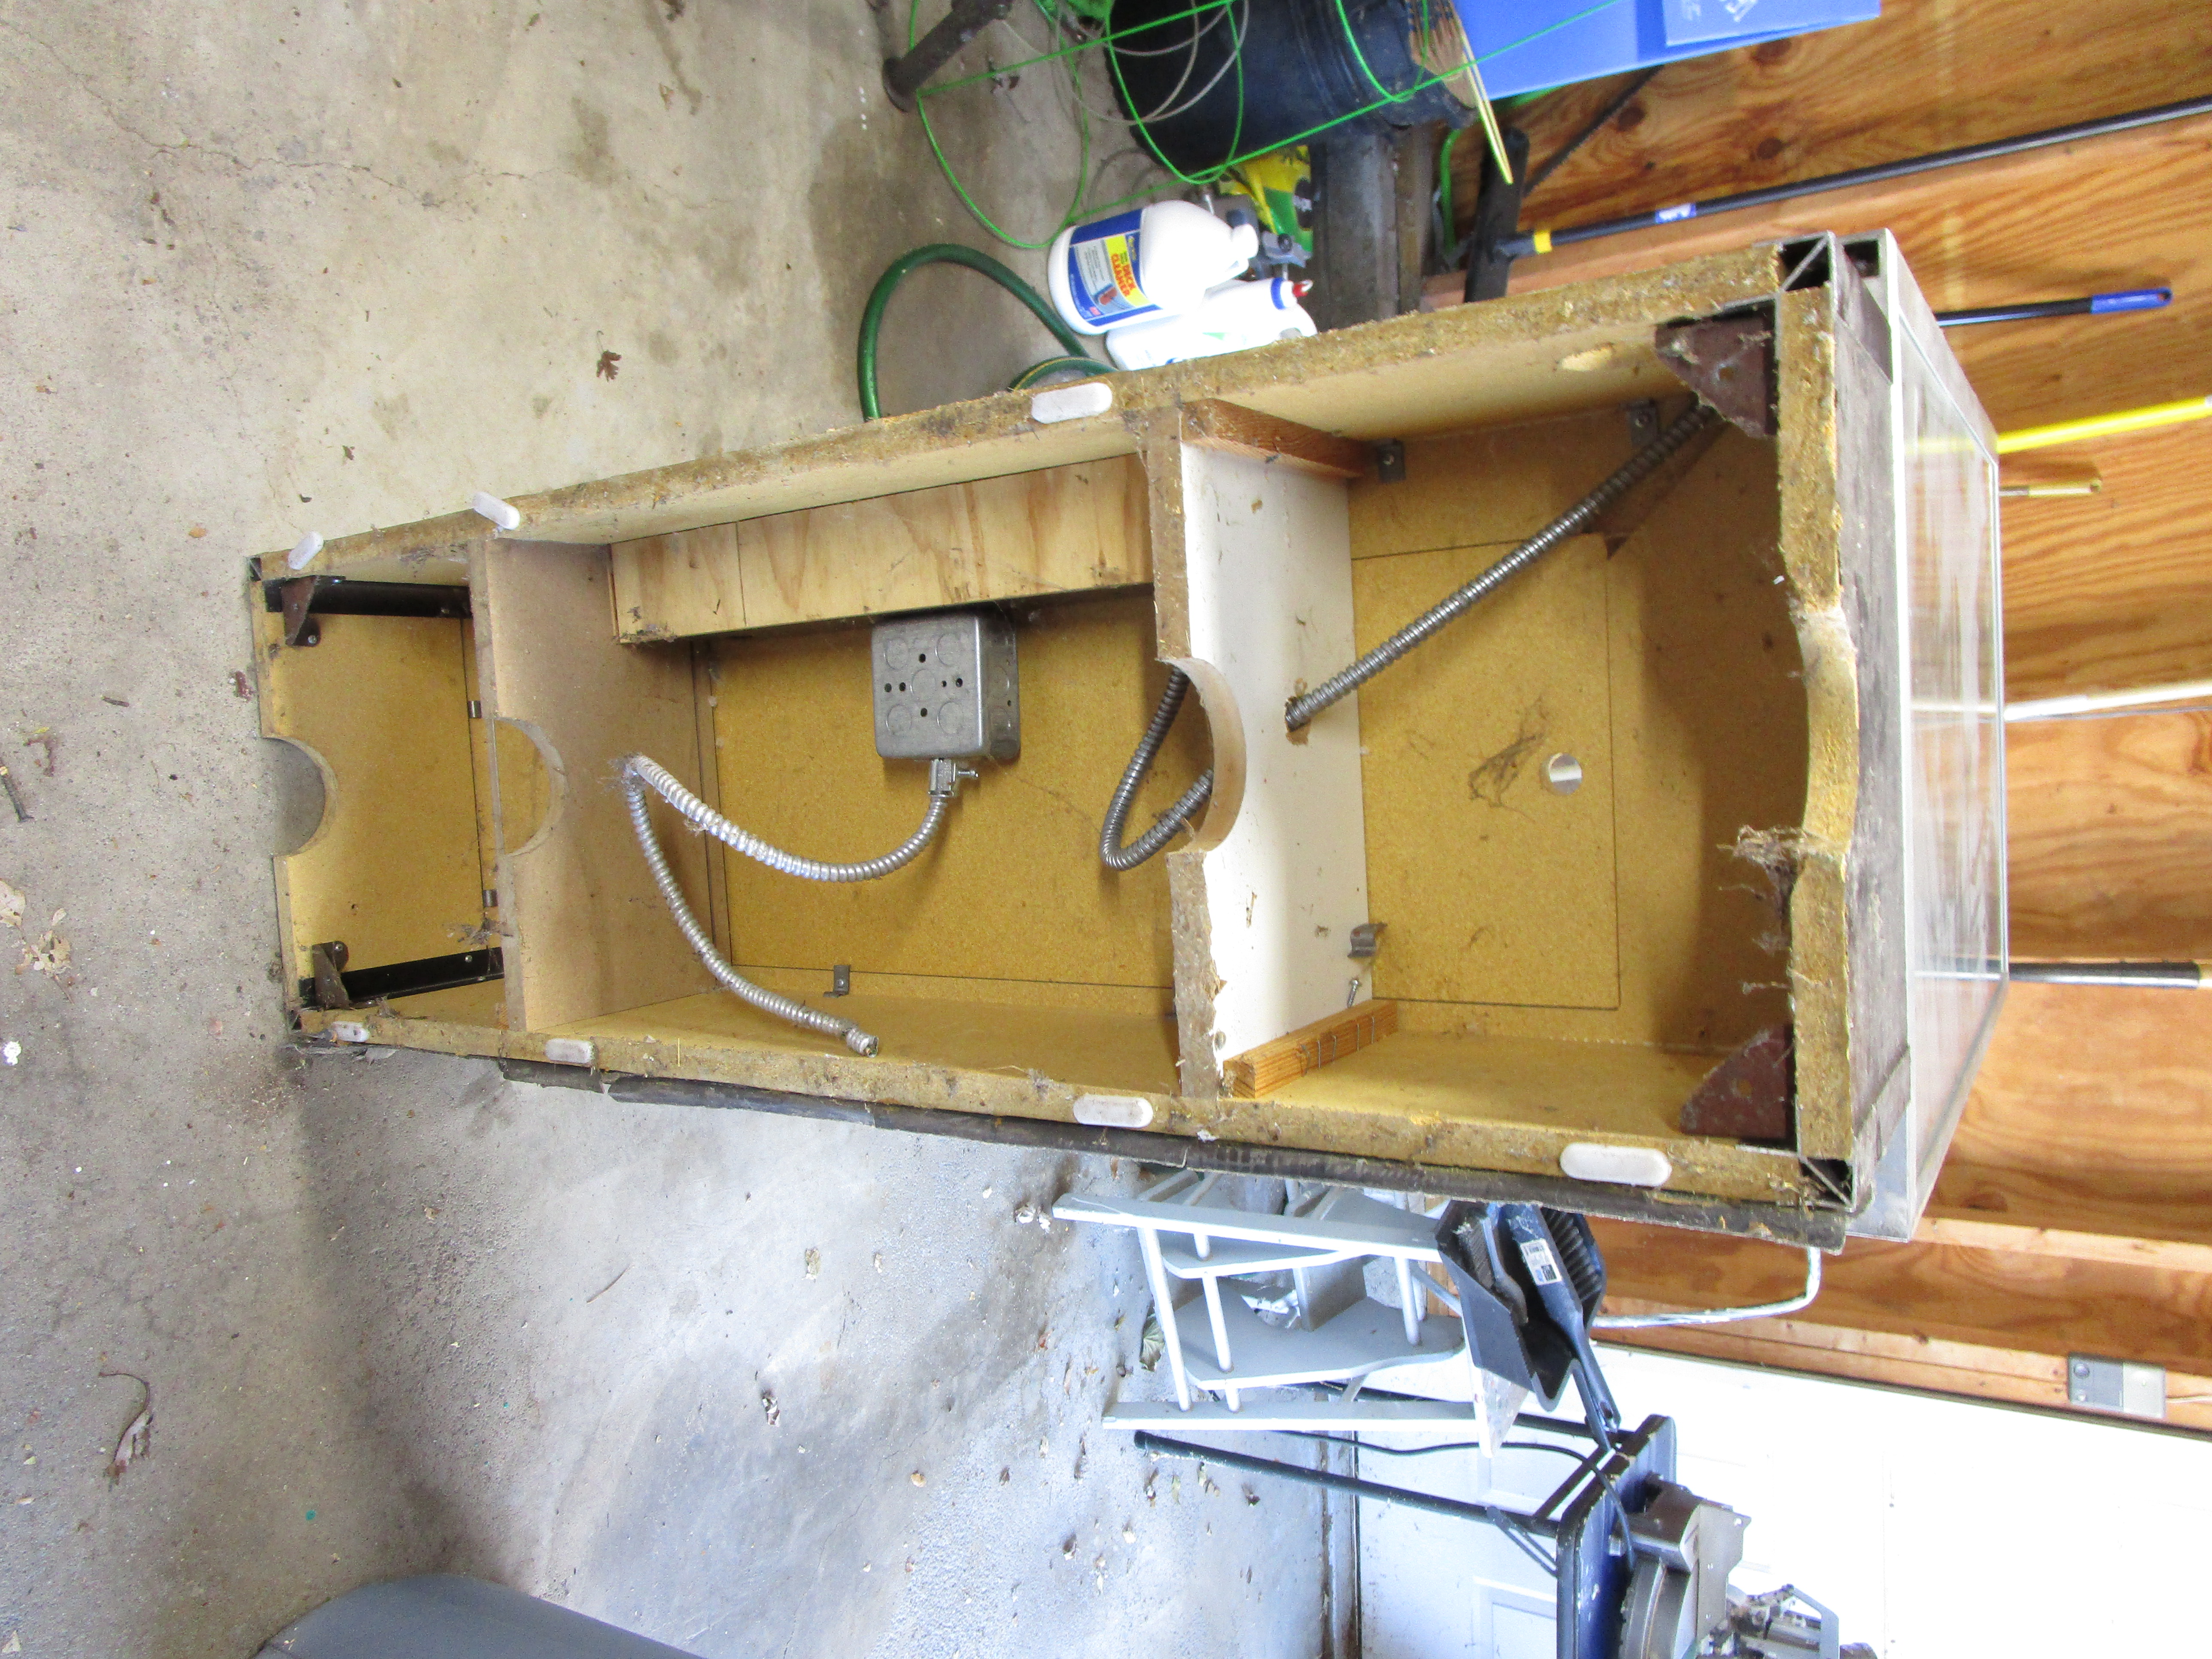
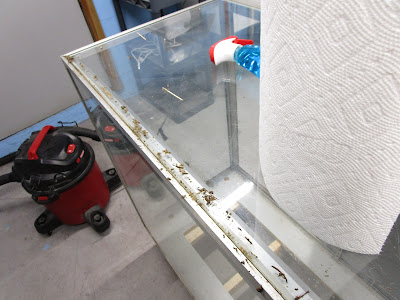
Unfortunately, when it arrived I saw it was a mess. It had been stored in a barn for years and it was covered in dirt, old stickers, and oily residue. The wooden framework underneath held the electronics for a lighting system but it didn't work. Worse, the bottom was covered with dozens of dead (and not dead... eek) spiders! I decided to clean it up and see what I could do with it.

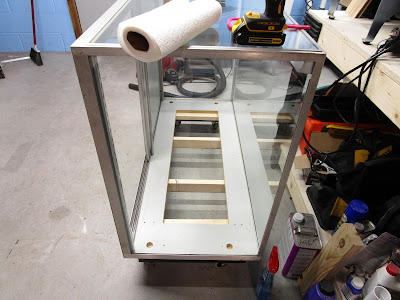
Because the shelf was originally designed for use in a store with sliding doors accessible only from the rear, it would be difficult to get things into and out of it when placed against a wall. So, I chose to mount wheels on the bottom, and that required a solid foundation. The particleboard framework had to go. Since it was in my garage and I was too lazy to go into the house for a hammer, I grabbed the nearest tool I could find... a sledgehammer! I guess I had been watching too much Red Green Show. However, it worked well.

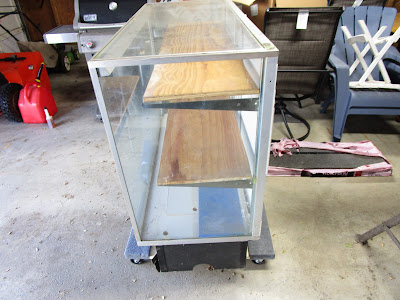
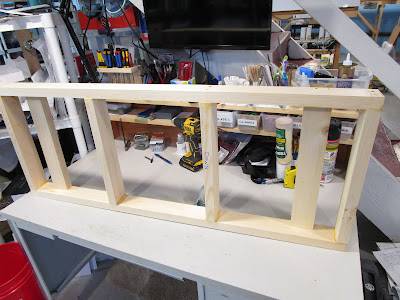
Then, I built a new frame from some 5/4 lumber. I later painted it black to help it hide in the shadows.

I spent several hours cleaning up the case, and used a ton of Windex and a roll of paper towels. Various tools were used to scrape gunk out of every seam, and all the glass was cleaned to remove stickers and dirt. It was immensely satisfying to see it all come together, but very disgusting too.

A friend helped me carry the case into the basement, where I set it on the frame. I had premeasured and drilled holes in the wood floor of the case, so I used them as spot markers to drill into the 5/4 wood frame. Some strong lag bolts tied it all together. Naturally, I had to order the bolts twice because the first set were too short.

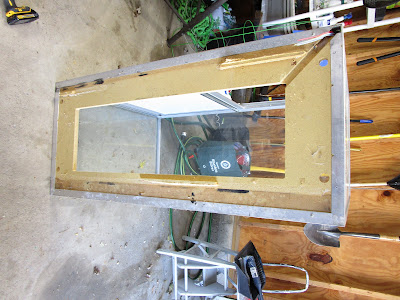
The old plywood shelves were filthy and blocked views of the lower shelf, so they were replaced with new 1/4" glass shelves. It turns out that the glass company I went to with had a model railroader on staff, so they were pretty easy to work. Unfortunately, when I tried to install the new shelves they wouldn't fit. They were about 1/8" too long. How could that be?

I discovered a couple of more problems at this time. First, the three shelf bracket support tracks are not equal. The middle one flops around a little bit because it is only supported at the top and bottom, and isn't firmly attached for the length of the vertical corner like the other two. This meant that the rear edge of the glass sometimes pivoted around the middle shelf track which stuck out further from the rear sliding door area, and that caused the excess length of glass to bind. So, I returned the glass and had it shortened by 1/2", and then it fit in fine.

However, once that was done the glass shelves were dangerously close to falling off the three steel brackets. The brackets fit loosely in the tracks and are free to swung left and right a little, and if the ones on the end swung out from under the glass it could crash down. That would be bad! So, I ordered some suction cup support brackets from Ebay which fit over the shelf brackets and extend the amount of surface area holding the glass. It turns out that when I bought the display case some were actually included, but they were so old and brittle and warped that I threw them out. 

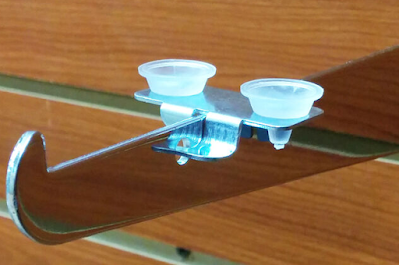
So, I ordered two identical sets of brackets at the same time from the same seller, and naturally they came with completely different shaped rubber cups. They also didn't fit the metal shelf brackets in my display case, so I had to cut away or reshape the new ones with a Dremel tool, belt sander, and pliers. But I made them work. Below is one modified with one side cut away to clear the side of the display case.

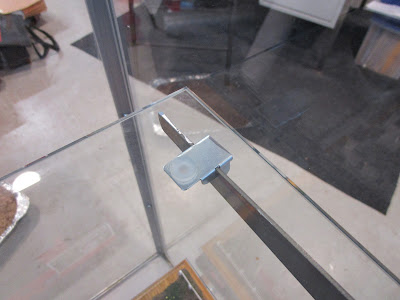
The next problem with that the steel shelf brackets had a hook at the end which stuck up to hold the glass shelves in place. However, I couldn't get the glass to fit in them because they extended out different lengths from the shelf brackets. Again, the non-rigid vertical middle shelf track was causing havoc. Had I made the shelves narrower they would have worked, but I had ordered the glass without knowing of the problems described above. Instead of taking the glass back to have it recut narrower, I instead removed the brackets and used my bandsaw to cut off the sticky-uppy portion at the end. Then, the glass dropped in fine.

When I went to set the shelf brackets at their final height, I discovered yet another problem. Whomever built the unit cut the shelving tracks at three equal lengths but they didn't make sure the bracket mounting holes were aligned the same on each one! So, let's say I set all three brackets in place in the fourth holes from the top. If I laid a level across them, it wouldn't be level! So, I picked holes that generally matched up and relied on the compression of the suction cups to help compensate for the differences.

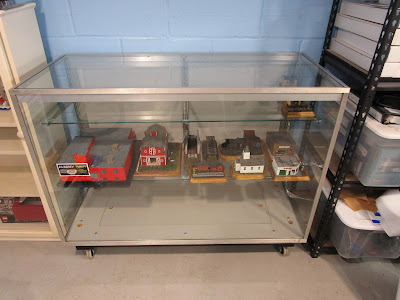
In total, it was a very involved process (as are all of my projects) to get my display case. But, I am absolutely thrilled with it. It holds a lot of stuff, and it is easy to see into. It sits alongside a wall where I can easily see it from my workbench, and it provides instant gratification at seeing my models. 

Saturday, May 7, 2022

Structure - Southworth Tractor (part 5)

As I got ready to paint my building, I ran into a snag. From the one picture showing the south end of the structure, I knew that it said "SOUT..." but I couldn't see the rest. Did it say "Southworth", or "Southworth Machinery", or Southworth Tractor"? I couldn't tell. 

I planned to have custom decals made from Precision Design Company and Bill Brillinger (who did my Albany Tomato Company decals) but I didn't know what the lettering on the side was supposed to say. And it is long gone now. So, I called the old Southworth company (currently Gabrielli Truck Sales).

The first person there that I talked to was Chuck V., who thankfully didn't brush me off right away but instead tried to answer some of my questions. He then put me in touch with a woman named Bernice P., who had worked for the company from 1974 through 1990. I also was contacted by John H., who kindly sent me a couple of historical pictures (below) of the plant. Finally, Frank D., an employee who had started with them 50 years ago and still was with the Caterpillar company in its new location, reached out to me. Between the four of them, I was able to have my original question answered and in the process learned a whole lot more useful and interesting information.

The below picture is dated 1970 and shows only the word "Southworth" along the top of the building's wall. And of note: it didn't stretch from one edge of the building to the other but stopped above some of the windows below. I can't say why that was, but that is what it looked like then.

John wasn't sure about the date of this next picture but guessed either late-1970s or early 1980s based on the vehicles and equipment lying around. I then asked Frank D. and he confirmed it was done in the late 1970s. Note in the circled area that it says "Southworth" and "Caterpillar" on the ends, with each word taking up a full row. 

Now I finally had my answer, but it was a good news/bad news situation. Unfortunately, in designing my model I had compressed the height of the building between the large garage door and the upper row of windows. At the time, this didn't seem significant because I wasn't aware that I would need to fit a row of lettering between them. But now I was faced with two options: keep the model as it was and delete the "Caterpillar" lettering on the bottom row, or rebuild the model taller to accommodate it. This would require not only adding height to that office section in front, which wasn't the end of the world, but also raising all other walls of the building to maintain the correct proportion. That was the end of the world.

I didn't have the heart to do this, so sadly I went with the first option. That is one of the problems with historical research. Sometimes, you find out more than you wanted to know. Thankfully, few people will know of my dilemma.

With that decision made, I ordered the decals and will not prepare the model for painting.

I owe a TREMENDOUS THANK YOU to all of the people at Gabriellie Truck Sales and Milton Caterpillar who came together to provide me information, pictures, and other resources to help with this model. 

Tuesday, May 3, 2022

Brown D&H boxcars (1977)

I have previously commented on how I love to model the early 1980s, when colorful former per-diem boxcars roamed the rail network. The D&H had boxcars painted red, orange, yellow, green, brown, dark maroon/purple, and blue (in MOW service). Pity those modelers who build layouts devoted to the Pennsylvania Railroad, where every train contained strings of dull brown boxcars. Not the D&H!

... or at least not during the time frame I model. As can be seen below in these shots dated August 1977, strings of old D&H 40' boxcars await their fate which I assume is scrapping. 

They look like 40' cars, which fell out of favor by that time. Note that a couple have yellow lettering on a reddish-brown carbody, while most have white lettering on a brown carbody.