CP Executive train in Albany

CP Executive train in Albany

Friday, February 24, 2017

Assembling the benchwork

Well, this past weekend my layout took another step forward. I attached the leg assemblies to the L-girders, doing my best to space them 1/5 the total length of the girder in from the ends. This was per the chart in the benchwork book. Since I had to splice the 1x2" rail on the L-girder I used another piece of wood as a gusset, and that interfered with the optimal location of the legs. So, they are actually located inward 2" more than they should be. However, the ends will be secured to the perpendicular side-girders so I think they will be fine. Also, one L-girder came out warped so I clamped it to the table and then glued/screwed another 1x4" to it to help mitigate the bend.

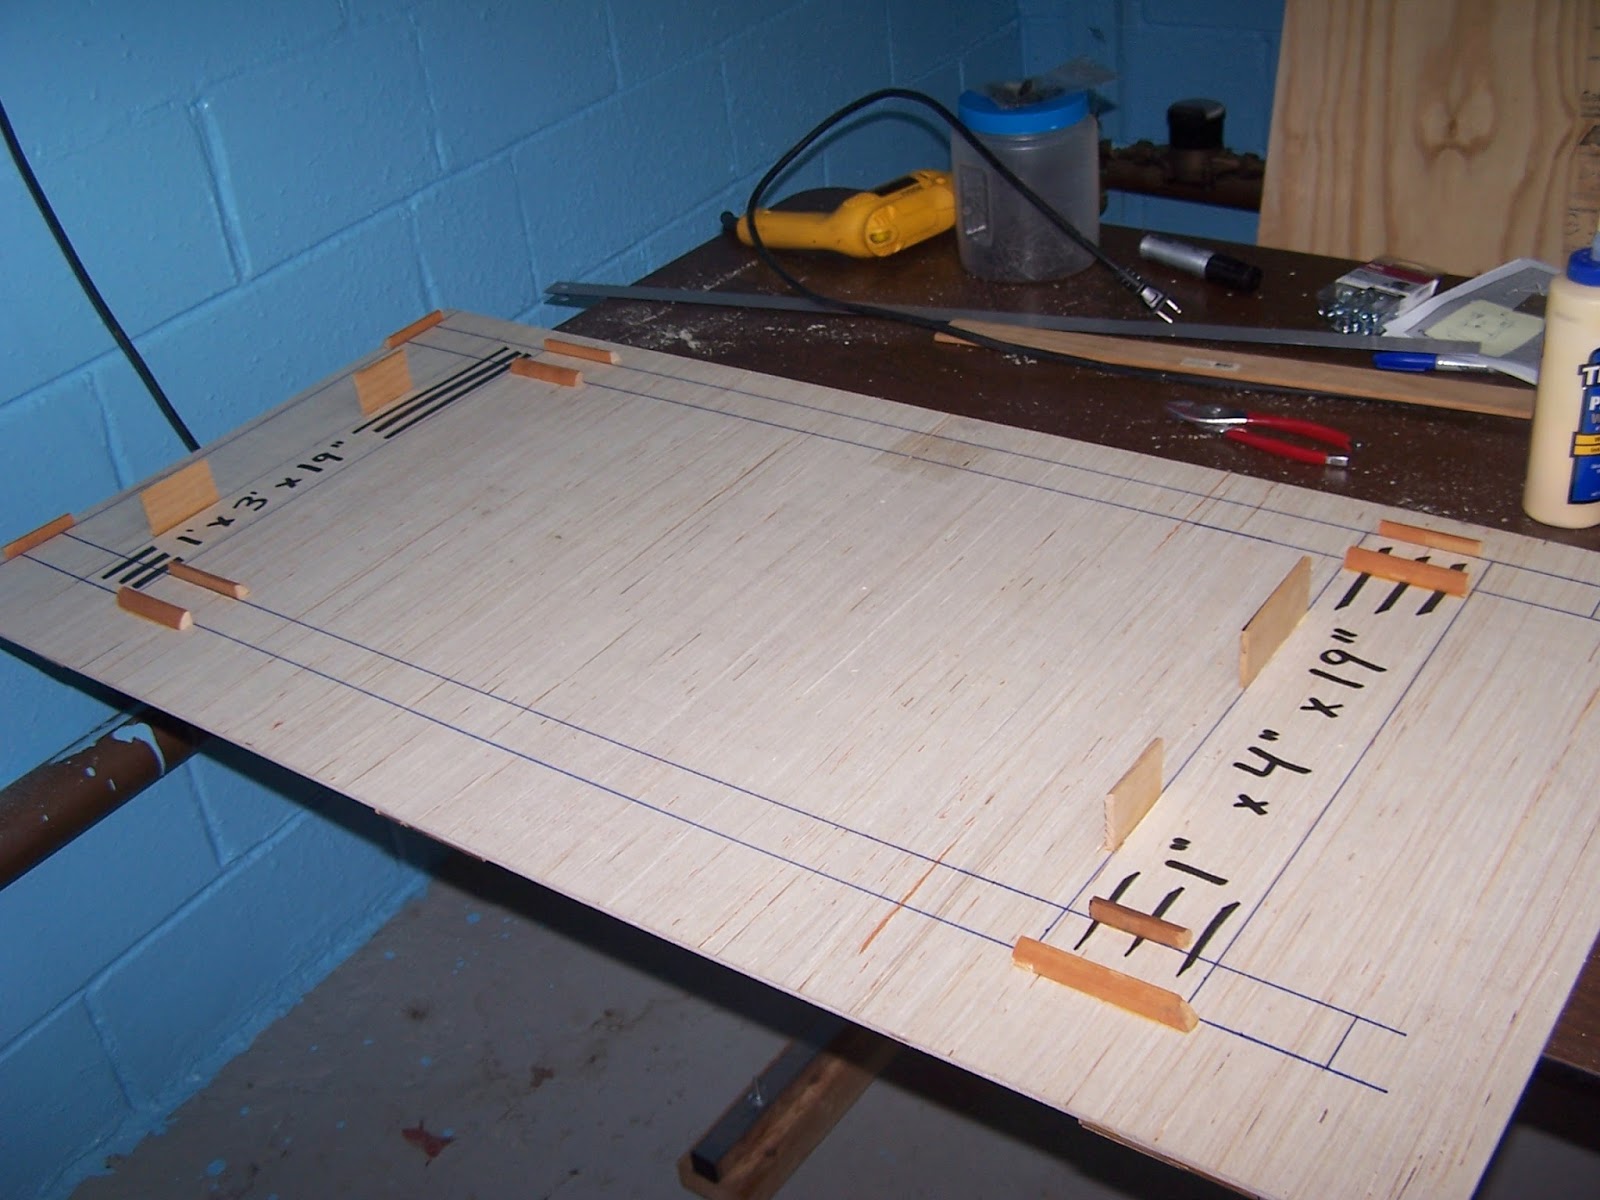
Gluing the legs to the girders is not recommended usually, but I didn't want to rely solely on screws to hold it together. Reusing the girders should I decide to change my plans will mean cutting off the legs, or cutting the girder in half between the legs and then joining it together. Or something else, which I won't have to figure out until I change my plans.

As it currently stands, the layout lacks no diagonal supports for the legs, and the tops of the L-girders and the ends are not tied together with any cross braces. It is not sturdy, and I don't plan to put much weight on it for now. The bracing will come in another week or so, and then it will be leveled and all three pieces will be tied together to make one strong unit.

But, it was strong enough for me to set everything in place to see how much space it took. And it barely fit in the 12' width area that I planned for it. I am also glad I am currently only building it 12' square instead of 12' x 17' because that would be a monster. I hoped to leave some space around all four sides so that it wasn't touching the wall, but it might be closer to several inches rather than a foot as I originally intended.

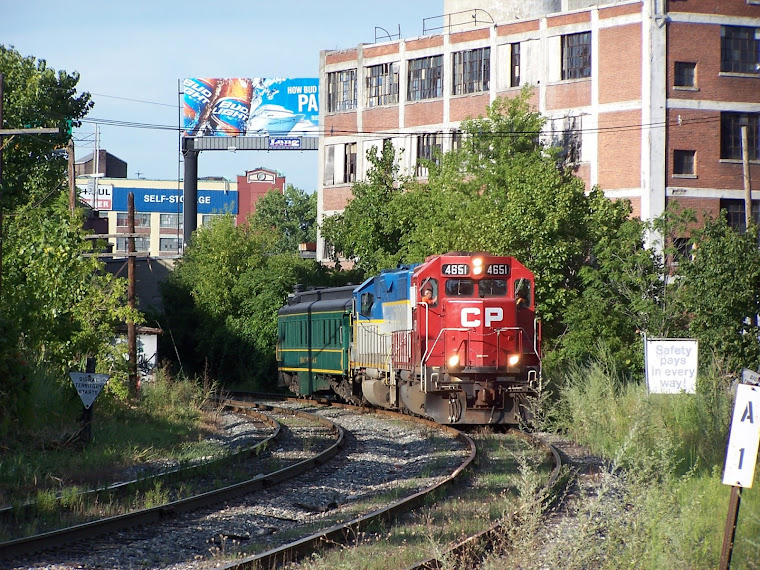
Anyway, with that done I roughly put the plywood pieces on the L-girders and then set out to sketch what I thought the track plans might look like. One had been done years ago, so I cut and tacked it in places and transferred the lines. For two other sections, I went on rough sketches. My challenge is that I want 24" radius curves and I don't want much of the curve to fall on the side sections. That means the track has to end up near the back of each module to have enough room to curve on the corners. This makes planning any features on the far (North) side of the track very difficult. For one area, representing Keis Beverage and Norlite, I used some graceful curves to bring the track closer to the front of the section and add some visual interest. And, for the Mohawk Paper section I built in the only run-around on the layout (so far) and also let the spur into the paper mill pull as far away from the main line as I could as it will need to drop in elevation too.

Knowing the trackplan will be important when assembling the box frame structure for each section. I may use Tortoise (by Circuitron) switch machines mounted under the layout and if I do, I need to make sure not to put a cross brace in the way. It is easier to shift a cross-member a couple of inches now, and that way their location won't dictate where I can or cannot locate a switch. While surfing the web, I found someone on EBay ("jweed") selling a nifty template for installing the switch machines. If you search for "Tortoise switch machine drilling template" you will find it. With shipping, it cost nearly as much as a machine but it looks neat, should work well, comes in a variety of colors including glow-in-the-dark (!), and will make my life easier. Yes, a paper template would be just as easy to check clearances but when the time comes actually install them, I will take all the help I can get! I ordered mine in green to match the machines.

A friend recently asked me why I was buying all this expensive lumber and not just a bunch of 2x4" stock that I could build into a frame. It was an excellent question, and I am not sure I know the answer. I suppose it is because I would rather do it right following someone else's plan instead of making it up as I go. My last 4x8' layout in the late 1990s was framed with nothing but 2x4" lumber and it was fine, though wobbly (I didn't brace the legs). With the 1x3" and 1x4"lumber ($28) used to make the leg assemblies, the extra 1x4" ($6) I used to gusset the warped I-beam, and the carriage bolts ($8) I will insert into the legs to level the layout my total bill is $300. I certainly could have done it cheaper. But better? Probably not for me. I will likely be in around $500 when it is all said and done, which seems like a lot but I trust those who have gone before me who have warned that buying cheap lumber and rushing through the benchwork will lead to a disappointing layout.

Thursday, February 23, 2017

HO Roster: D&H Cabooses

Even as my benchwork is being built, I am still working on other projects. I thought I would slowly go through my roster of equipment which I have collected that will someday make an appearance on the layout. While I am pretty much sticking to a time frame of 1984 for my D&H models I will occasionally bend the rules slightly if there is a good reason for it, and I will also go completely off the rails when I see something I like. If you have a layout of your own, I don't need to say anymore as I am sure you know where I am coming from.

Recently I was working on building some models of cabooses, so that seemed like a good place to start. One of the reasons I selected the early 1980s to model the D&H (as opposed to a later time period) was that they still used cabooses. I don't know when the practice was discontinued on through trains, but even today Canadian Pacific still runs their local out with a caboose in the consist though sometimes it is in the front and sometimes at the rear. It might be for a shove move, or perhaps just a place for the crew to rest in.

The D&H also had a ton of variety as would be expected from a railroad that was over 150 years old. Even into the 1980s, they were using bay window, extended vision window, Reading northeast style, and transfer cabooses, as well as a few home-built jobs. Most were red with black roofs, with several different styles of lettering and insignia designs. The D&H colorguide book is an excellent resource in this regard. 

Like all of my equipment, I try to purchase it inexpensively and I don't focus too much on details which are fragile and easily broken. The great modeler Allen McClelland of Virginia & Ohio Railroad fame popularized the "good enough" approach for modeling, at least at the onset of a layout, and I have adopted this approach. As my time and finances increase, I may start to replace earlier models with more detailed ones or build contest-quality models as part of my MMR merit badge. But, for right now, my roster is made up of Athearn and MDC/Roundhouse kits and some Atlas Trainman ready to run models.

Right now, I have ten cabooses. There is no way I will need that many on my layout for operations, as I doubt I will even be able to run more than two trains at the same time. Since I am not modeling one of the classification yards (Kenwood, Mechanicville, Colonie) I don't even need them to sit on the caboose ready track. But, I like them. 

Mechanically speaking, one thing I did to standardize all my cars was to convert them all to Intermountain metal wheels when practical. I also have adopted Kadee #58 and #158 couplers as well, and so the horn hooks, Accumates, McHenry, and Kadee #5s were removed (though I kept the Kadees for other projects). Next, I added weight consistent with the NMRA recommended practice. I build boxes of styrene and fill them with lead shot that I ordered online (try explaining why you need to buy it loose at a gun store and they look at you funny). Before that, I used BBs but they are larger and less dense so I generally don't use them much anymore. I mix up epoxy or wood glue, stir in the shot, and then pour it into the styrene boxes. Once cured, I use double sided tape to attach them to the caboose frames.

Aesthetically, I also upgraded the cabooses to give them a used, family appearance. All the wheels are painted in a jig that Tony Koester once described in MR. The frames and weights are painted flat black. Handrails and other trim are picked out in yellow the best that I can manage, but I always prefer to leave it unpainted rather than poorly painted. The windows are glazed from the inside with clear styrene, though no attempt is made at an interior. The roofs are all painted black, including some custom-painted Bev-Bel cabooses that had the roofs red. I couldn't find any picture documentation for that. Finally, the cars are weathered, usually heavily, as the D&H Alco engines threw up a tremendous about of black smoke. A clean caboose was a rarity. In looking at the picture above, I see that I probably should add more weathering to a couple of the models.

There are some anomalies in my roster. For example, two different extended vision cabooses are Athearn models painted by Bev-Bel and have the same road number (#35712) but the font size and location is different on both. I don't know why they did that. Also, I believe that the D&H had some roof-mounted electrical radio equipment (one of my kits came used with parts for this in the box) but I haven't bothered researching it.

I don't yet have a model of the D&H sesquicentennial scheme with the round emblem though I want one even if it didn't exist in 1984. Sadly, the attractive yellow bay window cabooses delivered to the D&H in 1968 weathered poorly and were repainted red in the early 1970s so I won't buy one of those kits. I purchased my tenth kit recently because it was only $3, and with that I am closing the book on D&H cabooses. It is the one in the back awaiting construction.

There are lots of junk train set cabooses on EBay. What I find surprising though is that very few even attempt to be close to realistic. For example, Life Like has Reading-style cabooses in two different paint schemes- one is bright orange with black shield outlines and the other is gray with yellow shields- but had they painted it red it might have been passable. Some company actually did a red D&H caboose but they used a streamlined Wabash style car and picked the round D&H insignia. I imagine they will be for sale on EBay forever.

For the most part, I am ready to move on from D&H cabooses. However, the D&H ran through trains in conjunction with the B&M and Maine Central during this period and they swapped equipment frequently. So, I can always pick up a couple of cabooses for either of those roads. Yay!


Monday, February 20, 2017

Assembling the Legs

A quick sketch was made to determine exactly how I should assemble the legs together, and then I compared it to the leg fixture I had glued up. They didn't match. Originally I was going to have my legs spaced about 20" apart with the L-girders on the inside of them. I changed my mind and moved the legs closer together so that the L-girders would be outside. Recessing the legs in a bit more (though admittedly not by much) may prevent accidental bumps to the layout. So, I modified my jig and began assembling things.

One of the main considerations I had when deciding on layout height was my wife's concern that if it were too high, she wouldn't be able to see it easily. I like my layouts high (48"-60") where as she prefers them lower, like what you would see at an N-trak exhibit (40"). However, when we were at the Springfield show recently Model Railroad Hobbyist e-magazine had a really nice booth set up, and featured in it was an HO scale switching layout. Not only did the modeling portion look great, but the physical construction details (layout height, fascia color and material, recessed toggle switches) made it look professional and clean. And, my wife liked the height. So much that we asked how tall it was and Joe Fugate (publisher of MRH) pulled out a tape measure and checked for us. 50". So, that became the height for my new layout.

L-girder has a lot going for it but one problem is that it is really thick. The girders that are 3-5" tall, the cross joists on top are usually another 3-4" thick, and then you have risers, the track support plywood, cork roadbed, and actual track. It adds up and could be as much as 7-8" more above the girders.

My box-frame layout sections will be about 3.5" thick, with another half-inch of plywood on top, for a total of 4." I needed the L-girders to be about 44" tall so that when I added any cross supports, my open grid sections, and the leveling bolts on the bottom of the legs my layout would come up to about 50" tall. Which meant my legs needed to get shortened by about 4". No problem, I borrowed my uncle's chop saw which made nice clean ends perfect for accepting the 5/16" tee nuts that are necessary for the bolts for leveling the legs.

Finally, each pair of legs was secured to some 1x3" and 1x4" stock that I cut to length and it all was glued and screwed together. I originally planned to go with diagonal cross braces but I have seen many people use perpendicular ones and they are much easier to cut if you have a chop saw. Also, some people specifically advocate not gluing anything else besides the L-girders together and instead just relying on the screws to hold it all in place. Because I wanted my leg assemblies to be rock solid, I glued and screwed it all together. Overkill? Perhaps, but one think I knew I would need to contend with was a the occasional bump from the dog (or me)!

Tuesday, February 7, 2017

Starting the L-girder benchwork

I have been struggling with how to support my layout sections. I originally wanted shelf brackets but am not going to drill holes in my basement wall at this time. Then I thought about cheap plastic banquet tables, which are sturdy and would work well. But, the downside is that they are too short in height and the cost and effort to make them taller isn't worth it. Plus, under the layout access could be difficult to do wiring or anything, and any connections between them like clamps would need to overhang the table ends to work. I looked into plastic shelving units to support them and while the added storage would be awesome I would need a lot of shelves, and they would all need to be shimmed accordingly for my uneven floor.

I guess I could just mount legs on the bottom of my layout sections but I really want the ability to flip them over or on their side to work on them, and legs will make that difficult even if I have removable legs. Plus, I would need to build a lot of legs. Perhaps I am overthinking this and legs might just work out fine. But, I want to move forward and so I came to...

L-Girder benchwork!
I originally threw it out as old-fashioned and unworkable. Designed by Linn Westcott (the diagram at right is taken from his benchwork book), one of its strengths is that it doesn't require precise lumber cuts. That means no chop saw is required. While I overlooked this benchwork system originally because it isn't easy to make strong sections required for LDEs, here I can build a simple L-girder framework to go below my LDEs. And, I won't need a million legs to support it and I can make them as tall as I want.

So, with this idea fresh in my head I ran off to the lumber store to purchase some supplies to make a fixture to help build the leg assemblies square and identical. I also went looking for some 2" x 2" lumber for the legs but instead what I found was a pile of warped, twisted, wood. So, I instead I bought 16 pieces of 1" x 2" pine boards. They were very straight, all were about the same length (4'), and as a bonus I wouldn't need to cut them to size as I wanted the layout L-girders to be about 4' off the ground. I glued and screw them back to back and now have very straight 2x2 lumber for my legs. They will cost more than a regular 2x2 stock but in total each one will cost me less than $5. I only need 12 legs, so it was a good deal. If I had a table saw and could rip down 2x4 lumber, it would be a different story.

If you look at my drawing at the right, you can spot to omissions pretty quickly. First, the L-girders look pretty empty and not really suitable to hold the layout sections. But, I will secure some 1x2" lumber laid flat along the way, bridging the two girders. They are yellow in the diagram, and I omitted them from most of the benchwork for clarity. Second, I don't know how I am going to handle the section where I plan to enter/exit the interior of the layout.

Then, I pre-drilled seven or eight holes along one of the 2x2 pieces, spread glue on the back, put it on top of another piece and carefully lined up one end. Some #6 drywall screws, 1+1/8" long, went into the soft pine perfectly and things were set. I had to check the alignment of the legs before setting each screw but these pieces will be perfect for what I need once the glue sets. I don't know if predrilling was necessary but I did the top piece. I used a #6 countersink drill bit that I bought on Ebay for a buck or so. It took a month to arrive from China but it worked great. Switching bits between that and the screw driver bit was very annoying though.

Next, I made my L-girders. The "back" side (the side opposite the one facing the stairway where I plan to enter) will have a pair of 12' long L-girders. The two sides will each have a pair of 10' L-girders attached, making a "C" shape. The front, or entrance, is unknown yet. I might build a shorter L-girder to fit between the two sides, or I might try and make a lift section combined with a smaller piece. I will cross that bridge later.

Anyway, finding 10' and 12' long 1x3 lumber was impossible at Home Depot and Lowes. Even 1x4, slightly oversize for my needs but extra strong, wasn't available. But, an 84 Lumber about 20 minutes away had 1x4s in lengths up to 14', so a quick Saturday morning trip found two 12' and four 10' long pieces sticking out the back of my Toyota Corolla. They only have "select" grade which was knot and warp free but at a slightly more expensive price than HD/L. To me, it was worth it.

Then, for the top of the L-girder I went to Lowes and picked out a bunch of 8' long 1x2 stock that was straight and knot free. I will need to splice them to get the proper length, but at least the 1x4s aren't spliced. A lot of pre-drilling and gluing later (I bought a gallon of wood glue for the whole project, and it should last me years), I had my L-girders and legs ready for the next step.

A new member to our household is "Clover," our recently adopted 5 year old golden retriever. She was serving as my apprentice as I worked on the benchwork. Some of the sawdust landed on her, making a mess of sorts. And, she has a fondness of chewing wood scraps I left lying around on the floor. I can't do that again!

Total cost so far? While I don't really want to think about costs for a layout, nor do I want to keep a running tally (nor publish it where my wife can easily see it!), so far I have spent about $45 on the two sheets of plywood; $48 for the twenty four 1x2 lumber for the legs; $70 for the six 1x4 boards for the web of the l-girders; and $35 for the nine 1x2 boards for the flanges of the l-girders. Additionally, have $22 for the box of #6 drywall screws, $7 for the tee-nuts for the bottoms of the legs, and $18 for the gallon of wood glue. Another $14 was used for the plywood for the leg fixture. So, about $260 for what I have so far. And, it is high quality lumber and not that twisted stuff. The lumber has come from Lowes, Home Depot, and 84 Lumber, which makes me an equal opportunity shopper.

Monday, February 6, 2017

First wood purchased for benchwork!

I had hoped to be knee-deep in benchwork by now, but some various factors in and out of my control have served to prevent that. First off, I don't own a chop saw. This tool, which not entirely necessary for benchwork, is handy and convenient for making repeated, straight cuts to lumber. And those are the types of cuts that are required for open-grid style benchwork. While I could try and build it using a plain old miter saw or a backsaw, it would be a disaster.

Thankfully, a friend offered to help cut all the lumber I needed in his workshop. However, some personal problems in his life have held that up. I wish him and his family well, and all of the extra time has been a blessing because I have been able to think through my next steps.

But, I still wanted to get moving. So, a couple of days before New Year's Eve I went to Home Depot and purchased two sheets of 4x8 plywood and I had them rip them lengthwise. I also had them trim the final length to 7'. So, I now have at least the tops for four of my LDEs. With great excitement I loaded them into my Toyota Corolla (they just fit) and brought them home and set them up on the floor. Where they sat and sat...

It is cold in the basement in the winter, and sitting on the floor sketching track arrangements (necessary to ensure that track switches and under-the-table motors won't interfere with the benchwork) just wasn't a pleasant thought. Plus, a ceiling joist directly over the layout area split and had to be repaired and that took priority of my time.

But, my benchwork is started!

Wednesday, February 1, 2017

Springfield Train Show 2017

Well, it's a wrap. Another wonderful day come and gone. If you have never been to the Springfield Train Show (http://www.railroadhobbyshow.com/) then you are really missing out. There are eight (!) acres of trains... consisting of model layouts, exhibitions, prototype train displays with brochures, tables upon tables of books, models, slides, etc. and tons of other great things. It is, quite frankly, impossible to see in one day- which is why it is actually a two day show.

For the past 5 years the local chapter of the NMRA has chartered a bus to go out, and I think that it is great. Not only do you not have to deal with driving or parking, but after 8 hours of walking on pavement you can relax and sleep on the way back (or play with your newly purchased goodies!) Lately, my wife has joined me and she usually has a good time too though like most normal people she gets tired after 4-5 hours of solid walking.

This year was the first year that I had to be careful of my spending for two reasons: (1) I now have a mortgage payment to deal with, and (2) I am building a layout now, so the things to look for and prioritize have changed. Specifically, I was hoping to find Micro Engineering track, Highball ballast (recently discontinued), and Tortoise switch machines at good prices. Instead, I bought more of the same!

The first thing I bought was three different 40/45' trailer kits. Lately I have been really interested in building Trailer-on-flatcar (TOFC) models even though the required minimum radius of my layout probably won't support it. I will likely post on that sometime in the future, but I have been collecting inexpensive 40' and 45' trailer kits to go on 85' and 89' flat cars. I found three more that would be appropriate for the early 1980s for $10 total. Plus, one was in the Rock Island scheme which I like.

Next, I found a D&H bay-window caboose that was a custom Bev-Bel paint job for $3. It was assembled, somewhat poorly, and there were holes in the roof drilled for radio antennas and marker lights. I will need to fill the holes and paint the whole roof black (Bev-Bel never did it), but for the price it was good. Last month I worked on my fleet of nine D&H cabooses, including adding weight, window glass, painted railings, metal wheels, and weathering. I am pretty burned out from that project, so this caboose may sit around for awhile.

I also bought a Escanaba and Lake Superior RR 50' boxcar. Did I need another one? Well, not really. I doubt it ever would have made it to D&H rails. But, the E&LS is a special line to me for two reasons: (1) they sold the Arcade and Attica Railroad their #14 ten-wheeler (my favorite steam engine), and (2) they currently have on their property the D&H's two Baldwin shark engines. So, I had to buy the boxcar. It will likely sit in my kit pile though for some time.

Finally, I had an impulse purchase. I couldn't help myself. There was a seller with a box of about a half-dozen Athearn undecorated, unpowered RDC units for $5. I nearly bought one, but I held my composure. I mean, what exactly would I do with it anyway?

Then, I turned the corner and saw someone selling a new B&M Life Like Proto 1000 RDC for $20. After checking that it had the McGuinness scheme on the ends (instead of the "Minuteman logo") I snapped it up. I am partial to the scheme because my initials are "B&M" and the black/white/blue color scheme is sharp. Plus, I had the identical model in college but sold it off when I briefly converted to N scale. As my wife put it moments later when she caught up with me, "I left you alone for 10 seconds and you buy something!" It won't fit my layout at all, but I am only human. Surprisingly, I didn't buy any old magazines or paper. Maybe because I am running out of space to store it?

We did visit the displays of the Boothbay Railway Village, the Wiscasset, Waterville & Farmington Railway Museum, the Sandy River and Rangeley Lakes Railroad museum, and the Maine Narrow Gauge Railroad Co. & Museum. For my birthday around Memorial Day weekend this year, we are going to Maine to do the "Two Foot Gauge Tour." Four railroads in three days, but it should be fun.

The Boothbay Railway Village even had brought an engine out to steam up and slowly travel up and down a short stretch of track they laid in the parking lot. As the temperature was cold, I looked on from the comfort of our tour bus and noted that the whistle and safety valve were really, really loud!

My wife, who is interested in N scale, picked out several more cars for her small but growing collection. Looking through cases and cases of small trains made me realize that my eyes just aren't what they used to be.

The only downside is that now I need to wait another whole year before Springfield comes around again!