My last structure is something personal: a model of the Arcade and Attica Railroad's sandhouse. I knew that I was going to model at least one A&A building for my MMR, and I had picked this out from the start.

Harold Russell drew up plans in the September 1978 issue of Model Railroader, and he was even kind enough to autograph for me one of my copies of the magazine.

The sandhouse has an extensive history. It is unknown when it was built, though likely it was before 1917. Up until 1947 there was a tank and
spout inside of the structure and it functioned as a water tower for their steam locomotives. After 1947,
when the A&A dieselized with 44-tonners, the tank/spout were removed and it was used to
house and dry traction sand. There was a stove on the single floor south
section which was used to keep the tank thawed in the winter time and later to
dry the sand. The building also housed bulk salt used for deicing crossings. Later on it also stored track cars, track
materials, coach parts and excursion steam locomotive grates and patterns. (Image below from 2004)

The sandhouse saw two later additions.
By 1950 the single floor addition off the north of the building was built, and
sometime between 1965 and 1975 it was modified to add large doors on the side. These may have been for the inspection cars and were fabricated from surplus sheeting materials used as linings inside of the fleet of A&A’s
interchange boxcars. Around 1965 the garage addition (which was relocated from a
nearby house!) was joined to the southern extension for the motor cars (inspection / track
cars). (Image below from 2007)

Unfortunately, in January 2008 after years of neglect it became a
safety hazard and was pulled down. The concrete piers from the tank support
still remain. (Image below from 2007)

It definitely had a cobbled together appearance, which I liked. Had I really thought it all through, though, I would have picked a different N scale structure to model as the MOW Benton station I had just finished also had a similar look. Oh well.
I used grooved Evergreen styrene (#2050) for the walls. Because it was only 0.020" thin I had to attach it to some 0.020" styrene to give it some strength. I first laid out the pieces of the scribed styrene and cut them out, and then I laminated them onto the plain 0.020" stuff.

The sandhouse didn't have many windows, which was nice, and I had some castings in my box that would work. I used them to lay out the openings, which I wanted to cut while the walls were flat.

A Tichy door was also pressed into service for the side entrance.

After gluing the castings into the walls, the structure started to come together. Because it was a combination of four different areas/extensions, I was careful to think everything through before committing to anything. I added lots of bracing where it wouldn't be seen.

One end contained a weird garage stitched on and I wasn't sure what I was going to do for that, so to keep everything square in the meantime I added some interior cross-braces.

Both ends of the tower had what looked like doors or removable panels. Maybe they were for maintenance of the old water tower inside? I don't know, but I cut holes in either end and saved the pieces removed. I then filed them down so that they were slightly smaller and glued them back in. The gaps are now visible enough to draw attention to them, but not at all sloppy.

The backside where the gaps were cut was also reinforced.

One end has a pitched roof. Even though a garage will be added to this end, I built the first extension and braced where the roof would go.

The roof panels were installed and then I filled the tiny gap on the top with a piece of styrene rod. It probably won't even be noticeable under the shingles and tar paper.

The other end has an extension with a full width roof that slanted towards the ground. That was a little easier. The sandhouse top was done the same way as the end.

All of the corners were trimmed out with Evergreen L-angle (#294). As nearly every end had some weird angle or cut to make, I had to do it one piece at a time.

Another one of the window frame is a heavily modified blue window casting from a Model Power kit. In retrospect it would have been just as easy to scratchbuild the frame itself. The original casting is on the right, and the final cut up frame is on the left.

The garage on the end is covered in tar paper for three sides, so I built it from plain styrene. I will later laminate pieces of tar paper to match the plans. It was heavily braced to prevent warping.

The end of the garage has a door that looked somewhat similar to a D.P.M. door casting I had purchased for a different project, but it required some modifications. I added some styrene trim on the lower area to better match the prototype pictures. There was no need to cut the window opening for the door because once the end of the garage is painted additional wood patches will be added. The plans also indicated that some of the tarpaper on the end had a brick pattern. I wasn't sure how to model that so I used part of the modular brick section from D.P.M. and cut it to fit on the end. Because the brick sheet and door castings were so thick, the white styrene had to be built up to make it all relatively flush. It sure looks odd... but prototypical.

The track-facing side of the garage had wooden sliding doors to allow access for speeder cars. These were built over the plain styrene using grooved styrene. I then took Evergreen c-channel (#262), tiny styrene strips, some L-angle, and n/b/w castings to make the associated tracks and hardware for the doors. This is the type of stuff I really enjoy doing.

The garage was then glued onto end of the sandhouse and the joints were trimmed out with styrene. I noticed that I should have made the roof that overhangs the garage a little longer so I extended it with strip styrene too.

As per my usual modus operandi, everything about the garage was heavily braced to prevent warping.

The extension on the other end of the building had two steel doors that were hinged to open outward. I made them from plain styrene, and framed them with styrene strip. I didn't add the triangular hinges yet because they will interfere with painting. On both sides of the building were strange brackets with what looked like n/b/w castings, so I modeled them. I suspect they might have had to do with lighting fixtures or power line receptors.

There are many different roof surfaces on this structure reflecting its cobbled-together history. I labeled each area so I wouldn't mix them up while modeling them. The roof of the central tower is made from tin panels with tar covering the seams. I replicated this by taking thin styrene sheet and roughly scribing/gouging lines to represent panel joints. The rough edges, one painted, will hopefully look like worn metal joints.

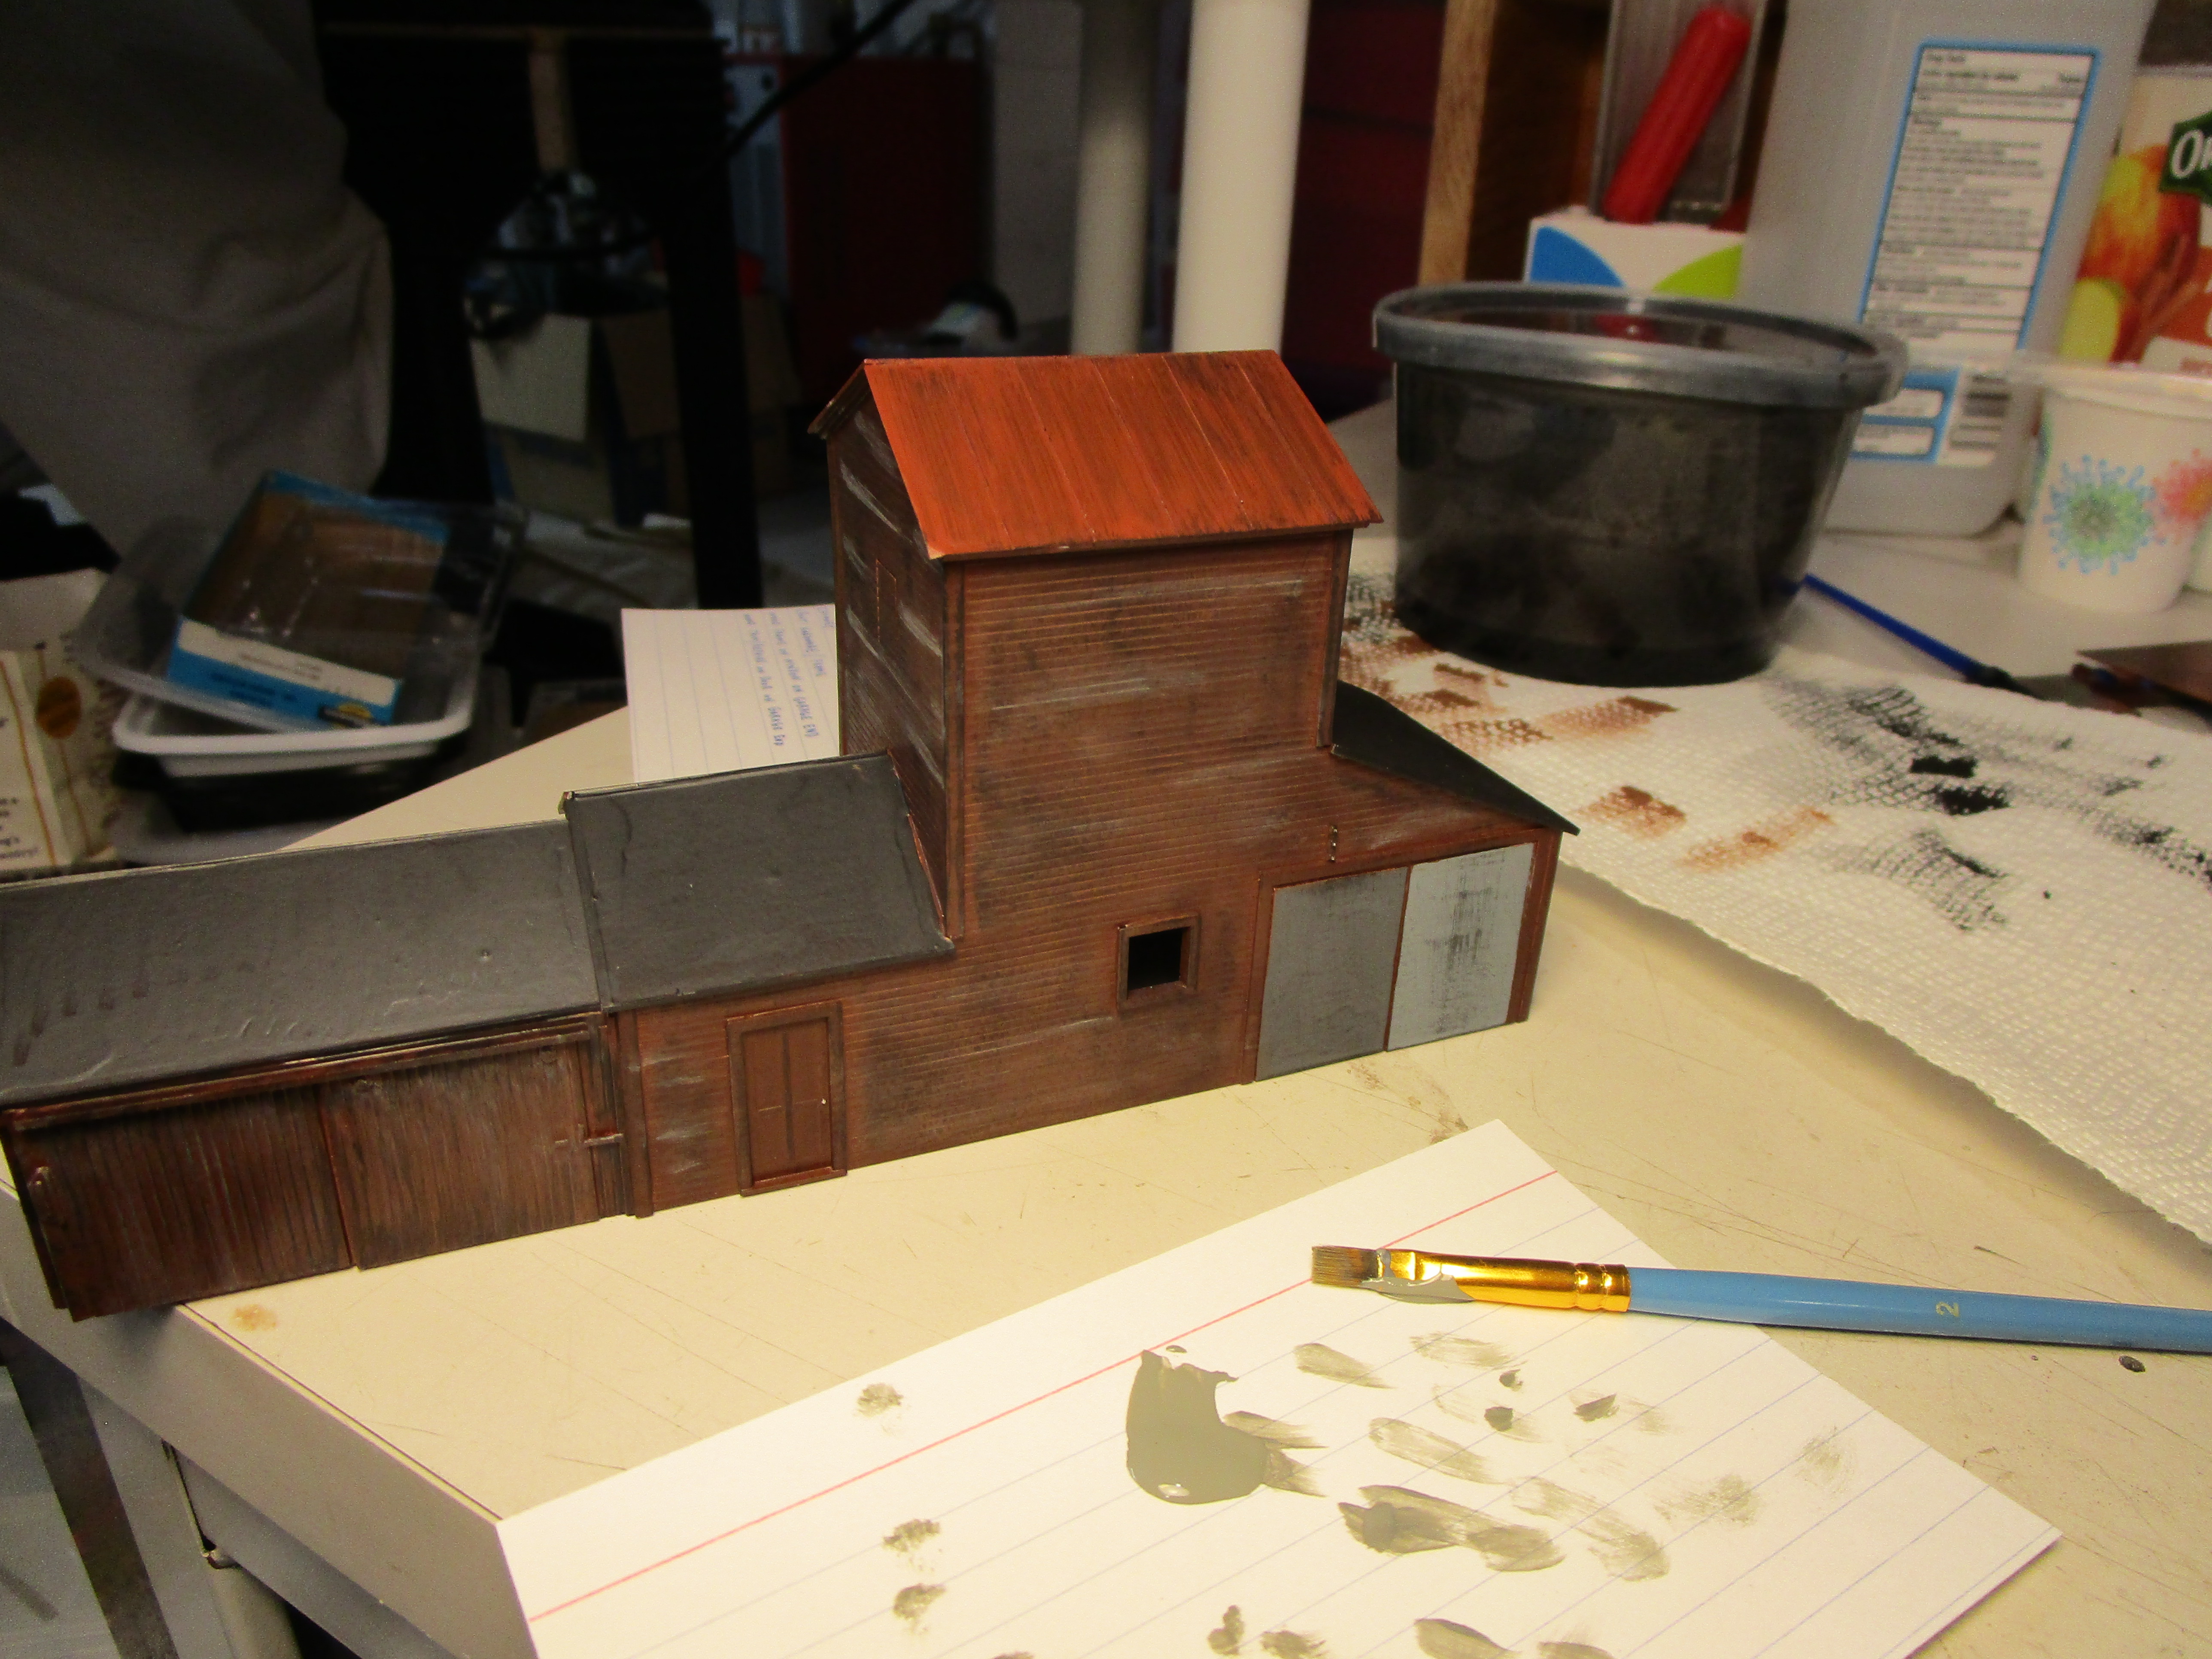
And with that, all the styrene work was done and it was ready for painting. First, I gave it a good bubble bath to remove any dirt, oil, and then it was given several light coats of Testors' brown spray paint. Sadly, my hobby shop had no other suitable brown paint in a spray can. Perhaps they don't make it anymore, but I went with this color and one benefit is that touchups are easy as Testors also sells small bottles of the matching color.

The two swinging metal doors were painted in two different shades of gray paint. I first thought it might be the way the sun was reflecting on the doors, but multiple pictures confirmed different gray colors.

All of the roof areas were painted flat black, and the metal roof on the top of the sandhouse was painted rusty red. I then quickly wiped off most of the paint, leaving a streaked, reddish color remaining.

To look like old, weathered wood, I could have used real scribed wood siding. I had it in my stash, and had even started to lay it out, but changed to styrene as I liked working with it more. So, I had the challenge of making styrene look like wood. After painting it brown, I drybrushed random boards and areas with a lighter shade of brown.

I then randomly drybrushed areas with black and gray paints. It looks a bit stark right now, but further weathering would tone down the appearance.

Bragdon Enterprises weathering powders were ground into the roof and tar lines were applied. I had never used weathering powders before and I really like them.

It was time for tar paper- lots of tar paper! Nearly every roof surface and half the sides have it in some form or another. Instead of buying a commercial product, I decided to try making it. Some gray paper from Hobby Lobby's scrapbook section was given various washes of homemade ink solutions to look like old, weathered tar paper.

It was then cut into pieces and glued on.

The roof of one extension had long strips which I added, and then weathered. Per the prototype plans I also added some patches and simulated tar lines.

The other end had tar paper strips applied, but they were all different widths and not consistent at all. This was modeled.

One portion of the garage extension has hexagonal shingles, perhaps from when it was originally an automobile garage connected to a house. I couldn't find any hex-shingles commercially available, and even if I did it seemed a waste to buy them for about two square inches of coverage. I had some Rail Scale Models shingles left over from the barn, and so I took a chisel blade and nipped the corners to make them look like half-hexagons. Once they are overlapped they will look sort of like the prototype. At least it isn't more tar paper!

I spoke too soon! Tar paper patches were applied... one was called out on the plans, and one was added to help hide a not-so-perfect shingle job. If that ain't following prototypical practice I don't know what is.

The chimney casting is an Alexander Scale Models (#2705) piece I had in my scrapbox. It is a solid white metal casting, but I drilled out the flue on the drill press and then filed the inside corners square.

Once painted and weathered, it was glued on and now the sand drying process could begin.

The rear wall of the garage extension was tar paper... lots and lots of little pieces of tar paper. I suppose it is cheaper than just about any other exterior sheathing, but by the end of the project I was sick of tar paper.

The extension on the other end of the building had two gray swinging doors. After they were weathered, tiny black hinges cut from thin styrene and painted black were installed.

I was nearly done with the model... and then disaster struck! I found a picture from 1970 that showed the garage portion of the building in completely different colors than I had painted my model. The end bricks were a yellowish color, and the tar paper beneath it was new and dark black. The wooden batting around the window was new, raw wood with no window in the opening (so I didn't glue any glass in this opening). Worse, the plywood covering the window on the end door, the wooden side door, the sliding doors, and the swinging doors were white. WHITE! And not dull white either, but bright white like they had just been repainted.
So I painted my sliding doors a weathered white, and the plywood on the end door got the same treatment. The people door was painted solid, new whitewash and man it looks hideous on this structure. Stupid prototype pictures... I should have left well enough alone. The two swinging doors on the far end of the building are staying their two shades of gray, though, as painting them white at this stage would probably just mess them up.

The wooden framework remains for the water spout was also glued up and attached. The plans showed a bit more rigging but I didn't really have good pictures of it, and so I left it as is. I can live with it.

I took some Micro Engineering code-55 flextrack and modified it by removing every fifth tie. I then re-spaced the ties, and not too perfectly either, and sprayed it with camouflage paint.

The rails were painted a lighter brown color, and each tie was hand-painted with washes of black, gray, or brown. An interesting effect occurred that had not happened on my layout: the washes were so wet and the rail was so short in height that the colored paint was sucked up the rail and over to the adjacent tie. Some of the black ties turned the gray ties adjacent to them a mottled, marble-ish color. It is strange, but I left it as the railroad's ties are pretty worn in the area anyway. The base is a wooden plaque I purchased for a couple of bucks from Hobby Lobby. The trimmed corners are a bit fancy for this model, but the regular rectangular ones had rough knots in them. I stained and polyurethaned it. The track was attached and then buried in cinders, real dirt, ground foam, real coal (from the A&A!), and sand.

The final details were a pair of cut up telephone poles- Bachmann, I think. I painted and weathered them and then installed them on the corners. They are a unique detail but very fragile.

Some other things were weathered and scattered around the property. Two sandbags came from Walthers, and while I am not sure if sand was still delivered like this I thought they might work out. Random stripwood was dumped here and there.

The rear of the structure also received some details like boards and static grass clumps.

The various weathering treatments of the tarpaper made it look different and helped break up the monotony of an otherwise all-black building.

And with that, my structure was essentially finished. I posed one of my Bachmann 44-tonners with the sandhouse and called it a day.

In the process of building my twelve structures, I learned a lot of new skills. I became more comfortable when working with wood. I found out about LED lighting and fiber optics. I managed to fabricate my own shingles and tar paper. I experimented with new weathering techniques like wood-staining and weathering powders. I built my own bridge board-by-board. I drew up plans for complex structures like churches and barns. I detailed the interiors of several structures. I rolled my own hay bales and "welded" up an auto lift. I scratchbuilt a Pepsi machine, and made church pews and a miniature train layout. And I finally finished the Albany Tomato Company.
I don't think any of my buildings will be award winners, but that wasn't the goal (at least it wasn't when I set more realistic expectations). The Master Model Railroader program was designed to push modelers into learning new things, and this certainly did. The pandemic helped with more free time, of which without it I never would have completed 12 structures in a little over 4 months. But now that it is over, there are other things I want to work on. So, hopefully I can have my models judged in the near future and then I can focus on something else.