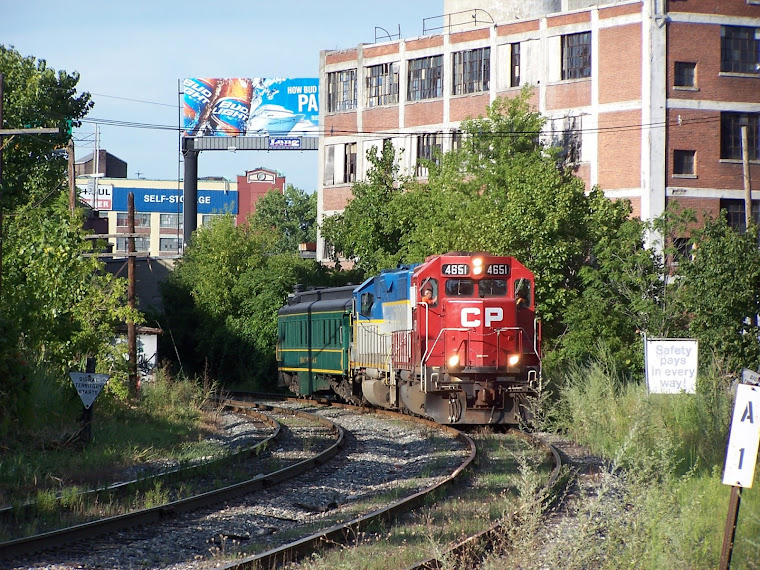
CP Executive train in Albany

CP Executive train in Albany

Monday, April 30, 2018

Mohawk Paper - a slight grade adjustment

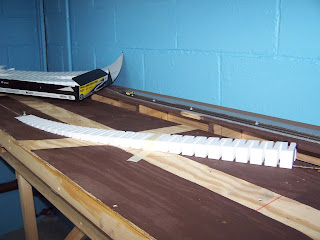
I thought I was done with this section, but the more I looked at the grade I had created the more I realized that the road crossing was at an incline. This would mean that paving the area would require a lot of skill to pour the plaster and keep it consistently thick but also at an angle. I wanted to rush and get the track down and wired, but I decided to first make the area where the track crossed the road. I scraped up the foam incline section and tried to save as much of it as I could. I had used foam-safe adhesive and it didn't want to come up cleanly from the porous ceiling tile. Yes, I know the angle I cut the riser means that area of the track isn't cross-level. It's fine.

I discovered that the box from Woodland Scenics does comes with a steady grade of 4% and there is only one foam section that takes you from flat to the start of the grade. I thought that it would have thin ramp areas as well as thick spacers to use underneath them. While probably explaining it poorly, the upshot was that you cannot split the box in half and build two 4% grades. You would need to take a middle or upper section and saw the bottom off to get a "starter grade" piece. Since the very thin incline start section shredded, I used cork and cardboard to build another one. Admittedly, it was a little wobbly in places but that only adds to the realism.

When I laid the track, I let the flextrack float at the bottom of the grade because it naturally took the bend that was most gentle. I could have forced it down and pinned it in place, but the change in elevation would have been too abrupt. After letting the track's caulk cure, I discovered a gap between the bottom of the ties and the ramp so I added more cardboard to fill in the space. When it comes time to ballast the area, I am sure any additional gaps will be hidden. I also soldered the rail joiners on this flex track so that the entire siding is one long piece. That will hopefully smooth out any bumps between pieces on the bends in the grade.

The last step was to test the track to ensure that my trains would operate on it properly. This is a siding so most trains wouldn't use it, and those that did would be dropping off or picking up only a few cars at slow speed. Even still, I had to make sure that the couplers held together over the grade and didn't come apart (a runaway train down the grade would certainly lead to a crash. My testing train consisted of two long (probably 75 scale feet) Like Like Amtrak coaches. They are longer than normal 50' boxcars that will be run on this track, and if the coaches can make it, anything can. The couplers shifted vertically about a 1/4 knuckle, which is acceptable to me.

Four more pairs of feeder wires, which made a total of seven for this section, finished up the hard stuff. I need to insert wooden ties in the gaps but that will be pretty easy.

Wednesday, April 25, 2018

Federal Railroad Administration T10 RDC

One of the slides in my collection is of the Federal Railroad Administration's #T10. It is an interesting piece of railroad equipment, and when I saw that it was in Colonie in 1983 I just had to purchase the image. I found out that Budd built ten of these for Connecticut DOT and they weren't very successful. Budd also built an eleventh car, and it went to the FRA..


Here are some more pictures of what I think is the same car, though repainted in a newer paint scheme, on RRpicturearchives online. The paint schemes shown in the pictures are confusing though. Either the front and back are painted different (note the presence or lack of the orange/black diagonal stripes) or the dates on the uploaded pictures are off. Sometimes the ends are black, sometimes silver with a thin red band.

I am not sure why it was on the D&H in 1983. Anyone have any additional information?

Wednesday, April 18, 2018

Railfanning Mechanicville Yard

If you clicked this post thinking there would be some really good pictures of Mechanicville Yard "back in the day," I am afraid you will be very disappointed...

I have a friend who lives near Mechanicville, and I frequently visit him to play board games. On the way, I sometimes stop near the junction of the old B&M and D&H to hang out by XO Tower and watch for trains. That got me thinking about the good (and bad) times I have spent up there, and I thought I would post some pictures from various railfan trips. But first, a brief confession...

October 08, 2007
I have not always been a fan of the D&H. Growing up in Rochester, I knew nothing about it except that it had a classy lightning stripe paint scheme on its engines. I only became interested in 2010 when I started to plan a G scale switching layout based on the D&H. But, I like to railfan, and in 2005 I decided to explore the legendary Mechanicville Yard that I had heard other local railroaders talking about. Not knowing where it was, I bought a paper map of the area and saw a giant yard printed on it. One day I drove up and expected to see long strings of freight cars and a busy engine terminal. I didn't realize the yard was gone, consolidated and closed by Guilford years before.

October 08, 2007
I went back with some regularity just to record what was left, including the old Boston & Maine engine terminal buildings, the run down station across from the yard, and XO Tower. Such a sad condition it was in. By 2007, it was boarded up, partially vandalized, and surrounded by grass. It provided a shady place to put a camping chair down on the ground and watch for trains (which seemed to be never) but the area was dead and the glory days were long done. I guess it was a lucky break that the tower wasn't completely torn down and the area bulldozed. So many other railroad structures had met their end that way.

April 17, 2016
But, a funny thing happened. Norfolk Southern announced their "Patriot Corridor" plan and rebuilt part of the old yard to make it an intermodal facility. They previously had a facility in Kenwood Yard for containers, and for a period of time single stack COFC trains would ply the Colonie Main. But, NS was going to move their operations point north to Mechanicville. Announced in 2008, it was rebuilt into a sprawling facility with five paved tracks to allow for COFC cars to be loaded and unloaded, and another two shorter tracks for autorack loading or unloading. It officially opened in January 2012. Unfortunately, you can still only see a portion of the north/eastern part of the yard from public areas.

August 14, 2012
At the same time (and perhaps because of the additional tax revenue from the railroad), Mechanicville became interested in preserving its railroad history. Part of that involved restoring XO Tower. At least externally, it was slowly repaired and the lower part of the building was converted for use as a town board room. I have heard that the upstairs is being planned for use by a train club, but I don't know more that at this time. The area behind the building was paved, making it possible to drive right up to the tower and sit in a nice A/C car while waiting for the trains (which seemed to come a little bit more frequently).

August 11, 2015
Trainspotting here is always hit or miss, though. In the dozen or so times I have come to watch trains, I have probably seen at most 15 trains, including the scheduled C.P. Holiday Train. There isn't a lot of action up here. But, I have caught the Pan Am (formerly Guilford, formerly MEC) Executive (OCS) train before I knew or cared that such a thing existed. I have captured one of the few remaining Heritage "Lightning stripe" engines (#7304) going past the tower, and it took me by such a surprise that the picture posted is the only decent one of the six I shot. I have seen Pan Am locals in solid blue engines running long-hood forward, and solid consists of CP red engines. Those were good days.

August 11, 2015 ("the rain shot")
I have had bad days too. Summer days where you sit for hours in the heat and never see a train. Or worse, the one day it was so hot I left my car windows rolled down and crossed the tracks to where the former B&M swung north. I saw NS was leaving with an autorack train and thought taking a picture with XO Tower behind it would be cool. After crossing the road and setting up, I got stuck waiting for over 25 minutes with the outgoing autorack train stalled and blocking the crossing. I couldn't get back to my car, the summer humidity led to rain, and I got drenched waiting for the train to clear with no good place to find shelter. Worse, some books I had lying on my car seat were destroyed.

April 17, 2016
But, this place has railroad roots that run deep. I don't plan to model it on my layout, but when if I ever have a staging yard on the north end of my layout it will represent Mechanicville. I am also hoping to find one of the discontinued CH&R Structures Unlimited kits for it. And, come summer (or any season actually) you can bet that I will be foolish to head up with a book, a camera, and some water with the hopes of catching a train.

Monday, April 16, 2018

Atlas D&H #5005 RS-11

(from Atlas' website)
A couple of months ago Atlas announced that it was offering another two engines in their "Classic" line lettered for the D&H: RS-11s #5000 and #5005. Both will be in the lightning stripe scheme with large numbers on the sides. I believe that this is the first commercial plastic model of a D&H RS-11 with large blue numbers in the lightning stripe scheme. I have seen others with either small numbers or just the road name, but not this. And I really like the large numbers, because once they are weathered they really help establish my layout in the early 1980s.

#5000 in August 16, 1984
So, which engine to buy? My research indicates that both engines received large hood numbers in the early 1980s and still had them in 1984, though by that time they (and the yellow shields on the hoods) were horribly faded. The numbers on #5005 were still prominent in 1984, but on #5000 they were peeling badly and nearly gone on at least one side by November 1984. Modeling that might be interesting, but it likely would be easier to start with an engine that has factory painted small numbers and add large number decals over it, instead of trying to do it vice versa. So, I ordered #5005.

An interesting discussion of these engines can be found on the Atlas Rescue Forum by member LVRR325. He questioned the logic of producing D&H engines that were only in that paint scheme (large numbers) for a brief period (1982-1987). If I had to guess it would be because there are already other RS-11 engines out there in lightning stripe schemes with small road numbers or no road numbers by Atlas and Life Like Proto 1000. Thank goodness they are doing something different!

The last time I pre-ordered an Atlas engine it took a year to arrive, and I had forgot all about it when the dealer called to inform me. I was told that Atlas' delay was not unusual. Normally I purchase DC engines (Silver series) and have DCC installed, but the difference between the dealer's price for the DC engine + DCC installed versus the DCC/Sound factory installed (Gold series) engine was only about $20. So, I splurged and ordered it fully loaded. It is ironic that I will have sound in only three of my engines, and all of them are my RS-11s!

Now, if only a manufacturer would offer #5003 in the striking solid blue with yellow chevron scheme. Atlas???

Friday, April 13, 2018

Super elevation!

The NMRA Civil Engineering  certificate requires various trackwork components, and one of the options is super elevation. While it doesn't specify how much track is required, I wanted to give this a solid effort. Ideally, super elevation is used on broad and sweeping curves. While it looks great, I cant do that on my layout (see what I did there?) because I mostly have industrial sidings and spurs. In fact, in those instances it could easily be confused for sinking foundation, cross-elevation issues, and poor drainage! So, it had to go on the mainline, which meant I had four corners to choose from.

Each of my layout corner curves are 90-degree segments, so my super elevation had to start and end on the corner section because I didn't want to try and carry it over to the straight sections. The curve between Norlite and Mohawk Paper isn't a true curve and thus the super elevation wouldn't work there. One curve has a switching coming off into a yard, and I didn't want to mess around with super elevating curved switches as my first attempt, so that was out. The third curve between Southworth Machinery and Keis was laid months ago and I forgot about super elevation, and I wasn't digging it up. That left the fourth corner, which is the one next to the stairs. I will be highly visible, which should be nice.

There are many ways to super elevate curves, and I must have read about them all while scouring the internet and reading magazines. Tapered stripwood sounded okay but I didn't have any. I have read about sliding some electrical wire under the cork roadbed (or into a slot cut on the side of it) but that seemed pretty fussy. Strips up masking tape, built up in layers to create the ramp sounded pretty tedious. So, I went with something that Pelle Soeborg wrote about in Model Railroader a couple of years ago, which is gluing tiny pieces of stryene in various thicknesses to the underside of your track ties.

This seems like it would only work with stiff Micro Engineering flextrack or sectional track, because trying to glue the styrene on while having the track bend around is a recipe for the plastic falling off. Because I could prebend the Micro Engineering track to the shape of the curve and have it hold, I could precisely glue the styrene on the underside without fear of it breaking off. I used two thicknesses of styrene, 0.030" and 0.040", to build up the ramps. I glued it on with MEK, which is pretty strong stuff (but I had just knocked over the remains of my last bottle of Plastruct Weldene, and they don't make it anymore). I spaced the styrene about every other pair of ties, which worked well. I made sure the ramp came up gradually, as it only had about 40" of linear track to go up and come back down.

The placement of the styrene dictates the amount of cross elevation too. If you place it at the outside edges of the ties, it will be less than if you put it more towards the inner/center part of the ties. I chose a nice, gentle cross elevation, and experimented with a boxcar first and a level to see what I liked. I determined that gluing the styrene shims just under the outside rail not only created a gentle incline but also was very easy to duplicate. When I glued the track down with caulk, I was careful to pin it with the pins going at the angle of the track's cross elevation to avoid kinking it or having the caulk compensate for the styrene shims and thus remove the elevation I had built in.

Does it look good? I can't tell now with bare plywood, a blue concrete block wall backdrop, and no scenery or ballast. I won't really know until the scene is finished. But, it seems to run okay without tilting the trains off, which is a good thing. I will not ballast this section until I have run trains for awhile, because if it is too much I can use pliers to remove the styrene shims.

My super elevation is one more thing bringing me closer to my Civil certificate!

Tuesday, April 10, 2018

Making the grade: Mohawk Paper

No, my layout isn't dead. I just haven't been in the mood to work on my layout for a while. Part of it was because I was sick, part of it was I didn't have the track or foam, and part of it was because I knew a redesign was necessary and I have been avoiding it.

When I first designed this section the most important scenic feature I wanted to capture was the elevation change which was caused by the siding dropping away from the main line, passing through a tiny forest of trees, crossing a road intersection, and going into the plant. I didn't want to do "cookie-cutter" style benchwork for the siding because that was too permanent a decision for the earliest stages of the layout design. So, I chose to use Woodland Scenics' foam incline sets. It is a pretty neat setup, and the fact that they came in different grades and were flexible was important for my plan. So, I left an abrupt elevation change of 1.5" in the area of the siding to be dealt with later. Well, fast forward a couple of months and I was playing around with strings and levels and such and I realized that I needed a 7% grade to make it work! 


Now, for a short siding I wasn't scared of 7% on its own. Trains using the siding would likely be one or two cars and an engine, so it wasn't too steep. But, compressed into the layout it would look silly, and be hard to build. Woodland Scenics inclines come in 2%, 3%, and 4% grades, and I didn't want to have to mount a 3% directly on top of a 4% to get the 7%. Plus the vertical curves at the top and bottom would be horrendous. So, I needed to reduce the grade, which meant raising the lower part of the benchwork. Because I had spent so much time marking up everything on the plywood, I first made a tracing.

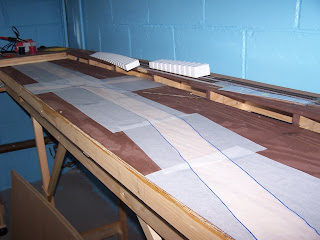
Then I went to the store to buy some 1/2" thick extruded insulation foam and ran into a problem. When I lived in Rochester, I could find it everywhere in various sizes (2x8', 4x8', 2x4') and in different thicknesses (1/2", 1", even 2") in blue or pink, but here in Albany it is very limited. I can usually only find it in 2x2' pieces that are 1" thick and green. Woodland Scenics makes foam sheets too, but they are small and very expensive. So, I considered ceiling tiles, which Jim Six discussed in the 2010 Model Railroad Planning magazine (and various places online). Unfortunately, they are only sold by the case at the store. They even had broken ones, which I offered to pay for, but was told "they arrived in a case, and will go out in a case." Thankfully, a friend had some lying around and I was in business. I first bought some 1/2" x 3/4" wood trim and glued it to the ends of the section to protect the edges of the tiles. I was careful with the glue so that I didn't accidentally glue the sections together!

Next, I used tracing paper to capture all the sketches I had done for the roads. It was pretty easy, though I had to clean off the section to do it. And, let me tell you, I am running out of space to put all my tools, drawings, track, nails, etc. I might just buy a small folding table to have set up under the layout to hold all that junk. Next, I measured and cut the tiles with a utility knife and then glued them down to the top of the plywood. I made sure that the front was flush with the wood, and the back was allowed to have a gap if necessary. I used Loctite adhesive applied with a caulking gun, and I weighted down the top though it probably wasn't necessary. It doesn't have to be perfectly flat.

Then, everything got a thick coat of my brown paint (at least the once I am currently settled on... my third choice so far). Next, I transferred my roads and other dimensions back to the top of the ceiling tile. I used adhesive specifically designed for foam to glue in the section of the 4% incline that I had cut, and adjusted the curves sightly at the start and end so that it wasn't perfectly straight. My small wallpaper roller was used to make sure that there were no blobs of adhesive under the grade which would skew it one way or the other. I am not intentionally planning any cross elevation!

The top of the foam ramp was at the exact same height as the top level of the benchwork, but I didn't want to try and cut the incline to slide alongside parallel with the top layer. So, instead I filled the gap with whatever I had on hand... some 3/4" thick wood trim, several layers of foamcore sheets, and a single layer of N scale (1/8" thick) cork. It looks like a dog's breakfast, but it will be covered up with scenery so it won't matter. More importantly, it creates a nice gentle start to the incline. Once that has cured, I can lay the actual roadbed and finish the siding down to the paper mill area.

Sunday, April 8, 2018

Pink "Girls Train" (D&H #38028)

I work in Albany and after work one day I had to get to Schenectady so I took the expressway, which parallels Canadian Pacific's (formerly D&H's) Kenwood Yard. However, traffic is intense in this area and I usually only can take a quick glance at what is in the yard. Sometimes it is chock full of tank cars, sometimes the near tracks are being filled in as the northbound CP train is being made up, but today I saw something different. A pink gondola. After looking for a couple of seconds, I came to the conclusion that it wasn't a red D&H/CP gondola that had faded. No, it really looked pink. And at my distance, I couldn't tell if it had markings. So, after asking online at the Railroad.net forum I was told it was CP's wheelset gondola. Cool! If only I could get a better picture of it. There was a great line of sight from the shoulder on the other side of the expressway and a break in train cars. Unfortunately, I had places to be.

As I drove along I remembered Lionel's "Girl's Train" set. Some history can be found on Lionel's own website (picture from elsewhere online):
When this pastel-colored set was first produced, it was expected to be a favorite toy among girls. Much to everyone’s surprise, demand for this toy was extremely low. Apparently, no one wanted a pink engine and brightly colored freight cars—even girls. The Girl’s Set would surprise everyone again in more recent times. Because only a small number of sets were sold in the 1950’s, collectors find these rare sets extremely desirable. 

The biggest problem was that there never was a prototype for this train, and most girls didn't want to see pastel colored train cars. They wanted trains painted like the real thing. Lionel even made a complimentary "Boy's Train" in blue colors that sold even worse!

I didn't make it back to Kenwood Yard for another five days, and I was worried it would be gone. Happily, it wasn't when I returned on a bright Saturday morning. Sadly, though, my sightlines from the expressway and through the chain link fence were obstructed by freight cars. The shots I took though were somewhat artistic. At this distance, and with my older Kodak digital camera, I never know if the shot is good until later when I review it on my computer. I had to take a couple of hope they worked out. Interesting, at this distance I still couldn't see the markings very well.

Here is a better shot from a different angle. It is interesting that marked as a "D&H" car instead of a "CP" car. I like the classy breast cancer awareness ribbon. From what I understand, the car is now used to transport wheelsets and is sometimes stored in Binghamton. I don't know what it was doing in Albany, but it is a pretty neat car and a nice tribute by the railroad to a worthy cause. I guess there really is a "Girl's Train" out there. Compare this gondola to the Lionel one in the picture above. Here are some more pictures online from rrpicturearchives.

Saturday, April 7, 2018

Laying Track - Part 3

Having the holidays fall on Monday has led to several three-day weekends, and there is nothing more fun than working on my layout. However, despite the large amount of free time I generally only find myself putting in an hour or so before taking a break. It keeps me fresh, and it allows me to work on other things too. For example, I lifted up the track leading to Southworth Tractor and spaced the ties further apart. It had been bothering me for a while, but it was pretty easy. I also adjusted the curvature of the siding a little bit to make the joint with the switch flow smoother, though this resulted in the track sticking out over the roadbed. Ballast will eventually hide this.

I then went and laid the cork for the two sidings in Keis Distributors. I needed sheet cork, but I couldn't find it at Home Depot or Lowes and the employees I asked didn't know what it was. So, I ordered it online and it arrived in time for the weekend. However, it was rolled during shipment and had a tendency to curl, which is why I used so many pins to hold it in place. The cork is thinner than the mainline roadbed, so again the sidings will be lower. It doesn't look like much now but lots of articles I have read suggest doing this. I hope once it is all sceniced and ballasted the differences in elevation will be worthwhile.

I used code 70 for the sidings. Even today (2017) the prototyle sidings are in place and in decent shape. The rails are extremely rusted and the ties are lightened from decades of sunlight, but they still look straight and level. I have been told that they were never used by Keis itself, and were only installed to get better rates from the trucking company that also serviced the plant. This might be true, though the D&H sometimes parked maintenance equipment on them. I made sure to include them in my plan even though there isn't much room for the structure itself behind it. I curved the mainline on this section away from the back edge which is somewhat prototypical, though the curve is more extreme on the layout. All this work for sidings that won't be used.

Finally, in my non-ending saga of finding the "right" brown paint for the layout I purchased some more from Lowes. Once again my wife was correct in that choosing a lighter shade is better for the basement. The adjacent picture shows the original color on the left, the second color on the right foreground section, and my final choice in the back right (Olympic Cocoa Delight - OL728.5). I avoided browns that were too red or too tan, as neither looked good to me. However, my lighting isn't great and so making things a nice dark brown just made everything look overcast. I bought and used up a quart, but now nearly everything is a uniform brown color.