One of the great things about modeling the D&H in the 1980s was that there were a ton of colorful freight cars roaming the system. Two of my favorite examples are the blue Oneonta glass recycling service hopper cars and the blue and white "I love NY" boxcars. I have models of each, thanks in part to my lovely wife. They have been sitting in my display case for a while waiting for the right time to work on them, and with most of my scratchbuilt car projects finished or waiting for parts in the mail I thought that this would be a good time to get them layout ready.
 The boxcars were from Intermountain and for the most part they look pretty good. The shade of blue used is dark, which matches the prototype during their early careers on the D&H. It only began to fade in the late 1980s when they were pretty much off the roster. Unfortunately, Athearn and Bev-Bel used this lighter color when they produced their models and they just look bad. The Intermountain cars don't have roofwalks, which is correct, but they do have ladders on the right sides and non-brake end that go up to the roof. I cut these down to match the prototype, and then touched up the white paint where the pins were. The ladders are fragile and cracked (but didn't break), which surprised me.
 Car #50027 should have a black "Operation Lifesaver" emblem, and car #50008 should have a "NYSDOT" emblem, but I couldn't find decals. I may have some made up for future cars, but for now I am okay with them as is. If someone points out their omission I would be very impressed. The stock couplers are Kadee #5, (better than cheap McHenry or similar clones) but I use #158 couplers. The coupler boxes, unfortunately, are glued shut and to the frame. So, I pried them off and had to drill/tap the area for 2-56 screws. Not tough, but these cars don't appear easy to take apart and everything is very fragile. The cars received light weathering as the paint was only two years old in 1984. This was not the place to create a "rust bucket."
To see an extreme example of weathering one of these boxcars by Lee Turner, check out his blog.
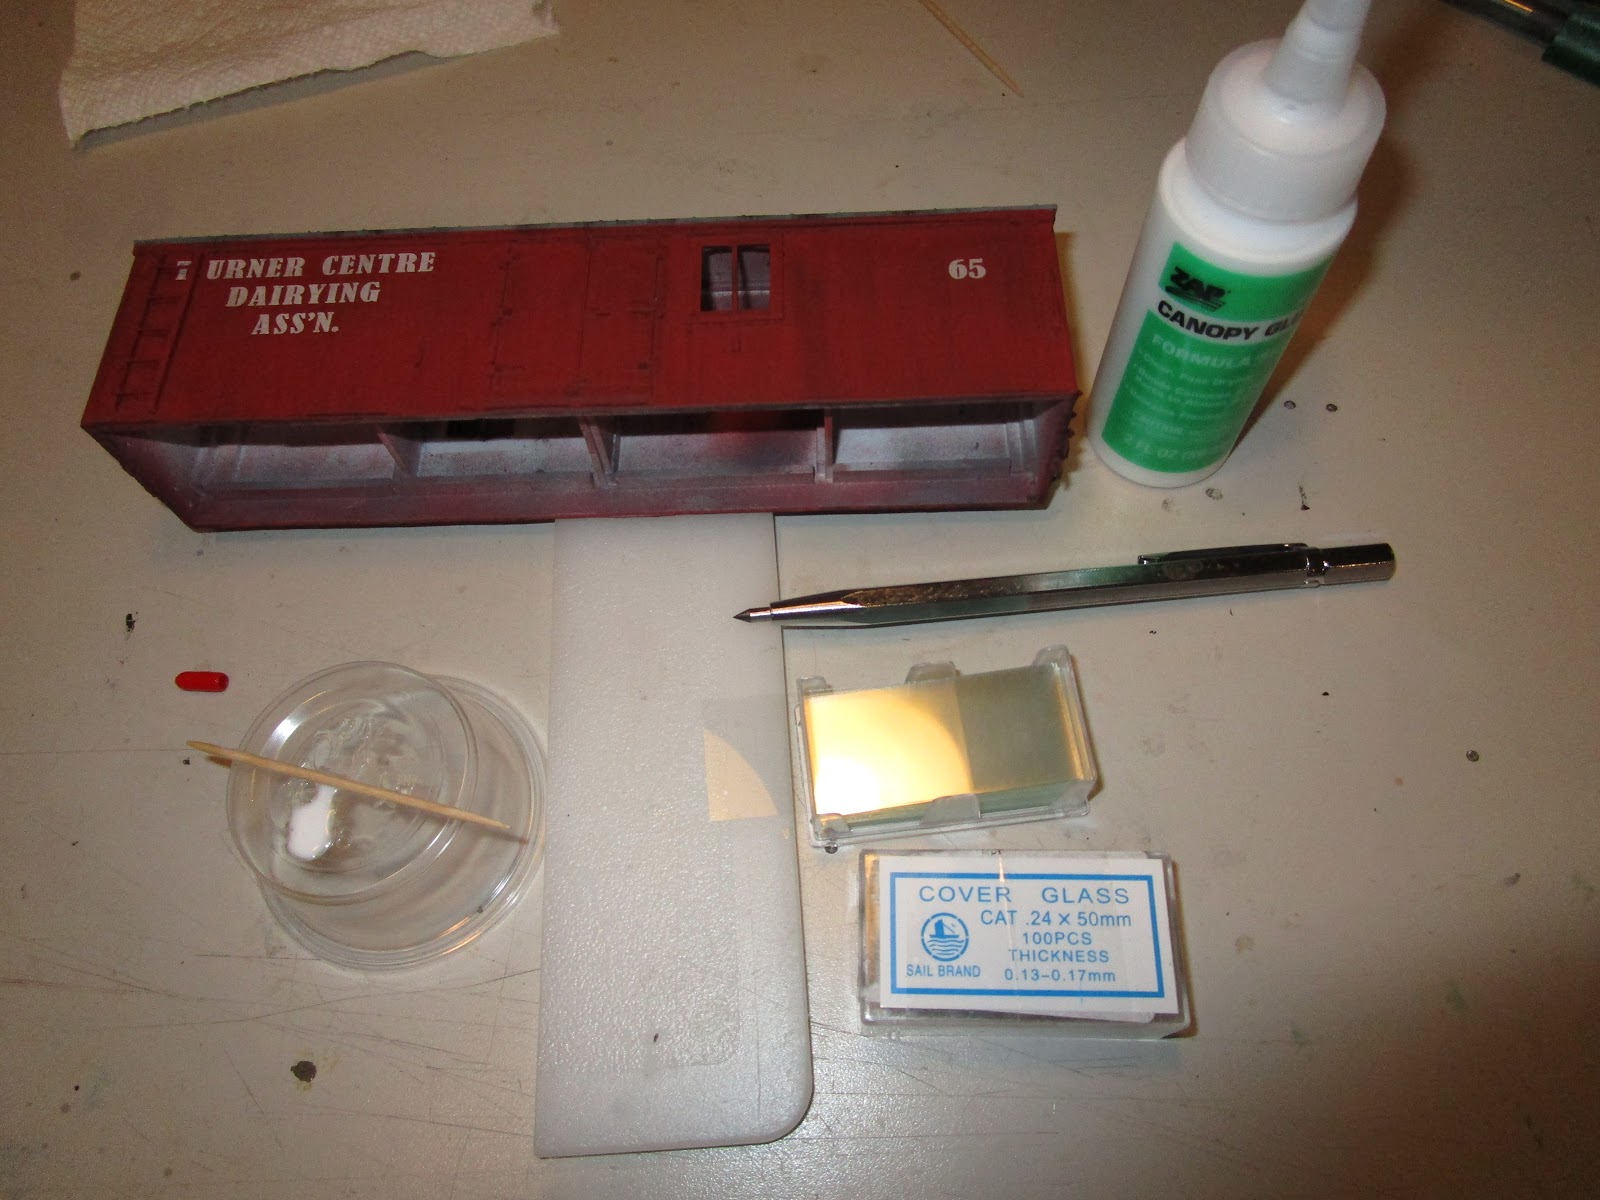
 The two Oneonta recycling hoppers are another set of cars that I really like. I have a 4-bay model from Walthers and a limited 2-bay one from Atlas. Unfortunately, the car numbers on both are the same... #7065! That is wrong for the Walthers model, but so is everything else: body style, artwork style, lettering color. So, I left it as is. The load was made from a styrene base with mounds formed from caulk from a tube and the edges sealed with more caulk. Then the loads were then painted with Testors gloss gold enamel paint or green acrylic craft paint. The caulk worked well, but I don't know if it was any easier then used carved pieces of foam which is always featured in magazine articles.
 Next, I took some Czech "tube beads" that I found on online and crushed them to make the load. I couldn't find HO scale bottles for sale and even if I had, they would have been so small as to effectively render them useless. And expensive, if I wanted to fill even the visible portion of a hopper load. I considered those tiny round "Indian" glass beads (also sometimes called "seed beads", perhaps because that is more P.C.) that are used for bracelets, but then I found tube beads on Ebay for a couple of bucks a bag, delivered from China. Not knowing how much I needed, I bought three bags each of a greenish color and a brownish color. Remember, Oneonta sorted the loads by glass color so I did too.
 The beads were still too large to represent bottles or jars in HO scale, so I put some in a Ziplock back and started wacking with a hammer to crush them. Then, I filtered the glass shards through one of my dirt sieves (cleaned, of course) to remove the bigger pieces that required more wacking. Over and over, the process went, but it wasn't difficult. I would definitely suggest not doing it directly on your workbench... a piece of sheet metal, or even wood, would be better. And, eye protection is a must. But, I was happy with the results and it didn't take too long. One bag of each color was more than enough for one car, so I have a lot of extra.
 Then, they were heaped onto the loads and maneuvered in place. The centers of the cars are mounded, much like coal would be when it passes through an automatic loader. I doubt the glass was loaded into these hoppers like that, but I didn't want the top perfectly flat. After the glass was how I wanted it, I dribbled rubbing alcohol all over it and then soaked it with my matte medium. The green one came out perfect, but the brown one (the first car I worked on) didn't. There was too much whitish glass powder in the mix and that dried in white spots, so I then ground some more brown glass to go over the top. Much better.
 I am really happy with how they turned out. I had seen articles suggesting glitter but that looked too fake. You can buy ground glass shards (used for other crafting projects) but since hobby stores were closed I wasn't sure how large the pieces would be. Here, for about $3 a car I had a really neat glass load. And yes, if you dig your finger into the load you are likely to get cut, so I didn't try it. The green car came out especially nice, and I really wish I could think of another application to use this glass for. Since these cars were routed from Oneonta to Corning, I doubt they spent much time at all traveling on the Colonie Main. So, they might just reside in my display case for now. But, they may make appearances now and then for something special.
... and that would have been the end of the story, except I showed the models to my wife who first commented that I shouldn't have weathered the boxcars ("but they were so shiny and pretty"), and this is coming from a woman who thinks all train cars should be weathered! Then, she saw the glass hoppers and wanted one filled with blue glass. I explained that blue glass wasn't around to recycle in the 1970s, and still isnt' even now, but she thought it would be pretty. I had a Like Like blue hopper on order- a really dated and terrible model in my opinion- that I was going to use up my extra green glass in. But, if she wants a blue glass car she will get a blue glass car! The glass is ordered... stay tuned for that.
 The two Oneonta recycling hoppers are another set of cars that I really like. I have a 4-bay model from Walthers and a limited 2-bay one from Atlas. Unfortunately, the car numbers on both are the same... #7065! That is wrong for the Walthers model, but so is everything else: body style, artwork style, lettering color. So, I left it as is. The load was made from a styrene base with mounds formed from caulk from a tube and the edges sealed with more caulk. Then the loads were then painted with Testors gloss gold enamel paint or green acrylic craft paint. The caulk worked well, but I don't know if it was any easier then used carved pieces of foam which is always featured in magazine articles.
 Next, I took some Czech "tube beads" that I found on online and crushed them to make the load. I couldn't find HO scale bottles for sale and even if I had, they would have been so small as to effectively render them useless. And expensive, if I wanted to fill even the visible portion of a hopper load. I considered those tiny round "Indian" glass beads (also sometimes called "seed beads", perhaps because that is more P.C.) that are used for bracelets, but then I found tube beads on Ebay for a couple of bucks a bag, delivered from China. Not knowing how much I needed, I bought three bags each of a greenish color and a brownish color. Remember, Oneonta sorted the loads by glass color so I did too.
 The beads were still too large to represent bottles or jars in HO scale, so I put some in a Ziplock back and started wacking with a hammer to crush them. Then, I filtered the glass shards through one of my dirt sieves (cleaned, of course) to remove the bigger pieces that required more wacking. Over and over, the process went, but it wasn't difficult. I would definitely suggest not doing it directly on your workbench... a piece of sheet metal, or even wood, would be better. And, eye protection is a must. But, I was happy with the results and it didn't take too long. One bag of each color was more than enough for one car, so I have a lot of extra.
 Then, they were heaped onto the loads and maneuvered in place. The centers of the cars are mounded, much like coal would be when it passes through an automatic loader. I doubt the glass was loaded into these hoppers like that, but I didn't want the top perfectly flat. After the glass was how I wanted it, I dribbled rubbing alcohol all over it and then soaked it with my matte medium. The green one came out perfect, but the brown one (the first car I worked on) didn't. There was too much whitish glass powder in the mix and that dried in white spots, so I then ground some more brown glass to go over the top. Much better.
 I am really happy with how they turned out. I had seen articles suggesting glitter but that looked too fake. You can buy ground glass shards (used for other crafting projects) but since hobby stores were closed I wasn't sure how large the pieces would be. Here, for about $3 a car I had a really neat glass load. And yes, if you dig your finger into the load you are likely to get cut, so I didn't try it. The green car came out especially nice, and I really wish I could think of another application to use this glass for. Since these cars were routed from Oneonta to Corning, I doubt they spent much time at all traveling on the Colonie Main. So, they might just reside in my display case for now. But, they may make appearances now and then for something special.
 |
| For comparison: HO scale figure on left, then Indian bead, then tube beads |