
 |
| I only used the hair dryer, not the stove's burner |
 The plans explain where to install the various pieces and piping but they assume that you can cut holes easily in the sides of the girders... once they are already installed on the underside of the car. The truth is that you can't. I tried twirling the tip of a hobby knife where I wanted the hole but it didn't work. That is why I had previously cut the girders in a couple of places. I then began working on adding the brake lines. I used brass 0.030" rod and some parts from a Details West (#DS-2012) metal brake gear set, as well as some Athearn styrene parts. I much preferred the styrene parts because MEK bonds to it. And then I had to repair all the girders I had channeled through.
 Then, with the flatcars back to being flatcars, I began gluing on the stake pockets to the sides of the car. I formed them from two pieces of C-channel glued together and sliced into pieces. I had only done one of the four sides before quitting in 2019 so I had three sides to go. And try as I might, I couldn't get them to stick. It was as if my glue had turned to water. I tried over and over but throughout the morning they all fell off. The ones I had done last year were on rock solid. What changed? Then I realized I had kept metal cans of MEK and Lacquer Thinner on my workbench and had recently refilled my small MEK bottle. And, that bottle's nozzle wasn't working anymore either. Bingo Bango... I bet I was using lacquer thinner instead of MEK. After pouring out the bottle and substituting MEK, things began to stick again!
 I then jumped back to the brake gear again. Piping was done using 0.030" brass rod and even finer 0.015 brass and styrene rods, sometimes bent to get around certain areas. Some parts had to be made with multiple smaller pieces on each side of a cross brace to give the appearance of one longer pieces running the length of the car. But, it came together in the end. I can really appreciate all the effort that certain modelers take when they make everything exactly as it should be. I did my best per the plans that I have see more complex cars before. I don't think it would be possible to approach this level of detail in N scale, that is for sure.
 Once my stainless steel 0.015" wire arrived I began making things like grab irons and stirrup steps. For HO scale it probably would have been better to use even finer wire (0.008"?), but that just wasn't going to work for me. I ordered both stainless and brass wire but went with stainless because it is more durable. An online discussion about the best material for grab irons was pretty useful in my decision making. I didn't bother with a forming jig or anything like that; I just used my serrated-jaw pliers and put the wire in the serration notch every time. If I needed larger ones, I used a different notch. It worked pretty well, and the metal was surprisingly strong. I made lots of extra ones just in case.
 Then, out came the #72 (0.025") drill bit and pin vise to drill all the holes. Despite being an extremely small bit, I only had it break once and that was because I got careless. The trick for me was to drill horizontally while supporting the bit with my index finger of the left hand while turning the pin vise with my right. The styrene was thin and cut easily. Worried about breaking lots of bits, I ordered a 6-pack of #72 bits from Micro-Mark. They cost $7.95, and $18.26 total with tax. That is over $3 a bit. Ebay has 10-packs of bits for less than $6 delivered. Are they just as good? Who knows, but they are much cheaper. In the future I will use the cheap ones until they prove unreliable. The grab irons were secured with superglue.
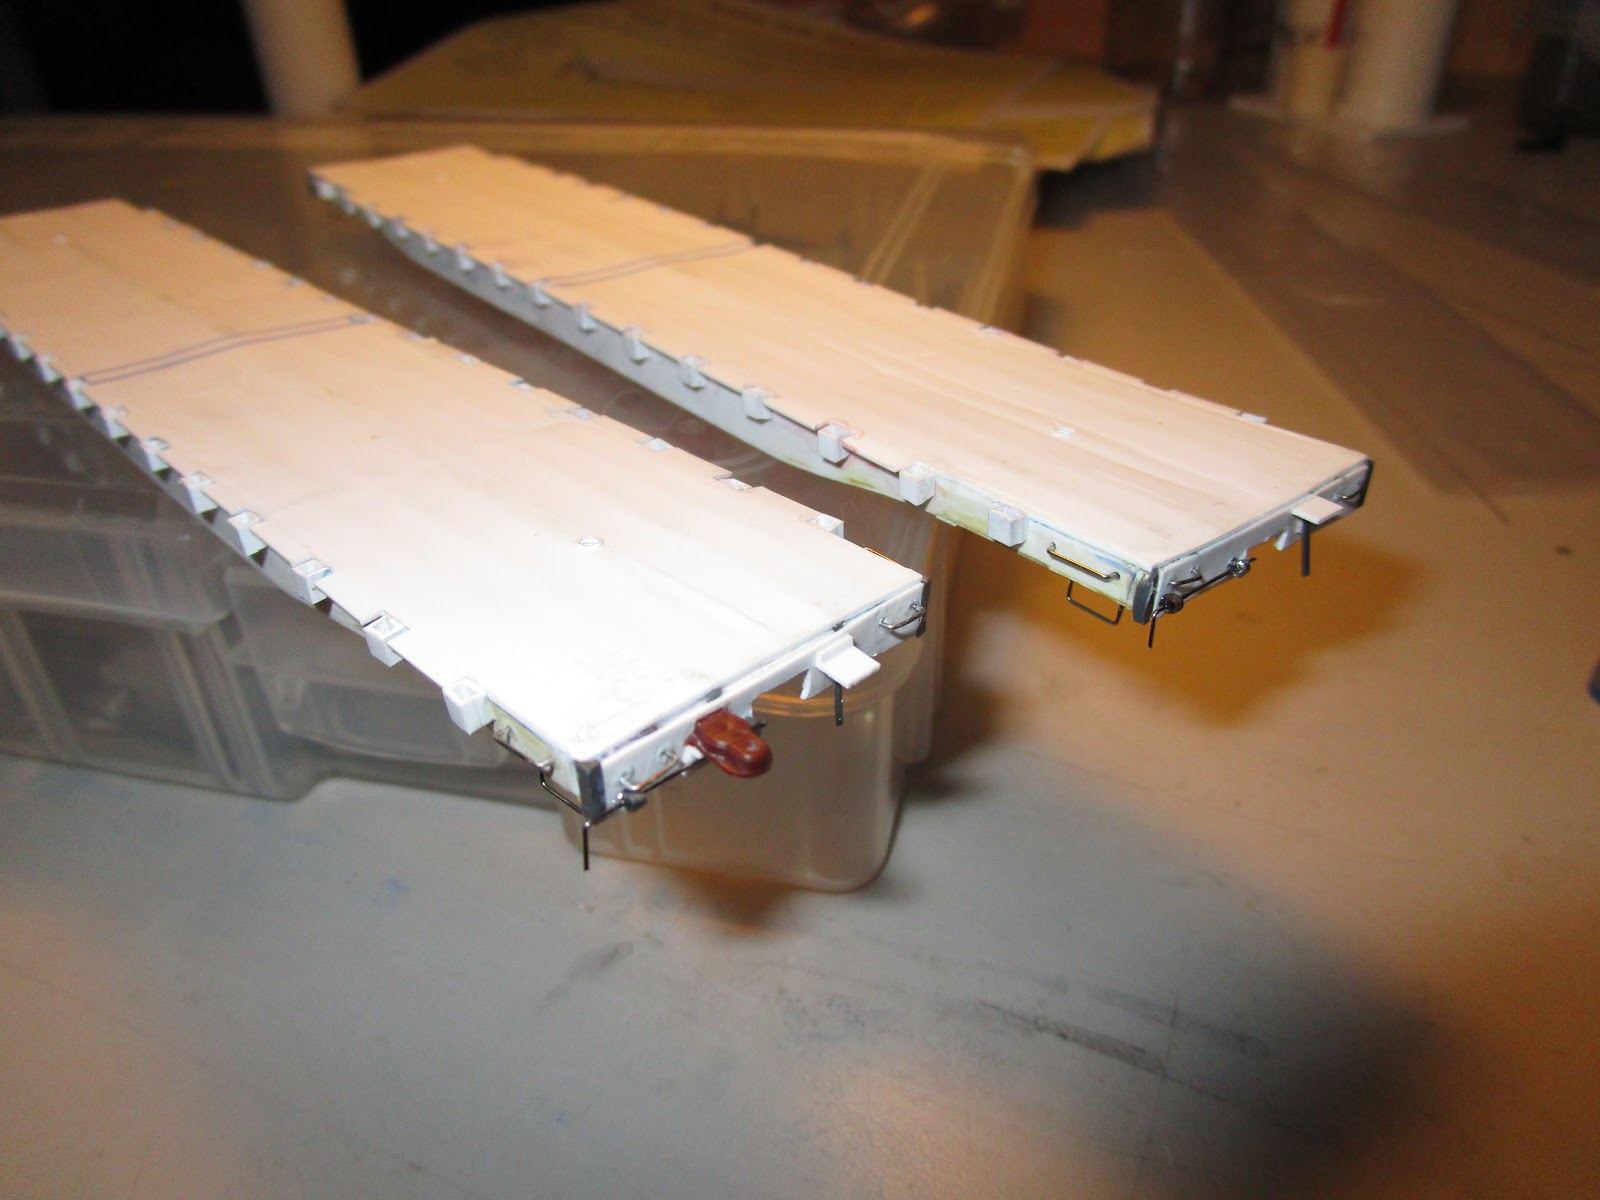 Next, I worked on the cut levers for the couplers. The prototype has a cut-lever design that works from only one side of each end of the car. The cut bar goes under the coupler and pulls the pin from the bottom. Since my cars will have Kadee couplers and draft gear boxes, and I am not exactly sure how much room the shanks will require to pivot, I modeled the cut levers up to the point where they enter the coupler shank area. I used more 0.015" stainless steel wire for the cut levers themselves, but for the wire support brackets I used cut down Athearn metal handrail stanchions (something I found to be really convenient.) I won't add the brake staff or brake wheel until the very end, because they will just get damaged otherwise.
Up next: the flatcars get a bubble bath, and then into the paint shop. After that, the wooden decking is installed and final details are added.
No comments:
Post a Comment