
As has been mentioned previously, one of the goals of constructing
this model was to earn points in the Structure category of the Master Model
Railroader's certification program. After having talked with several local MMRs
including Robert Hamm and Kevin Surman, I was encouraged to attempt this
undertaking. Both pointed out that more points would be awarded for
scratchbuilding details such as windows and doors (instead of using castings),
and so I will attempt to do everything by myself for this model (paint and
decals excepted).
This will not be an easy model to build,
yet I don't think in and of itself it is a very complex structure.
Certainly, as this will be my very first scratchbuilt structure I have an
uphill climb but I am not intimidated by it.
I plan to do as much as possible using styrene, a plastic which I
am quite familiar with and really enjoy using. It is dimensionally stable and
doesn’t warp or twist from humidity, it takes paint really well, cutting (using
the “score and snap” method) is very effective up to about thicknesses of 0.080,”
and my local hobby store carries the full line of Plastruct and Evergreen
shapes.
More importantly, though, is that it fits in with the time period I
am modeling. If I were modeling the steam era or even the transition era,
wooden structures would be much more common. In that case, I would likely need
to build them in stripwood just to preserve the wood grain and allow for better
weathering techniques. I have longed to build one of those master craftsman
kits which contains hundreds of pieces of wood and countless castings, and
which usually result in a worn-down wooden factory or station. However, those
types of structures just don’t fit with my 1984 layout. Instead, corrugated
iron or steel, concrete, and brick are what I will be using and all are nicely
represented by styrene.
Initial Drawings
 The first step of any project should
be to make some drawings or at least sketches of what you hope to build.
This not only will serve as a guide when cutting the wood or plastic but it
also tempers expectations at the early stage. For example, after drawing plans
for the main portion of the ATC I was surprised just how much room it would take
up on my layout. And that didn’t include the attached garage or adjoining
building. Instead of taping multiple 8.5x11" sheets together, I went to Office Max and purchased an oversize book of graph paper.
The first step of any project should
be to make some drawings or at least sketches of what you hope to build.
This not only will serve as a guide when cutting the wood or plastic but it
also tempers expectations at the early stage. For example, after drawing plans
for the main portion of the ATC I was surprised just how much room it would take
up on my layout. And that didn’t include the attached garage or adjoining
building. Instead of taping multiple 8.5x11" sheets together, I went to Office Max and purchased an oversize book of graph paper.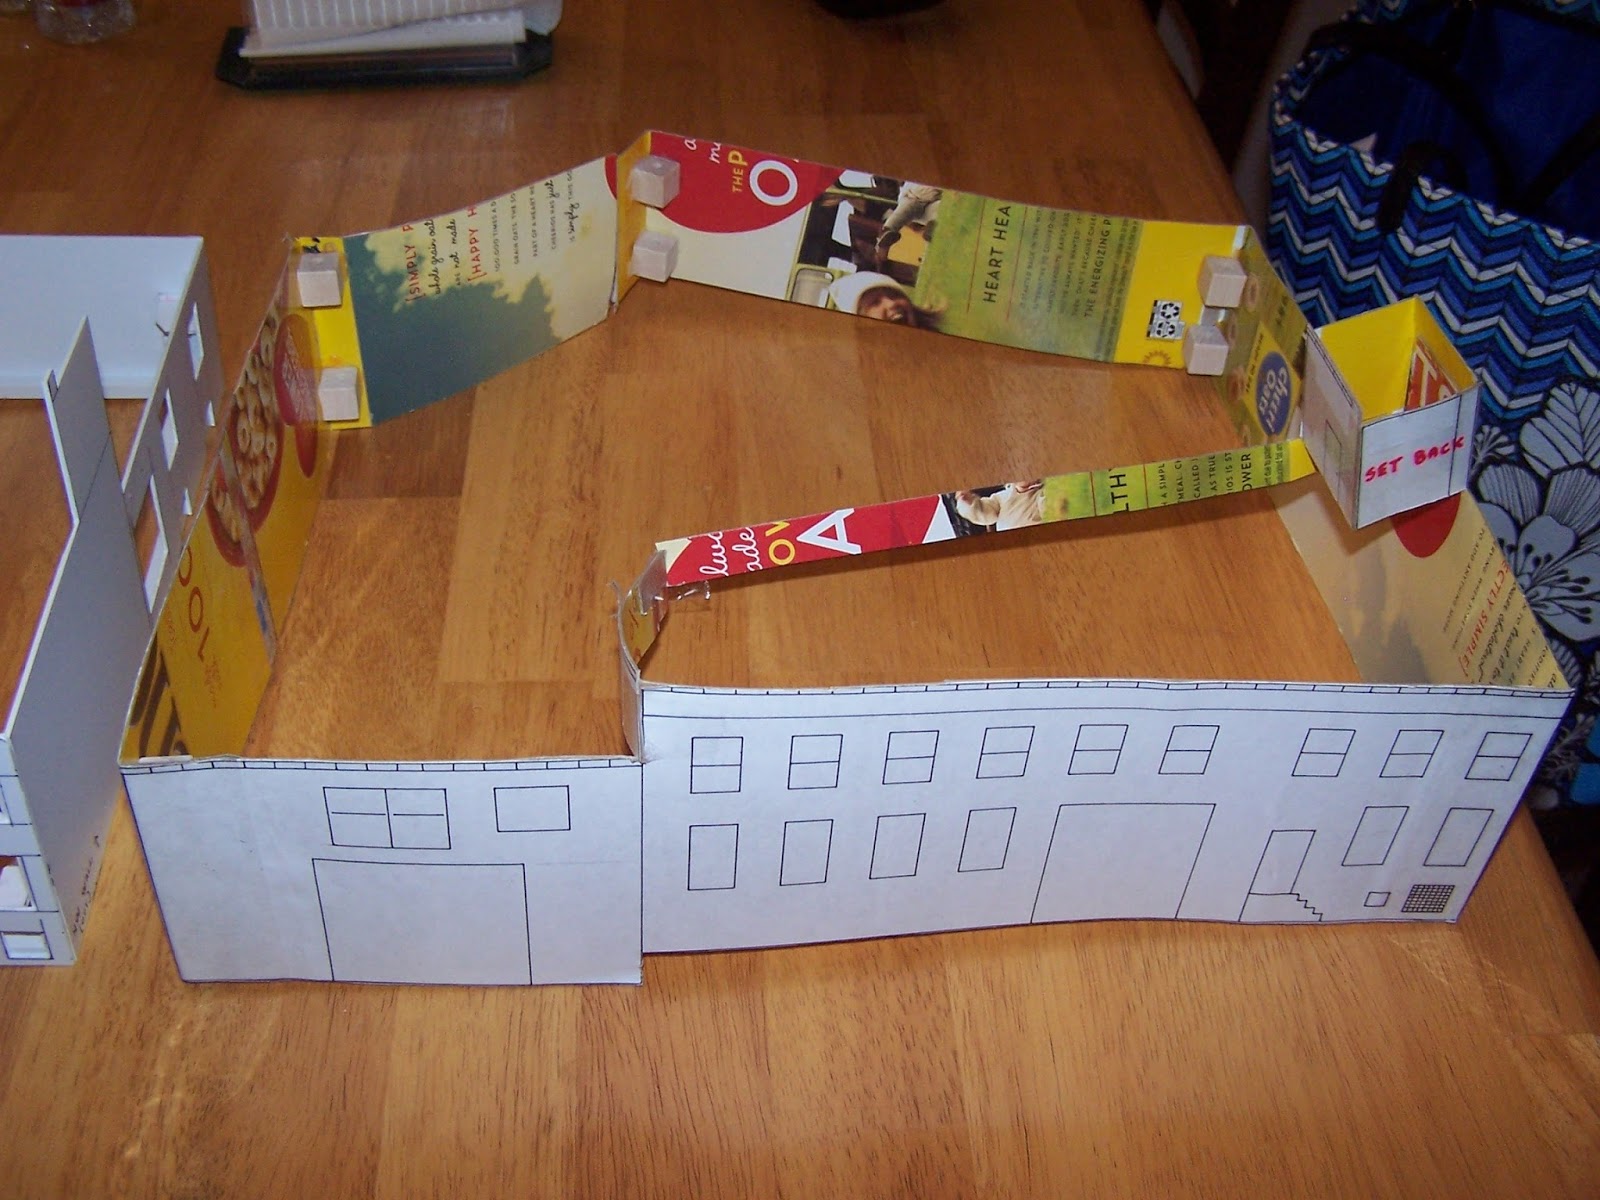 I love making drawings and find it very relaxing and enjoyable,
but will gladly take any printed drawings from books or magazines if available.
Then, consistent with good advice I have seen online I copied my drawings and
glued them to cereal box cardboard. These were then trimmed and taped together
to give me a three-dimensional view of the building. Since mine had complex
roof lines I left them pretty much open for now. I used wooden blocks to reinforce the corners but they didn't work all that well.
I love making drawings and find it very relaxing and enjoyable,
but will gladly take any printed drawings from books or magazines if available.
Then, consistent with good advice I have seen online I copied my drawings and
glued them to cereal box cardboard. These were then trimmed and taped together
to give me a three-dimensional view of the building. Since mine had complex
roof lines I left them pretty much open for now. I used wooden blocks to reinforce the corners but they didn't work all that well. Then, I waited. And waited. And waited some more until my yearly vacation came around. I didn’t want to start this project and have to stop and put it away every night because of other things, so I just thought about it and collected supplies (like styrene and brick sheet) until the magical week arrived.
For this
structure, I plan to use a core of 0.060” styrene sheets. I would have
preferred 0.080” but my hobby shop had a lot of trouble ordering it. The down
side with going thicker is that when you scribe and snap it the edges don’t
always come out square. Also, window openings are more difficult to cut in
larger styrene. The walls will be braced in the corners and edges with
1/4" square styrene rods. Additionally, I made some custom 90-degree
corner braces from styrene.
Finally, the outside
will be sheathed in plastic brick sheets. I looked long and hard online and the
various options out there (including some marketed for N scalers) and for right
now settled on some by Plastruct. This will be discussed more in the future,
but suffice to say that because the sheets are so thin all of the rigidity of
the building must come from the styrene core.
Cutting the Walls
 One of my
favorite tools is my large plastic cutting board which was sold for using in
the kitchen for carving turkeys. I don’t have one of those healing cutting
mats, but instead have multiple plastic cutting boards in various sizes
including a really helpful one about the size of a business envelope. I also
have a piece of glass that I sometimes use for complex gluing jobs because
styrene won’t bond to the glass. One side also has a "juice" channel around the edges which catches round things like springs and knives from rolling off. (Note: they can warp in the dishwasher from the heat so don't use an old kitchen one if you need it to be perfectly flat.)
One of my
favorite tools is my large plastic cutting board which was sold for using in
the kitchen for carving turkeys. I don’t have one of those healing cutting
mats, but instead have multiple plastic cutting boards in various sizes
including a really helpful one about the size of a business envelope. I also
have a piece of glass that I sometimes use for complex gluing jobs because
styrene won’t bond to the glass. One side also has a "juice" channel around the edges which catches round things like springs and knives from rolling off. (Note: they can warp in the dishwasher from the heat so don't use an old kitchen one if you need it to be perfectly flat.) I cut the walls
to size per the plans, and constantly double checked my work. It is important
to make sure the walls end up square and true but even more so when you are
scratchbuilding a model and don’t have pre-molded guides. And, since this was
to be a model for competition and wonky walls would surely result in a bad
score. Inside joints were braced (perhaps too much?) with the square styrene
and my corner braces. Since the roofs would be supported along the top and I wasn't sure yet how I was going to do it, all braces were left off the top 1/2" of the model for now. I also made sure not to put any braces in locations where they would be seen from the windows or open doors.
I cut the walls
to size per the plans, and constantly double checked my work. It is important
to make sure the walls end up square and true but even more so when you are
scratchbuilding a model and don’t have pre-molded guides. And, since this was
to be a model for competition and wonky walls would surely result in a bad
score. Inside joints were braced (perhaps too much?) with the square styrene
and my corner braces. Since the roofs would be supported along the top and I wasn't sure yet how I was going to do it, all braces were left off the top 1/2" of the model for now. I also made sure not to put any braces in locations where they would be seen from the windows or open doors.
I use Plastruct
Weldene exclusively for all styrene joints. It is labeled as non-toxic and I
don’t get headaches like when I use MEK, though proper ventilation for
everything is a must. I flow the Weldene into the joints on the
inside and let capillary action suck it into the gaps. Joints set quickly and
fully harden overnight. Usually, I glue up a joint and then let it sit 30
minutes before doing another. If you get it on
painted surfaces it doesn’t damage them or cause them to bubble… it will cause
the paint to go from shiny to dull, but a coat of Dullcote over it at the end
hides all mistakes. I love the stuff, though my shop doesn’t carry it anymore
and I have to buy it online. The only downside is that it won't work on ABS plastic, only styrene plastic.
For the few windows and doors that I have I decided to depart my my usual course and purchase a "Nibbler." In the past, I either did the "scribe an outline, then scribe an X" to break through the plastic or else cut the building into slices, removed the window areas, and then glued it all back together. Here, I purchased the Nibbling Cutter from Micro-Mark (http://www.micromark.com/nibbling-cutter,7761.html) after reading some good reviews online. It is only recommended for plastic up to 1/16" thick (0.0625") and it did a good job on my 0.060" walls. Had I gone with the thicker 0.080" walls, I don't know if it would have handled it. True, the Nibbler is a slow tool to use but it is accurate and sort of fun.

To use it, I had to drill a 3/16" diameter hole inside the window or door area and then begin nibbling out. What I did was to nibble to one of the edges, then turn the tool 90" and nibble along that edge. At a corner, I turned the tool and went on again. I left barely a sliver of plastic at the edges so that a file would straighten it. However, if I were using window castings that sat proud of the wall and covered the edges this might not have been necessary. My windows are recessed in the gaps so straight edges were critical.
Some doors were actually cut out with the nibbler and then styrene was glued directly behind them. That is because I wanted to door to be slightly recessed so I had to make a gap for it, but at this time I didn't want to leave that much plastic missing which could compromise the integrity of the wall. As long as my finished recessed door is less than 0.060" thick it is fine.
 The walls went together fine over the course of about 2 days with only one issue. One of my drawings was 3/16" shorter than the opposite side wall, and that resulted in a warped structure. It was easy to correct by sawing through the wall and then gluing another wall piece of the correct length over it. I chose to do it at the short wall section because doing it there wouldn't affect any window or door spacing. I used my Dremel to go right through all of the corning bracing and then shifted it out. The inside is now looking pretty ugly at that corner, what with all of the bracing. However, it won't be visible from the outside. It will serve as a valuable lesson though!
 After getting this far, I decided to call it quits. I still need to figure out the divided roof areas for the larger "room" on the right in the picture above, and I don't want to rush it and make a mistake. Also, the small building on the roof and the chimney will also require some thinking to make sure they come out right. Overall, though, I am quite pleased with where it is right now.
My dad's side of the family owned ATC back in the day. I was born in 1983 so I never met Gaetano. My grandfather sold the business but not sure of the year? My dad and my aunt would know all the details. Thanks for posting that amazing picture of their ad!
ReplyDeleteThat is really cool! I would have loved to talk with them. The building has been renovated in the past couple of years with a blue exterior expansion. Very different looking now, and you would never know that it was the old ATC.
DeleteI read on your blog that the building is now being used as some type of a medical facility? I'm always curious to learn about these things. Life in 2025 is so different than it was in the late 1800s to early 1900s. Thanks for noticing these details and blogging about them. I appreciate your work!
DeleteIt is a Whitney Young Health Clinic now
Delete